This article mainly introduces how to use the js control bootstrap datepicker, which has certain reference value. Interested friends can refer to Bootstrap tutorial
bootstrap-datepicker sandbox environment:
bootstrap-datepicker sandbox environment:
1. requirejs configuration
requirejs.config({
  baseUrl: '../pages/modules',
//  urlArgs: "v=" + (new Date()).getTime(),//禁止缓存,生产环境去除
  urlArgs:'v=2016110701',
  paths: {
    jquery: ["../../plugins/jquery/jquery"],
    bootstrap: ["../../plugins/bootstrap/dist/js/bootstrap.min"],
    datepicker:["../../plugins/bootstrap-datepicker/dist/js/bootstrap-datepicker.min"],
    datepicker_zh:["../../plugins/bootstrap-datepicker/dist/locales/bootstrap-datepicker.zh-CN.min"]
  },
  shim: {
    bootstrap: {deps: ["jquery"],exports: 'bootstrap'},
    datepicker:{deps:["jquery"],exports:"datepicker"},
    datepicker_zh:{deps:["jquery","datepicker"],exports:"datepicker_zh"}
  }
});
require(['jquery', 'bootstrap']);2 html
<p class="form-group col col-sm-3 padding no-margin-bottom" id="birthdayGroup">
        <label class="col col-sm-4 text-right form-label no-padding-left">出生日期:</label>
        <p class="col col-sm-8 no-padding-left no-padding-left input-group date">
          <span class="input-group-addon">
            <i class="fa fa-calendar"></i>
          </span>
          <input id="birthday" type="text" class="form-control" placeholder="出生日期"/>
        </p>
</p>3 js
var $ = require('jquery');
require('datepicker_zh');
$("#birthdayGroup .input-group.date").datepicker({todayHighlight:true,todayBtn: 'linked'
      ,keyboardNavigation:true,autoclose:true,language:'zh-CN',format:'yyyy-mm-dd'
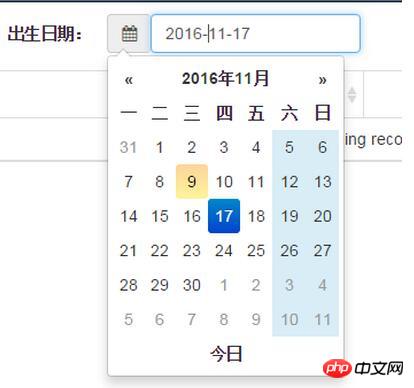
,daysOfWeekHighlighted:'0,6'});4 Effect

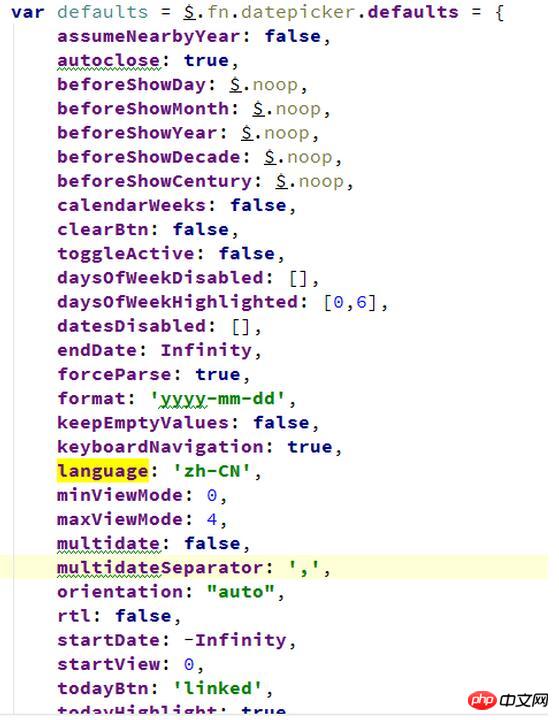
5 Change the default configuration
If each control is written according to the above js , is it painful? So you can set the configuration you think is commonly used to

After setting up, what you need to do is the format of the date, because bootstrap-datepicker.zh-CN.min .js sets the format to yyyy year mm month dd day, so if you want the default format to be 'yyyy-mm-dd', you have to change bootstrap-datepicker.zh-CN.min.js.

Now you just need to achieve the effect.
$("#birthdayGroup .input-group.date").datepicker();
6 The date of the time period
The focus of the jsp page is input- daterange The style of input-group
<p class="form-group col col-sm-4 padding no-margin-bottom">
<label class="col col-sm-4 text-right form-label no-padding-left">入库日期:</label>
<p class="col col-sm-8 col-xs-6 no-padding-left input-daterange input-group">
<input type="text" class="input-sm form-control" name="filter_ged_instockDateFontalInstockExample"
value="<fmt:formatDate value='${filter_ged_instockDate}' pattern='yyyy-MM-dd'/>" />
<span class="input-group-addon">到</span>
<input type="text" class="input-sm form-control" name="filter_led_instockDateFontalInstockExample"
value="<fmt:formatDate value='${filter_led_instockDate}' pattern='yyyy-MM-dd'/>"/>
</p>
</p>The configuration of js is also relatively simple. Just configure it during initialization and it will be fine
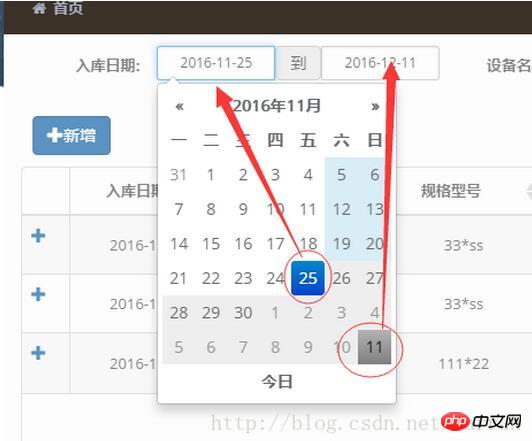
$(".input-daterange").datepicker({keyboardNavigation:!1,forceParse:!1,autoclose:!0});Example from the picture below It can be seen that there is a selected date in the calendar, and the size of the two dates before and after is completed by the control itself, and no human operation is required.

The above is the detailed content of Detailed explanation of how to use the JS control bootstrap datepicker (picture). For more information, please follow other related articles on the PHP Chinese website!