When we visit chat rooms or forums, we often encounter people asking how to add custom CSS to a Drupal website - generally speaking, it is best to add it through a Drupal theme. However, in some cases, other methods have to be considered due to environmental restrictions or because the website administrator does not have access to the theme files.
Today, this article will introduce how to use the CSS Injector module to add custom CSS to the Drupal 7 website.
(Annotation: Both CSS Injector and CSS Editor can be used as temporary CSS addition and adjustment methods, but ultimately they should be added through the theme CSS file)
Step one: Install and enable the CSS Injector module
Download this module from the CSS Injector project page

 ##, scroll down the page to the bottom, and click save to enable CSS Injector
 Step 2: Add custom CSS
After enabling the CSS Injector module, enter the "Configuration > CSS Injector" page to start using CSS Injector. Click the Create a new rule link to start adding a new CSS rule.
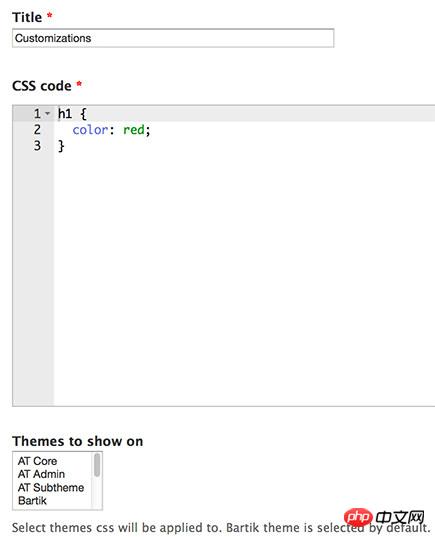
 After filling in the title and CSS code of the CSS rules, specify the theme to use these CSS through the settings in the Themes to show on section
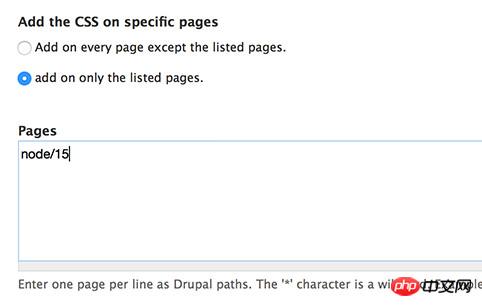
 By default, the added CSS will take effect on all pages. You can also select the page where the CSS will take effect as needed
 After filling in all the content, click "Save" "That's it.
The above is the detailed content of Detailed explanation of the steps to add custom CSS to a Drupal 7 website. For more information, please follow other related articles on the PHP Chinese website!


