PHP file upload—detailed explanation of sample code for multiple file uploads
PHP supports uploading multiple files at the same time and automatically names their information in the form of an array , it is actually very simple to implement such a function. You only need to use the file upload field in the HTML form and the array submission syntax of multi-select boxes and check boxes.
Then the function of uploading files was introduced in the previous article "PHP File Upload-move_uploaded_file() Function". It only introduced the use of this function and single file upload. This chapter will Introducing how to implement multiple file uploads!
It was also introduced in the previous article "PHP Comprehensive Use of Array Functions - Implementing Multi-File Upload". In PHP, when the form request submitted by the browser client contains When uploading a file, PHP will temporarily store the uploaded file in the temporary directory, and then store the uploaded file information in the global variable $_FLIES, so we only need to obtain the uploaded file information through the $_FILES array, and then process it Just perform the corresponding processing operations!
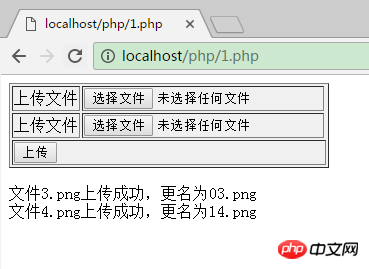
The example below has 4 file upload fields. The name of the file field is u_file[]. The file information uploaded after submission will be saved in $_FILES['u_file']. The generated file is mostly an array. Read Get the array information and upload the file. The specific example code is as follows:
<html>
<body>
<!--上传文件表单-->
<form method="post" action="" enctype="multipart/form-data">
<table id="up_table" border="1" bgcolor="f0f0f0">
<tbody id="auto">
<tr id="auto">
<td>上传文件</td>
<td><input type="file" name="u_file[]"></td>
</tr>
<tr>
<td>上传文件</td>
<td><input name="u_file[]" type="file"></td>
</tr>
<tr>
<td colspan="4">
<input type="submit" value="上传" >
</td>
</tr>
</tbody>
</table>
</form>
</body>
</html>
<?php
header("Content-Type:text/html; charset=utf-8");
if(!empty($_FILES['u_file']['name'])){ //判断变量$_FILES是否为空
$file_name = $_FILES['u_file']['name']; //将上传文件名另存为数组
$file_tmp_name = $_FILES['u_file']['name']; //将上传文件的临时文件名存为数组
for($i=0;$i<count($file_name);$i++){ //循环上传文件
if($file_name[$i]!=""){ //判断上传文件名是否为空
move_uploaded_file($file_tmp_name[$i],$i.$file_name[$i]);
echo "文件".$file_name[$i]."上传成功,更名为".$i.$file_name[$i]."<br>";
}
}
}
?>The output result is as follows:

Summary:
Regarding the file system, we first introduced the basic operations on files, then learned the basic operations on directories, then we learned advanced file processing technology, and finally learned PHP's file upload technology. The file system is an indispensable part of developing a website. I hope everyone can understand the key knowledge points of the file system and master common functions. See you in the next topic!
The above is the detailed content of PHP file upload-detailed explanation of sample code for multiple file uploads. For more information, please follow other related articles on the PHP Chinese website!


