
 Backend Development
Python Tutorial
Detailed example of user registration function development (python)
Backend Development
Python Tutorial
Detailed example of user registration function development (python)
Detailed example of user registration function development (python)

The birth of a web application based on flask is the fifth article. This article mainly introduces the development of user registration function. It has certain reference value. Interested friends can refer to it.
The roles are divided below There are two types, ordinary users and administrator users. At least for ordinary users, it is not advisable to directly modify the DB. A user registration function is required. The development of user registration will begin below.
User Table
First of all, think about what information users need to provide when registering: user name, password, nickname, email, birthday, gender, self Introduction, let’s modify the user model according to this information:
class User(db.Model):
 __tablename__="users"
 id=db.Column(db.Integer,primary_key=True)
 username=db.Column(db.String(50),unique=True,index=True)
 password=db.Column(db.String(50))
 nickname=db.Column(db.String(50))
 email=db.Column(db.String(100))
 birthday=db.Column(db.DateTime)
 gender=db.Column(db.Integer)
 remark=db.Column(db.String(200))
role_id=db.Column(db.Integer,db.ForeignKey("roles.id"))Then use the script to modify the db
python default.py db migrate -m "修改用户表"
After pressing Enter, the interface displays the content:
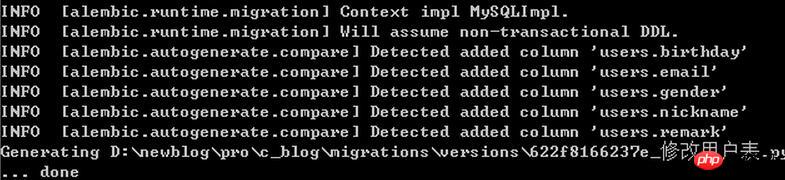
Then make changes to the db difference
python default.py db upgrade
Now look at the table structure in the db:
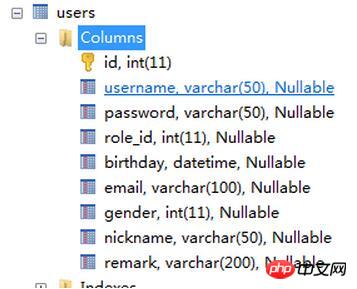
has been modified successfully
Registration interface
Then create a new register.html template and set the login form:
{% extends "base.html"%}
{% block content %} <!--具体内容-->
<p class="container">
<p class="row"></p>
<p class="row">
<p>
<p class="page-header">
<h1>欢迎您注册</h1>
</p>
{% for message in get_flashed_messages() %}
<p class="alert alert-warning">
<button type="button" class="close" data-dismiss="alter">×</button>
{{message}}
</p>
{% endfor %}
<form method="post">
<p class="form-group">
<label for="username">用户名</label>
<input type="text" class="form-control" name="username" id="username" placeholder="请输入用户名">
</p>
<p class="form-group">
<label for="passworld">密码</label>
<input type="password" class="form-control" name="password" id="passworld" placeholder="请输入密码">
</p>
<p class="form-group">
<label for="email">昵称</label>
<input type="email" class="form-control" name="nickname" id="nickname" placeholder="请输入昵称">
</p>
<p class="form-group">
<label for="birthday">生日</label>
<input type="date" class="form-control" name="birthday" id="birthday" placeholder="请输入生日">
</p>
<p class="form-group">
<label >性别</label>
<label class="form-control">
<input type="radio" name="gender" value="0" id="gender0"><label for="gender0">男</label>
<input type="radio" name="gender" value="1" id="gender1"><label for="gender1">女</label>
</label>
</p>
<p class="form-group">
<label for="email">电子邮箱</label>
<input type="email" class="form-control" name="email" id="email" placeholder="请输入电子邮箱">
</p>
<button type="submit" class="btn btn-default">登录</button>
</form>
</p>
</p>
</p>
{% endblock %}Then add the register route in the default.py file, the code is:
@app.route("/register",methods=["GET"])
def register():
return render_template("/register.html")The running interface is normal, and then add post routing:
@app.route("/register",methods=["Post"])
def registerPost():
 user=User();
 user.username=request.form.get("username","")
 user.password = request.form.get("password", "")
 user.birthday = request.form.get("birthday", "")
 user.email = request.form.get("email", "")
 user.gender = request.form.get("gender", "")
 user.nickname = request.form.get("nickname", "")
 user.role_id = 1 #暂时约定公开用户角色为1

 #判断,其中用户名,密码,昵称不能为空
 if(len(user.username.strip())==0):
  flash("用户名不能为空")
  return render_template("/register.html")
 if(len(user.password.strip())==0):
  flash("用户密码不能为空")
  return render_template("/register.html")
 if (len(user.nickname.strip()) == 0):
  flash("用户昵称不能为空")
  return render_template("/register.html")
 db.session.add(user);
 flash("您已注册成功")
return render_template("/register.html")The code is a bit verbose and not beautiful, but the basic intention can be expressed clearly and the function can be realized, but now the problem is coming, join me If you add a new field, you need to modify three codes (html, form.get, verification), and especially the html needs to be modified, and the html part is not verified. If client verification is added, more modifications will be needed. So is there a tool for optimizing forms? The answer is of course, it’s wtf’s turn.
Introducing the WTF form framework
As before, you first need to install the plug-in.
pip3.6 install flask-wtf
Then introduce the required packages
from flask.ext.wtf import Form
from wtforms import StringField,PasswordField,SubmitField,RadioField
from wtforms.validators import DataRequired,EqualTo,Length
Create a form RegisterForm below:
class RegisterForm(Form):
 username = StringField("请输入用户名", validators=[DataRequired()])
 password = PasswordField("请输入密码", validators=[DataRequired()])
 repassword=PasswordField("确认密码", validators=[EqualTo("password")])
 nickname= StringField("昵称")
 birthday= DateField("出生日期")
 email= StringField("邮箱地址", validators=[Email()])
 gender= RadioField("性别", choices=[("0", "男"), ("1", "女")], default=0)
 remark= TextAreaField("自我简介")
submit=SubmitField("提交")Modify the register.html template:
{% extends "base.html"%}
{% block content %} <!--具体内容-->
{% import "bootstrap/wtf.html" as wtf %} <!--导入bootstrap模板 -->
<p class="container">
<p class="row"></p>
<p class="row">
<p>
<p class="page-header">
<h1>欢迎您注册</h1>
</p>
{% for message in get_flashed_messages() %}
<p class="alert alert-warning">
<button type="button" class="close" data-dismiss="alter">×</button>
{{message}}
</p>
{% endfor %}
{{ wtf.quick_form(form)}} <!--创建表单-->
</p>
</p>
</p>
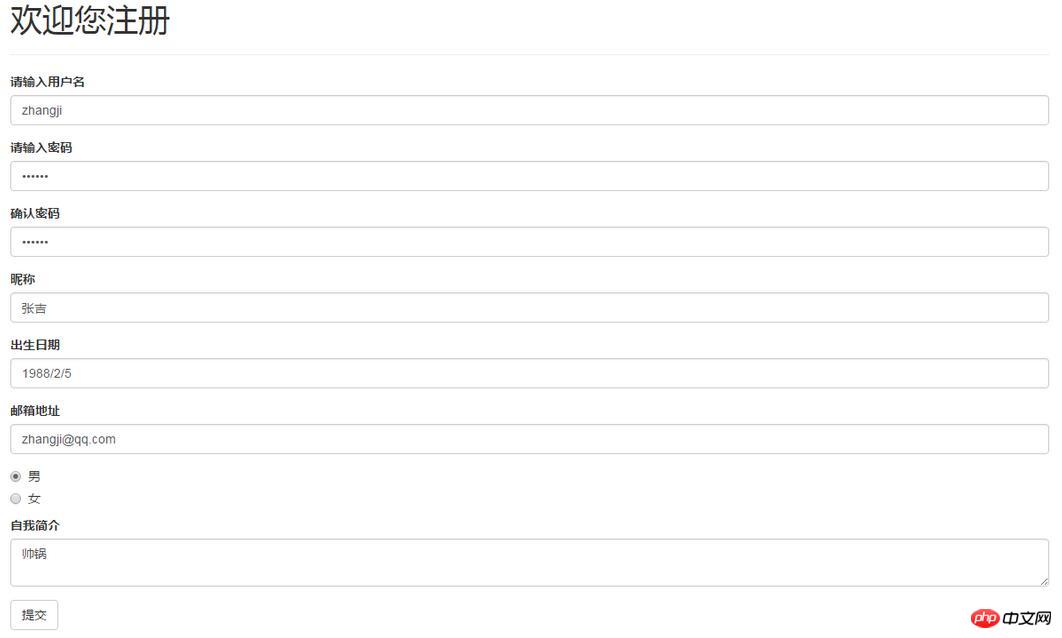
{% endblock %}Execute and output the results :

Aou, an error was reported, see what error the output is:
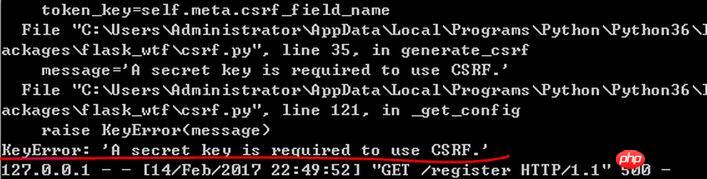
Pay attention to the red line, it is CSRF Error, the concept of CSRF can be directly linked to Baidu. Once you know the problem, it is actually easy to modify. Adding a secret key to the framework can effectively prevent it. Add a line to default.py:
app.config['SECRET_KEY'] = "Niu_blog String"
The secret key string can be customized
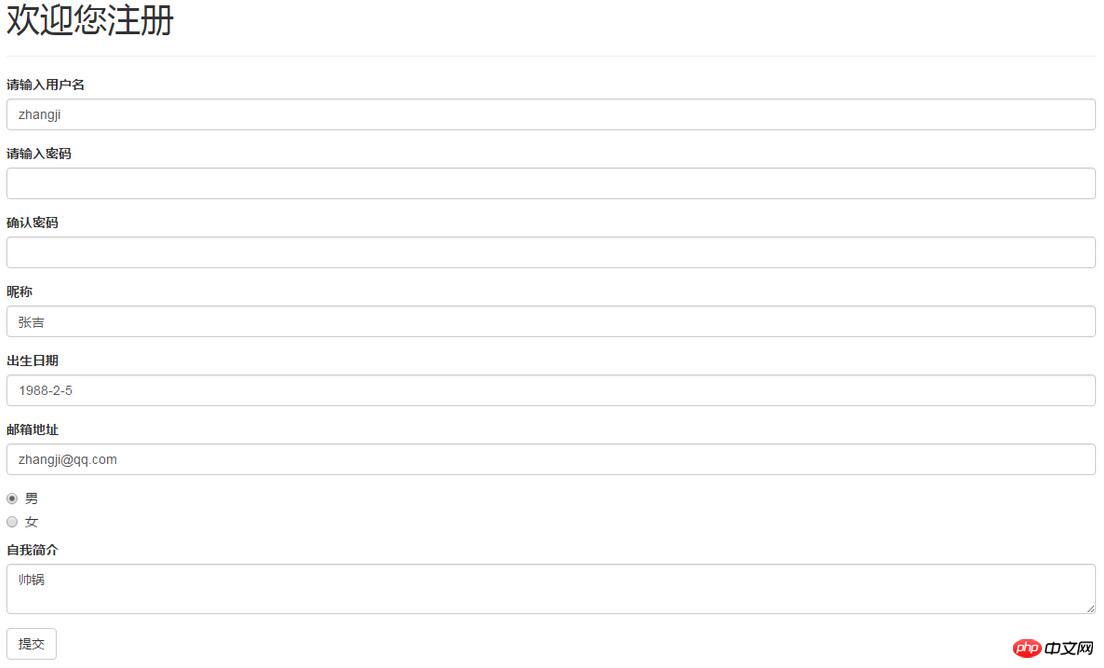
Then run it again, and the interface will appear:
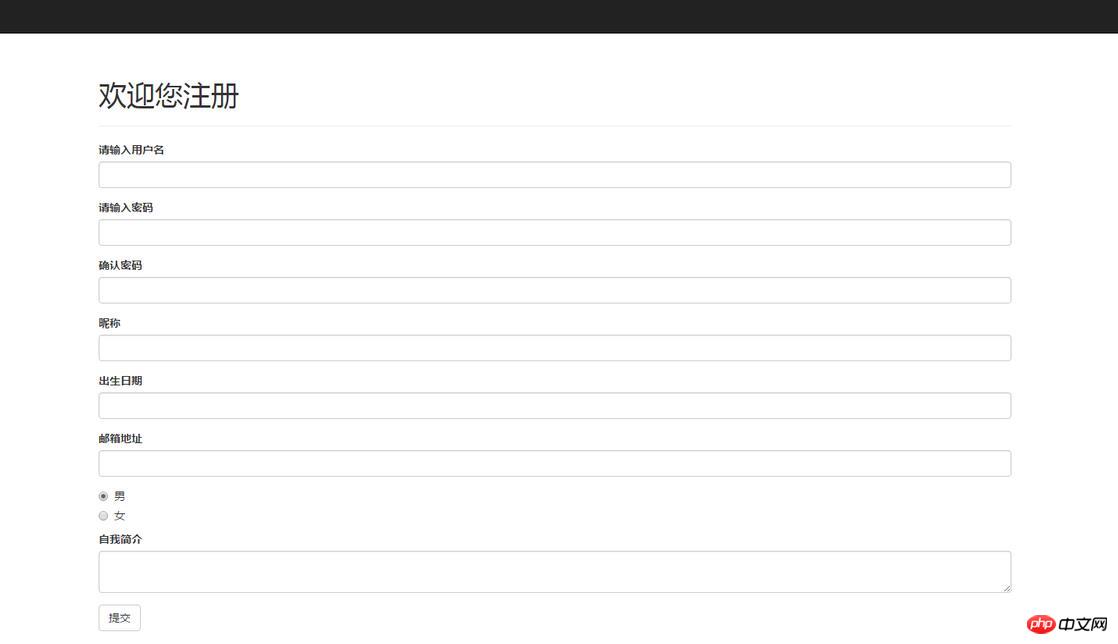
and contains the verification style for verifying bootstrap, then continue The registration function has been completed by transforming default.py
@app.route("/register",methods=["GET","POST"])
def register():
 form=RegisterForm()
 if form.validate_on_submit():
  user=User()
  user.username=form.username.data
  user.password=form.password.data
  user.birthday=form.birthday.data
  user.email=form.email.data
  user.gender=form.gender.data
  user.nickname=form.nickname.data
  user.role_id=1   #暂时约定公开用户角色为1
  db.session.add(user)
return render_template("/register.html",form=form)Note that the registerPost method has been deleted at this time
Let’s run and test it
Click to submit:
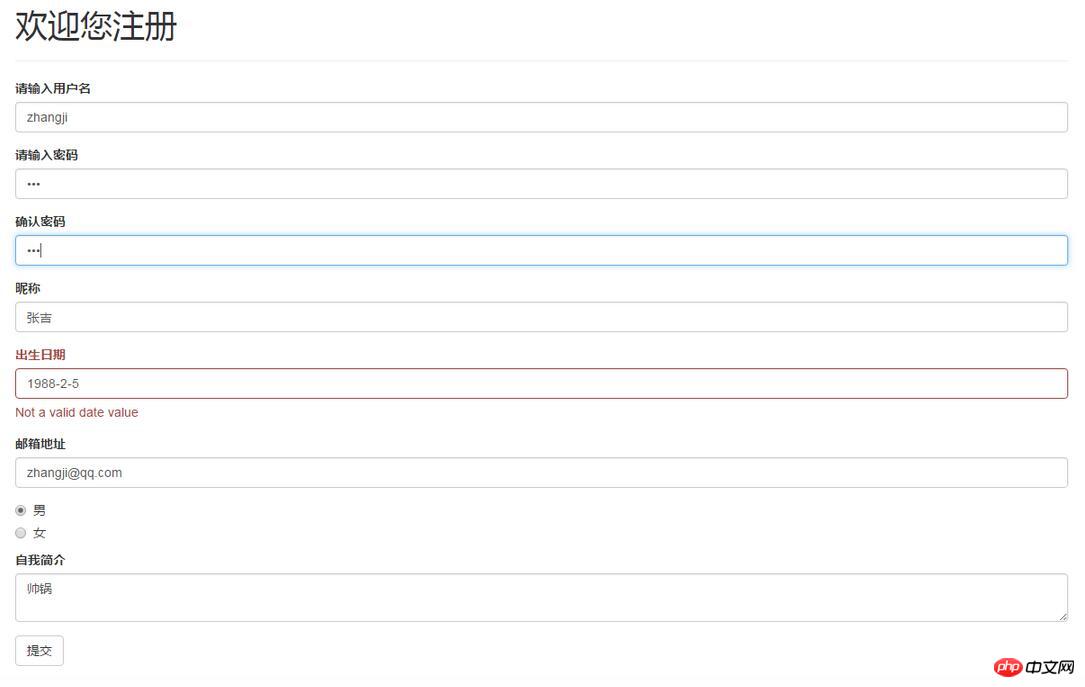
Ao, why is the date format wrong? You have to read this from the source code:
class DateField(DateTimeField):
 """
 Same as DateTimeField, except stores a `datetime.date`.
 """
 def __init__(self, label=None, validators=None, format='%Y-%m-%d', **kwargs):
  super(DateField, self).__init__(label, validators, format, **kwargs)

 def process_formdata(self, valuelist):
  if valuelist:
   date_str = ' '.join(valuelist)
   try:
    self.data = datetime.datetime.strptime(date_str, self.format).date()
   except ValueError:
    self.data = None
raise ValueError(self.gettext('Not a valid date value'))This is the source code of wtforms field, located at line 745 of /wtforms/fields/core.py. You can see that the date format supported here is year-month- Japanese format, the format is relatively strict, and the text box does not use HTML5 date but ordinary text. The solution will be discussed later. For now, modify the input to 1988-2-5, and then click Submit:
Note that after the code is submitted successfully, it still returns to this page and injects content, so there is no problem with the display. Take a look at the db:

The record enters the db normally and the function is completed.
Improve the login page
Let’s transform the login page. First create the login form:
class LoginForm(Form):
 username=StringField("请输入用户名",validators=[DataRequired()])
 password=PasswordField("请输入密码")
submit=SubmitField("登录")Modify the login template page:
{% extends "base.html"%}
{% import "bootstrap/wtf.html" as wtf %}
{% block content %} <!--具体内容-->
<p class="container">
<p class="row"></p>
<p class="row">
<p class="col-md-4 col-md-offset-4 col-sm-6 col-sm-offset-3">
<p class="page-header">
<h1>欢迎您登陆</h1>
</p>
{% for message in get_flashed_messages() %}
<p class="alert alert-warning">
<button type="button" class="close" data-dismiss="alter">×</button>
{{message}}
</p>
{% endfor %}
{{ wtf.quick_form(form)}}
</p>
</p>
</p>
{% endblock %}Modify routing method:
@app.route("/login",methods=["GET","POST"])
def login():
 form=LoginForm()
 if form.validate_on_submit():
  username = form.username.data
  password = form.password.data
  user = User.query.filter_by(username=username, password=password).first()
  if user is not None:
   session["user"] = username
   return render_template("/index.html", name=username, site_name='myblog')
  else:
   flash("您输入的用户名或密码错误")
   return render_template("/login.html",form=form) # 返回的仍为登录页
return render_template("/login.html",form=form)Restart the service, run the program, enter zhangji and 123, and successfully log in to the homepage
Return to the homepage
Now the home page is completely white with no content. A normal light blog should display the post button, followed articles, etc. after logging in, but the login status must be recorded first, which will be explained in the next chapter.
The above is the detailed content of Detailed example of user registration function development (python). For more information, please follow other related articles on the PHP Chinese website!

Hot AI Tools

Undresser.AI Undress
AI-powered app for creating realistic nude photos

AI Clothes Remover
Online AI tool for removing clothes from photos.

Undress AI Tool
Undress images for free

Clothoff.io
AI clothes remover

Video Face Swap
Swap faces in any video effortlessly with our completely free AI face swap tool!

Hot Article
Hot Tools

Notepad++7.3.1
Easy-to-use and free code editor

SublimeText3 Chinese version
Chinese version, very easy to use

Zend Studio 13.0.1
Powerful PHP integrated development environment

Dreamweaver CS6
Visual web development tools

SublimeText3 Mac version
God-level code editing software (SublimeText3)
Hot Topics
 1386
1386
 52
52

 Can vs code run in Windows 8
Apr 15, 2025 pm 07:24 PM
Can vs code run in Windows 8
Apr 15, 2025 pm 07:24 PM
VS Code can run on Windows 8, but the experience may not be great. First make sure the system has been updated to the latest patch, then download the VS Code installation package that matches the system architecture and install it as prompted. After installation, be aware that some extensions may be incompatible with Windows 8 and need to look for alternative extensions or use newer Windows systems in a virtual machine. Install the necessary extensions to check whether they work properly. Although VS Code is feasible on Windows 8, it is recommended to upgrade to a newer Windows system for a better development experience and security.
 Is the vscode extension malicious?
Apr 15, 2025 pm 07:57 PM
Is the vscode extension malicious?
Apr 15, 2025 pm 07:57 PM
VS Code extensions pose malicious risks, such as hiding malicious code, exploiting vulnerabilities, and masturbating as legitimate extensions. Methods to identify malicious extensions include: checking publishers, reading comments, checking code, and installing with caution. Security measures also include: security awareness, good habits, regular updates and antivirus software.
 How to run programs in terminal vscode
Apr 15, 2025 pm 06:42 PM
How to run programs in terminal vscode
Apr 15, 2025 pm 06:42 PM
In VS Code, you can run the program in the terminal through the following steps: Prepare the code and open the integrated terminal to ensure that the code directory is consistent with the terminal working directory. Select the run command according to the programming language (such as Python's python your_file_name.py) to check whether it runs successfully and resolve errors. Use the debugger to improve debugging efficiency.
 Can visual studio code be used in python
Apr 15, 2025 pm 08:18 PM
Can visual studio code be used in python
Apr 15, 2025 pm 08:18 PM
VS Code can be used to write Python and provides many features that make it an ideal tool for developing Python applications. It allows users to: install Python extensions to get functions such as code completion, syntax highlighting, and debugging. Use the debugger to track code step by step, find and fix errors. Integrate Git for version control. Use code formatting tools to maintain code consistency. Use the Linting tool to spot potential problems ahead of time.
 Python vs. JavaScript: The Learning Curve and Ease of Use
Apr 16, 2025 am 12:12 AM
Python vs. JavaScript: The Learning Curve and Ease of Use
Apr 16, 2025 am 12:12 AM
Python is more suitable for beginners, with a smooth learning curve and concise syntax; JavaScript is suitable for front-end development, with a steep learning curve and flexible syntax. 1. Python syntax is intuitive and suitable for data science and back-end development. 2. JavaScript is flexible and widely used in front-end and server-side programming.
 Golang vs. Python: Concurrency and Multithreading
Apr 17, 2025 am 12:20 AM
Golang vs. Python: Concurrency and Multithreading
Apr 17, 2025 am 12:20 AM
Golang is more suitable for high concurrency tasks, while Python has more advantages in flexibility. 1.Golang efficiently handles concurrency through goroutine and channel. 2. Python relies on threading and asyncio, which is affected by GIL, but provides multiple concurrency methods. The choice should be based on specific needs.
 Choosing Between PHP and Python: A Guide
Apr 18, 2025 am 12:24 AM
Choosing Between PHP and Python: A Guide
Apr 18, 2025 am 12:24 AM
PHP is suitable for web development and rapid prototyping, and Python is suitable for data science and machine learning. 1.PHP is used for dynamic web development, with simple syntax and suitable for rapid development. 2. Python has concise syntax, is suitable for multiple fields, and has a strong library ecosystem.
 What is vscode What is vscode for?
Apr 15, 2025 pm 06:45 PM
What is vscode What is vscode for?
Apr 15, 2025 pm 06:45 PM
VS Code is the full name Visual Studio Code, which is a free and open source cross-platform code editor and development environment developed by Microsoft. It supports a wide range of programming languages and provides syntax highlighting, code automatic completion, code snippets and smart prompts to improve development efficiency. Through a rich extension ecosystem, users can add extensions to specific needs and languages, such as debuggers, code formatting tools, and Git integrations. VS Code also includes an intuitive debugger that helps quickly find and resolve bugs in your code.
