
 Java
javaTutorial
Share some frequently asked questions about web-mvc projects building SpringBoot on IDEA
Java
javaTutorial
Share some frequently asked questions about web-mvc projects building SpringBoot on IDEA
Share some frequently asked questions about web-mvc projects building SpringBoot on IDEA

This article mainly introduces a summary of the problems encountered in building a SpringBoot web-mvc project on IDEA. Friends in need can refer to it
I have been studying how to build a web-mvc project on IDEA these days. mvc's SpringBoot project, I followed online tutorials to build it step by step, but there were still a lot of problems.
In order to save everyone from taking some detours in the future, I am here to share the results of my research over the past few days, and I hope it can be helpful to everyone.
Here we first introduce the configuration information of various environments: idea2016.2.1 jdk1.8.0_31
Because SpringBoot has built-in tomcat, there is no need for additional tomcat configuration. Now Let’s start talking about how to build the SpringBoot web-mvc project on idea
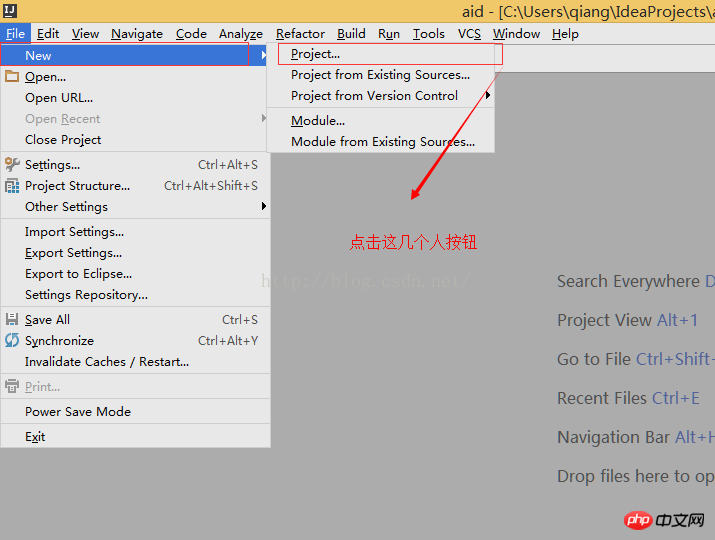
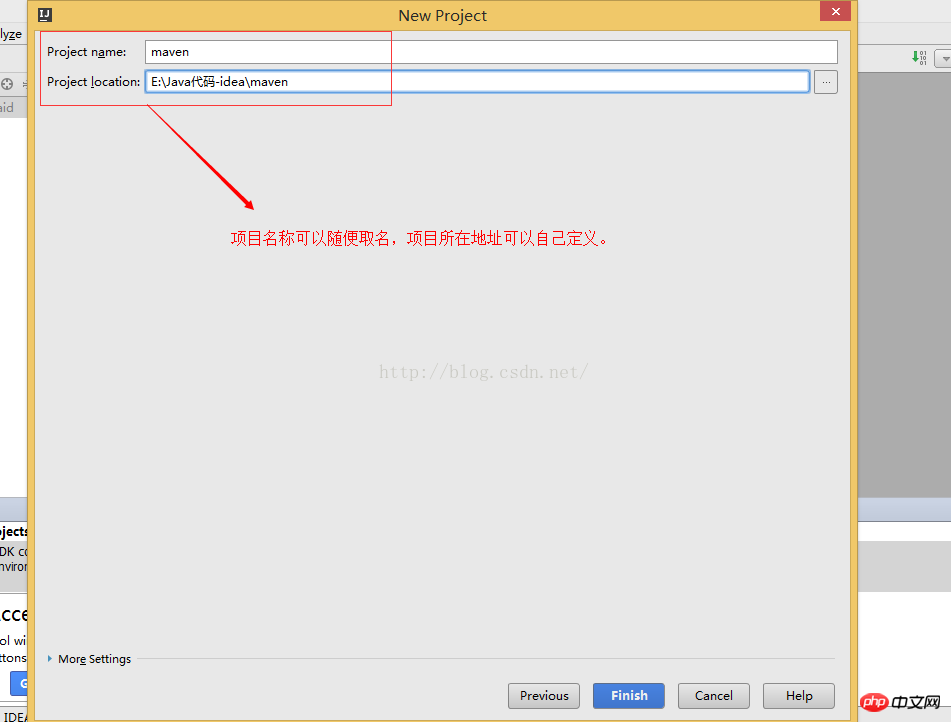
Step 1:Create a new regular maven project in IDEA. Please see the following diagram for the specific steps:

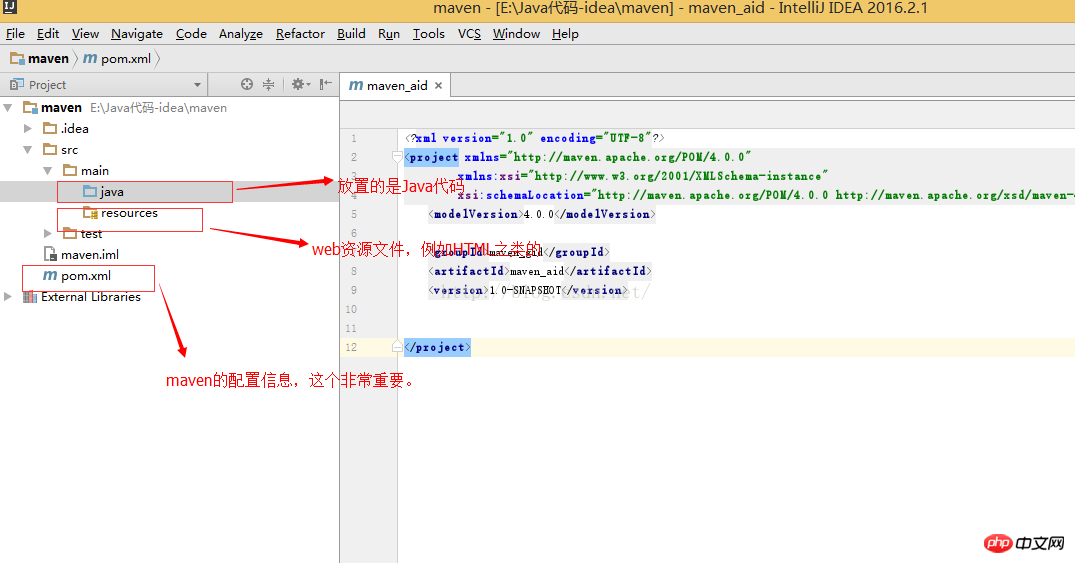
Step 2:
1. First copy the following code to pox.xml<?xml version="1.0" encoding="UTF-8"?>
<project xmlns="http://maven.apache.org/POM/4.0.0" xmlns:xsi="http://www.w3.org/2001/XMLSchema-instance"
xsi:schemaLocation="http://maven.apache.org/POM/4.0.0 http://maven.apache.org/xsd/maven-4.0.0.xsd">
<modelVersion>4.0.0</modelVersion>
<groupId>com.example</groupId>
<artifactId>demo</artifactId>
<version>0.0.1-SNAPSHOT</version>
<packagingexample>jar</packagingexample>
<name>demo</name>
<description>Demo project for Spring Boot</description>
<parent>
<groupId>org.springframework.boot</groupId>
<artifactId>spring-boot-starter-parent</artifactId>
<version>1.4.0.RELEASE</version>
<relativePath/> <!-- lookup parent from repository -->
</parent>
<properties>
<project.build.sourceEncoding>UTF-8</project.build.sourceEncoding>
<project.reporting.outputEncoding>UTF-8</project.reporting.outputEncoding>
<java.version>1.8</java.version>
</properties>
<dependencies>
<dependency>
<groupId>org.springframework.boot</groupId>
<artifactId>spring-boot-starter-web</artifactId>
</dependency>
<dependency>
<groupId>org.springframework.boot</groupId>
<artifactId>spring-boot-starter-test</artifactId>
<scope>test</scope>
</dependency>
<dependency>
<groupId>org.springframework.boot</groupId>
<artifactId>spring-boot-starter-thymeleaf</artifactId>
</dependency>
</dependencies>
<build>
<plugins>
<plugin>
<groupId>org.springframework.boot</groupId>
<artifactId>spring-boot-maven-plugin</artifactId>
</plugin>
</plugins>
</build>
</project>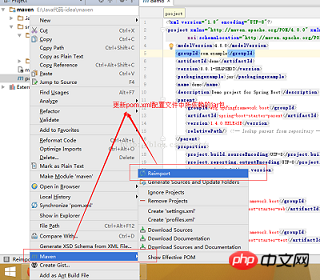
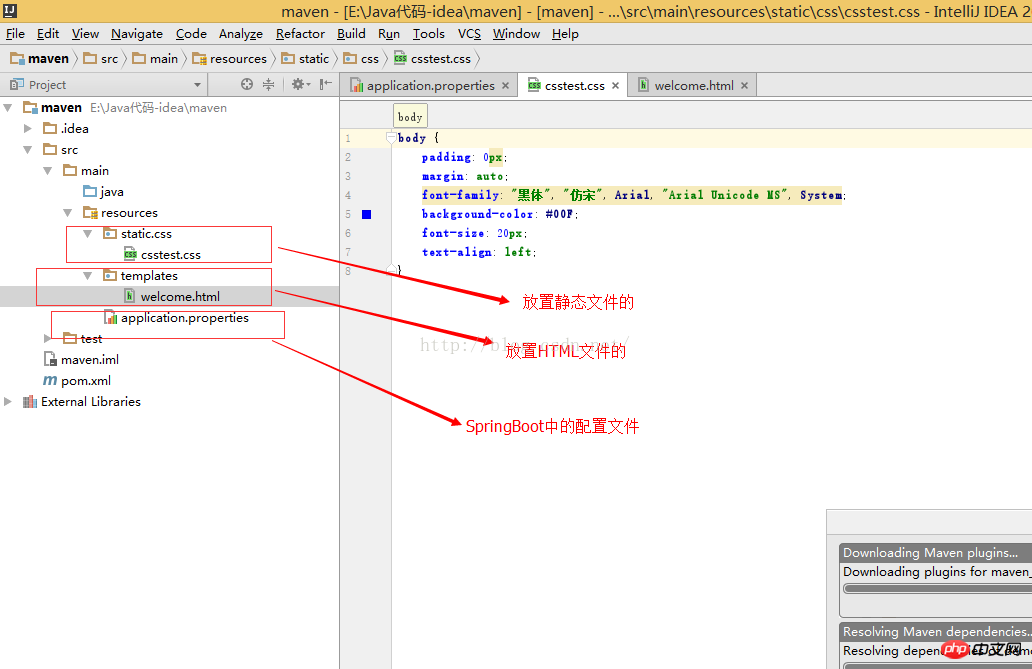
body {
  padding: 0px;
  margin: auto;
  font-family: "黑体", "仿宋", Arial, "Arial Unicode MS", System;
  background-color: #00F;
  font-size: 20px;
  text-align: left;
}<html> <head> <title>Title</title> </head> <link href="css/csstest.css" rel="external nofollow" rel="stylesheet"/> <body> <p>welcome page is login.........</p> </body> </html>
#修改tomcat的默认的端口号,将8080改为8888
server.port=8888
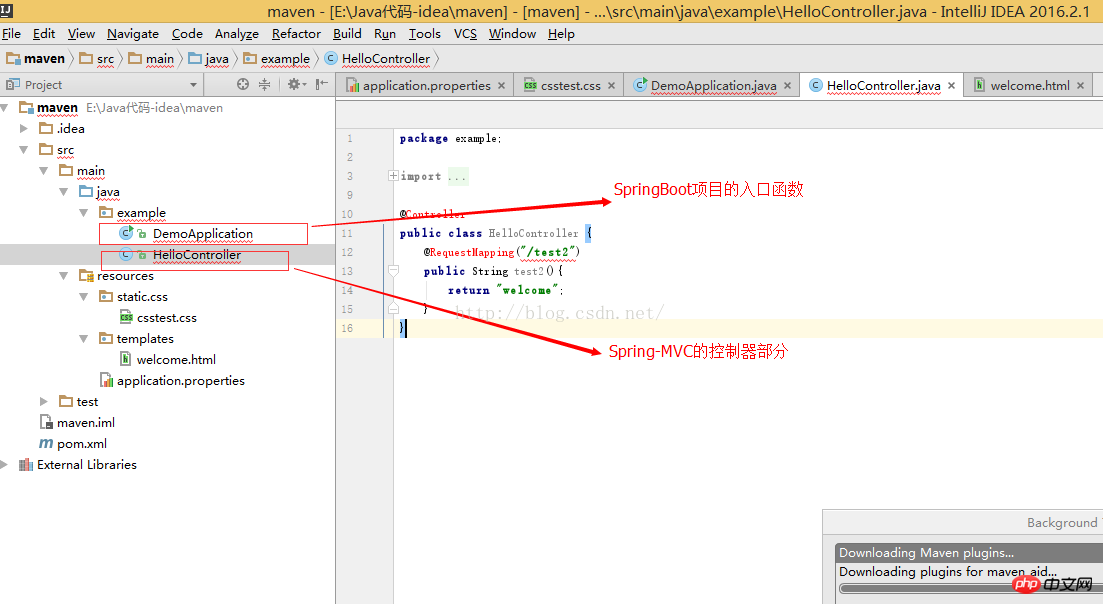
package example;
import org.springframework.boot.SpringApplication;
import org.springframework.boot.autoconfigure.SpringBootApplication;
@SpringBootApplication
public class DemoApplication {
  public static void main(String[] args) {
    SpringApplication.run(DemoApplication.class, args);
  }
}package example;
import org.springframework.stereotype.Controller;
import org.springframework.web.bind.annotation.RequestMapping;
import org.springframework.web.bind.annotation.ResponseBody;
import java.util.HashMap;
import java.util.Map;
@Controller
public class HelloController {
@RequestMapping("/index")
public String index(){
return "welcome";
}
}The above is the detailed content of Share some frequently asked questions about web-mvc projects building SpringBoot on IDEA. For more information, please follow other related articles on the PHP Chinese website!

Hot AI Tools

Undresser.AI Undress
AI-powered app for creating realistic nude photos

AI Clothes Remover
Online AI tool for removing clothes from photos.

Undress AI Tool
Undress images for free

Clothoff.io
AI clothes remover

Video Face Swap
Swap faces in any video effortlessly with our completely free AI face swap tool!

Hot Article
Hot Tools

Notepad++7.3.1
Easy-to-use and free code editor

SublimeText3 Chinese version
Chinese version, very easy to use

Zend Studio 13.0.1
Powerful PHP integrated development environment

Dreamweaver CS6
Visual web development tools

SublimeText3 Mac version
God-level code editing software (SublimeText3)
Hot Topics
 1387
1387
 52
52

 The difference between idea community version and professional version
Nov 07, 2023 pm 05:23 PM
The difference between idea community version and professional version
Nov 07, 2023 pm 05:23 PM
The differences between IDEA Community Edition and Professional Edition include authorization methods, functions, support and updates, plug-in support, cloud services and team collaboration, mobile development support, education and learning, integration and scalability, error handling and debugging, security and privacy protection. etc. Detailed introduction: 1. Authorization method. The community version is free and suitable for all developers, no matter what operating system is used. The community version supports open source projects and commercial projects. The professional version is paid and suitable for commercial development. The professional version has 30 There is a trial period of three days, after which you need to purchase a license to continue using it, etc.
 Five IntelliJ IDEA plug-ins to write code efficiently
Jul 16, 2023 am 08:03 AM
Five IntelliJ IDEA plug-ins to write code efficiently
Jul 16, 2023 am 08:03 AM
Artificial intelligence AI is currently a widely recognized future trend and development direction. Although some people worry that AI may replace all jobs, in fact it will only replace jobs that are highly repetitive and low-output. Therefore, we should learn to work smarter rather than harder. This article introduces 5 AI-driven Intellij plug-ins. These plug-ins can help you improve productivity, reduce tedious repetitive work, and make your work more efficient and convenient. 1GithubCopilotGithubCopilot is an artificial intelligence code assistance tool jointly developed by OpenAI and GitHub. It uses OpenAI’s GPT model to analyze code context, predict and generate new code
 Idea how to start multiple SpringBoot projects
May 28, 2023 pm 06:46 PM
Idea how to start multiple SpringBoot projects
May 28, 2023 pm 06:46 PM
1. Preparation Use Idea to build a helloworld SpringBoot project. Development environment description: (1) SpringBoot2.7.0 (2) Idea: IntelliJIDEA2022.2.2 (3) OS: The MacOS environment is different. Some operations are slightly different, but the overall idea is the same. 2. Start multiple SpringBoot2.1 Solution 1: Modify the port of the configuration file In the SpringBoot project, the port number can be configured in the configuration file, so the simplest solution that can be thought of is to modify the port of the configuration file application.(properties/yml) Configurations
 How to solve the problem of empty mapper automatically injected into idea springBoot project
May 17, 2023 pm 06:49 PM
How to solve the problem of empty mapper automatically injected into idea springBoot project
May 17, 2023 pm 06:49 PM
In the SpringBoot project, if MyBatis is used as the persistence layer framework, you may encounter the problem of mapper reporting a null pointer exception when using automatic injection. This is because SpringBoot cannot correctly identify the Mapper interface of MyBatis during automatic injection and requires some additional configuration. There are two ways to solve this problem: 1. Add annotations to the Mapper interface. Add the @Mapper annotation to the Mapper interface to tell SpringBoot that this interface is a Mapper interface and needs to be proxied. An example is as follows: @MapperpublicinterfaceUserMapper{//...}2
 What software is idea?
Sep 02, 2022 pm 05:05 PM
What software is idea?
Sep 02, 2022 pm 05:05 PM
Idea is a Java integrated development environment tool software developed by JetBrains Software Company. IDEA advocates intelligent coding, and its special functions include: intelligent selection, coding assistance, flexible typesetting, dynamic syntax detection, code inspection, full support for JSP, preset templates, perfect support for version control, intelligent code, etc.
 How to solve the problem that Springboot hot deployment is invalid in Idea
May 18, 2023 pm 06:01 PM
How to solve the problem that Springboot hot deployment is invalid in Idea
May 18, 2023 pm 06:01 PM
一、开启idea自动make功能1-EnableAutomakefromthecompilerPRESS:CTRL+SHIFT+ATYPE:makeprojectautomaticallyPRESS:EnterEnableMakeProjectautomaticallyfeature2-EnableAutomakewhentheapplicationisrunningPRESS:CTRL+SHIFT+ATYPE:RegistryFindthekeycompiler.automake.allow.
 How to debug Java Stream operations in IntelliJ IDEA
May 09, 2023 am 11:25 AM
How to debug Java Stream operations in IntelliJ IDEA
May 09, 2023 am 11:25 AM
Stream operation is a highlight of Java8! Although java.util.stream is very powerful, there are still many developers who rarely use it in actual work. One of the most complained reasons is that it is difficult to debug. This was indeed the case at the beginning, because streaming operations such as stream cannot be used in DEBUG When it is one line of code, when it comes to the next step, many operations are actually passed at once, so it is difficult for us to judge which line in it is the problem. Plug-in: JavaStreamDebugger If the IDEA version you are using is relatively new, this plug-in is already included and does not need to be installed. If it is not installed yet, install it manually and then continue below.
 Basic tutorial: Create a Maven project using IDEA
Feb 19, 2024 pm 04:43 PM
Basic tutorial: Create a Maven project using IDEA
Feb 19, 2024 pm 04:43 PM
IDEA (IntelliJIDEA) is a powerful integrated development environment that can help developers develop various Java applications quickly and efficiently. In Java project development, using Maven as a project management tool can help us better manage dependent libraries, build projects, etc. This article will detail the basic steps on how to create a Maven project in IDEA, while providing specific code examples. Step 1: Open IDEA and create a new project Open IntelliJIDEA
