
 Web Front-end
JS Tutorial
How to convert a solid color QR code into a colored QR code (JavaScript)
Web Front-end
JS Tutorial
How to convert a solid color QR code into a colored QR code (JavaScript)
How to convert a solid color QR code into a colored QR code (JavaScript)

This article mainly introduces in detail the solution of turning JavaScript solid color QR code into color QR code. It has certain reference value. Interested friends can refer to it.
The main content of this article is The discussion is about how to turn a solid color QR code into color.
Some time ago, there was a demand in the company's business. Customers did not like the solid color QR codes generated in the background. Pure blue, pure purple, and pure green were not acceptable. They wanted colored QR codes. Then this task fell on me. Because it was image processing, the main idea was to rely on canvas. Canvas can perform pixel operations, so I made some attempts and encountered some pitfalls. The specific records are as follows.
Prerequisite knowledge
drawImageMethod can draw pictures onto canvas, getImageData The method can obtain the information of all pixels in a rectangular area. The data attribute of the return value is a one-dimensional array, which stores the information of all pixels. The information of one pixel will occupy four elements, representing r,g,b and transparency. The order of pixels in a one-dimensional array is from left to right and top to bottom. The last is the putImageData method, which throws the changed pixel information array back to the canvas.
Some small pitfalls
The first pitfall is that canvas uses attributes to give width and height, don’t use css;
The second pitfall Pitfalls, image processing seems to require a server environment, which is not possible locally. I heard it was based on some security considerations. In the end, I solved the canvas error by setting up a local server.
The third pitfall is stack overflow. The reason for this has not been found yet. I will talk about it in detail later
The idea of discoloration
The main idea comes from "Aha!" algorithm! "In the chapters of depth-first search and breadth-first search, the last part of the chapter, "Treasure Island Adventure", implements numbering different areas in sequence. Think of the numbers as coloring, but they are actually the same.
Specific implementation
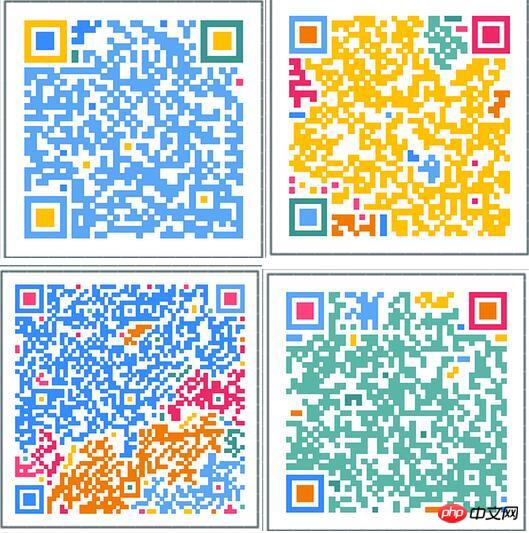
In fact, the so-called color QR code is not the kind of QR code where the color of each pixel is random. If you look closely at the QR code, you will find that the black parts are one piece at a time, and they are distributed among the white ones, just like islands distributed in the sea. What we have to do is to dye each black block individually. The essence of a black block is a black pixel.
As mentioned earlier, we use canvas because we can perform pixel operations, so our operation is actually to dye the pixels. We obviously do not want to dye the background color, so the background color needs to be judged; before It was also mentioned that the background color is like the ocean dividing the black color blocks. That means that after we read a pixel and dye it, we constantly judge the color of the pixels on the right side of it. When the background color appears, it means we have arrived. The boundary can stop coloring in the right direction, but each pixel actually has four connected directions. When the right side of a pixel is the background color, we should also try the possibility of other directions. This is depth-first search. Through recursion, constantly verify that the color of the next position of the current pixel is the background color, then come back and try another direction; if it is not the background color, then dye it, and then perform four directions on the dyed pixel. verify.
There are a few points to mention. To determine whether it is a background color, you must compare the rgba value, so the color parameters must be processed. The other is an array of pixel information. Every four elements represent a pixel. Therefore, if you want to compare the correct pixel information, this part must also be processed.
It may be a bit confusing, let’s take a look at the code
The first part,canvas
1 2 3 4 5 6 |
|
The second part,Color processing
1 2 3 4 5 6 7 8 9 10 11 12 13 14 15 16 17 18 19 20 21 22 23 24 25 26 27 28 |
|
The third part, Give initial parameters
In order to avoid redundant operations, we use a marker array to record the judged position
1 2 3 4 5 6 7 8 9 10 11 12 13 14 15 16 17 18 19 20 21 22 |
|
Part 4, Get the pixel information, traverse each pixel, and finally throw it back to the canvas
If it has been marked, skip it. If it has not been marked, just randomly Color, depth-first search and dyeing
1 2 3 4 5 6 7 8 9 10 11 12 13 14 15 16 17 18 19 20 21 22 23 24 25 26 27 28 29 30 31 32 33 34 35 36 37 38 39 40 41 42 43 |
|
Key code
We use a direction array to simplify the operation. We have agreed that the direction to try is clockwise. Start from the right.
1 2 3 4 5 6 7 8 9 10 11 12 13 14 15 16 17 18 19 20 21 22 23 24 25 26 27 28 29 30 31 |
|
The last pitfall I encountered is that when the length and width are greater than 220, the stack will overflow, but if it is less than this value, there will be no problem. The specific reason is not clear. I guess it may be that there is a problem there. , leading to an infinite loop.
All code here
1 2 3 4 5 6 7 8 9 10 11 12 13 14 15 16 17 18 19 20 21 22 23 24 25 26 27 28 29 30 31 32 33 34 35 36 37 38 39 40 41 42 43 44 45 46 47 48 49 50 51 52 53 54 55 56 57 58 59 60 61 62 63 64 65 66 67 68 69 70 71 72 73 74 75 76 77 78 79 80 81 82 83 84 85 86 87 88 89 90 91 92 93 94 95 96 97 98 99 100 101 102 103 104 105 106 107 108 109 110 111 112 113 114 115 116 117 118 119 120 121 122 123 124 125 126 127 128 129 130 131 132 |
|
Summary
Although it seems a bit long, most functions actually process pixel information. To implement it, the main thing is to have an understanding of depth-first search. Every pixel is searched for depth-first. The dyed ones are naturally marked, so when a new unmarked pixel appears, it naturally means New color blocks. In terms of details, just pay attention to the correspondence between imgD.data and pixel serial numbers, and everything else will be fine. However, one thing to note is that because the pixels are very small, color blocks that appear to be disconnected to the naked eye may be connected together and dyed the same color.
I forgot to post pictures, so here are a few. They were taken from QQ, and the outer borders were accidentally cut off. Well, let’s take a look.
The above is the detailed content of How to convert a solid color QR code into a colored QR code (JavaScript). For more information, please follow other related articles on the PHP Chinese website!

Hot AI Tools

Undresser.AI Undress
AI-powered app for creating realistic nude photos

AI Clothes Remover
Online AI tool for removing clothes from photos.

Undress AI Tool
Undress images for free

Clothoff.io
AI clothes remover

Video Face Swap
Swap faces in any video effortlessly with our completely free AI face swap tool!
Hot Article
Hot Tools

Notepad++7.3.1
Easy-to-use and free code editor

SublimeText3 Chinese version
Chinese version, very easy to use

Zend Studio 13.0.1
Powerful PHP integrated development environment

Dreamweaver CS6
Visual web development tools

SublimeText3 Mac version
God-level code editing software (SublimeText3)
Hot Topics
 1393
1393
 52
37
111
52
37
111

 How to create a QR code using wps
Mar 28, 2024 am 09:41 AM
How to create a QR code using wps
Mar 28, 2024 am 09:41 AM
1. Open the software and enter the wps text operation interface. 2. Find the insert option in this interface. 3. Click the Insert option and find the QR code option in its editing tool area. 4. Click the QR code option to pop up the QR code dialog box. 5. Select the text option on the left and enter our information in the text box. 6. On the right side, you can set the shape of the QR code and the color of the QR code.
 How to implement an online speech recognition system using WebSocket and JavaScript
Dec 17, 2023 pm 02:54 PM
How to implement an online speech recognition system using WebSocket and JavaScript
Dec 17, 2023 pm 02:54 PM
How to use WebSocket and JavaScript to implement an online speech recognition system Introduction: With the continuous development of technology, speech recognition technology has become an important part of the field of artificial intelligence. The online speech recognition system based on WebSocket and JavaScript has the characteristics of low latency, real-time and cross-platform, and has become a widely used solution. This article will introduce how to use WebSocket and JavaScript to implement an online speech recognition system.
 WebSocket and JavaScript: key technologies for implementing real-time monitoring systems
Dec 17, 2023 pm 05:30 PM
WebSocket and JavaScript: key technologies for implementing real-time monitoring systems
Dec 17, 2023 pm 05:30 PM
WebSocket and JavaScript: Key technologies for realizing real-time monitoring systems Introduction: With the rapid development of Internet technology, real-time monitoring systems have been widely used in various fields. One of the key technologies to achieve real-time monitoring is the combination of WebSocket and JavaScript. This article will introduce the application of WebSocket and JavaScript in real-time monitoring systems, give code examples, and explain their implementation principles in detail. 1. WebSocket technology
 How to use JavaScript and WebSocket to implement a real-time online ordering system
Dec 17, 2023 pm 12:09 PM
How to use JavaScript and WebSocket to implement a real-time online ordering system
Dec 17, 2023 pm 12:09 PM
Introduction to how to use JavaScript and WebSocket to implement a real-time online ordering system: With the popularity of the Internet and the advancement of technology, more and more restaurants have begun to provide online ordering services. In order to implement a real-time online ordering system, we can use JavaScript and WebSocket technology. WebSocket is a full-duplex communication protocol based on the TCP protocol, which can realize real-time two-way communication between the client and the server. In the real-time online ordering system, when the user selects dishes and places an order
 How to implement an online reservation system using WebSocket and JavaScript
Dec 17, 2023 am 09:39 AM
How to implement an online reservation system using WebSocket and JavaScript
Dec 17, 2023 am 09:39 AM
How to use WebSocket and JavaScript to implement an online reservation system. In today's digital era, more and more businesses and services need to provide online reservation functions. It is crucial to implement an efficient and real-time online reservation system. This article will introduce how to use WebSocket and JavaScript to implement an online reservation system, and provide specific code examples. 1. What is WebSocket? WebSocket is a full-duplex method on a single TCP connection.
 JavaScript and WebSocket: Building an efficient real-time weather forecasting system
Dec 17, 2023 pm 05:13 PM
JavaScript and WebSocket: Building an efficient real-time weather forecasting system
Dec 17, 2023 pm 05:13 PM
JavaScript and WebSocket: Building an efficient real-time weather forecast system Introduction: Today, the accuracy of weather forecasts is of great significance to daily life and decision-making. As technology develops, we can provide more accurate and reliable weather forecasts by obtaining weather data in real time. In this article, we will learn how to use JavaScript and WebSocket technology to build an efficient real-time weather forecast system. This article will demonstrate the implementation process through specific code examples. We
 Simple JavaScript Tutorial: How to Get HTTP Status Code
Jan 05, 2024 pm 06:08 PM
Simple JavaScript Tutorial: How to Get HTTP Status Code
Jan 05, 2024 pm 06:08 PM
JavaScript tutorial: How to get HTTP status code, specific code examples are required. Preface: In web development, data interaction with the server is often involved. When communicating with the server, we often need to obtain the returned HTTP status code to determine whether the operation is successful, and perform corresponding processing based on different status codes. This article will teach you how to use JavaScript to obtain HTTP status codes and provide some practical code examples. Using XMLHttpRequest
 What should I do if the QR code on Enterprise WeChat cannot be loaded?
Mar 14, 2024 pm 10:46 PM
What should I do if the QR code on Enterprise WeChat cannot be loaded?
Mar 14, 2024 pm 10:46 PM
What should I do if the QR code on Enterprise WeChat cannot be loaded? What should we do when we find that the QR code cannot be loaded and cannot be displayed when logging into the computer version of Enterprise WeChat? Here, the editor will give you a detailed introduction to the solution to the problem that the QR code of Enterprise WeChat cannot be loaded. Anyone who needs it Friends, come and take a look! Method 1. Network reasons 1. The network speed may be slow, resulting in slow loading and failure to display. You can disconnect and reconnect. 2. Check the computer's own network problems to see if it is connected to the network. You can restart the network device. Method 2: Maintenance and update: The QR code may not be generated because the version of Enterprise WeChat is too low. You can upgrade the software to the latest version. Method three, firewall 1
