
 Web Front-end
PS Tutorial
How to add a gorgeous colorful halftone texture effect to a beautiful woman's portrait in Photoshop tutorial
Web Front-end
PS Tutorial
How to add a gorgeous colorful halftone texture effect to a beautiful woman's portrait in Photoshop tutorial
How to add a gorgeous colorful halftone texture effect to a beautiful woman's portrait in Photoshop tutorial

This tutorial teaches Script Home’s PS photo processing learners how to use Photoshop to add a gorgeous color halftone mesh effect to a beautiful woman’s portrait. The tutorial mainly explains the production of colorful halftone characters. Interested Friends can learn together
The production of colorful half-tone characters is divided into three parts: first, you need to cut out the characters individually and add a gorgeous gradient color to the background; then render the color for the characters and add them with gradients Use some fashionable gradient colors, and adjust local light and dark; finally, use filters and selections to add halftone patterns to the characters.
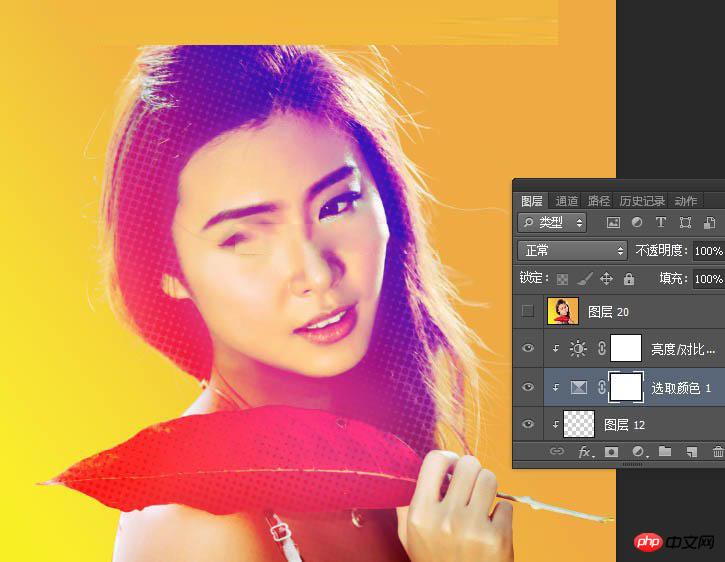
Final effect

##Original image

Main process
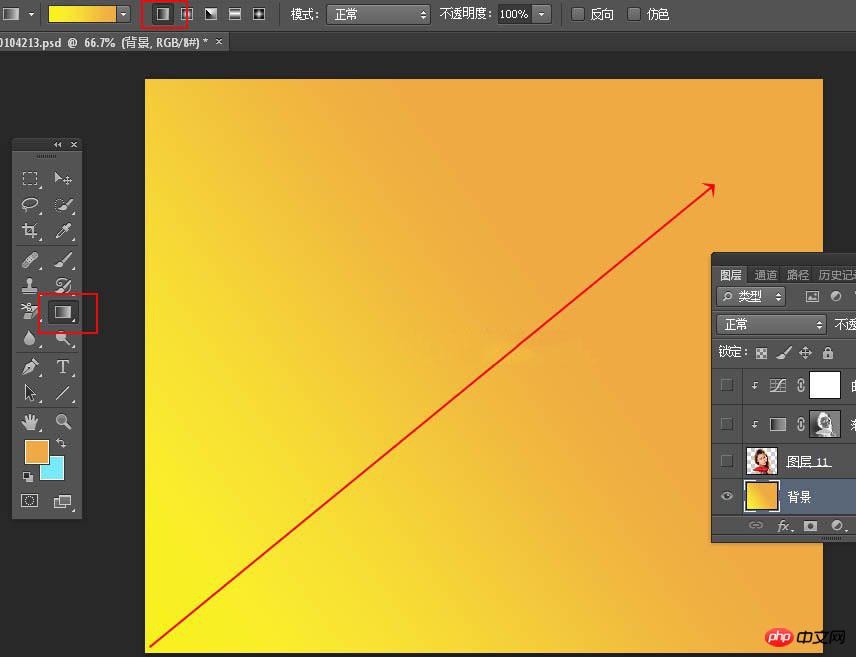
1. Create a new canvas. Open PS, press Ctrl + N to create new, and set the size as shown below.
ift + E to stamp the layer, as shown below.
Thumbnail Load the selection, and then press Ctrl + Shift + I Turn the constituency upside down.
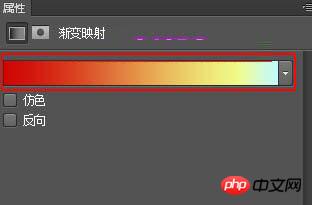
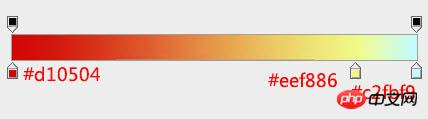
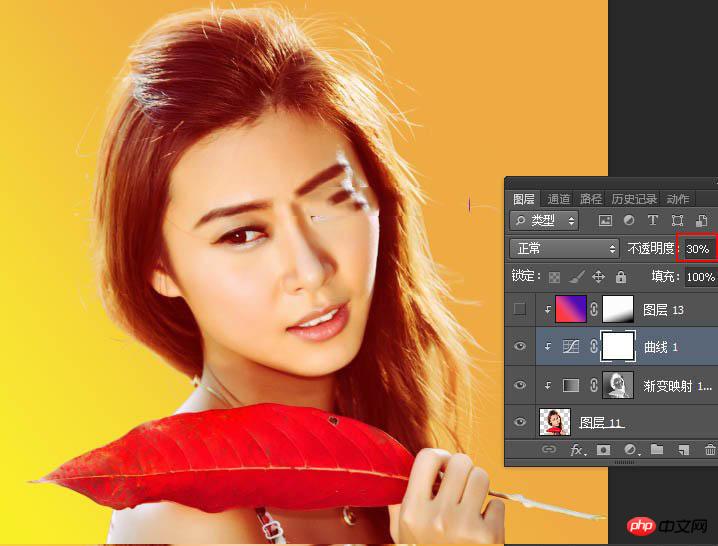
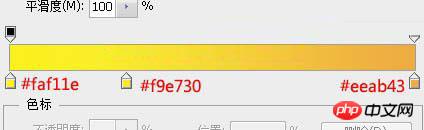
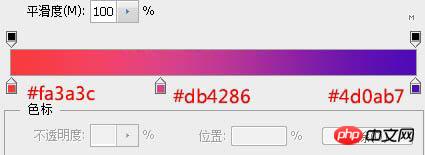
12. Create a new layer, create a clipping mask, change the layer blending mode to "Lighten"; select the gradient tool, color Set it as shown below, and then pull out a linear gradient from the lower left corner to the upper right corner; after confirming, use a soft-edged black brush with a transparency of 10% to paint the lower right corner of the character.

13. Press Ctrl + J to duplicate the current gradient layer and create a clipping mask.

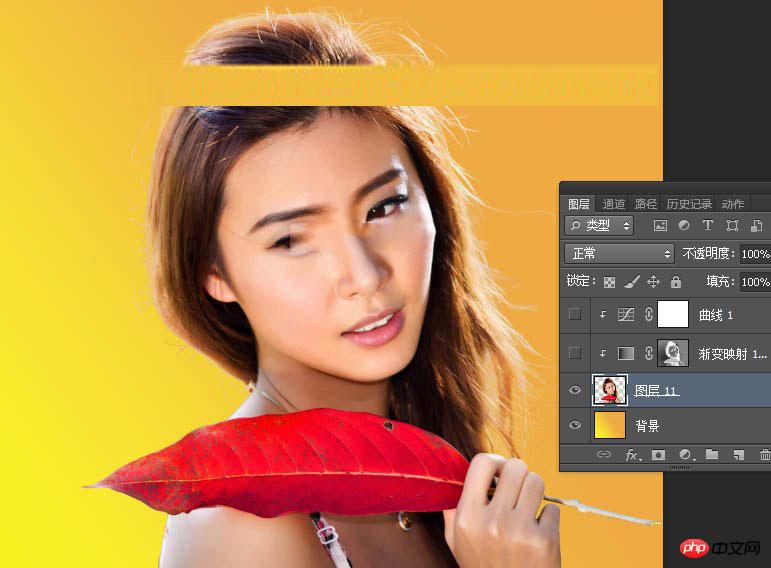
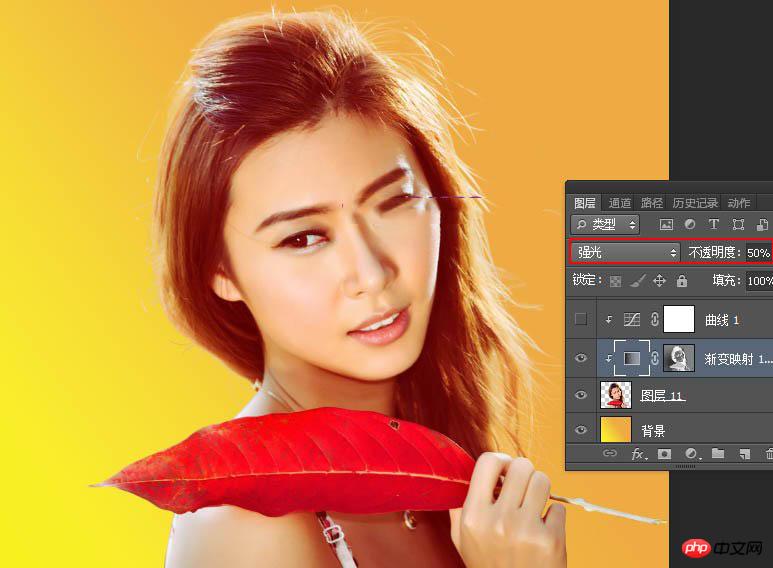
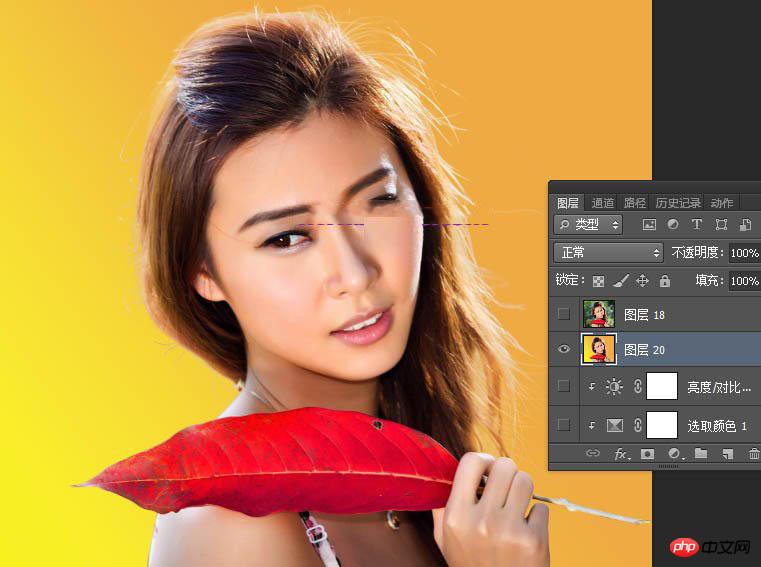
14. Create a new layer, change the blending mode to "Screen", and the opacity to 50%; set the foreground color to orange #FBE10A, and then use Use a soft-edged brush with an opacity of 10% to slightly brighten the right side of the character.
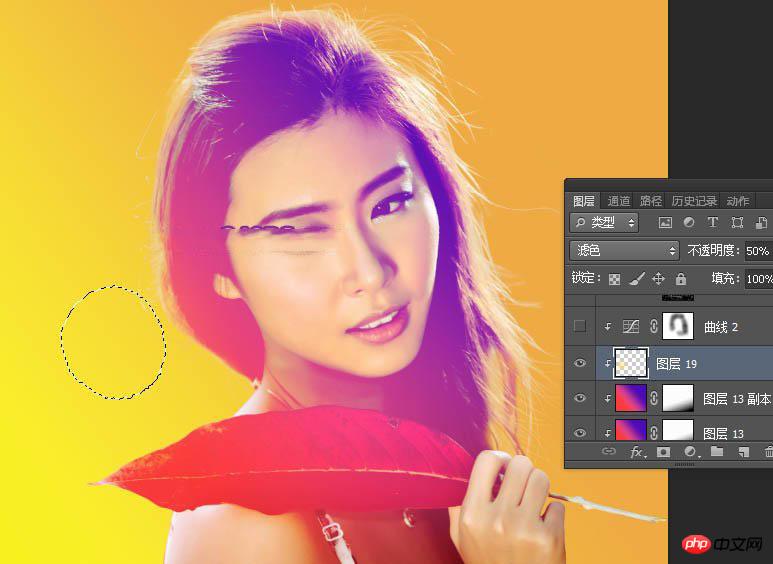
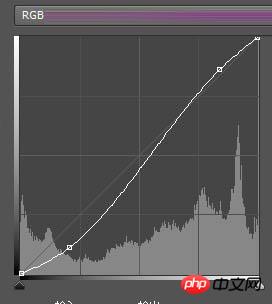
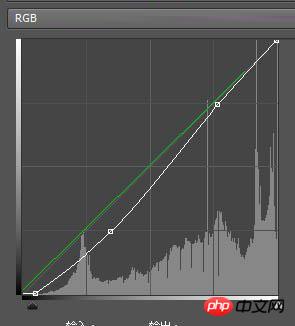
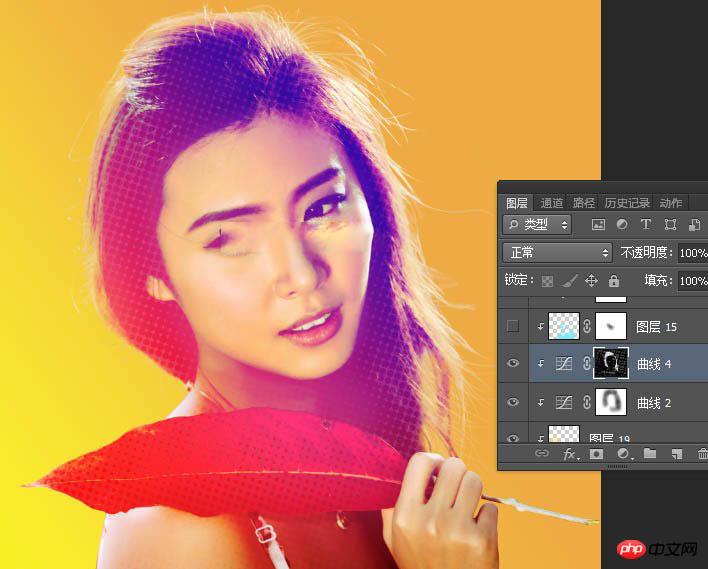
15. Create a curve adjustment layer, adjust the RGB and green channels, and set the parameters as shown below. After confirmation, create a clipping mask; then set the transparency to 10% Use a soft-edged black brush to paint out the head of the character.
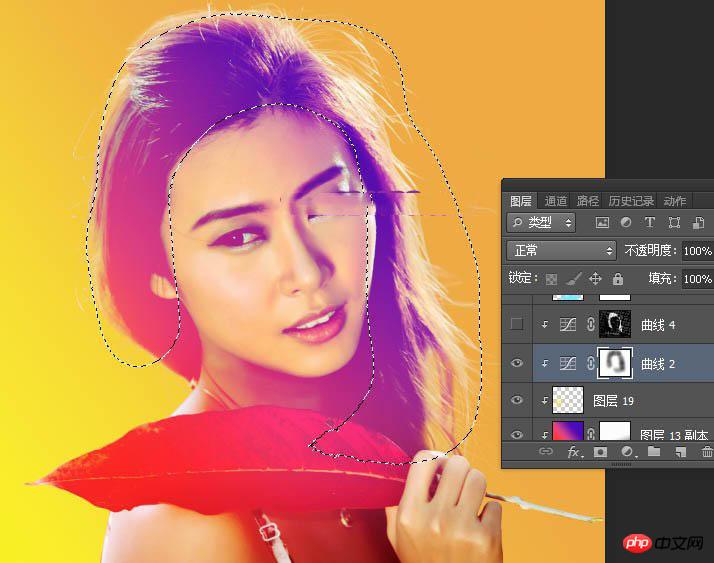
16. Now let’s make the halftone pattern. Bring out the top stamp layer and select it.
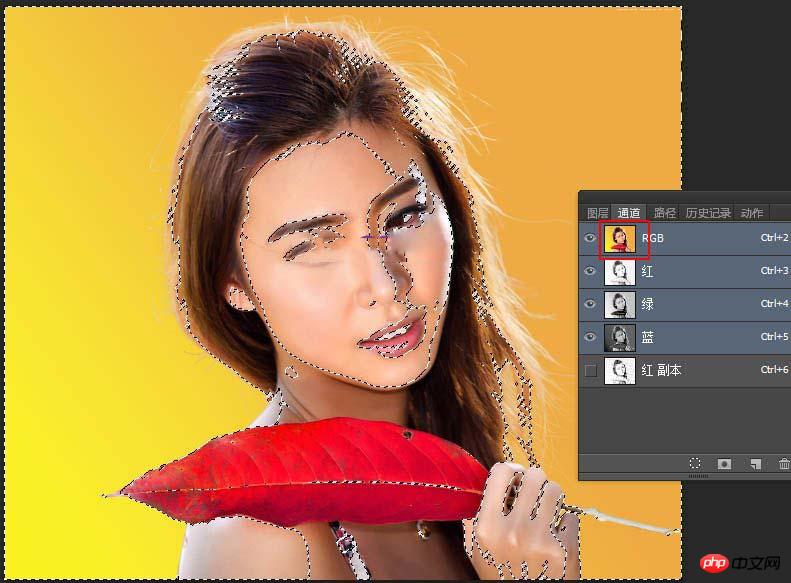
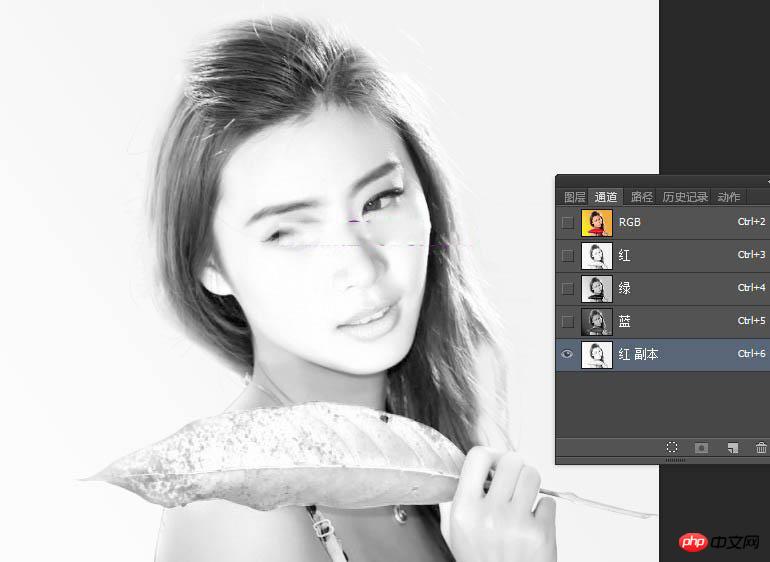
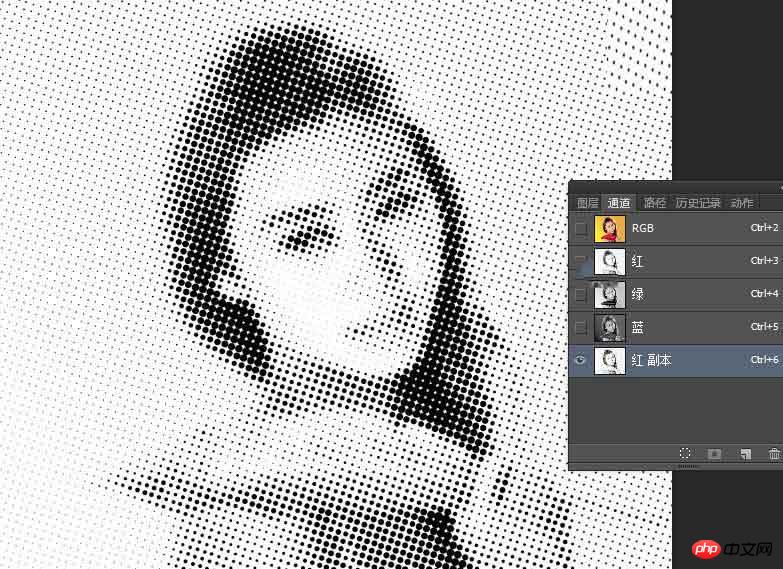
#17. Enter the channel panel and copy the red channel to get the red copy channel, as shown below.
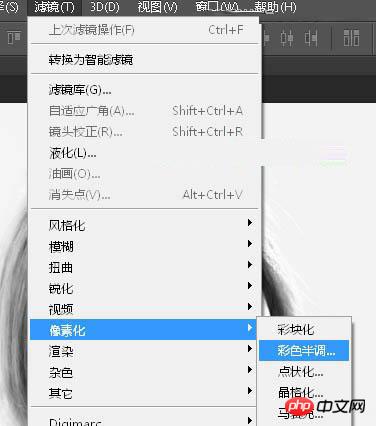
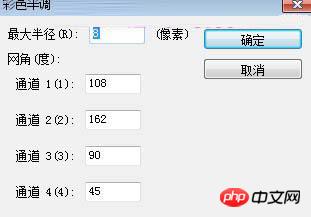
18. Select the menu: Filter > Pixelate > Color Halftone, the parameters are default, and the effect after confirmation is as shown below.
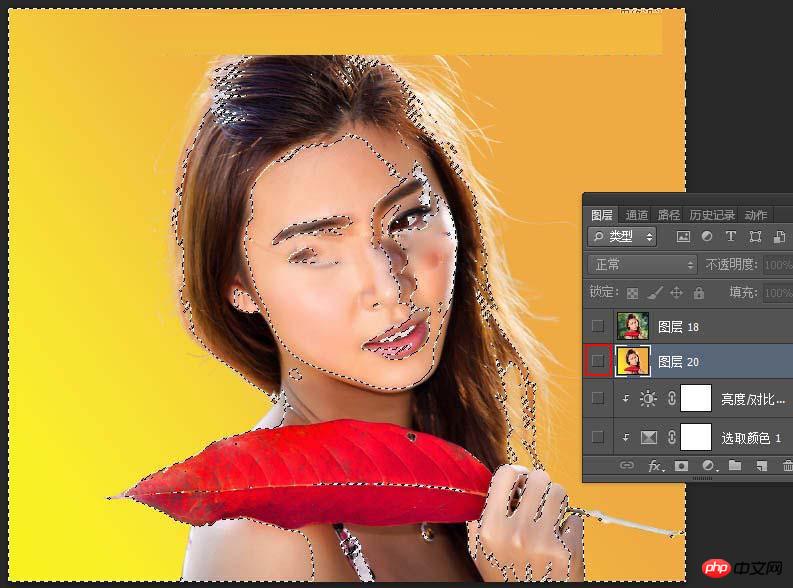
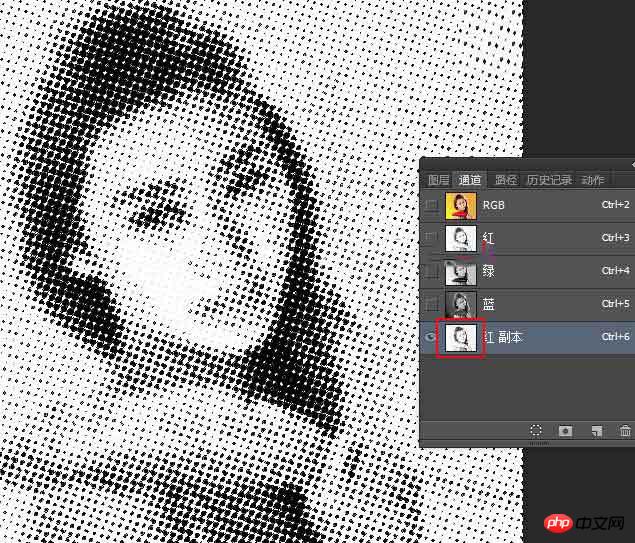
19. Hold down the Ctrl key + left-click the red copy channel thumbnail to load Select the area and press Ctrl + Shift + I to invert the selection.
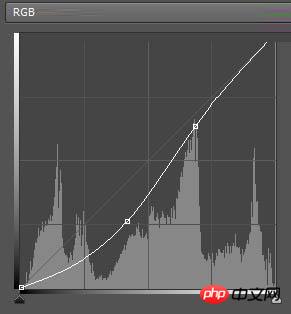
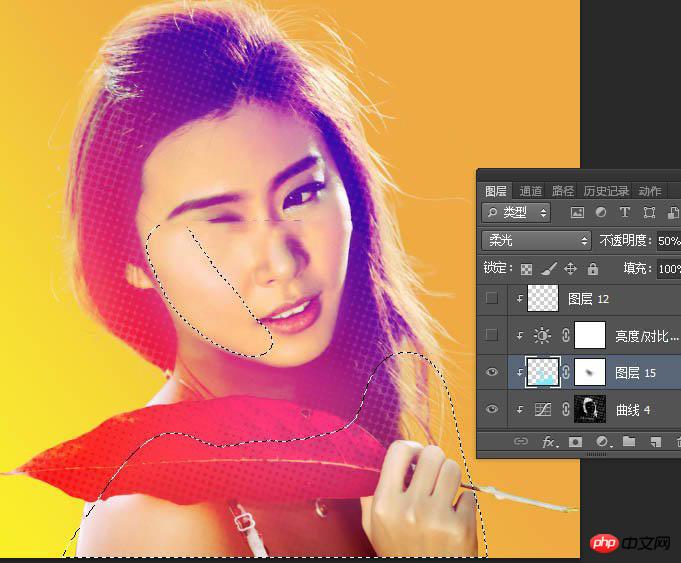
20. Keep the selection, click the RGB channel to return to the layer panel, hide the stamp layer, and create a curve adjustment layer on top of the character layer. The parameter settings are as follows , create a clipping mask after confirmation; then use a soft-edged black brush with an transparency of 10% to erase some unnatural areas.
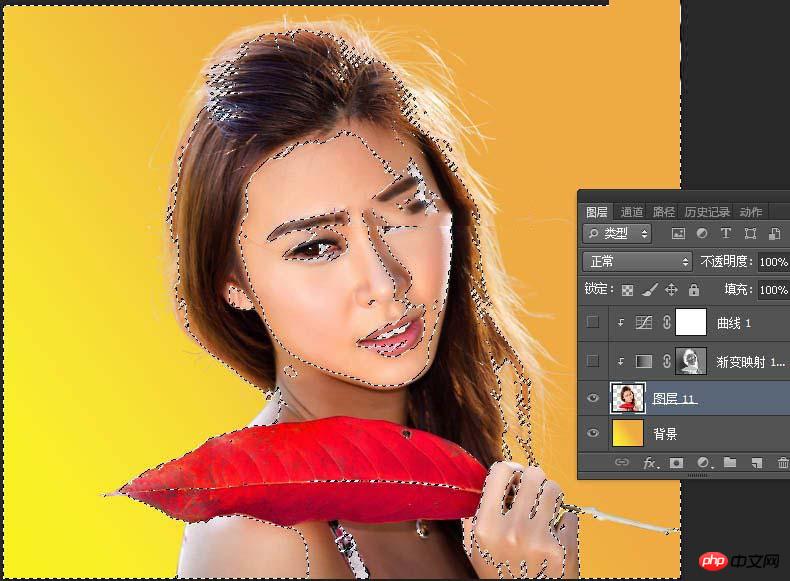
21. Create a new layer, change the blending mode to "Soft Light", change the opacity to 50%, and create a clipping mask; set the foreground color to cyan #79E9FD, and then use a soft layer with a transparency of 10% Use a brush to paint the selected area in the picture below with some complementary colors.
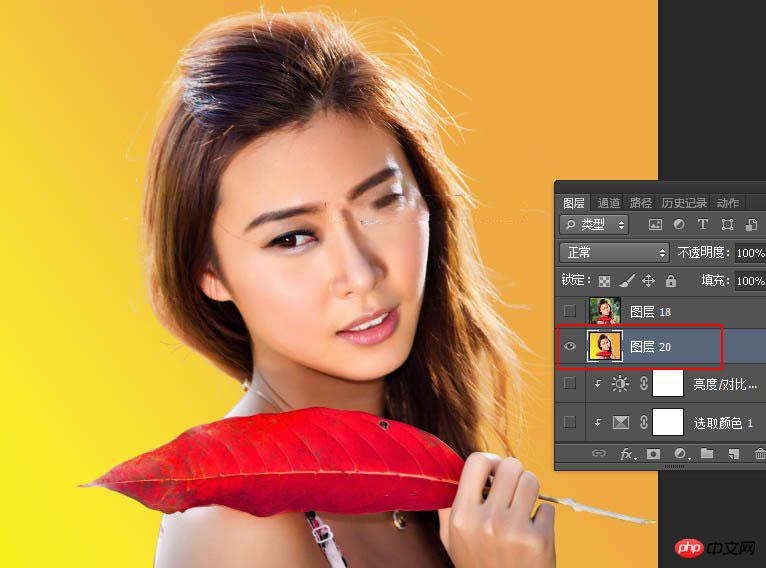
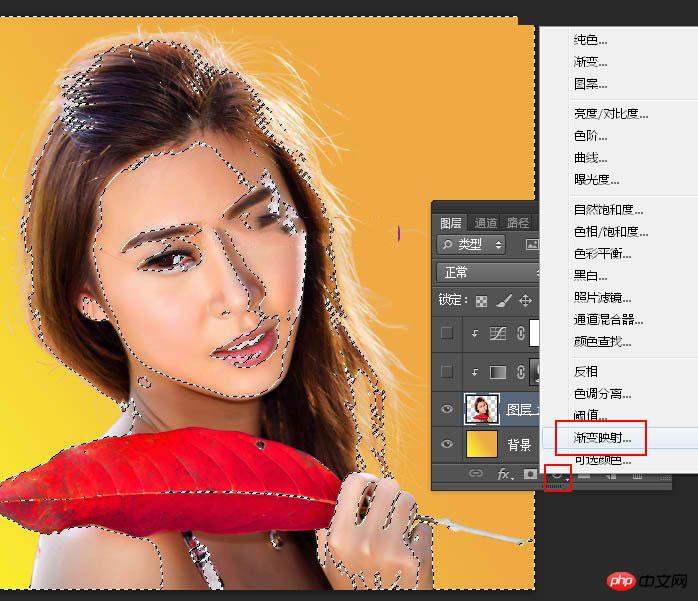
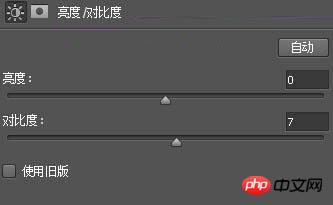
#22. Create a brightness/contrast adjustment layer, increase the contrast appropriately, set the parameters as shown below, and create a clipping mask after confirmation.
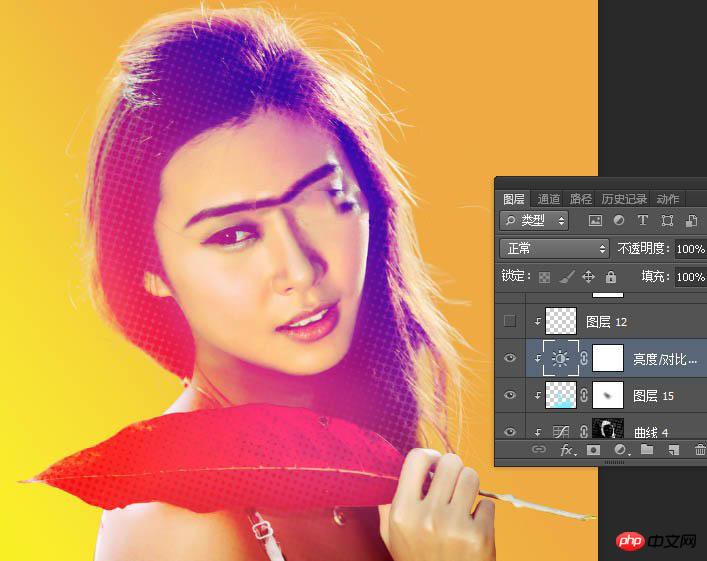
23. Finally, fine-tune the color and enhance some light and shade, as shown below.
final effect
The above is the detailed content of How to add a gorgeous colorful halftone texture effect to a beautiful woman's portrait in Photoshop tutorial. For more information, please follow other related articles on the PHP Chinese website!

Hot AI Tools

Undresser.AI Undress
AI-powered app for creating realistic nude photos

AI Clothes Remover
Online AI tool for removing clothes from photos.

Undress AI Tool
Undress images for free

Clothoff.io
AI clothes remover

Video Face Swap
Swap faces in any video effortlessly with our completely free AI face swap tool!

Hot Article
Hot Tools

Notepad++7.3.1
Easy-to-use and free code editor

SublimeText3 Chinese version
Chinese version, very easy to use

Zend Studio 13.0.1
Powerful PHP integrated development environment

Dreamweaver CS6
Visual web development tools

SublimeText3 Mac version
God-level code editing software (SublimeText3)
Hot Topics
 1386
1386
 52
52

 What are the permanently free photoshopcs5 serial numbers?
Jul 06, 2023 am 10:00 AM
What are the permanently free photoshopcs5 serial numbers?
Jul 06, 2023 am 10:00 AM
The permanently free photoshopcs5 serial numbers are: 1. 1330-1440-1602-3671-9749-7897; 2. 1330-1191-2998-6712-2520-5424; 3. 1330-1367-4285-4928-0630-3107; 4. 1330-1570-9599-9499-8092-8237; 5. 1330-1028-1662-3206-1688-5114, etc.
 Solution: Fix keyboard shortcuts not working in Photoshop
Sep 22, 2023 pm 03:17 PM
Solution: Fix keyboard shortcuts not working in Photoshop
Sep 22, 2023 pm 03:17 PM
Adobe Photoshop is the industry standard for digital design, loved and used every day by the online community. However, when keyboard shortcuts stutter or fail entirely, it can significantly slow down any project or your overall productivity on Windows 11. Whether you're an experienced designer or just dabbling in photo editing, these glitches are more than just minor annoyances in Photoshop and Photoshop CC. First, let's look at the common reasons why custom or default shortcuts stop working. Why don't my shortcuts work in Photoshop? Customize workspace settings: Sometimes, adjusting or switching between workspace settings can reset keyboard shortcuts. Sticky Keys: This accessibility feature
 How to solve the problem of printing color documents in Win11?
Jan 04, 2024 pm 05:41 PM
How to solve the problem of printing color documents in Win11?
Jan 04, 2024 pm 05:41 PM
The color printer cannot print in color. This is a problem encountered by users using the Win11 system. They don’t know how to solve it. This article brings you the solution to the problem that the Win11 color printer cannot print color documents. Method 1: Restart the PrintSpooler service 1. First, press the [Win+X] key combination on the keyboard, or right-click the [Windows Start Icon] on the taskbar, and select [Run] in the hidden menu item that opens; 2. In the run window, enter the [services.msc] command and press [OK or Enter] to open the service; 3. In the service window, find and double-click to open the service named [PrintSpooler]; PrintSpooler service
 Adobe Photoshop official web version AI generated fill and generate extended image tools
Sep 29, 2023 pm 10:13 PM
Adobe Photoshop official web version AI generated fill and generate extended image tools
Sep 29, 2023 pm 10:13 PM
Adobe's Photoshop web service (an online web version) is now generally available. The web version of Photoshop will soon support the AI-generated fill and generate extended image tools, which were recently released for the desktop version of Photoshop. Powered by the Adobe Firefly generative AI model, these features are commercially available and allow users to quickly add, remove, or expand images using text-based descriptions in more than 100 languages while matching the lighting conditions and perspective of the original image. The web version of Photoshop also provides many of the most commonly used tools from the desktop version, but with a redesigned layout to provide a more "simplified" user experience for new Photoshop users. This includes early this year
 How to deal with blurred scanned documents
Jan 05, 2021 pm 03:09 PM
How to deal with blurred scanned documents
Jan 05, 2021 pm 03:09 PM
Processing method: 1. Open the scanned image to be processed in the PS software; 2. Click "Filter" - "Sharpening" - "Smart Sharpening" on the top toolbar; 3. In the pop-up window, select according to your needs Sharpen the radius and click "OK"; 4. Click "File" - "Save As" and save it as a file.
 Which company does photoshop belong to?
Jul 20, 2022 am 11:47 AM
Which company does photoshop belong to?
Jul 20, 2022 am 11:47 AM
photoshop is owned by Adobe. Photoshop is an image processing software developed and distributed by Adobe. It mainly processes digital images composed of pixels. Adobe is an American computer software company headquartered in San Jose, California. It is mainly engaged in the development of multimedia production software; its customers include enterprises, knowledge workers, creative people and designers, OEM partners, and developers around the world.
 Which company developed photoshop?
Jul 08, 2022 am 11:34 AM
Which company developed photoshop?
Jul 08, 2022 am 11:34 AM
Photoshop was developed by Adobe Systems; Photoshop is a graphics processing software developed and distributed by "Adobe Systems", which mainly processes digital images composed of pixels. Adobe Systems is an American multinational computer software company headquartered in San Jose, California.
 What tools do you use to draw paths in photoshop
Mar 19, 2021 pm 05:11 PM
What tools do you use to draw paths in photoshop
Mar 19, 2021 pm 05:11 PM
In photoshop, you can use the "pen tool" to draw paths. The pen tool is a tool used to create paths. After creating a path, you can edit it again. The pen tool is a vector drawing tool. Its advantage is that it can draw smooth curves and maintain a smooth effect after scaling or deformation.
