 Web Front-end
 PS Tutorial
 Tutorial on converting retro girl photos into classical literary and artistic hand-painted effects using Photoshop
Tutorial on converting retro girl photos into classical literary and artistic hand-painted effects using Photoshop
This tutorial teaches PS learners of Script House how to use Photoshop to convert retro girl photos into classical literary and artistic hand-painted effects. The photos themselves have a retro charm, but the pixels are not very high. When processing The overall color is a more literary blue-purple, and each part of the character has been slightly hand-painted. Finally, some textures were added to make the picture more classical.
Final effect


##Original picture

Main process
1. First cut to the appropriate size.


 ##8. Add some orange to the lips and corners of the eyes red.
 #9. Duplicate a layer, go to Filter-Noise-Middle value, and then erase the facial features after the middle value.
 10. Save the file in PSD format, put it in SAI, and use watercolor pen to smooth the skin
 11. Eyes Apply eyeliner and paint the fleshy corners of the eyes with orange to refine the outline of the eyes (mainly for de-noising).

12. Redraw the double eyelids. Use a reddish color directly on the double eyelids and upper eyeliner to make it look cuter.
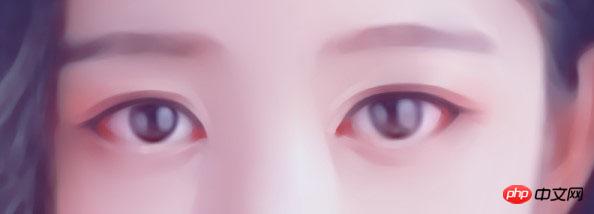
#13. Apply color to the pupils, trace the double eyelids, and strengthen the light-receiving areas of the eye contours.
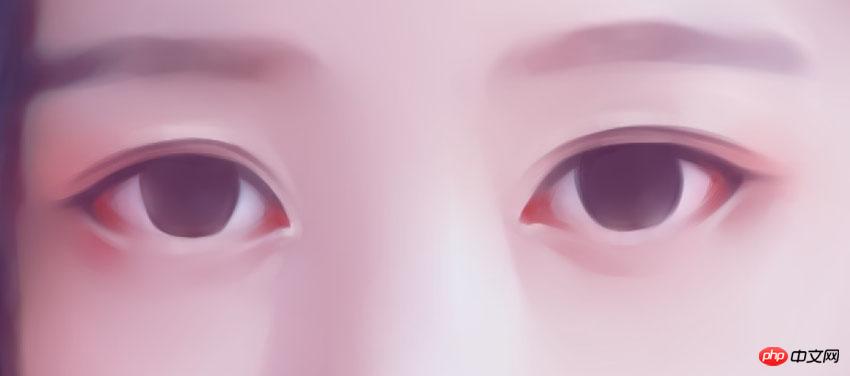
14. The eyebrows and pupils are slightly thinned.

15. Add highlights to the eyes.

#16. Apply mascara with cool movements.

#17. Next, draw the nose. This is relatively simple. Just trace the bottom line and highlight it. When tracing the border, pay attention to the fact that there are light lines and dark lines. Don’t use too dark a color for the dark lines, and don’t press the light lines too hard. Draw them a little more breathably.

18. Then comes the mouth. First, slightly enhance the light and shade to make the purple purple appear more three-dimensional, and then use a watercolor pen to smooth down the skin. It turns purple.

19. Create a new overlay layer and brush a little red color between the upper and lower lips. The retro look will be a bit thicker; then roughly brush out the lower lips. For the highlight position, trace the middle lip line with a red color that is darker than the lips.

#20. Click on the highlight.

21. If you are lazy, use the flat pen material of the pen tool to base your hair. It is said to be base, but in fact, you can also add highlights to your hair~ ~It is more convenient to draw hair with this brush~~But I can’t draw too detailed with just a flat brush~~~I have given up on hair treatment.

#22. Create a new overlay layer and add some highly saturated colors to the dark parts of the screen. It will look more three-dimensional and not monotonous.

#23. Save the drawing in PSD format, put it into PS, and drag in a piece of rice paper material. . . Set the mode to Multiply. . . The addition of rice paper gives it a paper-like feel and adds a retro feel.


Save and add watermark and you are done.

The above is the detailed content of Tutorial on converting retro girl photos into classical literary and artistic hand-painted effects using Photoshop. For more information, please follow other related articles on the PHP Chinese website!

Hot AI Tools

Undresser.AI Undress
AI-powered app for creating realistic nude photos

AI Clothes Remover
Online AI tool for removing clothes from photos.

Undress AI Tool
Undress images for free

Clothoff.io
AI clothes remover

Video Face Swap
Swap faces in any video effortlessly with our completely free AI face swap tool!

Hot Article

Hot Tools

Notepad++7.3.1
Easy-to-use and free code editor

SublimeText3 Chinese version
Chinese version, very easy to use

Zend Studio 13.0.1
Powerful PHP integrated development environment

Dreamweaver CS6
Visual web development tools

SublimeText3 Mac version
God-level code editing software (SublimeText3)

Hot Topics
 1386
1386
 52
52
 What are the permanently free photoshopcs5 serial numbers?
Jul 06, 2023 am 10:00 AM
The permanently free photoshopcs5 serial numbers are: 1. 1330-1440-1602-3671-9749-7897; 2. 1330-1191-2998-6712-2520-5424; 3. 1330-1367-4285-4928-0630-3107; 4. 1330-1570-9599-9499-8092-8237; 5. 1330-1028-1662-3206-1688-5114, etc.
 Solution: Fix keyboard shortcuts not working in Photoshop
Sep 22, 2023 pm 03:17 PM
Adobe Photoshop is the industry standard for digital design, loved and used every day by the online community. However, when keyboard shortcuts stutter or fail entirely, it can significantly slow down any project or your overall productivity on Windows 11. Whether you're an experienced designer or just dabbling in photo editing, these glitches are more than just minor annoyances in Photoshop and Photoshop CC. First, let's look at the common reasons why custom or default shortcuts stop working. Why don't my shortcuts work in Photoshop? Customize workspace settings: Sometimes, adjusting or switching between workspace settings can reset keyboard shortcuts. Sticky Keys: This accessibility feature
 Adobe Photoshop official web version AI generated fill and generate extended image tools
Sep 29, 2023 pm 10:13 PM
Adobe's Photoshop web service (an online web version) is now generally available. The web version of Photoshop will soon support the AI-generated fill and generate extended image tools, which were recently released for the desktop version of Photoshop. Powered by the Adobe Firefly generative AI model, these features are commercially available and allow users to quickly add, remove, or expand images using text-based descriptions in more than 100 languages while matching the lighting conditions and perspective of the original image. The web version of Photoshop also provides many of the most commonly used tools from the desktop version, but with a redesigned layout to provide a more "simplified" user experience for new Photoshop users. This includes early this year
 How to deal with blurred scanned documents
Jan 05, 2021 pm 03:09 PM
Processing method: 1. Open the scanned image to be processed in the PS software; 2. Click "Filter" - "Sharpening" - "Smart Sharpening" on the top toolbar; 3. In the pop-up window, select according to your needs Sharpen the radius and click "OK"; 4. Click "File" - "Save As" and save it as a file.
 Which company does photoshop belong to?
Jul 20, 2022 am 11:47 AM
photoshop is owned by Adobe. Photoshop is an image processing software developed and distributed by Adobe. It mainly processes digital images composed of pixels. Adobe is an American computer software company headquartered in San Jose, California. It is mainly engaged in the development of multimedia production software; its customers include enterprises, knowledge workers, creative people and designers, OEM partners, and developers around the world.
 Which company developed photoshop?
Jul 08, 2022 am 11:34 AM
Photoshop was developed by Adobe Systems; Photoshop is a graphics processing software developed and distributed by "Adobe Systems", which mainly processes digital images composed of pixels. Adobe Systems is an American multinational computer software company headquartered in San Jose, California.
 What tools do you use to draw paths in photoshop
Mar 19, 2021 pm 05:11 PM
In photoshop, you can use the "pen tool" to draw paths. The pen tool is a tool used to create paths. After creating a path, you can edit it again. The pen tool is a vector drawing tool. Its advantage is that it can draw smooth curves and maintain a smooth effect after scaling or deformation.
 Operation process of wps hand-drawn heart-shaped badge icon
Mar 27, 2024 pm 11:01 PM
1. Create a new wps document and click [Insert] [Shape] [Heart Shape]. 2. Draw the shape, set [Fill] to sky blue, and [Outline] to dark blue 6 points. 3. Copy one more heart shape and place it in the middle, set [Fill] to white and [Outline] to none. 4. Click [Insert] [Shape] [Swallowtail]. 5. Place it on both sides of the bottom of the heart shape, set [Fill] to white, and [Outline] to none. 6. Click [Insert] [Shape] [Rectangle]. 7. Add rectangular decoration, and save the final screenshot as a picture to appreciate the effect.


