
 Web Front-end
H5 Tutorial
Introduction to the parameters of Viewport in HTML5 and how to use it
Web Front-end
H5 Tutorial
Introduction to the parameters of Viewport in HTML5 and how to use it
Introduction to the parameters of Viewport in HTML5 and how to use it

The Internet is developing faster and faster, and various technologies are emerging one after another. The display sizes and resolutions of various devices are different. This is also a problem that our front-end personnel are currently struggling with: how to develop once and be friendly on different interfaces. Show it!
Fortunately Viewport appears in HTML5! The emergence of Viewport allows the applications or pages we develop to be displayed uniformly and friendly on devices of different sizes!
viewport syntax introduction:
<!– html document –>
 <meta name=”viewport”
content=”
 height = [pixel_value | device-height] ,
 width = [pixel_value | device-width ] ,
 initial-scale = float_value ,
 minimum-scale = float_value ,
 maximum-scale = float_value ,
 user-scalable = [yes | no] ,
 target-densitydpi = [dpi_value | device-dpi | high-dpi | medium-dpi | low-dpi]
”
/>
Parameter explanation:
width - controls the size of the viewport. You can specify a value or a special value. For example, device-width is the width of the device (unit is CSS pixels when scaling to 100%).
height - corresponds to width, specifies the height
target-densitydpi - a screen pixel density is determined by the screen resolution, usually defined as the number of dots per inch (dpi) . Android Supports three screen pixel densities: low pixel density, medium pixel density, and high pixel density. A low pixel density screen has fewer pixels per inch, while a high pixel density screen has more pixels per inch. Android Browser and WebView default screens are medium pixel density.
The following is the value range of the target-densitydpi attribute
device-dpi: Use the original dpi of the device as the target dp. Default scaling does not occur.
high-dpi: Use hdpi as the target dpi. Medium pixel density and low pixel density devices scale down accordingly.
medium-dpi: Use mdpi as the target dpi. Devices with high pixel density scale up accordingly, and devices with pixel density scale down accordingly. This is the default target density.
low-dpi: Use mdpi as the target dpi. Medium pixel density and high pixel density devices scale up accordingly.
<!– html document –>
 <meta name=”viewport” content=”target-densitydpi=device-dpi” />
 <meta name=”viewport” content=”target-densitydpi=high-dpi” />
 <meta name=”viewport” content=”target-densitydpi=medium-dpi” />
 <meta name=”viewport” content=”target-densitydpi=low-dpi” />
 <meta name=”viewport” content=”target-densitydpi=200″ />
To prevent Android Browser and WebView from scaling your page based on the pixel density of different screens, you can set the viewport's target-densitydpi to device-dpi. When you do this, the page will not scale. Instead, the page is displayed based on the pixel density of the current screen. In this case, you also need to define the viewport's width to match the device's width so that your page can fit on the screen.
initial-scale——Initial scaling. That is, the initial zoom level of the page. This is a floating point value that is a multiplier of the page size. For example, if you set the initial scaling to "1.0", then the web page will be displayed at 1:1 of the target density resolution when displayed. If you set it to "2.0", then the page will be enlarged to 2 times.
maximum-scale——Maximum scaling. That is, the maximum degree of scaling allowed. This is also a floating point value indicating the maximum multiplier of the page size compared to the screen size. For example, if you set this value to "2.0", then the page can be enlarged up to 2 times compared to the target size.
user-scalable – User-adjustable scaling. That is, whether the user can change the zoom level of the page. If set to yes, the user is allowed to change it, otherwise it is no. The default value is yes. If you set it to no, both minimum-scale and maximum-scale will be ignored, since scaling is not possible at all.
All scaling values must be within the range of 0.01–10.
Example: 1. Set the screen width to the device width, prohibit the user from manually adjusting the zoom
<meta name=”viewport” content=”width=device-width,user-scalable=no” />
Example: 2. Set the screen density to high frequency, medium frequency, low frequency automatic scaling, prohibit the user from manual adjustment Zoom
<meta name=”viewport” content=”width=device-width,target-densitydpi=high-dpi,initial-scale=1.0
【Related recommendations】
1. Special recommendation:"php programmer toolbox" V0. 1 version download
2. Example code about viewport compatibility issues
3. viewport special topic: in-depth understanding of responsive web design in css -viewport
The above is the detailed content of Introduction to the parameters of Viewport in HTML5 and how to use it. For more information, please follow other related articles on the PHP Chinese website!

Hot AI Tools

Undresser.AI Undress
AI-powered app for creating realistic nude photos

AI Clothes Remover
Online AI tool for removing clothes from photos.

Undress AI Tool
Undress images for free

Clothoff.io
AI clothes remover

AI Hentai Generator
Generate AI Hentai for free.

Hot Article
Hot Tools

Notepad++7.3.1
Easy-to-use and free code editor

SublimeText3 Chinese version
Chinese version, very easy to use

Zend Studio 13.0.1
Powerful PHP integrated development environment

Dreamweaver CS6
Visual web development tools

SublimeText3 Mac version
God-level code editing software (SublimeText3)
Hot Topics


 What software is crystaldiskmark? -How to use crystaldiskmark?
Mar 18, 2024 pm 02:58 PM
What software is crystaldiskmark? -How to use crystaldiskmark?
Mar 18, 2024 pm 02:58 PM
CrystalDiskMark is a small HDD benchmark tool for hard drives that quickly measures sequential and random read/write speeds. Next, let the editor introduce CrystalDiskMark to you and how to use crystaldiskmark~ 1. Introduction to CrystalDiskMark CrystalDiskMark is a widely used disk performance testing tool used to evaluate the read and write speed and performance of mechanical hard drives and solid-state drives (SSD). Random I/O performance. It is a free Windows application and provides a user-friendly interface and various test modes to evaluate different aspects of hard drive performance and is widely used in hardware reviews
 How to download foobar2000? -How to use foobar2000
Mar 18, 2024 am 10:58 AM
How to download foobar2000? -How to use foobar2000
Mar 18, 2024 am 10:58 AM
foobar2000 is a software that can listen to music resources at any time. It brings you all kinds of music with lossless sound quality. The enhanced version of the music player allows you to get a more comprehensive and comfortable music experience. Its design concept is to play the advanced audio on the computer The device is transplanted to mobile phones to provide a more convenient and efficient music playback experience. The interface design is simple, clear and easy to use. It adopts a minimalist design style without too many decorations and cumbersome operations to get started quickly. It also supports a variety of skins and Theme, personalize settings according to your own preferences, and create an exclusive music player that supports the playback of multiple audio formats. It also supports the audio gain function to adjust the volume according to your own hearing conditions to avoid hearing damage caused by excessive volume. Next, let me help you
 How to use Baidu Netdisk app
Mar 27, 2024 pm 06:46 PM
How to use Baidu Netdisk app
Mar 27, 2024 pm 06:46 PM
Cloud storage has become an indispensable part of our daily life and work nowadays. As one of the leading cloud storage services in China, Baidu Netdisk has won the favor of a large number of users with its powerful storage functions, efficient transmission speed and convenient operation experience. And whether you want to back up important files, share information, watch videos online, or listen to music, Baidu Cloud Disk can meet your needs. However, many users may not understand the specific use method of Baidu Netdisk app, so this tutorial will introduce in detail how to use Baidu Netdisk app. Users who are still confused can follow this article to learn more. ! How to use Baidu Cloud Network Disk: 1. Installation First, when downloading and installing Baidu Cloud software, please select the custom installation option.
 How to use NetEase Mailbox Master
Mar 27, 2024 pm 05:32 PM
How to use NetEase Mailbox Master
Mar 27, 2024 pm 05:32 PM
NetEase Mailbox, as an email address widely used by Chinese netizens, has always won the trust of users with its stable and efficient services. NetEase Mailbox Master is an email software specially created for mobile phone users. It greatly simplifies the process of sending and receiving emails and makes our email processing more convenient. So how to use NetEase Mailbox Master, and what specific functions it has. Below, the editor of this site will give you a detailed introduction, hoping to help you! First, you can search and download the NetEase Mailbox Master app in the mobile app store. Search for "NetEase Mailbox Master" in App Store or Baidu Mobile Assistant, and then follow the prompts to install it. After the download and installation is completed, we open the NetEase email account and log in. The login interface is as shown below
 How to use Xiaoai Speaker How to connect Xiaoai Speaker to mobile phone
Feb 22, 2024 pm 05:19 PM
How to use Xiaoai Speaker How to connect Xiaoai Speaker to mobile phone
Feb 22, 2024 pm 05:19 PM
After long pressing the play button of the speaker, connect to wifi in the software and you can use it. Tutorial Applicable Model: Xiaomi 12 System: EMUI11.0 Version: Xiaoai Classmate 2.4.21 Analysis 1 First find the play button of the speaker, and press and hold to enter the network distribution mode. 2 Log in to your Xiaomi account in the Xiaoai Speaker software on your phone and click to add a new Xiaoai Speaker. 3. After entering the name and password of the wifi, you can call Xiao Ai to use it. Supplement: What functions does Xiaoai Speaker have? 1 Xiaoai Speaker has system functions, social functions, entertainment functions, knowledge functions, life functions, smart home, and training plans. Summary/Notes: The Xiao Ai App must be installed on your mobile phone in advance for easy connection and use.
 BTCC tutorial: How to bind and use MetaMask wallet on BTCC exchange?
Apr 26, 2024 am 09:40 AM
BTCC tutorial: How to bind and use MetaMask wallet on BTCC exchange?
Apr 26, 2024 am 09:40 AM
MetaMask (also called Little Fox Wallet in Chinese) is a free and well-received encryption wallet software. Currently, BTCC supports binding to the MetaMask wallet. After binding, you can use the MetaMask wallet to quickly log in, store value, buy coins, etc., and you can also get 20 USDT trial bonus for the first time binding. In the BTCCMetaMask wallet tutorial, we will introduce in detail how to register and use MetaMask, and how to bind and use the Little Fox wallet in BTCC. What is MetaMask wallet? With over 30 million users, MetaMask Little Fox Wallet is one of the most popular cryptocurrency wallets today. It is free to use and can be installed on the network as an extension
 Teach you how to use the new advanced features of iOS 17.4 'Stolen Device Protection'
Mar 10, 2024 pm 04:34 PM
Teach you how to use the new advanced features of iOS 17.4 'Stolen Device Protection'
Mar 10, 2024 pm 04:34 PM
Apple rolled out the iOS 17.4 update on Tuesday, bringing a slew of new features and fixes to iPhones. The update includes new emojis, and EU users will also be able to download them from other app stores. In addition, the update also strengthens the control of iPhone security and introduces more "Stolen Device Protection" setting options to provide users with more choices and protection. "iOS17.3 introduces the "Stolen Device Protection" function for the first time, adding extra security to users' sensitive information. When the user is away from home and other familiar places, this function requires the user to enter biometric information for the first time, and after one hour You must enter information again to access and change certain data, such as changing your Apple ID password or turning off stolen device protection.
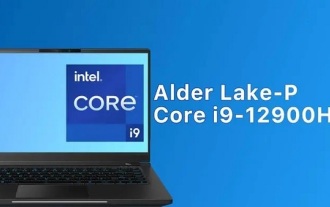 i9-12900H parameter evaluation list
Feb 23, 2024 am 09:25 AM
i9-12900H parameter evaluation list
Feb 23, 2024 am 09:25 AM
i9-12900H is a 14-core processor. The architecture and technology used are all new, and the threads are also very high. The overall work is excellent, and some parameters have been improved. It is particularly comprehensive and can bring users Excellent experience. i9-12900H parameter evaluation review: 1. i9-12900H is a 14-core processor, which adopts the q1 architecture and 24576kb process technology, and has been upgraded to 20 threads. 2. The maximum CPU frequency is 1.80! 5.00ghz, which mainly depends on the workload. 3. Compared with the price, it is very suitable. The price-performance ratio is very good, and it is very suitable for some partners who need normal use. i9-12900H parameter evaluation and performance running scores
