
 Web Front-end
H5 Tutorial
Share the code to implement water flow and pool animation using canvas
Web Front-end
H5 Tutorial
Share the code to implement water flow and pool animation using canvas
Share the code to implement water flow and pool animation using canvas

Use the canvas tag of HTML 5 to draw water flow and pool animations
Before using the canvas tag of HTML 5 to draw animations, let’s first introduce it Basic knowledge, including canvas (if you are familiar with canvas, you can skip this section directly), oCanvas framework, and sprite animation. After understanding the above basic knowledge, you can start using canvas for animation.
Introduction to the canvas tag
In this part, there are many things and it is complicated. Related introductions can be found on various websites. I will not reinvent the wheel here. The tutorials for novices are It's pretty good. I also recommend a very good blog post about how to play with HTML 5 canvas drawing. This article introduces it in great detail. I recommend you read it carefully.
Introduction to canvas framework oCanvas
The canvas tag is very powerful. It can process pictures and perform pixel-level processing. It can completely replace the flash on the browser side. However, the development of canvas has not yet been perfected. , the API is not yet complete, and the event processing functions of elements have not yet provided interfaces. It still takes a lot of effort to implement some complex functions, so many third-party canvas-based frameworks have emerged. Compared with native frameworks, these frameworks The canvas tag has more simple and easy-to-use APIs, which greatly improves the efficiency of our coding. Here I choose the oCanvas framework. Related usage documents and demos can be viewed in the link above.
Introduction to Elf Animation
Elf animation generally consists of a set of custom attribute values and 3 sub-functions (init, advance, draw).
The functions of the three functions are as follows:
init: Initialize the attribute value of the sprite animation
advance: Update the status value of the next frame before drawing the next frame
draw: Add the advance function to The updated status value is drawn into the canvas.
The execution order of the above three functions is: init->advance->draw->advance->draw->...and the loop continues. Let me illustrate the above execution process with an example of randomly generating rising bubbles.
var constructor_bubble = function (settings, core) {
return oCanvas.extend({
core: core,
shapeType: "rectangular",//下面定义了上面我们提到的三个函数:init(),advance(),draw()//在init中,我们map对象组、一个空的数组和一个代表高度的属性值
init: function () {
this.map=[
{r:2,speed:3},
{r:3,speed:3},
{r:4,speed:3},
{r:5,speed:3},
{r:6,speed:3},
{r:7,speed:3},
{r:8,speed:3},
{r:9,speed:3},
{r:10,speed:3}
]; this.points=[]; this.height=this.container.height_now;
},//下面是advance函数,在函数中我们利用if逻辑判断是否添加新的气泡以及进行气泡的位置更新,points数组利用队列的先进先出来存储气泡的
advance: function () {
this.height=this.container.height_now; if(Math.random()>0.95){ var new_point={
x:this.start.x+this.offset*2*(Math.random()-0.5),
y:this.start.y-this.map[0].r,
r:this.map[0].r
}; this.points.push(new_point);
} if(this.points.length>0){ for(var i=0;i<this.points.length;i++){ this.points[i].x+=this.offset*2*(Math.random()-0.5); this.points[i].y-=3; if(this.start.y-this.points[i].y>this.height-this.points[i].r-33){ this.points.shift();
}
}
}
},//draw函数中,利用canvas的圆弧绘制指令,将points数组中存储的气泡依次画出
draw: function () {
var canvas = this.core.canvas;
canvas.lineJoin = 'round';
canvas.lineWidth = this.GDwidth;
canvas.strokeStyle = "#fff"; if(this.points.length>0){ for(var i=0;i<this.points.length;i++){
canvas.beginPath();
canvas.arc(this.points[i].x,this.points[i].y,5,0,2*Math.PI);
canvas.stroke();
canvas.closePath();
}
}
}
}, settings);
};
oCanvas.registerDisplayObject("bubble", constructor_bubble, "init");//下面是在应用中定义和添加上面定义的精灵动画,其中:start数组代表了气泡的产生点,container代表了气泡的存在区域var pp1=canvas.display.bubble({
start:{x:425,y:566},
container:SC02,
width:50,
offset:1,
speed:5
}).add();Realization of water flow and pool animation
The following is a detailed introduction to the detailed steps of how to implement water flow animation and pool animation in the project:
Drawing of pool animation
var constructor_show = function (settings, core) {
    return oCanvas.extend({
        core: core,
        shapeType: "rectangular",//上面四行都是oCanvas框架的结构语法/*下面init()、advance()、draw()分别是上节中说的动画精灵三元素,第一个用来初始化,第二个用来
更新操作,第三个用来绘制图像/动画在管道对象中,定义了一些属性,包括:x、y、height、width、start、
height_now、full、speed、fill、trail_flag、[trail]。其中x、y分别代表水池参考点相对画布左
上角的位置,height、width是水池的宽高属性,start表征了动画是否开始,height_now代表了水池中水
位的高度,full表征了水池是否填满,speed水池上涨的速度,fill水的颜色,trail_flag表征了该水池
是否是一个标准的矩形,如果不是的话,配合trail属性,指定水池的轮廓*/
       init: function () {
       //默认动画关闭,水池full为0,当前高度为0
            this.start=0;            this.full=0;            this.height_now=0;
        },
        advance: function () {
        //如果水池未满并且是开启状态,水位未满就更新当前高度,否则将full置为1
           if(this.start==1&&this.full!=1){               if (this.height_now < this.Height) {                   this.height_now += this.speed;
               }               else {                   this.full = 1;
               }
           }
        },
        draw: function () {
            var canvas = this.core.canvas,            //先获得水池的位置
                origin = this.getOrigin(),
                x = this.abs_x - origin.x,
                y = this.abs_y - origin.y;            //开始绘制
            canvas.beginPath();
            canvas.strokeStyle = "#000";            if (this.trail_flag == 1) {            //如果是不规则图形,描出轮廓
                canvas.moveTo(this.trail[0].x_t, this.trail[0].y_t);                for (var i = 1; i < this.trail.length; i++) {
                    canvas.lineTo(this.trail[i].x_t, this.trail[i].y_t);
                }
                canvas.lineTo(this.trail[0].x_t, this.trail[0].y_t);
                canvas.clip();
            }            if (this.fill !== "") {            //设置颜色,绘制矩形水池
                canvas.fillStyle = this.fill;
                canvas.fillRect(x, y + this.Height - this.height_now, this.Width, this.height_now);
            }
            canvas.closePath();
        }
    }, settings);
};//将上面的动画精灵注册进oCanvas的display图形库中oCanvas.registerDisplayObject("SC_show", constructor_show, "init");Drawing of pipeline water flow animation
In the pipeline water flowmodel, the following attributes are defined:
destination: the position of the front end of the current water flow
cells: Pipe path array
deta: Direction hypotenuse length
deta_x: Direction x side length
deta_y: Direction y side length
flag_x: Cosine value
flag_y:Sine value
cellIndex: index of the current drawing edge
Speed: water flow speed
GDwidth: water flow width
LineHeight: water flow length
x_now: x coordinate of the current drawing point
y_now: y coordinate of the current drawing point
firstX: The coordinate x of the first point of the pipeline
firstY: The coordinate y of the first point of the pipeline
beginHeight: The starting point of the first section of water flow
endHeight: The unfinished water line left in the previous section of the pipeline
legacyHeight: the length left by the front end point in the previous pipe
paused: whether to start
fill: water flow color
full: whether to fill up
init function
//init函数主要完成初始化工作init: function () {
            this.x_now = this.cells[0].x_cell;
            this.y_now = this.cells[0].y_cell;
            this.firstX = this.x_now;
            this.firstY = this.y_now;
            this.endHeight = 0;
            this.beginHeight = 0;
            this.paused=0;
            this.full=0;

            this.cellIndex = 0;
            this.destination.x_d = this.cells[0].x_cell;
            this.destination.y_d = this.cells[0].y_cell;

            this.legacyHeight = -1;
            this.LineHeight=10;
            this.Speed=2*this.LineHeight/20;
}advance function
//advance函数主要实现每次动画的刷新步进操作
 advance: function () {
            if(this.paused==1){
                if (this.cellIndex < this.cells.length - 1) {
                    this.deta_x = this.cells[this.cellIndex + 1].x_cell - this.cells[this.cellIndex].x_cell;
                    this.deta_y = this.cells[this.cellIndex + 1].y_cell - this.cells[this.cellIndex].y_cell;
                    this.deta = Math.sqrt(this.deta_x * this.deta_x + this.deta_y * this.deta_y);
                    this.flag_x = this.deta_x / this.deta;
                    this.flag_y = this.deta_y / this.deta;
                    if (this.legacyHeight >= 0) {
                        this.cellIndex++;
                        if (this.cellIndex < this.cells.length - 1) {
                            this.deta_x = this.cells[this.cellIndex + 1].x_cell - this.cells[this.cellIndex].x_cell;
                            this.deta_y = this.cells[this.cellIndex + 1].y_cell - this.cells[this.cellIndex].y_cell;
                            this.deta = Math.sqrt(this.deta_x * this.deta_x + this.deta_y * this.deta_y);
                            this.flag_x = this.deta_x / this.deta;
                            this.flag_y = this.deta_y / this.deta;
                            this.destination.x_d = this.cells[this.cellIndex].x_cell + this.flag_x * this.legacyHeight;
                            this.destination.y_d = this.cells[this.cellIndex].y_cell + this.flag_y * this.legacyHeight;
                            if (Math.abs(this.destination.x_d - this.cells[this.cellIndex + 1].x_cell) > this.Speed * Math.abs(this.flag_x) || Math.abs(this.destination.y_d - this.cells[this.cellIndex + 1].y_cell) > this.Speed * Math.abs(this.flag_y)) {
                                this.legacyHeight = -1;
                                this.destination.x_d += this.flag_x * this.Speed;
                                this.destination.y_d += this.flag_y * this.Speed;
                            }
                            else {
                                if (this.flag_x == 0) {
                                    this.legacyHeight = this.Speed - Math.abs(this.destination.y_d - this.cells[this.cellIndex + 1].y_cell) / Math.abs(this.flag_y);
                                }
                                else {
                                    this.legacyHeight = this.Speed - Math.abs(this.destination.x_d - this.cells[this.cellIndex + 1].x_cell) / Math.abs(this.flag_x);
                                }
                            }
                        }
                    }
                    else {
                        this.destination.x_d += this.flag_x * this.Speed;
                        this.destination.y_d += this.flag_y * this.Speed;
                        if (Math.abs(this.destination.x_d - this.cells[this.cellIndex + 1].x_cell) >= this.Speed * Math.abs(this.flag_x) && Math.abs(this.destination.y_d - this.cells[this.cellIndex + 1].y_cell) >= this.Speed * Math.abs(this.flag_y)) {
                            this.legacyHeight = -1;
                        }
                        else {
                            if (this.flag_x == 0) {
                                this.legacyHeight = this.Speed - Math.abs(this.destination.y_d - this.cells[this.cellIndex + 1].y_cell) / Math.abs(this.flag_y);
                            }
                            else {
                                this.legacyHeight = this.Speed - Math.abs(this.destination.x_d - this.cells[this.cellIndex + 1].x_cell) / Math.abs(this.flag_x);
                            }

                        }
                    }
                }else{
                    this.full=1;
                }
                this.deta_x = this.cells[1].x_cell - this.cells[0].x_cell;
                this.deta_y = this.cells[1].y_cell - this.cells[0].y_cell;
                this.deta = Math.sqrt(this.deta_x * this.deta_x + this.deta_y * this.deta_y);
                this.flag_x = this.deta_x / this.deta;
                this.flag_y = this.deta_y / this.deta;
                if (this.paused == 1) {
                    if (Math.abs(this.firstX - this.cells[0].x_cell) >= this.LineHeight * Math.abs(this.flag_x) && Math.abs(this.firstY - this.cells[0].y_cell) >= this.LineHeight * Math.abs(this.flag_y)) {
                        this.firstX = this.cells[0].x_cell;
                        this.firstY = this.cells[0].y_cell;
                        this.beginHeight = 0;
                    }
                    else {
                        if (this.beginHeight < this.LineHeight) {
                            if (this.beginHeight + this.Speed >= this.LineHeight) {
                                this.beginHeight = this.LineHeight;
                            }
                            else {
                                this.beginHeight += this.Speed;
                            }
                            this.firstX = this.cells[0].x_cell;
                            this.firstY = this.cells[0].y_cell;
                        }
                        else if (this.beginHeight == this.LineHeight) {
                            this.firstX += this.flag_x * this.Speed;
                            this.firstY += this.flag_y * this.Speed;
                        }
                    }
                }
            }

}draw function
//draw函数在每次advance之后执行,将每次的步进更新重新绘制到画布上
 draw: function () {
            var canvas = this.core.canvas;            this.x_now = this.firstX;            this.y_now = this.firstY;            this.deta_x = this.cells[1].x_cell - this.cells[0].x_cell;            this.deta_y = this.cells[1].y_cell - this.cells[0].y_cell;            this.deta = Math.sqrt(this.deta_x * this.deta_x + this.deta_y * this.deta_y);            var myEnd = false;            this.flag_x = this.deta_x / this.deta;            this.flag_y = this.deta_y / this.deta;

            canvas.beginPath();
            canvas.lineJoin = 'round';
            canvas.lineCap="round";            this.endHeight = 0;
            canvas.lineWidth = this.GDwidth / 4;
            canvas.strokeStyle = this.fill;            if (this.beginHeight > 0) {
                canvas.moveTo(this.x_now, this.y_now);
                canvas.lineTo(this.x_now + this.flag_x * this.beginHeight, this.y_now + this.flag_y * this.beginHeight);
            }            this.x_now += this.flag_x * (this.beginHeight + this.LineHeight);            this.y_now += this.flag_y * (this.beginHeight + this.LineHeight);            for (var i = 1; i <= this.cellIndex; i++) {
                myEnd = false;                this.deta_x = this.cells[i].x_cell - this.cells[i - 1].x_cell;                this.deta_y = this.cells[i].y_cell - this.cells[i - 1].y_cell;                this.deta = Math.sqrt(this.deta_x * this.deta_x + this.deta_y * this.deta_y);                this.flag_x = this.deta_x / this.deta;                this.flag_y = this.deta_y / this.deta;                if (this.endHeight > 0) {
                    canvas.moveTo(this.cells[i - 1].x_cell, this.cells[i - 1].y_cell);
                    canvas.lineTo(this.cells[i - 1].x_cell + this.flag_x * (this.endHeight ), this.cells[i - 1].y_cell + this.flag_y * this.endHeight);                    this.x_now = this.cells[i - 1].x_cell + this.flag_x * (this.LineHeight + this.endHeight);                    this.y_now = this.cells[i - 1].y_cell + this.flag_y * (this.LineHeight + this.endHeight);
                }                if (this.endHeight < 0) {                    this.endHeight = Math.abs(this.endHeight);                    this.x_now = this.cells[i - 1].x_cell + this.flag_x * (this.endHeight);                    this.y_now = this.cells[i - 1].y_cell + this.flag_y * (this.endHeight);
                }                if (this.endHeight == 0 && i != 1) {                    this.x_now = this.cells[i - 1].x_cell;                    this.y_now = this.cells[i - 1].y_cell;
                }                while (Math.abs(this.x_now - this.cells[i].x_cell) >= this.LineHeight * Math.abs(this.flag_x) && Math.abs(this.y_now - this.cells[i].y_cell) >= this.LineHeight * Math.abs(this.flag_y)) {
                    canvas.moveTo(this.x_now, this.y_now);
                    canvas.lineTo(this.x_now + this.flag_x * this.LineHeight, this.y_now + this.flag_y * this.LineHeight);                    this.x_now += this.flag_x * this.LineHeight;                    this.y_now += this.flag_y * this.LineHeight;                    if (Math.abs(this.x_now - this.cells[i].x_cell) <= this.LineHeight * Math.abs(this.flag_x) && Math.abs(this.y_now - this.cells[i].y_cell) <= this.LineHeight * Math.abs(this.flag_y)) {                        if (this.flag_x == 0) {                            this.endHeight = Math.abs(this.y_now - this.cells[i].y_cell) / Math.abs(this.flag_y) - this.LineHeight;
                        }                        else {                            this.endHeight = Math.abs(this.x_now - this.cells[i].x_cell) / Math.abs(this.flag_x) - this.LineHeight;
                        }                        //this.endHeight = (Math.abs(this.y_now - this.cells[i].y_cell) + Math.abs(this.x_now - this.cells[i].x_cell) - this.LineHeight * (Math.abs(this.flag_y) + Math.abs(this.flag_x)))/2;
                        myEnd = true;                        break;
                    }                    else {                        this.x_now += this.flag_x * this.LineHeight;                        this.y_now += this.flag_y * this.LineHeight;
                    }
                }                if (myEnd == false && Math.abs(this.x_now - this.cells[i].x_cell) <= this.LineHeight * Math.abs(this.flag_x) && Math.abs(this.y_now - this.cells[i].y_cell) <= this.LineHeight * Math.abs(this.flag_y)) {
                    canvas.moveTo(this.x_now, this.y_now);
                    canvas.lineTo(this.cells[i].x_cell, this.cells[i].y_cell);                    //this.endHeight = this.LineHeight - Math.abs(this.x_now - this.cells[i].x_cell)*flag.x_flag - Math.abs(this.y_now - this.cells[i].y_cell)*flag.y_flag;
                    if (this.flag_x == 0) {                        this.endHeight = this.LineHeight - Math.abs(this.y_now - this.cells[i].y_cell) / Math.abs(this.flag_y);
                    }                    else {                        this.endHeight = this.LineHeight - Math.abs(this.x_now - this.cells[i].x_cell) / Math.abs(this.flag_x);
                    }                    //this.endHeight = ( this.LineHeight * (Math.abs(this.flag_y) + Math.abs(this.flag_x)) - Math.abs(this.y_now - this.cells[i].y_cell) + Math.abs(this.x_now - this.cells[i].x_cell)) / 2;
                }
            }            if (this.cellIndex < this.cells.length - 1) {

                myEnd = false;                this.deta_x = this.cells[this.cellIndex+1].x_cell-this.destination.x_d;                this.deta_y = this.cells[this.cellIndex+1].y_cell-this.destination.y_d;                this.deta = Math.sqrt(this.deta_x * this.deta_x + this.deta_y * this.deta_y);                if (this.deta > 0) {                    this.flag_x = this.deta_x / this.deta;                    this.flag_y = this.deta_y / this.deta;                    if (this.endHeight > 0) {
                        canvas.moveTo(this.cells[this.cellIndex].x_cell, this.cells[this.cellIndex].y_cell);
                        canvas.lineTo(this.cells[this.cellIndex].x_cell + this.flag_x * (this.endHeight ), this.cells[this.cellIndex].y_cell + this.flag_y * this.endHeight);                        this.x_now = this.cells[this.cellIndex].x_cell + this.flag_x * ( this.endHeight);                        this.y_now = this.cells[this.cellIndex].y_cell + this.flag_y * ( this.endHeight);                        if(Math.abs(this.destination.x_d-this.x_now)>this.LineHeight*Math.abs(this.flag_x)||Math.abs(this.destination.y_d-this.y_now)>this.LineHeight*Math.abs(this.flag_y)){                            this.x_now+=this.LineHeight*this.flag_x;                            this.y_now+=this.LineHeight*this.flag_y;
                        }                        else{                            this.x_now=this.destination.x_d;                            this.y_now=this.destination.y_d;
                        }                    if (this.endHeight < 0) {                        this.endHeight = Math.abs(this.endHeight);                        this.x_now = this.cells[this.cellIndex].x_cell + this.flag_x * (this.endHeight);                        this.y_now = this.cells[this.cellIndex].y_cell + this.flag_y * (this.endHeight);
                    }                    if (this.endHeight == 0 && this.cellIndex > 0) {                        this.x_now = this.cells[this.cellIndex].x_cell;                        this.y_now = this.cells[this.cellIndex].y_cell;
                    }                    if (this.cellIndex == 0) {                        this.x_now = this.firstX;                        this.y_now = this.firstY;                        if (this.beginHeight > 0) {
                            canvas.moveTo(this.x_now, this.y_now);
                            canvas.lineTo(this.x_now + this.flag_x * this.beginHeight, this.y_now + this.flag_y * this.beginHeight);
                        }                        this.x_now += this.flag_x * (this.beginHeight + this.LineHeight);                        this.y_now += this.flag_y * (this.beginHeight + this.LineHeight);
                    }                    while ((Math.abs(this.x_now - this.destination.x_d) >= this.LineHeight * Math.abs(this.flag_x) && Math.abs(this.y_now - this.destination.y_d) >this.LineHeight * Math.abs(this.flag_y))||(Math.abs(this.x_now - this.destination.x_d) > this.LineHeight * Math.abs(this.flag_x) && Math.abs(this.y_now - this.destination.y_d) >=this.LineHeight * Math.abs(this.flag_y))) {
                        canvas.moveTo(this.x_now, this.y_now);
                        canvas.lineTo(this.x_now + this.flag_x * this.LineHeight, this.y_now + this.flag_y * this.LineHeight);                        this.x_now += this.flag_x * this.LineHeight;                        this.y_now += this.flag_y * this.LineHeight;                        if (Math.abs(this.x_now - this.destination.x_d)<= this.LineHeight * Math.abs(this.flag_x)&&Math.abs(this.y_now - this.destination.y_d) <= this.LineHeight * Math.abs(this.flag_y)) {
                            myEnd = true;                            break;
                        }                        else {                            this.x_now += this.flag_x * this.LineHeight;                            this.y_now += this.flag_y * this.LineHeight;
                        }
                    }                    if (myEnd == false && Math.abs(this.x_now - this.destination.x_d) < this.LineHeight * Math.abs(this.flag_x) || Math.abs(this.y_now - this.destination.y_d) < this.LineHeight * Math.abs(this.flag_y)) {
                        canvas.moveTo(this.x_now, this.y_now);
                        canvas.lineTo(this.destination.x_d, this.destination.y_d);
                    }
                }
            }
            canvas.stroke();
            canvas.closePath();
}Example of water pump room
The following code defines a pool object and assigns corresponding attribute values. Finally Add the defined object to the canvas canvas.
var SC01 = canvas.display.SC_show({        x: 326,        y: 200,
        Width: 181,
        Height: 438,
        height_now: 0,
        trail_flag: 0,
        t: 0,
        fill: color_SC,
        speed:speed_SC,
        full:0,
        start:0
});canvas.addChild(SC01);The following code defines a pipeline object, assigns some initial values to the pipeline object, and finally adds it to the canvas.
var GD01 = canvas.display.GD({        x: 0,        y: 0,
        destination: {
            x_d: 0, y_d: 0
        },
        cells: [
            {x_cell: 195, y_cell: 587},
            {x_cell: 335, y_cell: 587}
        ],
        deta: 1,
        deta_x: 1,
        deta_y: 0,
        flag_x: 1,
        flag_y: 0,
        cellIndex: 0,
        Speed: speed_all,
        GDwidth: width_all,
        LineHeight: 10,
        x_now: 0,
        y_now: 0,
        firstX: 0,
        firstY: 0,
        beginHeight: 0,
        endHeight: 0,
        legacyHeight: 0,
        paused: 1,
        fill:color_GD,
        full:0
    });
canvas.addChild(GD01);The process control of the specific animation is as follows:
 canvas.setLoop(function () {
        //下面6个advance函数实现每一帧中的动画对象的更新操作
        GD01.advance();
        SC01.advance();
        SC02.advance();
        GD02.advance();
        SC03.advance();
        GD03.advance();
        //下面几个if语句实现动画的流程控制
        if(GD01.full==1){
            SC01.start = 1;
            SC02.start = 1;
        }
        if(SC02.full==1){
            GD02.paused = 1;
        }
        if(GD02.full==1) {
            SC03.start = 1;
            arrow_1.start();
            arrow_2.start();
        }
        if(SC03.full==1) {
            GD03.paused = 1;
        }
        canvas.redraw();  //重绘画布
}).start(); //循环开始[Related recommendations]
1. Special recommendation :"php Programmer Toolbox" V0.1 version download
2. h5canvas realizes the special effect code of falling snowflakes
3. h5 Example of Fill and Stroke text effects in Canvas
The above is the detailed content of Share the code to implement water flow and pool animation using canvas. For more information, please follow other related articles on the PHP Chinese website!

Hot AI Tools

Undresser.AI Undress
AI-powered app for creating realistic nude photos

AI Clothes Remover
Online AI tool for removing clothes from photos.

Undress AI Tool
Undress images for free

Clothoff.io
AI clothes remover

Video Face Swap
Swap faces in any video effortlessly with our completely free AI face swap tool!

Hot Article
Hot Tools

Notepad++7.3.1
Easy-to-use and free code editor

SublimeText3 Chinese version
Chinese version, very easy to use

Zend Studio 13.0.1
Powerful PHP integrated development environment

Dreamweaver CS6
Visual web development tools

SublimeText3 Mac version
God-level code editing software (SublimeText3)
Hot Topics
 1386
1386
 52
52

![Animation not working in PowerPoint [Fixed]](https://img.php.cn/upload/article/000/887/227/170831232982910.jpg?x-oss-process=image/resize,m_fill,h_207,w_330) Animation not working in PowerPoint [Fixed]
Feb 19, 2024 am 11:12 AM
Animation not working in PowerPoint [Fixed]
Feb 19, 2024 am 11:12 AM
Are you trying to create a presentation but can't add animation? If animations are not working in PowerPoint on your Windows PC, then this article will help you. This is a common problem that many people complain about. For example, animations may stop working during presentations in Microsoft Teams or during screen recordings. In this guide, we will explore various troubleshooting techniques to help you fix animations not working in PowerPoint on Windows. Why aren't my PowerPoint animations working? We have noticed that some possible reasons that may cause the animation in PowerPoint not working issue on Windows are as follows: Due to personal
 What to do if the blue screen code 0x0000001 occurs
Feb 23, 2024 am 08:09 AM
What to do if the blue screen code 0x0000001 occurs
Feb 23, 2024 am 08:09 AM
What to do with blue screen code 0x0000001? The blue screen error is a warning mechanism when there is a problem with the computer system or hardware. Code 0x0000001 usually indicates a hardware or driver failure. When users suddenly encounter a blue screen error while using their computer, they may feel panicked and at a loss. Fortunately, most blue screen errors can be troubleshooted and dealt with with a few simple steps. This article will introduce readers to some methods to solve the blue screen error code 0x0000001. First, when encountering a blue screen error, we can try to restart
 Resolve code 0xc000007b error
Feb 18, 2024 pm 07:34 PM
Resolve code 0xc000007b error
Feb 18, 2024 pm 07:34 PM
Termination Code 0xc000007b While using your computer, you sometimes encounter various problems and error codes. Among them, the termination code is the most disturbing, especially the termination code 0xc000007b. This code indicates that an application cannot start properly, causing inconvenience to the user. First, let’s understand the meaning of termination code 0xc000007b. This code is a Windows operating system error code that usually occurs when a 32-bit application tries to run on a 64-bit operating system. It means it should
 How to set up ppt animation to enter first and then exit
Mar 20, 2024 am 09:30 AM
How to set up ppt animation to enter first and then exit
Mar 20, 2024 am 09:30 AM
We often use ppt in our daily work, so are you familiar with every operating function in ppt? For example: How to set animation effects in ppt, how to set switching effects, and what is the effect duration of each animation? Can each slide play automatically, enter and then exit the ppt animation, etc. In this issue, I will first share with you the specific steps of entering and then exiting the ppt animation. It is below. Friends, come and take a look. Look! 1. First, we open ppt on the computer, click outside the text box to select the text box (as shown in the red circle in the figure below). 2. Then, click [Animation] in the menu bar and select the [Erase] effect (as shown in the red circle in the figure). 3. Next, click [
 GE universal remote codes program on any device
Mar 02, 2024 pm 01:58 PM
GE universal remote codes program on any device
Mar 02, 2024 pm 01:58 PM
If you need to program any device remotely, this article will help you. We will share the top GE universal remote codes for programming any device. What is a GE remote control? GEUniversalRemote is a remote control that can be used to control multiple devices such as smart TVs, LG, Vizio, Sony, Blu-ray, DVD, DVR, Roku, AppleTV, streaming media players and more. GEUniversal remote controls come in various models with different features and functions. GEUniversalRemote can control up to four devices. Top Universal Remote Codes to Program on Any Device GE remotes come with a set of codes that allow them to work with different devices. you may
 What does the blue screen code 0x000000d1 represent?
Feb 18, 2024 pm 01:35 PM
What does the blue screen code 0x000000d1 represent?
Feb 18, 2024 pm 01:35 PM
What does the 0x000000d1 blue screen code mean? In recent years, with the popularization of computers and the rapid development of the Internet, the stability and security issues of the operating system have become increasingly prominent. A common problem is blue screen errors, code 0x000000d1 is one of them. A blue screen error, or "Blue Screen of Death," is a condition that occurs when a computer experiences a severe system failure. When the system cannot recover from the error, the Windows operating system displays a blue screen with the error code on the screen. These error codes
 After a two-year delay, the domestic 3D animated film 'Er Lang Shen: The Deep Sea Dragon' is scheduled to be released on July 13
Jan 26, 2024 am 09:42 AM
After a two-year delay, the domestic 3D animated film 'Er Lang Shen: The Deep Sea Dragon' is scheduled to be released on July 13
Jan 26, 2024 am 09:42 AM
This website reported on January 26 that the domestic 3D animated film "Er Lang Shen: The Deep Sea Dragon" released a set of latest stills and officially announced that it will be released on July 13. It is understood that "Er Lang Shen: The Deep Sea Dragon" is produced by Mihuxing (Beijing) Animation Co., Ltd., Horgos Zhonghe Qiancheng Film Co., Ltd., Zhejiang Hengdian Film Co., Ltd., Zhejiang Gongying Film Co., Ltd., Chengdu The animated film produced by Tianhuo Technology Co., Ltd. and Huawen Image (Beijing) Film Co., Ltd. and directed by Wang Jun was originally scheduled to be released in mainland China on July 22, 2022. Synopsis of the plot of this site: After the Battle of the Conferred Gods, Jiang Ziya took the "Conferred Gods List" to divide the gods, and then the Conferred Gods List was sealed by the Heavenly Court under the deep sea of Kyushu Secret Realm. In fact, in addition to conferring divine positions, there are also many powerful evil spirits sealed in the Conferred Gods List.
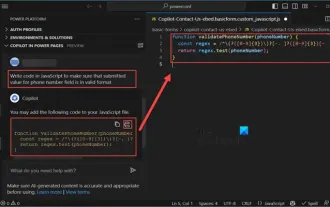 How to use Copilot to generate code
Mar 23, 2024 am 10:41 AM
How to use Copilot to generate code
Mar 23, 2024 am 10:41 AM
As a programmer, I get excited about tools that simplify the coding experience. With the help of artificial intelligence tools, we can generate demo code and make necessary modifications as per the requirement. The newly introduced Copilot tool in Visual Studio Code allows us to create AI-generated code with natural language chat interactions. By explaining functionality, we can better understand the meaning of existing code. How to use Copilot to generate code? To get started, we first need to get the latest PowerPlatformTools extension. To achieve this, you need to go to the extension page, search for "PowerPlatformTool" and click the Install button
