 Database
 Mysql Tutorial
 MYSQL tutorial about the installation and connection tutorial of mysql5.7.18
MYSQL tutorial about the installation and connection tutorial of mysql5.7.18
This article mainly introduces in detail the first part of MySQL basic tutorial, mysql5.7.18installation and connection tutorial. It has certain reference value for those who are interested. We can refer to
Starting from this article, we will use a new series of articles to introduce and learn MySQL. Why should you learn MySQL? From a product perspective, most software database services still use relational database. The main database products include Oracle, Microsoft's MSSQL, IBM's DB2, and the MySQL we are going to introduce. . MySQL is the first choice for databases in many small and medium-sized website servers. It has a free version and a commercial version. It is currently an Oracle product. From the perspective of testers, more and more software products are related to data, such as e-commerce, and some software products that provide database services in a certain field. In addition to basic software functional testing, the company also hopes that testers can understand more business knowledge. Usually, these business data have to deal with databases most of the time. Therefore, testers must master some basic operations of the database and be able to write SQL query statements. Being able to write SQL query statements is mentioned in many job descriptions.
There are many articles and examples on the Internet for simple addition, deletion, modification and query of SQL statements. What I want to do here is install MySQL and use it simply, and then
writing SQL queries, so that I can master SQL statements more systematically. Many times, you have SQL practice statements on the Internet, but you do not have a SQL Server environment, so it is difficult for you to understand and quickly master SQL statements. Therefore, our first article starts with installing the MySQL server and client, Creating the database and Connecting the database.
2. Pull down the page and find the Donwload button
3. After downloading, it will be installed by default. We will choose to install MySQL Server and leave other components unchecked. select.
4. During the installation process, create a password for root. I set the password here to root, as shown below.
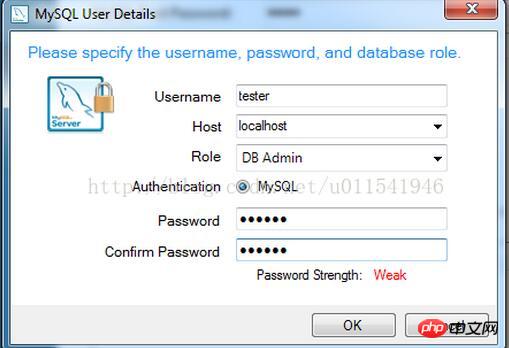
You need to click Add User to add a DAB account: test/123456, enter the user name and password, as shown below
Click Next to end the installation by default. After installing MySQL Server, database-related services will start every time you start your computer. Now that we have installed the database server, next, we need to install a visual, graphical interface client to connect to the database. Here we use MySQL Workbench. 
2. Download and install MySQL Workbench
2. Find "Windows (x86, 64-bit), MSI Installer"
3. Click the Download button
4. On the new page, pull down, we don’t need to log in to the account, click No thanks, just start my download.
5. Start downloading.
6. After the download is completed, start the installation. The interface is as follows:
##3. Connect to the database on MySQL Workbench
Open MySQL Workbench, the interface is as follows
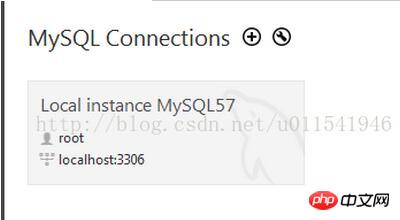
Local database Yes Connect as shown below.

1. Create our own database db1
Click on the red box in the picture above and create a new database according to the prompts. Enter db1 for the name and utf-8 for the encoding. The created database can be seen below the left panel.

In the above picture, db1 is our newly created database, and sys is the default database after MySQL Server is installed. From now on, we will use MySQL Workbench to connect to our database, and then create tables and other related data manually or with SQL statements. The overall interface is as follows.

#The basic SQL environment is introduced here. The next article will talk about how to create tables and columns in the table under the db1 database.
The above is the detailed content of MYSQL tutorial about the installation and connection tutorial of mysql5.7.18. For more information, please follow other related articles on the PHP Chinese website!

Hot AI Tools

Undresser.AI Undress
AI-powered app for creating realistic nude photos

AI Clothes Remover
Online AI tool for removing clothes from photos.

Undress AI Tool
Undress images for free

Clothoff.io
AI clothes remover

Video Face Swap
Swap faces in any video effortlessly with our completely free AI face swap tool!

Hot Article

Hot Tools

Notepad++7.3.1
Easy-to-use and free code editor

SublimeText3 Chinese version
Chinese version, very easy to use

Zend Studio 13.0.1
Powerful PHP integrated development environment

Dreamweaver CS6
Visual web development tools

SublimeText3 Mac version
God-level code editing software (SublimeText3)

Hot Topics
 How to open phpmyadmin
Apr 10, 2025 pm 10:51 PM
You can open phpMyAdmin through the following steps: 1. Log in to the website control panel; 2. Find and click the phpMyAdmin icon; 3. Enter MySQL credentials; 4. Click "Login".
 MySQL: An Introduction to the World's Most Popular Database
Apr 12, 2025 am 12:18 AM
MySQL is an open source relational database management system, mainly used to store and retrieve data quickly and reliably. Its working principle includes client requests, query resolution, execution of queries and return results. Examples of usage include creating tables, inserting and querying data, and advanced features such as JOIN operations. Common errors involve SQL syntax, data types, and permissions, and optimization suggestions include the use of indexes, optimized queries, and partitioning of tables.
 MySQL's Place: Databases and Programming
Apr 13, 2025 am 12:18 AM
MySQL's position in databases and programming is very important. It is an open source relational database management system that is widely used in various application scenarios. 1) MySQL provides efficient data storage, organization and retrieval functions, supporting Web, mobile and enterprise-level systems. 2) It uses a client-server architecture, supports multiple storage engines and index optimization. 3) Basic usages include creating tables and inserting data, and advanced usages involve multi-table JOINs and complex queries. 4) Frequently asked questions such as SQL syntax errors and performance issues can be debugged through the EXPLAIN command and slow query log. 5) Performance optimization methods include rational use of indexes, optimized query and use of caches. Best practices include using transactions and PreparedStatemen
 Why Use MySQL? Benefits and Advantages
Apr 12, 2025 am 12:17 AM
MySQL is chosen for its performance, reliability, ease of use, and community support. 1.MySQL provides efficient data storage and retrieval functions, supporting multiple data types and advanced query operations. 2. Adopt client-server architecture and multiple storage engines to support transaction and query optimization. 3. Easy to use, supports a variety of operating systems and programming languages. 4. Have strong community support and provide rich resources and solutions.
 How to connect to the database of apache
Apr 13, 2025 pm 01:03 PM
Apache connects to a database requires the following steps: Install the database driver. Configure the web.xml file to create a connection pool. Create a JDBC data source and specify the connection settings. Use the JDBC API to access the database from Java code, including getting connections, creating statements, binding parameters, executing queries or updates, and processing results.
 How to start mysql by docker
Apr 15, 2025 pm 12:09 PM
The process of starting MySQL in Docker consists of the following steps: Pull the MySQL image to create and start the container, set the root user password, and map the port verification connection Create the database and the user grants all permissions to the database
 MySQL's Role: Databases in Web Applications
Apr 17, 2025 am 12:23 AM
The main role of MySQL in web applications is to store and manage data. 1.MySQL efficiently processes user information, product catalogs, transaction records and other data. 2. Through SQL query, developers can extract information from the database to generate dynamic content. 3.MySQL works based on the client-server model to ensure acceptable query speed.
 Centos install mysql
Apr 14, 2025 pm 08:09 PM
Installing MySQL on CentOS involves the following steps: Adding the appropriate MySQL yum source. Execute the yum install mysql-server command to install the MySQL server. Use the mysql_secure_installation command to make security settings, such as setting the root user password. Customize the MySQL configuration file as needed. Tune MySQL parameters and optimize databases for performance.


