ZKEACMS Core is developed based on .net core and can run cross-platform on windows, linux, and mac. Next, let’s take a look at how to use Jexus hosting to run ZKEACMS on CentOS. Usually we Linux deploys ASP.NET Core applications. According to Microsoft’s official documentation, we usually need Nginx with Systemd (https://docs.microsoft.com/en-us/aspnet/core /publishing/linuxproduction), Nginx did not take over the Kestrel process. We need to maintain two processes, which increases the complexity. If you deploy asp.net core on windows, we can use IIS to take over the Kestrel process. We can also use Jexus on Linux to achieve the same experience as IIS.
Installation .Net Core runtime
Follow the official documentation https://www.microsoft.com/net/core#linuxcentos: Run The following command, install .Net Core Runtime
sudo yum install libunwind libicu
curl -sSL -o dotnet.tar.gz https://go.microsoft.com/fwlink/?linkid=843421
sudo mkdir -p /usr/local/dotnet && sudo tar zxf dotnet.tar.gz -C /usr/local/dotnet
sudo ln -s /usr/local/dotnet/dotnet /usr/local/bin
按照《CentOS 7.2下安装Mono 5.0》安装好了Mono 5, 我这里是安装通用版的Jexus,通用版的Jeuxs 才能使用到我们自己安装的最新版的Mono 5。安装 Jexus 直接使用一下命令即可(需要在root身份下执行):
curl https://jexus.org/release/install | sh
安装成功后会提示:OK, Jexus has been installed in /usr/jexus.
备注:
你可以直接安装独立版的Jexus,独立版的Jexus自带Mono,使用的是Mono的稳定版本4.8,安装命令也是一个命令就可以搞定:curl https://jexus.org/release/x64/install.sh|sh
I am using Tencent Cloud’s Cloud Database MySQL (Cloud Database for MySQL), which is a high-performance distributed data storage service professionally built by Tencent Cloud based on MySQL, the world’s most popular open source database. 100% fully compatible with MySQL protocol, suitable for relational database scenarios. ZKEACMS Core uses Oracle's official Mysql driver by default. Since Oracle's official mysql driver has many problems, it is still a beta version and has not been updated recently. I use it in the production environment. It is Pomelo.EntityFrameworkCore.MySql. I changed the MySQL driver of ZKEACMS to Pomelo.EntityFrameworkCore.MySql. After testing, it works well. I have pulled the relevant modifications to ZKEACMS. MySQL for .NET Core - Pomelo extension package series includes Pomelo.Data.MySql and Pomelo.EntityFrameworkCore.MySql. It is recommended for everyone to use and has been tested in actual projects.
The database script of ZKEACMS Core is only SQL Server. There are many tools to convert SQL Server database to MySQL, so I won’t introduce them in detail here. Publish ZKEACMS.CorePublishing ZKEACMS.Core is relatively simple, double-click Publish.cmd
settings. json, add the MySQL database connection string, the result is as follows
{ "Connection
Strings": { "DefaultConnection": "",
"
Sqlite": "", "MySql": "Server=10.66.241.199;Database=ZKEACMS_Core;User Id=root;Passw
ord=xxxxxxx;" },
"ApplicationInsights": {
"Instrumentation
Key": "" },
"Logging": {
"
IncludeScopes": false, "LogLevel": {
"Default": "Debug",
"System": "Information",
"Microsoft": "Information"
}
},
"CDN": {
"Enable": true,
"Url": "http://cdn.zkeasoft.com/core"
},
"Culture": "zh-CN"
}

定位到目录,然后使用 dotnet 命令运行
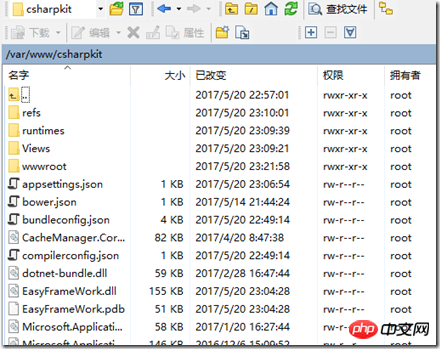
cd /var/www/csharpkit
dotnet ZKEACMS.WebHost.dll
运行成功以后,就可以使用您服务器的IP或者域名访问了,默认访问的端口是5000 退出SSH远程连接客户端后,发现访问不了,这是因为 dotnet 也退出了。下面我们就通过Jexus来管理我们服务进程。
使用以下命令:
1、切换到Jexus配置文件目录
cd /usr/jexus/siteconf
2、复制默认的配置文件为test
cp default csharpkit
3、编辑csharpkit配置文件
nano csharpkit
######################
# Web Site: csharpkit
########################################
port=80
root=/ /var/www/csharpkit
hosts=www.csharpkit.com #OR your.com,*.your.com
AppHost={
cmd=dotnet /var/www/csharpkit/ZKEACMS.WebHost.dll;
root=/var/www/csharpkit;
port=0;
}
配置的重点就在于AppHost中,需要注意的是在AppHost中的port(端口号)不代表Jexus对外服务的port(端口号),而是指要转发的 Asp.Net Core应用程序的端口号,如果在程序中使用了UsrUrls自定义端口则使用UsrUrls中填写的端口(不建议使用UsrUrls自定义端口),在没有使用UsrUrls自定义端口的情况下端口号设置为 0,Jexus会在运行时与Asp.Net Core进行"协商"具体使用的端口号,避免多个应用分配,端口的麻烦和冲突的风险。 简单来说就是会将外部的请求转发到这个端口,由这个端口对应的Asp.Net Core应用程序对请求进行处理。
4、启动/重启 Jexus
当配置文件编辑完成后使用以下命令对Jexus进行 启动/重启
# 如果已启动 Jexus:
sh /usr/jexus/jws restart

# 如果未启动 Jexus:
sh /usr/jexus/jws start
启动/重启成功后,在浏览器中输入 ip地址/域名:端口号 例如(http://www.csharpkit.com/) 即可访问Asp.Net Core应用程序
以上即是Jexus托管Asp.Net Core应用程序的配置全过程
The above is the detailed content of Running ZKEACMS using Jexus hosting. For more information, please follow other related articles on the PHP Chinese website!


