
 Operation and Maintenance
Linux Operation and Maintenance
Detailed introduction to installing Linux drivers and using Blueman to connect Bluetooth headsets (pictures and text)
Operation and Maintenance
Linux Operation and Maintenance
Detailed introduction to installing Linux drivers and using Blueman to connect Bluetooth headsets (pictures and text)
Detailed introduction to installing Linux drivers and using Blueman to connect Bluetooth headsets (pictures and text)

1.InstallationBluetoothDriver
I am using a desktop + BluetoothController, you need to install the Bluetooth driver first, otherwise An error will be reported when booting (the last line):
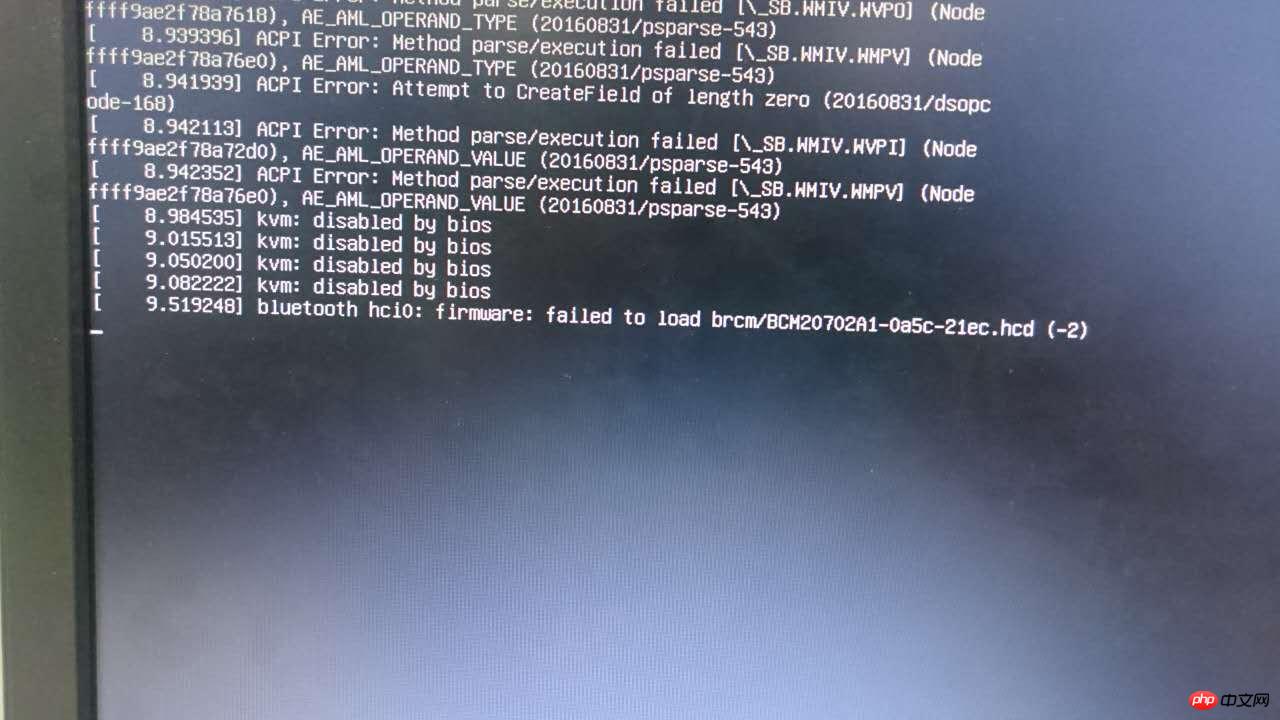
bluetooth hci0: firmware: failed to load brcm/BCM20702A1-0a5c-21ec.hcd (-2)
According to the error message, I searched online for the corresponding Bluetooth driver. I found the BCM20702A1-0a5c-21ec.hcd driver on GitHub, downloaded it and put it in /lib/firmware/brcm directory, restart to load.
2. Install Blueman
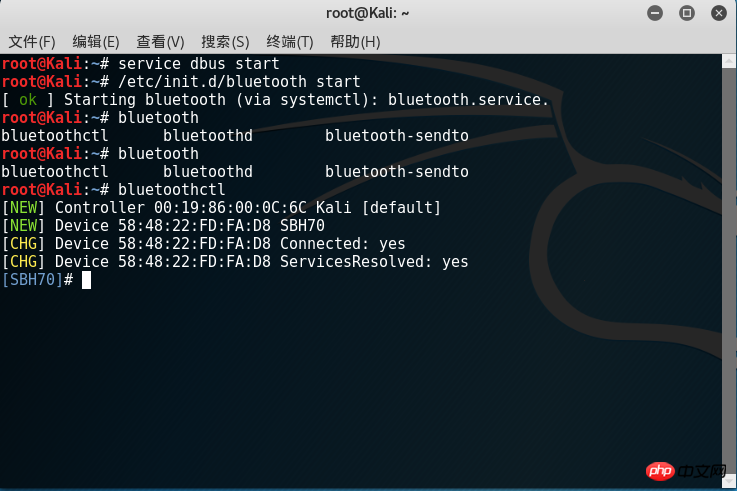
Start dbus and Bluetooth services (you can use service or /etc/init.d/):
service dbus start
/etc/init.d/bluetooth start
Blueman is a very convenient graphical Bluetooth management software, you can install it directly using apt-get:
apt-get install blueman
After completion, a Bluetooth icon will appear in the lower left corner (you can also use blueman-applet to start it manually).
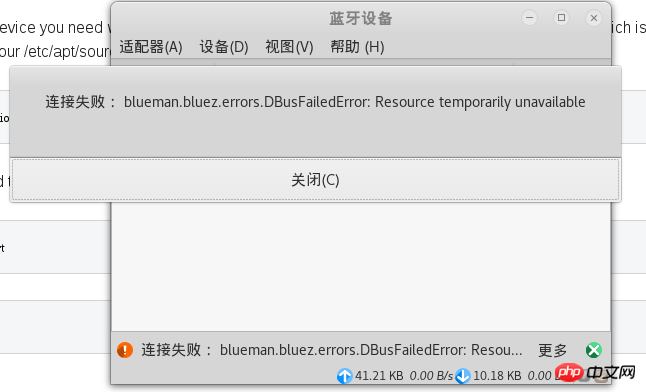
apt-get install pulseaudio pulseaudio-module-bluetooth pavucontrol bluez-firmware
Install Audio related modules. If these modules are missing,
blueman.bluez.errors.DBusFailedError: Resource will appear when connecting the headset. Temporarily unavailable error message.
service bluetooth restart
killall pulseaudio
After restarting the Bluetooth service, you can pair with the Bluetooth headset. However, the sound quality is very poor. You need to select high-fidelity playback (A2DP sink) in the audio configuration. If an error is reported, you also need to make some modifications to the configuration file.
A2DP error solution:
If the module is installed, but pactl load-module module-bluetooth-discover cannot load the module, you need to manually modify the configuration.
Refer to A2DP Bluetooth headset issues with PulseAudio 6.0
The approach on the 17th floor in the post:
1. Edit /etc/pulse/default. pa file.
vim /etc/pulse/default.pa
2. Find load-module module-bluetooth-discover and add # in front to comment it out:
# load-module module-bluetooth-discover
3. Edit /usr/bin/start -pulseaudio-x11 file
vim /usr/bin/start-pulseaudio-x11
Find the following code, and add another line below it
if [ x”$SESSION_MANAGER” != x ] ; then
     /usr/bin/pactl load-module module-x11-xsmp “display=$DISPLAY session_manager=$SESSION_MANAGER” > /dev/null
fiWrite below it (between the two fi) /usr/bin/pactl load- module module-bluetooth-discover, complete as follows:
if [ x”$SESSION_MANAGER” != x ] ; then
     /usr/bin/pactl load-module module-x11-xsmp “display=$DISPLAY session_manager=$SESSION_MANAGER” > /dev/null
 fi
     /usr/bin/pactl load-module module-bluetooth-discover
fiRestart the service:
service bluetooth restart
sudo pkill pulseaudio
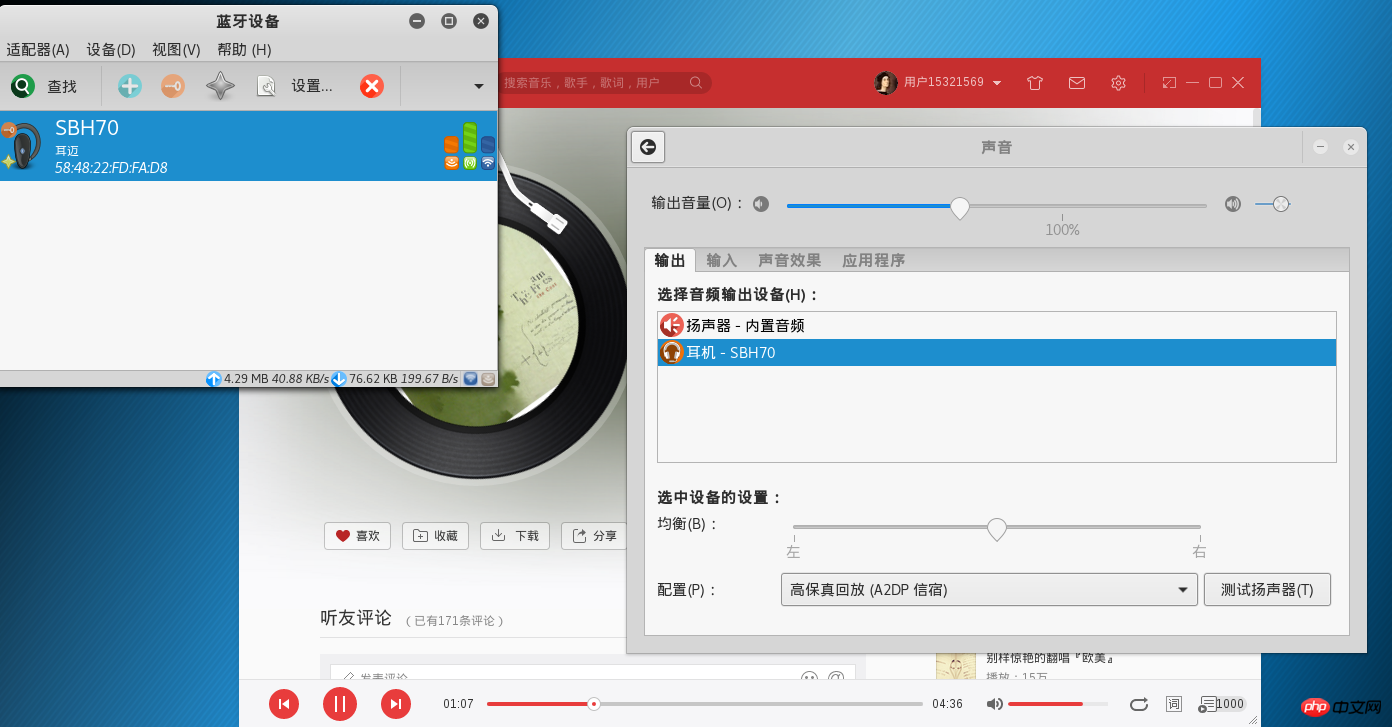
At this time, you can I selected A2DP in the audio configuration, and the sound quality instantly improved a lot.
The above is the detailed content of Detailed introduction to installing Linux drivers and using Blueman to connect Bluetooth headsets (pictures and text). For more information, please follow other related articles on the PHP Chinese website!

Hot AI Tools

Undresser.AI Undress
AI-powered app for creating realistic nude photos

AI Clothes Remover
Online AI tool for removing clothes from photos.

Undress AI Tool
Undress images for free

Clothoff.io
AI clothes remover

AI Hentai Generator
Generate AI Hentai for free.

Hot Article
Hot Tools

Notepad++7.3.1
Easy-to-use and free code editor

SublimeText3 Chinese version
Chinese version, very easy to use

Zend Studio 13.0.1
Powerful PHP integrated development environment

Dreamweaver CS6
Visual web development tools

SublimeText3 Mac version
God-level code editing software (SublimeText3)
Hot Topics
 1377
1377
 52
52

 Unable to log in to mysql as root
Apr 08, 2025 pm 04:54 PM
Unable to log in to mysql as root
Apr 08, 2025 pm 04:54 PM
The main reasons why you cannot log in to MySQL as root are permission problems, configuration file errors, password inconsistent, socket file problems, or firewall interception. The solution includes: check whether the bind-address parameter in the configuration file is configured correctly. Check whether the root user permissions have been modified or deleted and reset. Verify that the password is accurate, including case and special characters. Check socket file permission settings and paths. Check that the firewall blocks connections to the MySQL server.
 Solutions to the errors reported by MySQL on a specific system version
Apr 08, 2025 am 11:54 AM
Solutions to the errors reported by MySQL on a specific system version
Apr 08, 2025 am 11:54 AM
The solution to MySQL installation error is: 1. Carefully check the system environment to ensure that the MySQL dependency library requirements are met. Different operating systems and version requirements are different; 2. Carefully read the error message and take corresponding measures according to prompts (such as missing library files or insufficient permissions), such as installing dependencies or using sudo commands; 3. If necessary, try to install the source code and carefully check the compilation log, but this requires a certain amount of Linux knowledge and experience. The key to ultimately solving the problem is to carefully check the system environment and error information, and refer to the official documents.
 How to solve mysql cannot be started
Apr 08, 2025 pm 02:21 PM
How to solve mysql cannot be started
Apr 08, 2025 pm 02:21 PM
There are many reasons why MySQL startup fails, and it can be diagnosed by checking the error log. Common causes include port conflicts (check port occupancy and modify configuration), permission issues (check service running user permissions), configuration file errors (check parameter settings), data directory corruption (restore data or rebuild table space), InnoDB table space issues (check ibdata1 files), plug-in loading failure (check error log). When solving problems, you should analyze them based on the error log, find the root cause of the problem, and develop the habit of backing up data regularly to prevent and solve problems.
 Can mysql run on android
Apr 08, 2025 pm 05:03 PM
Can mysql run on android
Apr 08, 2025 pm 05:03 PM
MySQL cannot run directly on Android, but it can be implemented indirectly by using the following methods: using the lightweight database SQLite, which is built on the Android system, does not require a separate server, and has a small resource usage, which is very suitable for mobile device applications. Remotely connect to the MySQL server and connect to the MySQL database on the remote server through the network for data reading and writing, but there are disadvantages such as strong network dependencies, security issues and server costs.
 MySQL can't be installed after downloading
Apr 08, 2025 am 11:24 AM
MySQL can't be installed after downloading
Apr 08, 2025 am 11:24 AM
The main reasons for MySQL installation failure are: 1. Permission issues, you need to run as an administrator or use the sudo command; 2. Dependencies are missing, and you need to install relevant development packages; 3. Port conflicts, you need to close the program that occupies port 3306 or modify the configuration file; 4. The installation package is corrupt, you need to download and verify the integrity; 5. The environment variable is incorrectly configured, and the environment variables must be correctly configured according to the operating system. Solve these problems and carefully check each step to successfully install MySQL.
 Unable to access mysql from terminal
Apr 08, 2025 pm 04:57 PM
Unable to access mysql from terminal
Apr 08, 2025 pm 04:57 PM
Unable to access MySQL from the terminal may be due to: MySQL service not running; connection command error; insufficient permissions; firewall blocks connection; MySQL configuration file error.
 Monitor MySQL and MariaDB Droplets with Prometheus MySQL Exporter
Apr 08, 2025 pm 02:42 PM
Monitor MySQL and MariaDB Droplets with Prometheus MySQL Exporter
Apr 08, 2025 pm 02:42 PM
Effective monitoring of MySQL and MariaDB databases is critical to maintaining optimal performance, identifying potential bottlenecks, and ensuring overall system reliability. Prometheus MySQL Exporter is a powerful tool that provides detailed insights into database metrics that are critical for proactive management and troubleshooting.
 How to solve the problem of missing dependencies when installing MySQL
Apr 08, 2025 pm 12:00 PM
How to solve the problem of missing dependencies when installing MySQL
Apr 08, 2025 pm 12:00 PM
MySQL installation failure is usually caused by the lack of dependencies. Solution: 1. Use system package manager (such as Linux apt, yum or dnf, Windows VisualC Redistributable) to install the missing dependency libraries, such as sudoaptinstalllibmysqlclient-dev; 2. Carefully check the error information and solve complex dependencies one by one; 3. Ensure that the package manager source is configured correctly and can access the network; 4. For Windows, download and install the necessary runtime libraries. Developing the habit of reading official documents and making good use of search engines can effectively solve problems.
