Since the first time I came into contact with a computer in high school (I feel ashamed, I didn’t know how to use a computer until high school, and I didn’t know about QQ## until I was in my first year of college) #Such a thing, the family is poor and has no choice), in my concept, the computer should be like windows. Therefore, it wasn’t until I graduated from college that I learned that there was an operating system like linux. Then after I started working after graduation, I realized that Apple also has its own operating system. operating system. Therefore, I still can’t figure out why I embarked on the path of no return as a coder. Then he got out of hand as soon as he set foot on it, until one day he was shot dead on the beach. . .
Enough nonsense, let’s get to the topic. Having been exposed to windows for so many years, as programmers, we must first classify the programs of windows into the following categories:
(1) Console program.This is probably the first program I have ever developed as a professional coder. When we first wrote the first "hello world" in the C language in our freshman year of college, the program at that time was the console program. Its essence is a DOS program. It does not have its own window. The output you see is Hello The window of world is the DOS window that the program itself borrows from the operating system.
(2) Window program.Window program is probably the program we come into contact with the most, from the commonly used office to programs with various visible interfaces. It is a window program under windows. The goal of this column is to introduce the basics of windows window programs.
(3) Dynamic library program.This is the famous dll. For novices, you may have only seen pigs running around but not eaten. For ordinary users of windows, they may have never seen pig running. But as a veteran programmer, this should be all too familiar. We will also introduce the basics of developing this type of program later.
(4)This is a program type with the suffix lib. It is an antique-level program and does not have dll. It is commonly used, but it still has its own status in the world. Similarly, we will also introduce the development basis of its development later.
After introducing the nonsense and the classification of winddows programs, we have officially started developing the following content.
The main purpose of this article is to introduce how to create ## by yourself #windows program method, maybe you have heard of MFC program, this interface framework has The creation process of the Windows interface program is completely encapsulated, and what we have to learn next is to get rid of the shackles of MFC and develop and create a ## from scratch #windowsInterface program. First, let's introduce a step to create a Windows program. In subsequent articles, I will implement and explain each step step by step.
Creating a Windows interface program is divided into 7 steps:
(1)DefinitionWinMainfunction(This is windows For the entrance to the interface program, please refer to the first article in this column).
(2) Define the window processing function.(3) Registration window
(4) Create window
(5) Display Window
(6) Writing message (7) Processing message
3. Create a test environment
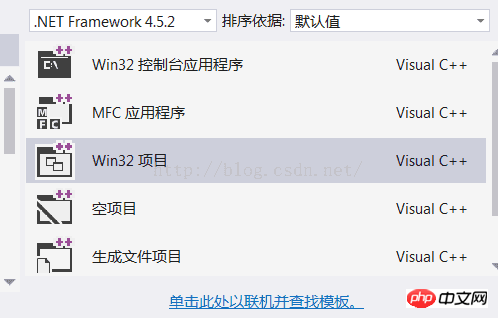
We firstcreate a win32 window program. We use the programming environment of VS2015, and the steps to create a win32 window program are the files->Create a new -> project and select Visual in the template C++, and then select Win32 Window Program. But in the last step, before clicking the Finish button, we need to select an empty project, which means that there will be no files after the project is completed. We need to create a new cpp file to start from Create a window program from scratch.

##3.1 Define the
In the newly added empty cpp file, we add the wWinMain function of the following program entry: int APIENTRY wWinMain(_In_ HINSTANCE hInstance,
_In_opt_ HINSTANCE hPrevInstance,
_In_ LPWSTR lpCmdLine,
_In_ int nCmdShow)
{
}
WinMain function: hInstance — —
The instance handle of the current program, which is the memory location of the current program. hPrevInstance ——当前程序的前一个程序实例句柄,目前已经废弃,不再使用。 lpCmdLine —— 命令行参数,我们执行程序时可以用命令行的形式传入一些参数。 nCmdShow —— 窗口的显示方式,最大化、最小化那种。 窗口处理函数用来为系统回调函数,主要用来处理消息。像我们平常对程序的一系列操作,反应到程序内部,其实都是产生了一系列的操作。比如窗口关闭时会传递窗口关闭的消息,窗口最大化时也会传递最大化的消息,包括我们拖动窗口都会产生消息。而我们定义的窗口处理函数就是处理操作上述的消息,如下面所示,我们定义的窗口处理函数处理了一个WM_DESTROY消息,这是我们在关闭窗口时发送的消息,被我们的窗口处理函数捕获之后,会调用系统的APIPostQuitMessage(0),使窗口退出。 窗口处理函数共有四个参数: hWnd —— 是窗口的句柄。 uMsg —— 是传入的消息,它的本质就是无符号整形的数字。 wParam、lParam —— 是消息附带的两个参数。 我们先定义窗口处理函数,稍后再进行使用。 一个窗口,在创建之前需要先向操作系统进行注册,这类似现实生活中我们开公司,要先向工商局进行注册一样。wce是一个WNDCLASSEX 类型的结构体,这就是一个窗口类,包含了我们所需要的窗口信息,包括菜单、图标、背景色等等。它最主要的是两个成员,hInstance是当前程序的实例句柄,lpszClassName是我们注册的类名称,其他的这里不再解释,可参照MSDN。 我们通过RegisterClassEx()这个API将窗口类在操作系统中进行注册,并通过其返回值判断是否注册成功。我们在WinMain函数中进行窗口的注册工作,请看下面的代码: 接下来我们创建窗口,创建窗口我们使用CreateWindowEx系统API,请留意下面它的第2、3两个参数,第二个参数使我们之前注册的窗口类名称,第三个参数是窗口的标题名称,其他的是一些窗口显示的参数,这里不再详细解释。3.2 定义窗口处理函数
//窗口处理函数
LRESULT CALLBACK WndProc(HWND hWnd, UINT uMsg, WPARAM wParam, LPARAM lParam)
{
    switch (uMsg)
    {
        case WM_DESTROY:
        PostQuitMessage(0);//可以使GetMessage返回0
        break;
        default:
        break;
    }
    return DefWindowProc(hWnd, uMsg, wParam, lParam);
}3.3 编写窗口注册函数
int APIENTRY wWinMain(_In_ HINSTANCE hInstance,
_In_opt_ HINSTANCE hPrevInstance,
_In_ LPWSTR    lpCmdLine,
_In_ int       nCmdShow)
{
    //注册窗口类
    WNDCLASSEX wce = { 0 };
    wce.cbSize = sizeof(wce);
    wce.cbClsExtra = 0;
    wce.cbWndExtra = 0;
    wce.hbrBackground = (HBRUSH)(COLOR_WINDOW + 1);
    wce.hCursor = NULL;
    wce.hIcon = NULL;
    wce.hIconSm = NULL;
    wce.hInstance = hInstance;
    wce.lpfnWndProc = wndProc;
    wce.lpszClassName = “Main”;
    wce.lpszMenuName = NULL;
    wce.style = CS_HREDRAW | CS_VREDRAW;
    ATOM nAtom = RegisterClassEx(&wce);
    if (!nAtom )
    {
        MessageBox(NULL, "注册失败", "Infor", MB_OK);
        return 0;
    }
}3.4 创建窗口
HWND hWnd = CreateWindowEx(0, “Main”, “Window”,
WS_OVERLAPPEDWINDOW, CW_USEDEFAULT, CW_USEDEFAULT, CW_USEDEFAULT, CW_USEDEFAULT, NULL, NULL, g_hInstance, NULL);
The above is the detailed content of Win32 SDK Basics (3) The first step on how to create a windows window from scratch. For more information, please follow other related articles on the PHP Chinese website!


