

win2003服务器使用WPS的COM组件的一些问题解决方法_php技巧

由于COM组件只能在windows上使用,因为程序必须放在windows的服务器上运行。在本地xp系统上搭建安装没任何问题,在服务器win2003上安装,碰到了N个问题,最后还是gump同学出手才解决,整整折腾了不少于10个小时才搞定。
安装完Wps office个人版最新的12012版后,按理说就完成了,但运行程序在服务器上报错如下:
Fatal error: Uncaught exception 'com_exception' with message 'Failed to create COM object `WPS.Application': 拒绝访问。 ' in D:\www\9enjoy.com\hx.php:12 Stack trace: #0 D:\www\9enjoy.com\hx.php(12): com->com('WPS.Application') #1 {main} thrown in D:\www\9enjoy.com\hx.php on line 12
是运行这句就$wps = new COM("WPS.Application");报错。经过一翻查找,在DCOM配置里做了配置,解决了这个提示。
1、打开控制面板 - 管理工具 - 组件服务
2、在组件服务面板中依次打开 控制台根目录 - 组件服务 - 计算机 - 我的电脑 - DCOM 配置
3、找到Kingsoft Writer Application Class(金山的文档应用服务),打开属性窗口,切换到安全标签。将“启动和激活权限”选择自定义,编辑,添加everyone权限即可。“访问权限”也一样处理。
这个错误提示通过,运行到$doc = $wps->Documents->Open($src_filename); 时又出现错误
Fatal error: Uncaught exception 'com_exception' with message 'Error [0x800706be] 远程过程调用失败。 ' in D:\www\9enjoy.com\hx.php:15 Stack trace: #0 D:\www\9enjoy.com\hx.php(15): variant->Open('d:\www\9enjoy.com...') #1 {main} thrown in D:\www\9enjoy.com\hx.php on line 15
在“标识”标签,将启动用户改为交互式用户,又出现了另一个错误提示:
Fatal error: Uncaught exception 'com_exception' with message 'Failed to create COM object `WPS.Application': 因为配置类型不正确,系统无法开始服务器进程。请检查用户名和密码。 ' in D:\www\9enjoy.com\hx.php:15 Stack trace: #0 D:\www\9enjoy.com\hx.php(15): com->com('WPS.Application') #1 {main} thrown in D:\www\9enjoy.com\hx.php on line 15
反复尝试,都不行,包括重装WPS。
后"标识"标签,使用指定用户运行,先使用网站用的用户运行,通不过。再使用管理员账号运行,点确定时也会弹出出错信息。应该是这两个选项(启动用户和指定用户)都无法把这个com组件启动起来。如果用交互式用户,是可以的,就是提示用户名和密码不对:(
后测试中有时出现长时间运行,一直不报错...还有出现过如下错误:
Fatal error: Uncaught exception 'com_exception' with message 'Failed to create COM object `WPS.Application': 服务器运行失败 ' in D:\www\9enjoy.com\hx.php:30 Stack trace: #0 D:\www\9enjoy.com\hx.php(30): com->com('WPS.Application') #1 {main} thrown in D:\www\9enjoy.com\hx.php on line 30
期间还发现,由于执行到$wps->Documents->Open就停了,会在进程中出现一个wps或wpsupdate进程,每刷新一次出现一个。最多一次发现有30多个这类进程,有时还会影响程序,需要手工一个一个删除。
最后,使用了一个很BT的做法,将这个站点的IIS身份验证方式使用administrator管理员账号运行,居然好了!。。。

Hot AI Tools

Undresser.AI Undress
AI-powered app for creating realistic nude photos

AI Clothes Remover
Online AI tool for removing clothes from photos.

Undress AI Tool
Undress images for free

Clothoff.io
AI clothes remover

Video Face Swap
Swap faces in any video effortlessly with our completely free AI face swap tool!

Hot Article
Hot Tools

Notepad++7.3.1
Easy-to-use and free code editor

SublimeText3 Chinese version
Chinese version, very easy to use

Zend Studio 13.0.1
Powerful PHP integrated development environment

Dreamweaver CS6
Visual web development tools

SublimeText3 Mac version
God-level code editing software (SublimeText3)
Hot Topics
 1389
1389
 52
52

 WPS and Office do not have Chinese fonts, and Chinese font names are displayed in English.
Jun 19, 2024 am 06:56 AM
WPS and Office do not have Chinese fonts, and Chinese font names are displayed in English.
Jun 19, 2024 am 06:56 AM
My friend's computer, all Chinese fonts such as imitation Song, Kai style, Xing Kai, Microsoft Yahei, etc. cannot be found in WPS and OFFICE. The editor below will tell you how to solve this problem. The fonts in the system are normal, but all fonts in the WPS font options are not available, only cloud fonts. OFFICE only has English fonts, not any Chinese fonts. After installing different versions of WPS, English fonts are available, but there is also no Chinese font. Solution: Control Panel → Categories → Clock, Language, and Region → Change Display Language → (Region and Language) Management → (Language for Non-Unicode Programs) Change System Regional Settings → Chinese (Simplified, China) → Restart. Control Panel, change the view mode in the upper right corner to "Category", Clock, Language and Region, change
 How to use wps translation function_How to use wps translation function
Mar 27, 2024 pm 04:46 PM
How to use wps translation function_How to use wps translation function
Mar 27, 2024 pm 04:46 PM
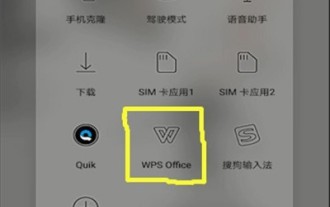
1. First, we open wpsoffice on the mobile phone. 2. Then click Apply. 3. Click the image to translate. Method 2 1. First, we open wpsoffice on the mobile phone. 2. Open the document that needs to be translated and click the tool in the lower left corner. 3. Click Review and Translate.
 How to center the WPS Word table
Mar 21, 2024 pm 02:21 PM
How to center the WPS Word table
Mar 21, 2024 pm 02:21 PM
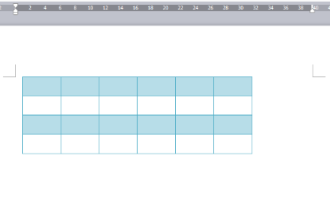
When using word in WPS, you often need to insert pictures, tables, etc., but if the inserted table is not centered, it will affect the beauty of the entire document. So how to set the centering of the WPS table? Today I will teach you how to make adjustments. The specific steps are as follows. Come and take a look! 1. The table in the picture is not in the middle of the page, which is not very beautiful. I want it to be centered. 2. First, right-click the mouse in the table (as shown in the picture). 3. Then click [Select All Tables] in the right-click menu (as shown by the red arrow in the figure). 4. After clicking, the table will be fully selected (as shown in the figure below). 5. At this time, click to open the [Start] tab of wps text (as shown by the red arrow in the figure). 6 o'clock
 How to create a QR code using wps
Mar 28, 2024 am 09:41 AM
How to create a QR code using wps
Mar 28, 2024 am 09:41 AM
1. Open the software and enter the wps text operation interface. 2. Find the insert option in this interface. 3. Click the Insert option and find the QR code option in its editing tool area. 4. Click the QR code option to pop up the QR code dialog box. 5. Select the text option on the left and enter our information in the text box. 6. On the right side, you can set the shape of the QR code and the color of the QR code.
 Why macros still cannot be enabled after wps installs vba
Mar 21, 2024 am 08:30 AM
Why macros still cannot be enabled after wps installs vba
Mar 21, 2024 am 08:30 AM
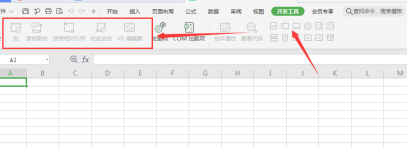
wpsOffice is an office software suite independently developed by Kingsoft Software Co., Ltd., which can realize multiple functions such as text, forms, presentations, and PDF reading. It has the advantages of low memory usage, fast running speed, multiple cloud functions, powerful plug-in platform support, free massive online storage space and document templates. What the editor will introduce to you today is the "macro" function. In the past few days, friends have always asked me why I still can't enable macros after installing VBA. The "macro" function is still gray and cannot be opened, as shown below. What's going on? The editor will find out the reasons for you. There are three main reasons for this situation: 1. Does your wps support vba? Some versions do not support it. 2. Confirm that you have enabled macros and whether the operation
 What should I do if WPS cannot start the printer job?
Mar 20, 2024 am 08:20 AM
What should I do if WPS cannot start the printer job?
Mar 20, 2024 am 08:20 AM
We can use office software to produce various electronic documents. Electronic documents greatly save the use of paper and are easier to save and read. However, sometimes according to work requirements, superiors require printing out paper documents for everyone to circulate. Document writing It's fine but unable to print. It's very difficult to encounter such a situation. The course we brought today can solve this problem. The following lesson is: What should I do if WPS cannot start the printer job? When trying to print a document using a LAN printer, a problem occurred, saying "WPSOffice cannot start the print job. Please check whether the printer is turned on and online." But in fact, the printer is powered on and online. 2. Click "OK", then click on the upper left corner of the title bar as shown in the picture
 How to set WPS value to automatically change color according to conditions_Steps to set WPS table value to automatically change color according to condition
Mar 27, 2024 pm 07:30 PM
How to set WPS value to automatically change color according to conditions_Steps to set WPS table value to automatically change color according to condition
Mar 27, 2024 pm 07:30 PM
1. Open the worksheet and find the [Start]-[Conditional Formatting] button. 2. Click Column Selection and select the column to which conditional formatting will be added. 3. Click the [Conditional Formatting] button to bring up the option menu. 4. Select [Highlight conditional rules]-[Between]. 5. Fill in the rules: 20, 24, dark green text with dark fill color. 6. After confirmation, the data in the selected column will be colored with corresponding numbers, text, and cell boxes according to the settings. 7. Conditional rules without conflicts can be added repeatedly, but for conflicting rules WPS will replace the previously established conditional rules with the last added rule. 8. Repeatedly add the cell columns after [Between] rules 20-24 and [Less than] 20. 9. If you need to change the rules, you can just clear the rules and then reset the rules.
 Introduction to the method of editing watermark with WPS
Mar 27, 2024 pm 02:06 PM
Introduction to the method of editing watermark with WPS
Mar 27, 2024 pm 02:06 PM
1. We use WPS to open a document. There is a watermark in it. It looks messy. How to remove it? Look down. 2. Find the Insert tab in the menu bar, select the header and footer icons under this tab, and click on them with the left mouse button. 3. At this time, the text on the page becomes gray and cannot be edited, but the watermark on the back of the text can be edited at this time. 4. Click on the watermark, you can see that this is a picture watermark, because there are several small squares around the picture, and the picture can be edited at this time. 5. Use the delete key on the keyboard to delete the picture, and you can see that the watermark is gone. 6. Double-click the mouse on the page to exit the header and footer editing mode. The text on the page returns to normal color and can be edited, but at this time the watermark on the page has disappeared. 7.
