

Recommended 5 articles about brown

This tutorial is mainly a tutorial on the comprehensive application of filters. When we see a good-looking texture, we can use PS to try to make it bit by bit. This tutorial is a good example in this regard! Final effect 1. Create a new file, set the foreground color to dark brown, and set RGB to 73, 22, and 4 respectively. Press the Alt Delete key to fill the background layer. The effect is as shown in Figure 1. 2. Execute "Filter" → " "Texture" → "Grain" command, in the pop-up grain dialog box, set the intensity to 100, the contrast to 24, and the grain type to vertical, as shown in Figure 2, and the image effect is shown in Figure 3. 3. Execute the "Filter" → "Distort" → "Rotate and Distort" command in the menu bar. In the pop-up Rotate and Distort dialog box, set the angle to -50, as shown in Figure 4, and the image effect is shown in Figure 5. . 4. Press the Ctrl A key to select the entire file window, and press the Ctrl C key to copy the image in the selection. Switch to the channel panel, click the Create new channel button below the control panel to generate a new channel Alpha 1. Press the Ctrl V key, paste the image you just copied into channel Alpha 1, cancel the selection, and the image effect is as shown in Figure 6 5.
1. Photoshop filter production Good-looking texture

Introduction: This tutorial is mainly a comprehensive application tutorial of filters. Texture can be used. We can use PS to try to make it bit by bit. This tutorial is a good example in this regard! Final effect 1. Create a new file and set the foreground color to dark brown RGB to 73, 22,
2. Photoshop a smooth brown pebble
Introduction: Pebbles are very common in life, but it takes a lot of effort to make them with PS. Especially the texture part, if it is made with simple filters, it always feels like it lacks realism and naturalness. It's best to use a similar splatter brush to paint, the effect will be much better.
3. Photoshop to create an exquisite dark brown notebook

##Introduction: The method of making a notebook is not difficult. The general process is: first make the surface part of the notepad, then make the paper part, and finally trim it in detail to achieve the effect you like.
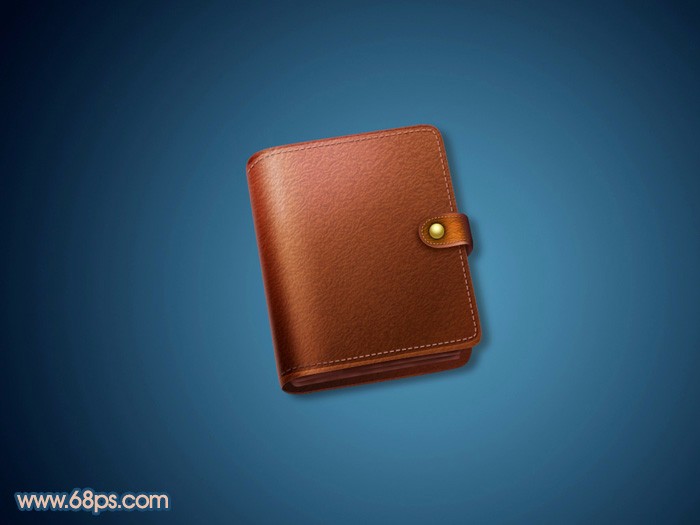
4. Photoshop design and create a brown wallet with realistic leather texture
5.
PS uses filters to create realistic reddish-brown pebbles
 ##Introduction: This tutorial introduces how to use Photoshop filters to create realistic small rocks. First determine the appropriate size and shape, then use a filter to add a stone-like texture, and then adjust the highlights and shadows as a whole
The above is the detailed content of Recommended 5 articles about brown. For more information, please follow other related articles on the PHP Chinese website!

Hot AI Tools

Undresser.AI Undress
AI-powered app for creating realistic nude photos

AI Clothes Remover
Online AI tool for removing clothes from photos.

Undress AI Tool
Undress images for free

Clothoff.io
AI clothes remover

AI Hentai Generator
Generate AI Hentai for free.

Hot Article
Hot Tools

Notepad++7.3.1
Easy-to-use and free code editor

SublimeText3 Chinese version
Chinese version, very easy to use

Zend Studio 13.0.1
Powerful PHP integrated development environment

Dreamweaver CS6
Visual web development tools

SublimeText3 Mac version
God-level code editing software (SublimeText3)
Hot Topics
 1382
1382
 52
52

 How do I use Photoshop for creating social media graphics?
Mar 18, 2025 pm 01:41 PM
How do I use Photoshop for creating social media graphics?
Mar 18, 2025 pm 01:41 PM
The article details using Photoshop for social media graphics, covering setup, design tools, and optimization techniques. It emphasizes efficiency and quality in graphic creation.
 How do I prepare images for web using Photoshop (optimize file size, resolution)?
Mar 18, 2025 pm 01:35 PM
How do I prepare images for web using Photoshop (optimize file size, resolution)?
Mar 18, 2025 pm 01:35 PM
Article discusses optimizing images for web using Photoshop, focusing on file size and resolution. Main issue is balancing quality and load times.
 What is the reason why PS keeps showing loading?
Apr 06, 2025 pm 06:39 PM
What is the reason why PS keeps showing loading?
Apr 06, 2025 pm 06:39 PM
PS "Loading" problems are caused by resource access or processing problems: hard disk reading speed is slow or bad: Use CrystalDiskInfo to check the hard disk health and replace the problematic hard disk. Insufficient memory: Upgrade memory to meet PS's needs for high-resolution images and complex layer processing. Graphics card drivers are outdated or corrupted: Update the drivers to optimize communication between the PS and the graphics card. File paths are too long or file names have special characters: use short paths and avoid special characters. PS's own problem: Reinstall or repair the PS installer.
 What are the common questions about exporting PDF on PS
Apr 06, 2025 pm 04:51 PM
What are the common questions about exporting PDF on PS
Apr 06, 2025 pm 04:51 PM
Frequently Asked Questions and Solutions when Exporting PS as PDF: Font Embedding Problems: Check the "Font" option, select "Embed" or convert the font into a curve (path). Color deviation problem: convert the file into CMYK mode and adjust the color; directly exporting it with RGB requires psychological preparation for preview and color deviation. Resolution and file size issues: Choose resolution according to actual conditions, or use the compression option to optimize file size. Special effects issue: Merge (flatten) layers before exporting, or weigh the pros and cons.
 How do I prepare images for print using Photoshop (resolution, color profiles)?
Mar 18, 2025 pm 01:36 PM
How do I prepare images for print using Photoshop (resolution, color profiles)?
Mar 18, 2025 pm 01:36 PM
The article guides on preparing images for print in Photoshop, focusing on resolution, color profiles, and sharpness. It argues that 300 PPI and CMYK profiles are essential for quality prints.
 How to solve the problem of loading when PS is always showing that it is loading?
Apr 06, 2025 pm 06:30 PM
How to solve the problem of loading when PS is always showing that it is loading?
Apr 06, 2025 pm 06:30 PM
PS card is "Loading"? Solutions include: checking the computer configuration (memory, hard disk, processor), cleaning hard disk fragmentation, updating the graphics card driver, adjusting PS settings, reinstalling PS, and developing good programming habits.
 How do I use Photoshop's video editing capabilities?
Mar 18, 2025 pm 01:37 PM
How do I use Photoshop's video editing capabilities?
Mar 18, 2025 pm 01:37 PM
The article explains how to use Photoshop for video editing, detailing steps to import, edit, and export videos, and highlighting key features like the Timeline panel, video layers, and effects.
 How to set password protection for export PDF on PS
Apr 06, 2025 pm 04:45 PM
How to set password protection for export PDF on PS
Apr 06, 2025 pm 04:45 PM
Export password-protected PDF in Photoshop: Open the image file. Click "File"> "Export"> "Export as PDF". Set the "Security" option and enter the same password twice. Click "Export" to generate a PDF file.
