
 Backend Development
C#.Net Tutorial
Example tutorial on supporting Korean in Noto Sans font in c#
Backend Development
C#.Net Tutorial
Example tutorial on supporting Korean in Noto Sans font in c#
Example tutorial on supporting Korean in Noto Sans font in c#

1. Origin:
VCU10 project uses Noto Sans font, which is indeed beautiful. However, when verified under win7, the Korean text displayed is garbled, which is quite a headache.
The interface is displayed as shown in the figure:

2. Font.GdiCharSet attribute
There is no way. Based on the current situation, can the problem be solved? The program needs to support multiple languages. Let’s start with the properties of the font itself. The verification found that by changing its character set GdiCharSet, Korean can be displayed normally. The solution is there! After consulting the information, we learned that the font GdiCharSet can have the following values:| ##Character set
| Value|
|---|---|
| ANSI
|
0
|
|
##1 |
|
|
2 |
|
|
128 |
|
##129 |
##North Korea Language |
129 |
##GB2312 |
134 |
##CHINESEBIG5 Applicable |
| 136
|
OEM |
| 255
|
##Korean |
|
|
##Hebrew
|
|
|
Arabic
| ##178
|
##Turkish |
##162 |
##Vietnamese |
##163 |
| ##Thai
|
222
|
|
204 |
|
##77 |
##Baltic |
186 |
It was verified that character sets such as Eastern Europe and Baltic Sea can display Korean normally without affecting the display effect of its default character set, so it was decided to replace its character set. |
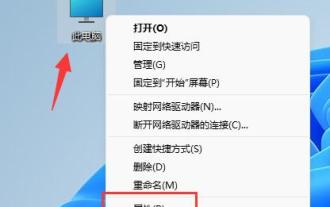
| 3. Replace The project interface has set fonts, and there are many interfaces. Of course it is not convenient to change them one by one. Write code to process them in batches. ! | In each form or each UserControl, call UpdateNotoSansCharset() and the numbers will be replaced uniformly.
        //处理Label字体,以能在win7下,NotoSans字体能显示韩文public static void UpdateNotoSansCharset(Form form)
        {if (OSUtils.OSVersion > FriendlyOSVersion.Win7)return;foreach (Control ctrl in form.Controls)
                UpdateNotoSansCharset(ctrl);
        }public static void UpdateNotoSansCharset(ScrollableControl parent)
        {if (OSUtils.OSVersion > FriendlyOSVersion.Win7)return;foreach (Control ctrl in parent.Controls)
                UpdateNotoSansCharset(ctrl);
        }public static void UpdateNotoSansCharset(GControl ctrl)
        {if (ctrl is ScrollableControl)
                UpdateNotoSansCharset(ctrl as ScrollableControl);else if (ctrl is Label)
            {//CharSet采用中欧字符集var font = new Font(ctrl.Font.FontFamily, ctrl.Font.Size, ctrl.Font.Style, ctrl.Font.Unit, 238);
                ctrl.Font = font;
            }
        }
Copy after login |
OK, the problem is solved, perfect:
The above is the detailed content of Example tutorial on supporting Korean in Noto Sans font in c#. For more information, please follow other related articles on the PHP Chinese website!

Hot AI Tools

Undresser.AI Undress
AI-powered app for creating realistic nude photos

AI Clothes Remover
Online AI tool for removing clothes from photos.

Undress AI Tool
Undress images for free

Clothoff.io
AI clothes remover

Video Face Swap
Swap faces in any video effortlessly with our completely free AI face swap tool!

Hot Article
Hot Tools

Notepad++7.3.1
Easy-to-use and free code editor

SublimeText3 Chinese version
Chinese version, very easy to use

Zend Studio 13.0.1
Powerful PHP integrated development environment

Dreamweaver CS6
Visual web development tools

SublimeText3 Mac version
God-level code editing software (SublimeText3)
Hot Topics
 1386
1386
 52
52

 win10 font folder path details
Jan 03, 2024 pm 08:37 PM
win10 font folder path details
Jan 03, 2024 pm 08:37 PM
When inputting text, many friends like to add their favorite personalized fonts, but they do not know where the font folder path of the win10 system is and cannot add fonts. The following will introduce the specific folder path to you. Win10 font folder path: 1. Click "This PC" on the desktop. 2. Enter the system disk C drive. 3. Click the “windows” folder. 4. Pull down to find the "Fonts" folder. 5. You can enter the font library. Friends who have other questions can take a look to learn more about common problems with win10 fonts~
 How to change the font in Outlook on Apple mobile phone
Mar 08, 2024 pm 04:46 PM
How to change the font in Outlook on Apple mobile phone
Mar 08, 2024 pm 04:46 PM
How to change the font in Outlook on Apple mobile phone? First open the Outlook software and click on the file in the upper left corner of the interface. You can set the font according to your own preferences. After the settings are completed, click the OK button. Let’s take a look! How to change the font in Outlook on Apple mobile phone 1. Open the Outlook software and click the "File" option in the upper left corner of the interface. 2. In the list that appears, find "Options" and click to enter. 3. On the left side of the option list, click "Mail". 4. Next, select “Letter and Fonts”. 5. If you want to set the font for new emails, reply emails, or composing, click the corresponding option to enter the settings. 6. Set the font according to personal preference. After the setting is completed, click OK
 How to solve win11 font blur problem
Jan 13, 2024 pm 09:00 PM
How to solve win11 font blur problem
Jan 13, 2024 pm 09:00 PM
After updating the win11 system, some friends found that their win11 fonts were blurred and very uncomfortable to use. This may be due to a bug in the system version, or it may be that we have turned on special effects. Let’s follow the editor. Let’s see how to solve it. Win11 fonts are blurred: Method 1: 1. First, right-click this computer and open "Properties" 2. Then enter "Advanced System Settings" in the related link 3. Then click "Settings" in Performance to open it. 4. Under "Visual Effects" check "Adjust for Best Performance" and click "OK" to save. Method 2: 1. Right-click a blank space on the desktop and open "Display Settings" 2. Click "Zoom" under Zoom and Layout 3. Then click "Text Size" under relevant settings
 How to change the font of Xiaomi 11_How to change the font of Xiaomi 11
Mar 25, 2024 pm 07:26 PM
How to change the font of Xiaomi 11_How to change the font of Xiaomi 11
Mar 25, 2024 pm 07:26 PM
1. Open the phone settings and click [Display]. 2. Click [Font]. 3. Select the font you like or click [More Fonts] to download the application.
 How to make vivo mobile phone font larger and where to set it
Feb 24, 2024 pm 06:16 PM
How to make vivo mobile phone font larger and where to set it
Feb 24, 2024 pm 06:16 PM
How to make the font size of vivo mobile phone larger? Where can I set it? In vivo mobile phone, you can make the font size larger, but most users don’t know how to set the font size of vivo mobile phone. Next, the editor brings you the settings of how to make the font size of vivo mobile phone larger. Method graphic tutorials, interested users come and take a look! Vivo mobile phone usage tutorial How to make the font size of vivo mobile phone larger Where to set it 1. First open the [Settings] function in the vivo mobile phone and click on it; 2. Then jump to the settings interface and find the [Display and Brightness] function; 3. Then Reach the page in the picture below and click the [Font Size and Thickness] service; 4. Finally, slide the horizontal line in the picture below to adjust the font size.
 How to fix Windows Hello unsupported camera issue
Jan 05, 2024 pm 05:38 PM
How to fix Windows Hello unsupported camera issue
Jan 05, 2024 pm 05:38 PM
When using Windows Shello, a supported camera cannot be found. The common reasons are that the camera used does not support face recognition and the camera driver is not installed correctly. So let's take a look at how to set it up. Windowshello cannot find a supported camera tutorial: Reason 1: The camera driver is not installed correctly 1. Generally speaking, the Win10 system can automatically install drivers for most cameras, as follows, there will be a notification after plugging in the camera; 2. At this time, we open the device Check the manager to see if the camera driver is installed. If not, you need to do it manually. WIN+X, then select Device Manager; 3. In the Device Manager window, expand the camera option, and the camera driver model will be displayed.
 An effective way to solve the Linux font blur problem
Jan 08, 2024 pm 11:25 PM
An effective way to solve the Linux font blur problem
Jan 08, 2024 pm 11:25 PM
Linux fonts are blurry. How can I make the fonts appear clearly? Let’s take a look at the detailed tutorial below. 1. Install font files 1. Download the file provided by the tool above, then drag the file to the desktop and unzip it. As shown in the picture below, because the file has been decompressed, it is in the form of a folder. 2. Then, without clicking anything on the desktop, right-click and select Open in Terminal. Enter the command in the terminal: sudodpkg-i and press space. Open the decompressed font file on the desktop, and drag the deb package into it one after the -i of this command. After pressing Enter, an error will appear, indicating that the dependency is not installed. If the dependency error is prompted, the command input is normal, otherwise it is an incorrect command. Newbies must pay attention to spaces and capitalization.
 How to change the font on an Apple phone How to change the font on an Apple phone
Mar 22, 2024 pm 08:11 PM
How to change the font on an Apple phone How to change the font on an Apple phone
Mar 22, 2024 pm 08:11 PM
1. Through settings, enter and modify the font style of the mobile phone system. 2. Open the phone settings and enter [Accessibility]. 3. Click [Subtitles and Closed Subtitles]. 4. Click [Style] to make modifications.
