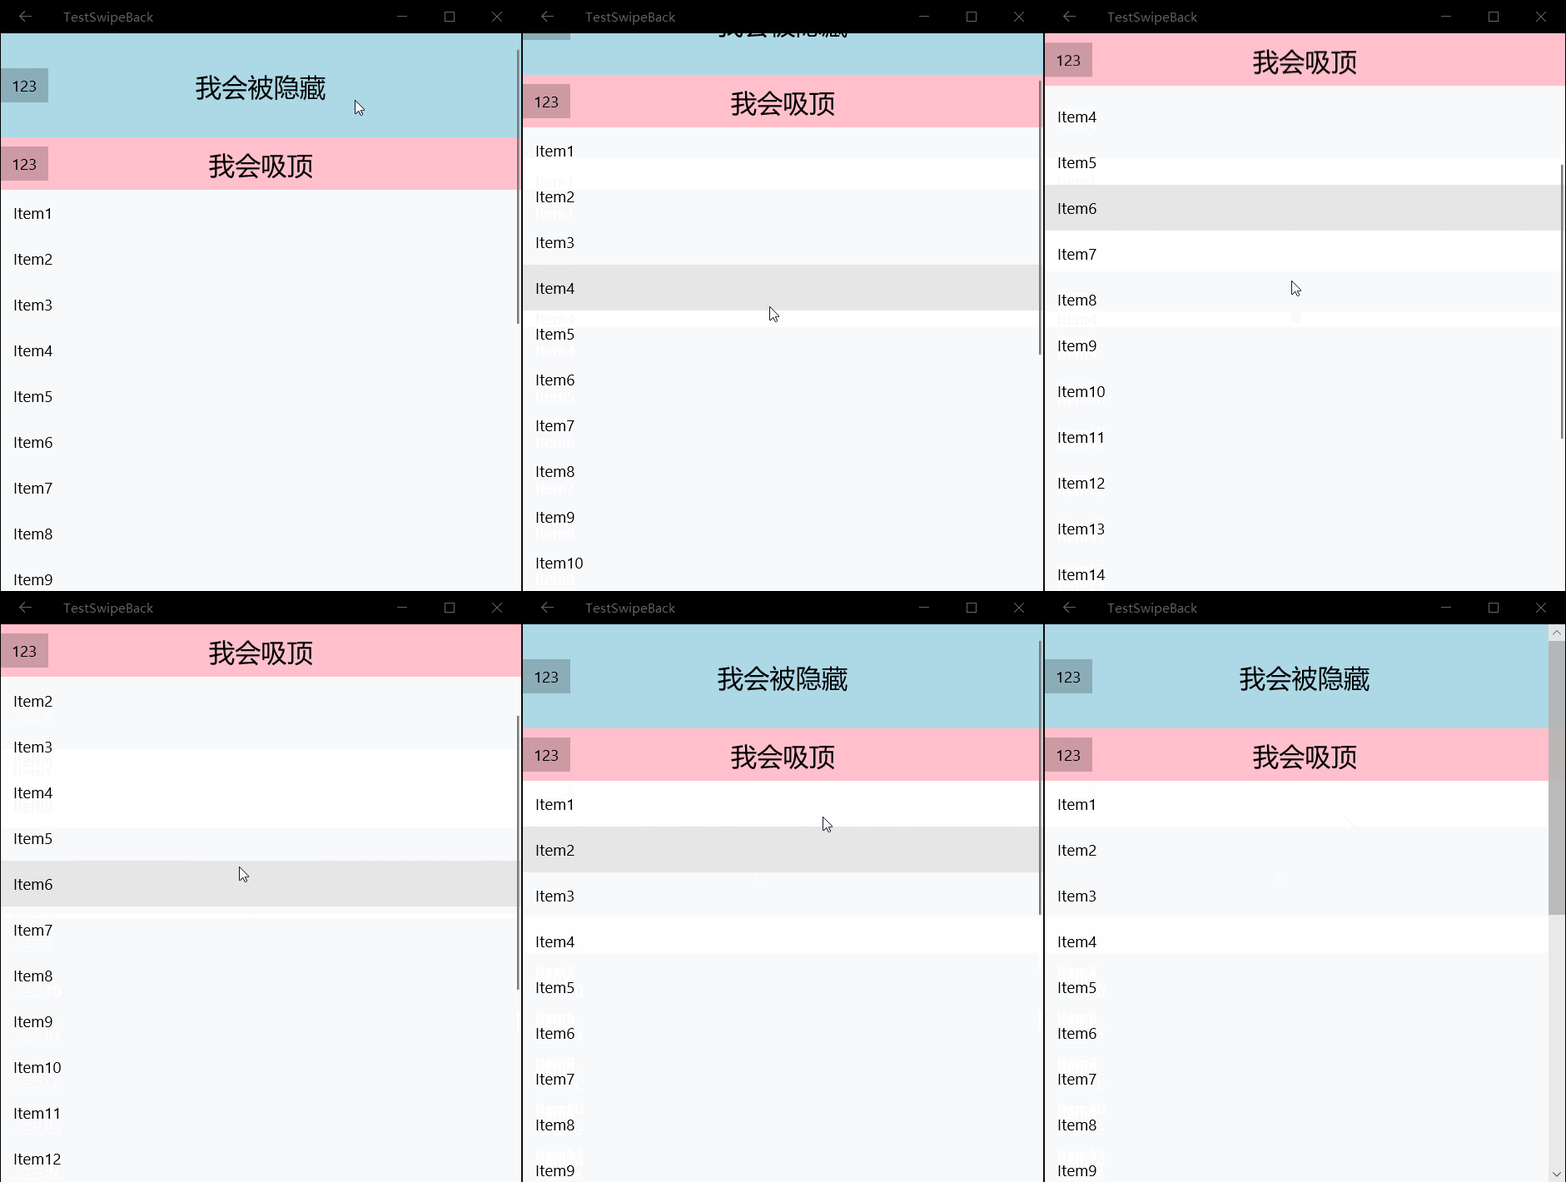
A few days ago I needed to implement ceiling ceiling in UWP, so I found some articles on the Internet:
Ceiling method--One of the ways to implement ceiling ceiling in toolbar in UWP
Page sliding navigation bar to top in UWP
I found that most of the previous implementation methods were to control the height of the Header of ListViewBase, or to create a ScrollViewer to place the ListViewBase inside. After testing, both methods have more or less problems. So I want to try using the Composition API to achieve the ceiling effect.
First of all, let’s understand what the Composition API is.
Windows.UI.Composition is a declarative retention-mode API that can be called from any Universal Windows Platform (UWP) application, allowing you to create composition objects, animations, and effects directly in your application. The API is a powerful addition to existing frameworks such as XAML, giving UWP application developers a familiar C# surface to add to their applications. These APIs can also be used to create DX-style framework-less applications.
XAML developers can use WinRT to "pull down" to a composition layer in C# to perform custom work on that composition layer, without having to drop all the way down to the graphics layer and use DirectX and C++. This technique can be used to animate existing elements using the composition API, or to augment the UI by creating "visual islands" of Windows.UI.Composition content within the XAML element tree.
Just looking at these few sentences, the introduction given by Microsoft is still unclear. Let’s look at the code.
There is a kind of animation in CompositionAPI called expression animation. The general effect is to make the properties of a Visual or PropertySet change with the changes of another property of itself, or the properties of another Visual or PropertySet.
For simple situations without Pivot, there is such a basic idea:
Get the ScrollViewer of ListViewBase;
Get the ScrollViewer's ManipulationPropertySet and the ListViewHeader's Visual;
Let the ManipulationPropertySet and Visual have a relationship.
Let’s create a simple page first.
<Pagex:Class="TestSwipeBack.ScrollTest"xmlns="http://schemas.microsoft.com/winfx/2006/xaml/presentation"xmlns:x="http://schemas.microsoft.com/winfx/2006/xaml"xmlns:local="using:TestSwipeBack"xmlns:d="http://schemas.microsoft.com/expression/blend/2008"xmlns:mc="http://schemas.openxmlformats.org/markup-compatibility/2006"mc:Ignorable="d" Loaded="Page_Loaded"><Grid Background="{ThemeResource ApplicationPageBackgroundThemeBrush}"><ListView x:Name="_listview" ItemsSource="{x:Bind ItemSource,Mode=OneWay}"><ListView.Header><Grid x:Name="_header"><Grid.RowDefinitions><RowDefinition Height="100" /><RowDefinition Height="50" /></Grid.RowDefinitions><Grid Background="LightBlue"><Button>123</Button><TextBlock FontSize="25" HorizontalAlignment="Center" VerticalAlignment="Center">我会被隐藏</TextBlock></Grid><Grid Background="Pink" Grid.Row="1"><Button>123</Button><TextBlock FontSize="25" HorizontalAlignment="Center" VerticalAlignment="Center">我会吸顶</TextBlock></Grid></Grid></ListView.Header><ListView.ItemTemplate><DataTemplate><TextBlock Text="{Binding }" /></DataTemplate></ListView.ItemTemplate></ListView></Grid></Page>Originally the Header in ListViewBase was below the ItemsPanelRoot. Use Canvans.SetZIndex to set the ItemsPanelRoot below.
Canvas.SetZIndex(_listview.ItemsPanelRoot, -1);
Then get the ScrollViewer in the ListView in the background.
_scrollviewer = FindFirstChild<ScrollViewer> T FindFirstChild<T>(FrameworkElement element) childrenCount = children = ( i = ; i < childrenCount; i++ child = VisualTreeHelper.GetChild(element, i) = (child ( i = ; i < childrenCount; i++ (children[i] != subChild = FindFirstChild<T> (subChild !=
Get ListViewHeader's Visual and ScrollViewer's ManipulationPropertySet.
var _headerVisual = ElementCompositionPreview.GetElementVisual(_header);var _manipulationPropertySet = ElementCompositionPreview.GetScrollViewerManipulationPropertySet(_scrollviewer);
Create an expression animation and then run it.
var _compositor = Window.Current.Compositor;var _headerAnimation = _compositor.CreateExpressionAnimation("_manipulationPropertySet.Translation.Y > -100f ? 0: -100f -_manipulationPropertySet.Translation.Y");//_manipulationPropertySet.Translation.Y是ScrollViewer滚动的数值,手指向上移动的时候,也就是可视部分向下移动的时候,Translation.Y是负数。_headerAnimation.SetReferenceParameter("_manipulationPropertySet", _manipulationPropertySet);

_headerVisual.StartAnimation("Offset.Y", _headerAnimation);
Now slide the demo to see if the Header stops after scrolling 100 pixels?

Note: After a Visual or propertySet is attached with animation (i.e. StartAnimation or StartAnimationGroup), the corresponding property can only be obtained as 0 when taking out (propertySet.TryGetScalar), but Assigning or inserting a value will take effect.
The above is the detailed content of Example tutorial of using Composition API to implement ceiling in UWP. For more information, please follow other related articles on the PHP Chinese website!
 Get window handle method
 The difference between rest api and api
 How to implement line break in alert
 How to set up domain name redirection
 How long does it take for Douyin recharge to arrive?
 The difference between master and host
 git undo submitted commit
 How to turn off ics network sharing
 vue references js files


