We talked about Identity Service in the previous article. Because it is developed based on IdentityServer4, there are not many knowledge points. Today we will take a look at Catalog Service. In the future explanations, we will focus on different and key points. I hope everyone understands. .
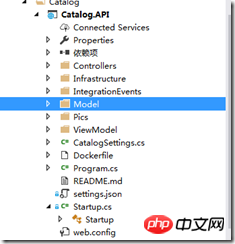
Let’s first look at its directory structure, a very standard webapi directory:

First look at Program, followed by IdentityService is similar, with the addition of UseWebRoot ("Pics"). The pics directory is set to webroot, and everything else is the same.
In the construction method of Startup, we also saw the use of the secret manager tool, but there is one more parameter. Here we see the Assembly type. In fact, the secret only needs the userSecretsId.
In ConfigureServices, we see the following code:
services.AddMvc(options =>
{
	options.Filters.Add(typeof(HttpGlobalExceptionFilter));
}).AddControllersAsServices();Added a filter. This HTtpGlobalExceptionFilter can be found in the project. The general meaning is that when an error of CatalogDomainException type is thrown, Returns a specific error code.
AddControllersAsServices This extension method registers all the Controllers in the project into Services. Let’s take a look at the source code:
        public static IMvcCoreBuilder AddControllersAsServices(this IMvcCoreBuilder builder)
        {
            var feature = new ControllerFeature();
            builder.PartManager.PopulateFeature(feature);foreach (var controller in feature.Controllers.Select(c => c.AsType()))
            {
                builder.Services.TryAddTransient(controller, controller);
            }

            builder.Services.Replace(ServiceDescriptor.Transient<icontrolleractivator>());return builder;
}</icontrolleractivator>The foreach section in the middle is, so that we can use dependency injection in the project to You can easily access each controller.
Going down:
            services.AddDbContext<catalogcontext>(options =>
            {
                options.UseSqlServer(Configuration["ConnectionString"],
                                     sqlServerOptionsAction: sqlOptions =>
                                     {
                                         sqlOptions.MigrationsAssembly(typeof(Startup).GetTypeInfo().Assembly.GetName().Name);                                         //Configuring Connection Resiliency:   sqlOptions.EnableRetryOnFailure(maxRetryCount: 5, maxRetryDelay: TimeSpan.FromSeconds(30), errorNumbersToAdd: null);
});// Changing default behavior when client evaluation occurs to throw. // Default in EF Core would be to log a warning when client evaluation is performed.options.ConfigureWarnings(warnings => warnings.Throw(RelationalEventId.QueryClientEvaluationWarning));//Check Client vs. Server evaluation: });</catalogcontext>When configuring DBContext, the Connection Resiliency (bounce connection) method is used here, and you can see when using migration , it uses MigrationsAssembly(AssemblyName). This method is somewhat similar to the FluentNhibernate I talked about before. EnableRetryOnFailure sets the failed attempt mechanism of this Action. If a Failure is encountered during Migration, it will automatically retry. This method avoids The impact of occasional connection failures caused by separation of app and database. Why is there this mechanism? Because when our database is in the cloud, such as Azure SQL, network connection problems will inevitably occur. Even if we put the app and database in a data center, I believe there will occasionally be this problem. We can now configure , so that if it encounters a failure, it will restart the operation, which avoids occasional problems caused by the network to a certain extent. You can also set some policies to enable retries when running commands. By default, EF only records warnings in client evaluation. We can make it throw this warning through ConfigureWarnings, and you can also configure it to ignore it.
Next we see the following code:
services.Configure<catalogsettings>(Configuration);</catalogsettings>
We can find similar statements in each eShop project. It will register some project-related Settings into services, so that It becomes an environment variable and we can configure it through setting.json. In addition to configuration through setting.json, we can also perform flexible configuration through Docker run –e.
Here our CatalogSetting contains an ExternalCatalogBaseUrl attribute. We can enter the following command when docker run:
docke run -e "ExternalCatalogBaseUrl=http://localhost:5011/" ....
This way we can flexibly configure it through the docker command, which is very convenient. You can also use -e to assign values to variables in our setting.json, such as ConnectionString. You can click to learn more about it.
            // Add framework services.services.AddSwaggerGen();
            services.ConfigureSwaggerGen(options =>
            {
                options.DescribeAllEnumsAsStrings();
                options.SingleApiVersion(new Swashbuckle.Swagger.Model.Info()
                {
                    Title = "eShopOnContainers - Catalog HTTP API",
                    Version = "v1",
                    Description = "The Catalog Microservice HTTP API. This is a Data-Driven/CRUD microservice sample",
                    TermsOfService = "Terms Of Service"
                });
            });

            services.AddCors(options =>
            {
                options.AddPolicy("CorsPolicy",
                    builder => builder.AllowAnyOrigin()
                    .AllowAnyMethod()
                    .AllowAnyHeader()
                    .AllowCredentials());
});The above two pieces of code are configured with SwaggerGen and Cors (cross-domain) strategies respectively. SwaggenGen is a very practical framework that can automatically convert our api to web mode and present it in front of us. Very useful for debugging. The configuration of Cors is not used well here. It allows all requests. It is recommended to follow the actual needs, otherwise there is no meaning in cross-domain settings.
Next we saw a series of add service operations, all related to EventBus. After looking at it for a while, we found that only the log action was done so far. Let’s take a look at the code:
if (raiseProductPriceChangedEvent) // Save and publish integration event if price has changed{//Create Integration Event to be published through the Event Busvar priceChangedEvent = new ProductPriceChangedIntegrationEvent(catalogItem.Id, productToUpdate.Price, oldPrice);// Achieving atomicity between original Catalog database operation and the IntegrationEventLog thanks to a local transactionawait _catalogIntegrationEventService.SaveEventAndCatalogContextChangesAsync(priceChangedEvent);// Publish through the Event Bus and mark the saved event as publishedawait _catalogIntegrationEventService.PublishThroughEventBusAsync(priceChangedEvent);
}The above code means that when the price changes, we call EventService to save and record the operation. The PublishThroughEventBusAsync method changes the State of this record to published. At present, I don't know why this method is used, and I don't know why it is named EventBus. However, I have raised this question in the project's issue, and I hope the developers of the project can give me an answer. I have checked Basket.Api. There will be subscription behavior in this project. We will take a closer look at the details in the next chapter.
ok, let’s look at the Configure method again. We can study the following piece of code:
var context = (CatalogContext)app
            .ApplicationServices.GetService(typeof(CatalogContext));

WaitForSqlAvailability(context, loggerFactory);We see that here it calls the previously registered CatalogContext, and it is not instantiated through new. Instead, the previous registration is obtained through GetService, so that other instances that the context depends on are also brought in, which is very convenient and easy to use.
WaitForSqlAvailability method is to try to make the database available, because it requires data migration later.
CatalogService contains 2 Controllers, one is PicController and the other is CatalogController. PicController only obtains pictures based on ID. CatalogController shows how to use webapi to do CURD.
如果你要运行Catalog.Api,你必须安装MSSQL和RabbitMQ,这次我把我的系统换成了Win10 Pro,并在电脑上使用Docker安装了MSSQL-Server-Linux和RabbitMQ。安装这2个非常简单,仅仅需要输入几条命令即可:
docker run --name mssql -e 'ACCEPT_EULA=Y' -e 'SA_PASSWORD=Pass@word' -p 5433:1433 -d microsoft/mssql-server-linux

docker run -d --hostname my-rabbit --name rabbitmq -p 8080:15672 -p 5672:5672 rabbitmq:3-management
ok,我们使用docker创建了mssql和rabbitmq,这里注意一下,我把mssql的端口映射到了本机的5433上,还有rabbitmq的管理页面,我映射到了本机的8080端口,你可以通过http://localhost:8080 进行访问。
上一篇我们说过我们可以通过iisexpress/Kestrel或者docker的形式运行因为牵涉到配置,所以这两种方式的运行有些不同。
一、iisExpress或Kestrel方式下,因为刚刚我们把mssql和rabbitmq的端口都映射到了本机,所以我们只需要在setting.json中把数据库连接和rabbitmq的地址指向本机即可,如下:
{  "ConnectionString": "Server=tcp:127.0.0.1,5433;Initial Catalog=Microsoft.eShopOnContainers.Services.CatalogDb;User Id=sa;Password=Pass@word",  "ExternalCatalogBaseUrl": "http://localhost:5101",  "EventBusConnection": "localhost",  "Logging": {"IncludeScopes": false,"LogLevel": {      "Default": "Debug",      "System": "Information",      "Microsoft": "Information"}
  }
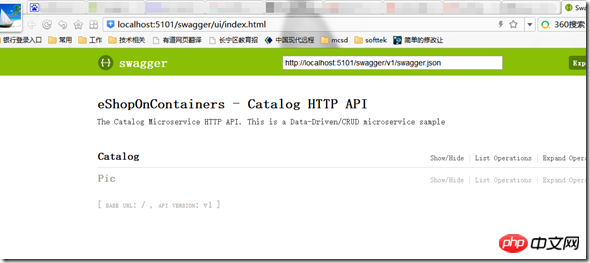
}ok,Ctrl+F5,运行一下看看:

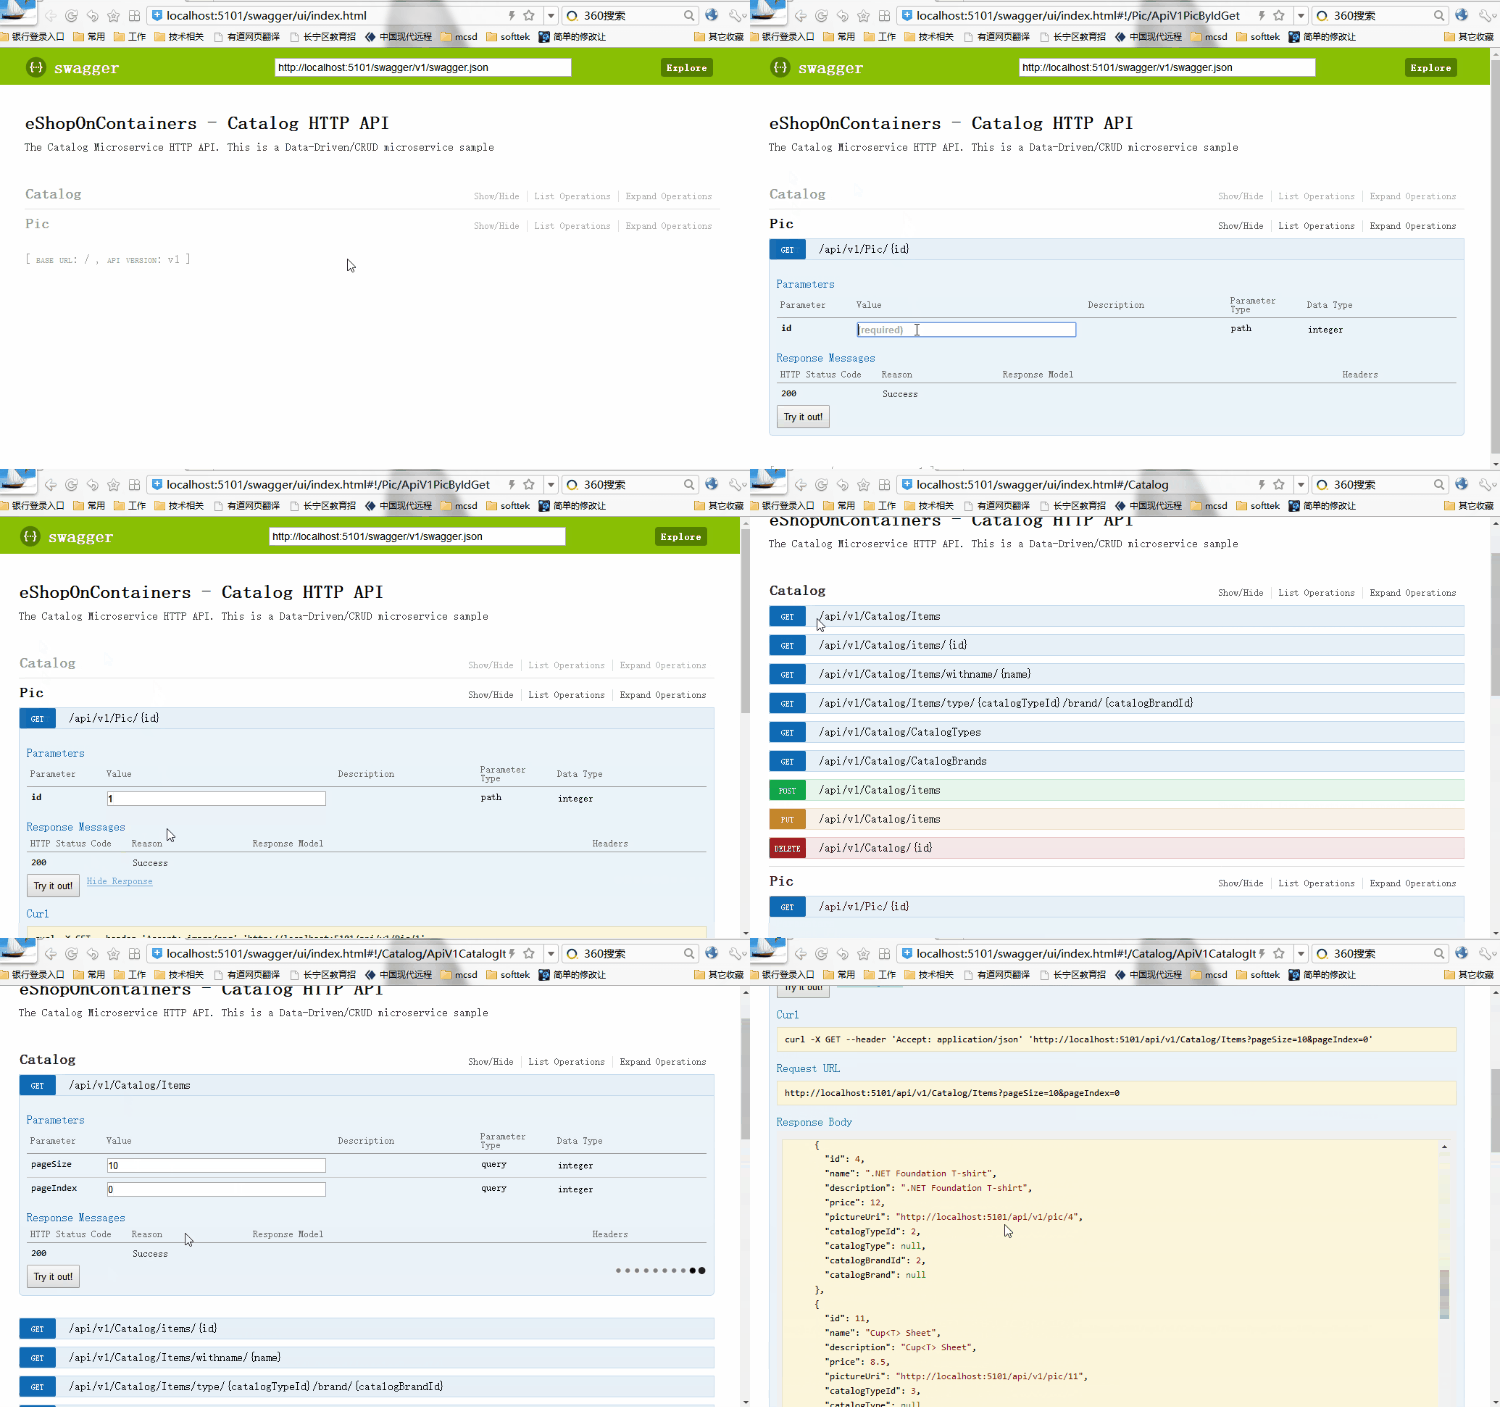
当看到上面这个页面,说明你的运行正常了,你还得测试下api是否运行正常,比如Pic,比如Items。
二、docker中运行,参照上一篇的方式,先publish再build Catalog Service - Analysis of Microsoft microservice architecture example code, 不过这里要注意一点,因为你之前的ConnectionString和EventBusConnection都是指向本机(127.0.0.1)的,所以这里必须改一下,改成主机的ip地址或者是对应容器的ip也可以,如果您不想更改的话,也可以通过docker -e进行设置,比如:
docker run -p 8899:80 --name catalog -e "EventBusConnection=172.17.0.2" -d catalog:01
我这里的172.17.0.2是我rabbitmq容器的ip地址,你可以通过docker inspect containerId 进行查看容器的ip。
如果一切配置都正确的话,你就可以通过浏览器http://localhost:8899 进行浏览了。
当然,除了正常浏览外,你还需测试下api是否正常。

在这个项目中有一些疑惑,希望大家能够给我答案。
Connection Resiliency,我看了很久,字面意思是弹性连接,但我觉得用弹性好像不太适合,一般来讲我们说的弹性都是指架构或者系统的伸缩性,我一开始也是从这个角度去了解,但看了很多文章,觉得它只是让我们在启动的时候,设置一些重试策略,在后面调用中可使用此策略,策略会根据你设置的重试次数、延迟时间等去自动重试,避免因为偶尔的错误造成的影响,所以觉得用弹回比较恰当。
EventBus,我感觉很奇怪,为什么一定要取这个名字呢?在Android中,很明确的,它是进行订阅发布,消息传递,可以解耦发布者和订阅者,但在Catalog.Api里,变成了记录操作,没有看到解耦,也没有看到订阅。在我的理解中,应该在Startup进行订阅操作,发布者CatalogController在进行update操作的时候,订阅者进行add log动作,但在这个实例中,我看到的是同步进行了这些操作,所以很不解。
Mssql-server-linux,当你用Docker安装了以后,你却不能使用visual studio 2017的sql server data tools进行查询(只能进行连接),为了查看效果,还需要安装Microsoft Sql Server Management Studio(必须17版本以后)进行查看数据。
这次的文章来的比较晚,一方面有点忙,另一方面就是上面提到的困惑,面对困惑我试着去解答,但有时候真的无法解答,所以提出来集思广益。
后面可能会比较慢,需要学习的东西真多,一边写一边学习成为这次系列的乐趣,现在每天坚持6公里快走,夜走能够是我保持头脑清晰,思考项目中的疑问,现在发觉生活越发有趣。
或许有很多人觉得只看了Startup就够了吗?其实真不够,我目前先把框架的源码过一遍,后面会分篇讲述,比如Connection Resiliency。
The above is the detailed content of Catalog Service - Analysis of Microsoft microservice architecture example code. For more information, please follow other related articles on the PHP Chinese website!


