
Windows development environment setup:
1. Install the latest VSCode;
2. Install the latest .NET CORE;
3. Get C# in VS Code extension ;
1. Create a C# project
1. Open VS Code and open the predefined folder from the command line, such as: E:\NetCore\demo;
Use shortcut keys to bring up the command line window, Ctrl + `; In fact, there are two ways here, and it is the same directly through the windows command line. The premise is that .NET CORE SDK is installed.
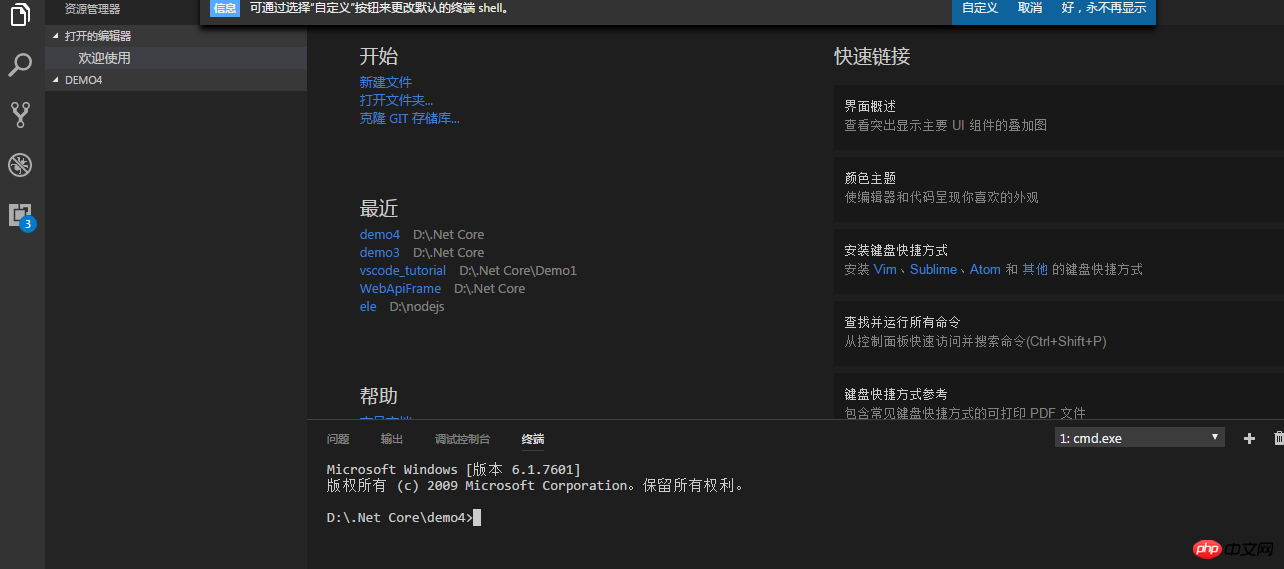
2. Enter dotnet new console, and a project with the same name as the folder will be generated, such as demo.csproj;

3. Enter dotnet restore to compile the project;

4. Run the project, dotnet run.

2. Command line usage can be viewed through dotnet help.
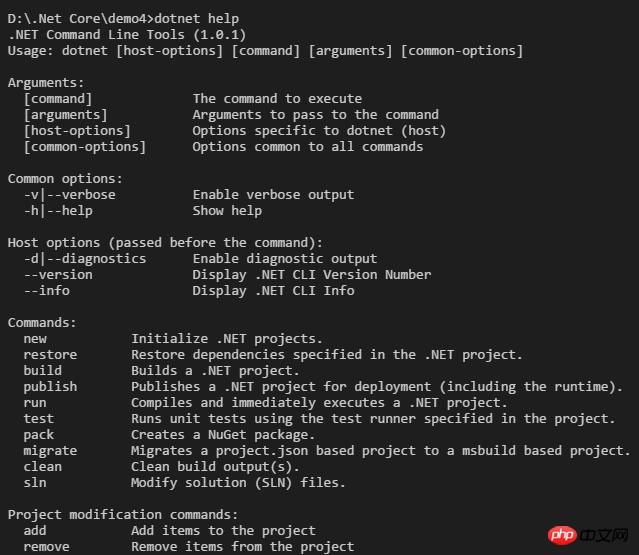
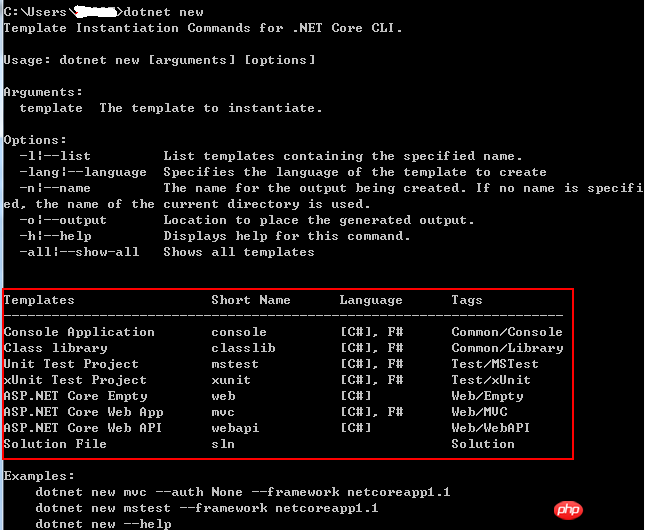
There is another more important command. Use dotnet new directly to view help and create various projects such as: Console Programs, Web projects, Web MVC, class libraries, test projects and solutions.
This command should only appear after dotnet core 1.1. Previously, the project was created in json format, and then it returned to the csproj solution mode.
3. Give it a try and create a Web Mvc program
1. Open VS Code and locate what you want Folder, such as: E:\MvcDemo1
2. Use the shortcut key Ctrl + `, then the terminal cmd.exe window will pop up in the lower right corner
3. Use dotnet new mvc -n MvcDemo

4. Now return to the left menu window, view the created project, and click on any file
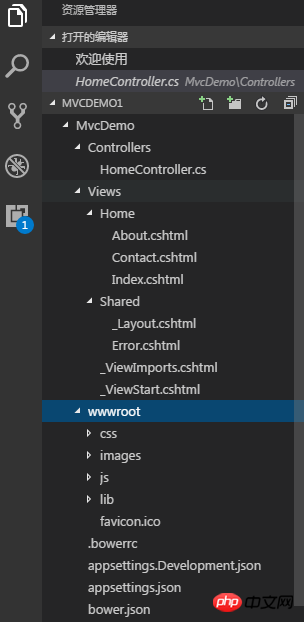
After clicking, wait for a while. In the output window, you will see that the OmniSharp package is being downloaded. Wait for the download to complete...

It seems that the download speed in China is relatively slow. If you encounter a failure to download the package, you can reopen it and it will download again.
After downloading OmniSharp, .NET Core Debugger will be downloaded...

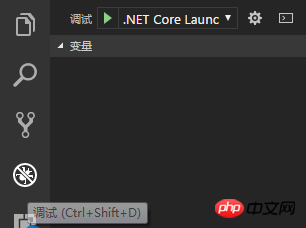
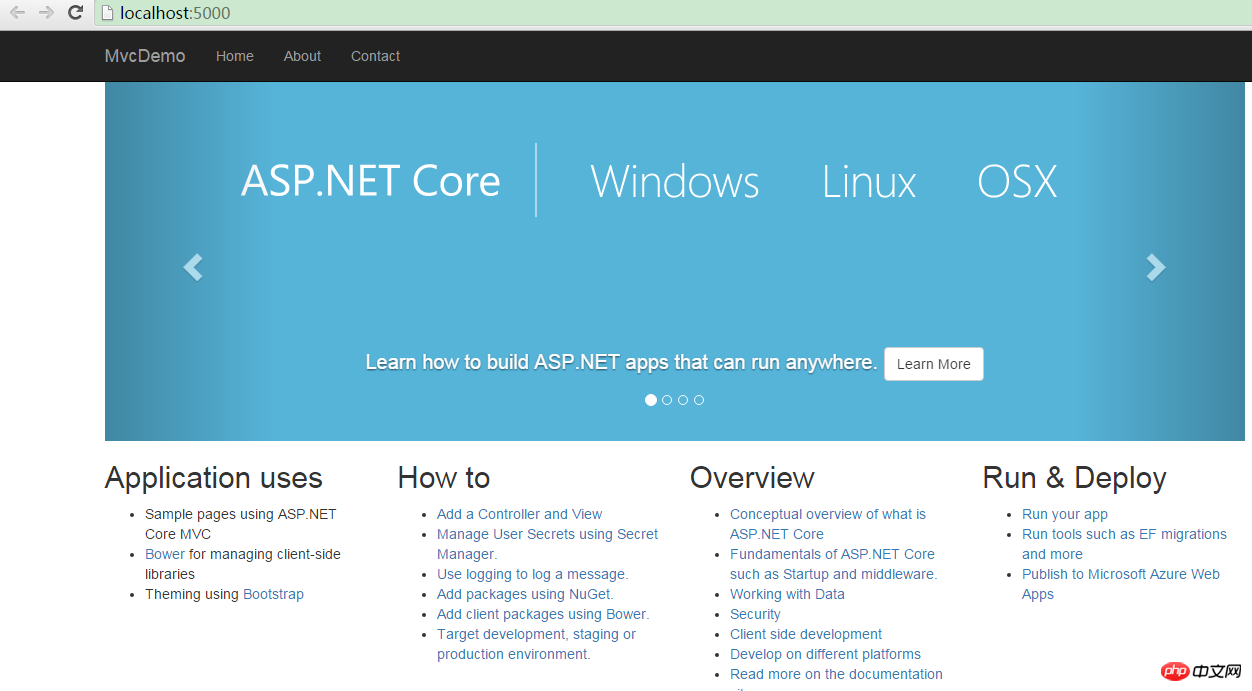
5. Run the MVC program, click the debug icon in the left menu bar, and select. NET Core Launch (Web), and then click Start Debugging
Running results
6 . Publish .NET Core applications, You can view Microsoft official documentation
Use dotnet publish to publish the program, you should first perform dotnet restore before publishing to restore and dotnet The steps to build the project
are as follows:
6.1 Generate dependencies, dotnet restore
6.2 Generate the project, dotnet build
6.3 Publish the project, dotnet publish - f netcoreapp1.1 -c Release
dotnet publish [
Specify the target framework -f|--framework
Specify Runtime RID, -r|--runtime

##To be continued, please correct me if there are any errors, thank you.
The above is the detailed content of Example tutorial on writing .NET Core projects using VSCode. For more information, please follow other related articles on the PHP Chinese website!


