Detailed introduction to webpack practical configuration
Previous words
The above introduces the introduction to webpack. This article will introduce the practical configuration of webpack in detail
Version number
Packaged with entry.js Taking bundle.js as an example, the export filename can be set to [id], [name], [hash], [chunkhash] and other replacement forms, as shown below
var webpack = require('webpack');
module.exports = {
  entry: './entry.js', //入口文件  output: {
    path: __dirname,//出口路径filename: '[id]-[name]-[hash].js'//出口名称  }
}Then export The file is 0-main-0c1dce21f6c5db455fb4.js

If index.html wants to reference the packaged js file, it is not easy to solve because the file name is uncertain. At this time, you need to use the html-webpack-plugin plug-in. This plug-in is not a built-in plug-in, so you need to install it
npm install html-webpack-plugin
HtmlWebpackPlugin simplifies the creation of HTML files to provide services for webpack packages. This is especially useful for webpack bundles that contain a hash in the file name that changes with each mutation
var webpack = require('webpack');var HtmlWebpackPlugin = require('html-webpack-plugin');
module.exports = {
  entry: './entry.js', //入口文件  output: {
    path: __dirname,//出口路径filename: '[id]-[name]-[hash].js'//出口名称  },
  plugins: [new HtmlWebpackPlugin({
      title: 'match',//生成的html文件的标题为'match'  filename: 'index.html'//生成的html文件名称为'index.html'    })
  ]
}With the above configuration, if index.html is in the current path, If it does not exist, generate it; if it exists, replace

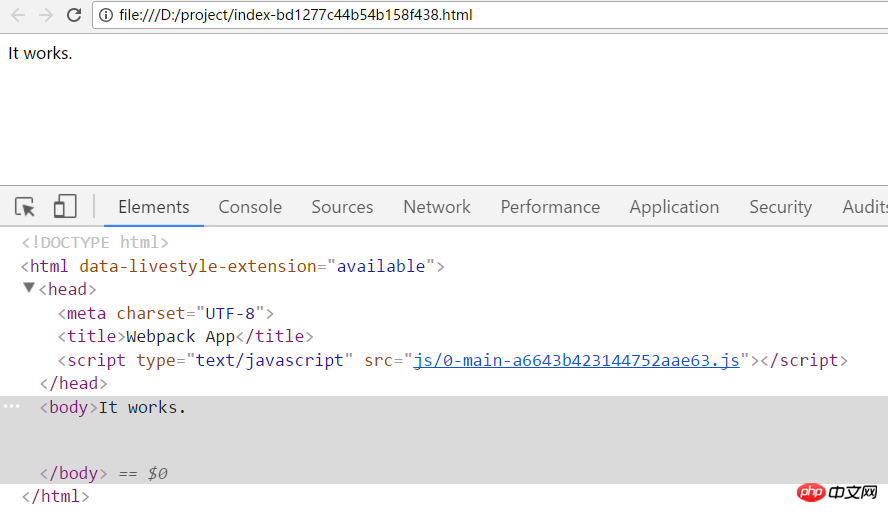
[Note] If htmlwebpackplugin is not configured, the parameter is empty, plugins: [new HtmlWebpackPlugin()]. By default, the name of the generated html file is 'index.html' and the title is 'Webpack APP'

var webpack = require('webpack');var HtmlWebpackPlugin = require('html-webpack-plugin');
module.exports = {
  entry: './entry.js', //入口文件  output: {
    path: __dirname,//出口路径filename: 'js/[id]-[name]-[hash].js'//出口名称  },
  plugins: [new HtmlWebpackPlugin({
      inject:'head',//将script标签插入到head标签中  filename: 'index-[hash].html',//生成的html文件名称为'index.html'    })
  ]
}
var webpack = require('webpack');var HtmlWebpackPlugin = require('html-webpack-plugin');
module.exports = {
  entry: './entry.js', //入口文件  output: {
    path: __dirname,//出口路径filename: 'js/[id]-[name]-[hash].js'//出口名称  },
  plugins: [new HtmlWebpackPlugin({
      favicon:'./icon.ico'})
  ]
}
var webpack = require('webpack');var HtmlWebpackPlugin = require('html-webpack-plugin');
module.exports = {
  entry: './entry.js', //入口文件  output: {
    path: __dirname,//出口路径filename: 'js/[id]-[name]-[hash].js'//出口名称  },
  plugins: [new HtmlWebpackPlugin({
      minify:{
          removeComments: true,//删除注释  collapseWhitespace:true//删除空格      }
    })
  ]
}<!DOCTYPE html><html><head><meta charset="UTF-8"><title>Webpack App</title></head><body><script type="text/javascript" src="js/0-main-8128c0c26a4449da7a05.js?1.1.11"></script></body></html>
<!DOCTYPE html>
<html lang="en">
<head>
    <meta charset="UTF-8">
    <title>template</title>
</head>
<body>
<script src="test.js?1.1.11"></script>
<div>test</div>
</body>
</html>
var webpack = require('webpack');var HtmlWebpackPlugin = require('html-webpack-plugin');
module.exports = {
  entry: './entry.js', //入口文件  output: {
    path: __dirname,//出口路径filename: 'js/[id]-[name]-[hash].js'//出口名称  },
  plugins: [new HtmlWebpackPlugin({  filename: 'index-[hash].html',//生成的html文件名称为'index.html'  template:'template/template.html'//模板文件为'template.html'    })
  ]
}
var webpack = require('webpack');var HtmlWebpackPlugin = require('html-webpack-plugin');
module.exports = {
  entry: './entry.js', //入口文件  output: {
    path: __dirname,//出口路径filename: 'js/[id]-[name]-[hash].js'//出口名称  },
  plugins: [new HtmlWebpackPlugin({
      title:'test',
      filename: 'index-[hash].html',//生成的html文件名称为'index.html'  template:'template/template.html'//模板文件为'template.html'    })
  ]
}
//webpack.config.jsvar webpack = require('webpack');var HtmlWebpackPlugin = require('html-webpack-plugin');
module.exports = {
  entry: './entry.js', //入口文件  output: {
    path: __dirname,//出口路径filename: 'js/[id]-[name]-[hash].js'//出口名称  },
  plugins: [new HtmlWebpackPlugin({
      title:'test',
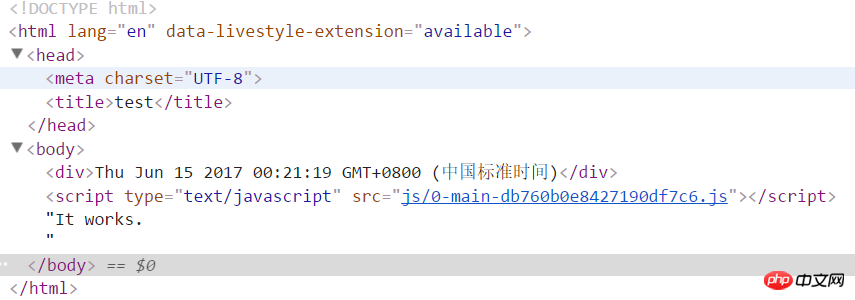
      template:'template/template.html',//模板文件为'template.html'  dateData: new Date()
    })
  ]
}//template.html<!DOCTYPE html>
<html lang="en">
<head>
    <meta charset="UTF-8">
    <title><%= htmlWebpackPlugin.options.title  %></title>
</head>
<body>
<div><%=htmlWebpackPlugin.options.dateData %></div>
</body>
</html>
//webpack.config.jsvar webpack = require('webpack');var HtmlWebpackPlugin = require('html-webpack-plugin');
module.exports = {
  entry: './entry.js', //入口文件  output: {
    path: __dirname,//出口路径filename: 'js/[id]-[name]-[hash].js'//出口名称  },
  plugins: [new HtmlWebpackPlugin({
      template:'template/template.html'})
  ]
}//template.html<!DOCTYPE html>
<html lang="en">
<head>
    <meta charset="UTF-8">
    <title>Document</title>
</head>
<body>
<div>
    <% include  template/header.html %>
</div>
<ul>
    <% var arr = [1,2,3,4,5] %>
    <% for(var i = 0; i < arr.length; i++){ %>
        <li><%=arr[i] %></li>
    <% } %>
</ul>
<div>
    <% include  template/footer.html %>
</div>
</body>
</html>//header.html<div>我是头部</div>//footer.html<div>我是尾部</div>
npm install ejs-compiled-loader
var webpack = require('webpack');var HtmlWebpackPlugin = require('html-webpack-plugin');
module.exports = {
  entry: './entry.js', //入口文件  output: {
    path: __dirname,//出口路径filename: 'js/[id]-[name]-[hash].js'//出口名称  },
  plugins: [new HtmlWebpackPlugin({
      template:'ejs-compiled-loader!template/template.html'})
  ]
}
多页面
对于多页面来说,一般地,有多个入口文件。不同的html页面输出对应不同的入口文件。 插件plugins()是一个数组,每new一个HtmlWebpackPlugin(),就可以输出一个html页面。这里有两个重要的属性:chunks和excludeChunks,chunks表示所包含的入口文件,excludeChunks表示要排除的入口文件
//webpack.config.jsvar webpack = require('webpack');var HtmlWebpackPlugin = require('html-webpack-plugin');
module.exports = {
  entry: {
      a:'./src/js/a.js',
      b:'./src/js/b.js',
      c:'./src/js/c.js'
  },
  output: {
    path: __dirname,//出口路径filename: 'js/[id]-[name]-[hash].js'//出口名称  },
  plugins: [new HtmlWebpackPlugin({
          filename:'a.html',
          template:'src/template/template.html',
          title:'this is a',
          chunks:['a']
    }),new HtmlWebpackPlugin({
          filename:'b.html',
          template:'src/template/template.html',
          title:'this is b',
          chunks:['b']
    }),new HtmlWebpackPlugin({
          filename:'c.html',
          template:'src/template/template.html',
          title:'this is c',
          excludeChunks:['a','b']
    }),
  ]
}结果如下
//a.html<!DOCTYPE html><html lang="en"><head><meta charset="UTF-8"><title>this is a</title></head><body><div></div><script type="text/javascript" src="js/2-a-9828ea84bd8c12c19b5f.js?1.1.11"></script></body></html>//b.html<!DOCTYPE html><html lang="en"><head><meta charset="UTF-8"><title>this is b</title></head><body><div></div><script type="text/javascript" src="js/1-b-9828ea84bd8c12c19b5f.js?1.1.11"></script></body></html>//c.html<!DOCTYPE html><html lang="en"><head><meta charset="UTF-8"><title>this is c</title></head><body><div></div><script type="text/javascript" src="js/0-c-9828ea84bd8c12c19b5f.js?1.1.11"></script></body></html>
内联
在前面的例子中,都是以链接的形式引入入口文件的。有时,为了追求性能,会将其处理为内联的形式。这里就需要安装一个扩展插件html-webpack-inline-source-plugin,专门用来处理入口文件内联的
$ npm install --save-dev html-webpack-inline-source-plugin
该插件的使用很简单,使用require()语句引入后,在插件plugins()新建一个html-webpack-inline-source-plugin对象,然后在html-webpack-plugin对象中添加inlineSource属性即可
inlineSource: '.(js|css)$' // embed all javascript and css inline
//webpack.config.jsvar webpack = require('webpack');var HtmlWebpackPlugin = require('html-webpack-plugin');var HtmlWebpackInlineSourcePlugin = require('html-webpack-inline-source-plugin');

module.exports = {
  entry: './entry.js',
  output:{
    path: __dirname,//出口路径filename: 'js/[id]-[name]-[hash].js'//出口名称  },
  plugins: [new HtmlWebpackPlugin({
        inlineSource: '.(js|css)$'}),new HtmlWebpackInlineSourcePlugin()
  ]
}结果如下
<!DOCTYPE html>
<html>
  <head>
    <meta charset="UTF-8">
    <title>Webpack App</title>
  </head>
  <body>
  <script type="text/javascript">/******/ (function(modules) { // webpackBootstrap/******/     // The module cache/******/     var installedModules = {};/******//******/     // The require function/******/     function __webpack_require__(moduleId) {/******//******/         // Check if module is in cache/******/         if(installedModules[moduleId]) {/******/             return installedModules[moduleId].exports;/******/         }/******/         // Create a new module (and put it into the cache)/******/         var module = installedModules[moduleId] = {/******/             i: moduleId,/******/             l: false,/******/             exports: {}/******/         };/******//******/         // Execute the module function/******/         modules[moduleId].call(module.exports, module, module.exports, __webpack_require__);/******//******/         // Flag the module as loaded/******/         module.l = true;/******//******/         // Return the exports of the module/******/         return module.exports;/******/     }/******//******//******/     // expose the modules object (__webpack_modules__)/******/     __webpack_require__.m = modules;/******//******/     // expose the module cache/******/     __webpack_require__.c = installedModules;/******//******/     // identity function for calling harmony imports with the correct context/******/     __webpack_require__.i = function(value) { return value; };/******//******/     // define getter function for harmony exports/******/     __webpack_require__.d = function(exports, name, getter) {/******/         if(!__webpack_require__.o(exports, name)) {/******/             Object.defineProperty(exports, name, {/******/                 configurable: false,/******/                 enumerable: true,/******/                 get: getter/******/             });/******/         }/******/     };/******//******/     // getDefaultExport function for compatibility with non-harmony modules/******/     __webpack_require__.n = function(module) {/******/         var getter = module && module.__esModule ?/******/             function getDefault() { return module['default']; } :/******/             function getModuleExports() { return module; };/******/         __webpack_require__.d(getter, 'a', getter);/******/         return getter;/******/     };/******//******/     // Object.prototype.hasOwnProperty.call/******/     __webpack_require__.o = function(object, property) { return Object.prototype.hasOwnProperty.call(object, property); };/******//******/     // __webpack_public_path__/******/     __webpack_require__.p = "";/******//******/     // Load entry module and return exports/******/     return __webpack_require__(__webpack_require__.s = 0);/******/ })/************************************************************************//******/ ([/* 0 *//***/ (function(module, exports) {

document.write('It works.')/***/ })/******/ ]);</script></body>
</html>
babel
下面使用babel来进行es最新标准的代码向es5代码的转换,首先需要安装babel核心程序,及babel-loader
npm install babel-loader babel-core
在使用babel-loader进行代码转换之前,要先了解到ecmascript标准变化很快,且浏览器支持情况不同。所以,出现了'es2015'、'es2016'、'es2017'、'latest'、'env(new)'等多个不同的标准。这时,要需要来选择从哪个标准进行转换,需要安装插件babel-preset-env
npm install babel-preset-env
在 webpack 配置对象中,需要添加 babel-loader 到 module 的 loaders 列表中
//webpack.config.jsvar webpack = require('webpack');var HtmlWebpackPlugin = require('html-webpack-plugin');

module.exports = {
  entry: './src/app.js',
  output:{
    path: __dirname,//出口路径filename: 'js/[name].bundle.js'//出口名称  },
  module:{
      loaders:[{
          test:/\.js$/,
          use:{
              loader:'babel-loader',
              options:{
                  presets: ['env']
              }
          }
      }]
  },
  plugins: [new HtmlWebpackPlugin({})
  ]
}//app.jslet num = 1; console.log(num);
【打包速度】
运行后,页面控制台输出1,转换正常。但是,babel的转换过程却很慢

前面的博文webpack的四个基本概念,我们介绍过loader的test属性表示该loader必须满足的条件,上面代码中使用/\.js$/ 来匹配,这样也许会去转译 node_modules 目录或者其他不需要的源代码。这样会大大增加webpack的编译时间
要排除 node_modules,就要使用 loaders 配置的 exclude 选项,表示哪些除外,exclude:/node_modules/
[注意]exclude也应该用正则的形式,如果用__dirname +'/node_modules'的形式则不会生效
var webpack = require('webpack');var HtmlWebpackPlugin = require('html-webpack-plugin');

module.exports = {
  entry: './src/app.js',
  output:{
    path: __dirname,//出口路径filename: 'js/[name].bundle.js'//出口名称  },
  module:{
      loaders:[{
          test:/\.js$/,
          exclude: /node_modules/,
          use:{
              loader: 'babel-loader',
              options:{
                  presets: ['env']
              }
          }
      }]
  },
  plugins: [new HtmlWebpackPlugin({})
  ]
}
当然了,除了exclude选项,也有include选项,能够明确被打包的文件时,使用include将使打包速度更快
对于include来说,它比较特别,字符串形式__dirname + './src/'和正则形式/\.\/src/都支持,经过测试,这两种形式的打包速度类似
var webpack = require('webpack');var HtmlWebpackPlugin = require('html-webpack-plugin');

module.exports = {
  entry: './src/app.js',
  output:{
    path: __dirname,//出口路径filename: 'js/[name].bundle.js'//出口名称  },
  module:{
      loaders:[{
          test:/\.js$/,
          include:/\.\/src/,
          use:{
              loader: 'babel-loader',
              options:{
                  presets: ['env']
              }
          }
      }]
  },
  plugins: [new HtmlWebpackPlugin({})
  ]
}
CSS
在webpack入门博文中由介绍过CSS插件的简单使用,接下来将详细介绍
首先,要安装css-loader和style-loader,css-loader用于读取并加载css文件,style-loader将它插入到页面中
[特别注意]在处理css时,最好不要使用include、exclude等属性。include、exclude属性是加快babel转换速度的,和css没什么关系,而且会添乱
npm install css-loader style-loader
//app.jsrequire('./css/common.css');//common.cssbody{margin: 0;background-color: red}//webpack.config.jsvar webpack = require('webpack');var HtmlWebpackPlugin = require('html-webpack-plugin');
module.exports = {
  entry: './src/app.js',
  output:{
    path: __dirname,//出口路径filename: 'js/[name].bundle.js'//出口名称  },
  module:{
      rules:[
          {
              test:/\.css$/,  use:[ 'style-loader', 'css-loader' ]
          }
      ]
  },
  plugins: [new HtmlWebpackPlugin({})
  ]
}效果如下

【自动前缀】
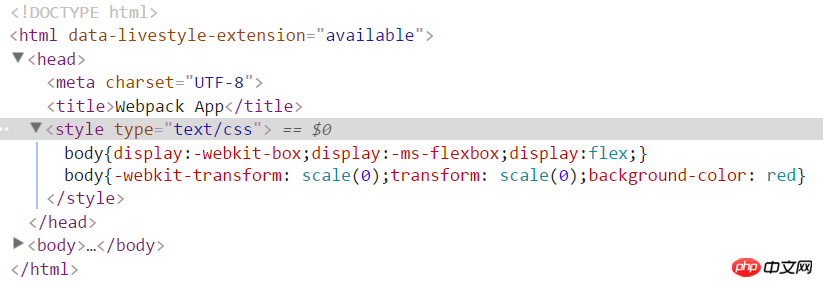
页面加载CSS往往并不像上面的情况这么简单,需要处理很多问题,其中一个就是浏览器前缀问题。对于某些属性来说,比如transform,不同浏览器的版本对其支持程度不同,浏览器前缀也不同。这时,就需要能够根据实际情况,自动增加前缀,而postcss-loader就是这样的工具,而且功能要强大的多
首先,先安装postcss-loader
npm install postcss-loader
然后,安装postcss的自动前缀的插件autoprefixer
npm install autoprefixer
配置如下
//common.cssbody{transform: scale(0);background-color: red}//app.jsrequire('./css/common.css');//webpack.config.jsvar webpack = require('webpack');var HtmlWebpackPlugin = require('html-webpack-plugin');
module.exports = {
  entry: './src/app.js',
  output:{
    path: __dirname,//出口路径filename: 'js/[name].bundle.js'//出口名称  },
  module:{
      rules:[
          {
              test:/\.css$/,
              use:[ 'style-loader', 'css-loader',
                    {
                        loader: 'postcss-loader',
                        options: {plugins: [require('autoprefixer')]}
                    }
                 ]
          }
      ]
  },
  plugins: [new HtmlWebpackPlugin({})
  ]
}结果如下

如果css文件中出现@import,则有两种处理方式,一种是将postcss文件单独写成配置文件postcss.config.js
//common.css@import './flex.css';
body{transform: scale(0);background-color: red}//flex.cssbody{display:flex;}//app.jsrequire('./css/common.css');//webpack.config.jsvar webpack = require('webpack');var HtmlWebpackPlugin = require('html-webpack-plugin');
module.exports = {
  entry: './src/app.js',
  output:{
    path: __dirname,//出口路径filename: 'js/[name].bundle.js'//出口名称  },
  module:{
      rules:[
          {
              test:/\.css$/,
              use:[ 'style-loader',
                  { loader: 'css-loader',
                    options: {importLoaders: 1}
                  },'postcss-loader']
          }
      ]
  },
  plugins: [new HtmlWebpackPlugin({})
  ]
}//postcss.config.jsmodule.exports = {
 plugins:[require('autoprefixer')]
}结果如下

另一种需要安装postcss-import插件
npm install postcss-import
//common.css@import './flex.css';
body{transform: scale(0);background-color: red}//flex.cssbody{display:flex;}//app.jsrequire('./css/common.css');//webpack.config.jsvar webpack = require('webpack');var HtmlWebpackPlugin = require('html-webpack-plugin');
module.exports = {
  entry: './src/app.js',
  output:{
    path: __dirname,//出口路径filename: 'js/[name].bundle.js'//出口名称  },
  module:{
      rules:[
          {
              test:/\.css$/,
              use:[ 'style-loader',
                  { loader: 'css-loader',
                    options: {importLoaders: 1 }
                  },
                  {
                    loader: 'postcss-loader',
                    options: {plugins: [
                          require('postcss-import'),
                          require('autoprefixer')
                        ]
                    }
                  }
                ]
          }
      ]
  },
  plugins: [new HtmlWebpackPlugin({})
  ]
}结果如下

【sass】
首先,需要安装sass-loader及node-sass
[注意]关于node-sass安装的问题移步至此
npm install sass-loader node-sass
由于sass-loader中已经自带了关于@import处理的问题。所以,不需要css-loader及postcss-loader的额外处理
//layer.scss@import './flex.scss';
body{
    background-color:green;
    div{
        width: 400px;
    }
}//flex.scss.flex{display:flex;}//app.jsrequire('./components/layer/layer.scss');//webpack.config.jsvar webpack = require('webpack');var HtmlWebpackPlugin = require('html-webpack-plugin');
module.exports = {
  entry: './src/app.js',
  output:{
    path: __dirname,//出口路径filename: 'js/[name].bundle.js'//出口名称  },
  module:{
      rules:[
          {
              test:/\.scss$/,
              use:[    'style-loader',
                      'css-loader',
                    {
                        loader: 'postcss-loader',
                        options: {plugins: [require('autoprefixer')]}
                    },'sass-loader' ]
          }
      ]
  },
  plugins: [new HtmlWebpackPlugin({})
  ]
}结果如下

【分离CSS】
默认地,CSS作为模块资源被打包到入口js文件中。有时,需要把CSS文件分离出来,这时就需要用到extract-text-webpack-plugin插件
npm install extract-text-webpack-plugin
该插件的配置如下
var webpack = require('webpack');var HtmlWebpackPlugin = require('html-webpack-plugin');var ExtractTextPlugin = require('extract-text-webpack-plugin');
module.exports = {
  entry: './src/app.js',
  output:{
    path: __dirname,//出口路径filename: 'js/[name].bundle.js'//出口名称  },
  module:{
      rules:[
          {
                  test:/\.scss$/,
                use: ExtractTextPlugin.extract({
                  fallback: 'style-loader',
                  use:[ 'css-loader',
                        {
                            loader: 'postcss-loader',
                            options: {plugins: [require('autoprefixer')]}
                        },'sass-loader' ]
                })
          }
      ]
  },
  plugins: [new HtmlWebpackPlugin({}),new ExtractTextPlugin("styles.css?1.1.11")
  ]
}结果如下,该插件将入口文件中引用的 *.css,移动到独立分离的 CSS 文件。因此,你的样式将不再内嵌到 JS bundle 中,而是会放到一个单独的 CSS 文件(即 styles.css)当中。 如果样式文件大小较大,这会做更快提前加载,因为 CSS bundle 会跟 JS bundle 并行加载

图片资源
webpack在处理图片、音乐、电影等资源文件时,需要使用file-loader
npm install file-loader
默认情况下,使用file-loader生成的文件的文件名就是文件内容的MD5哈希值并保留原始扩展名
以引入图片资源例,有以下几种情况
1、通过css文件的background属性引入
//webpack.config.jsvar webpack = require('webpack');var HtmlWebpackPlugin = require('html-webpack-plugin');
module.exports = {
  entry: './entry.js', //入口文件  output: {
    path: __dirname,//出口路径filename: 'js/[id]-[name]-[hash].js'//出口名称  },
  module:{

      rules:[
          {
              test:/\.css$/,
              use:[ 'style-loader', 'css-loader' ]
          },
          {
              test:/\.(png|jpg|gif|svg)$/i,
              use:'file-loader'  }
      ]
  },
  plugins: [new HtmlWebpackPlugin()
  ]
}//entry.jsrequire('./src/css/common.css');//common.cssbody{background: url('../img/eg_bulbon.gif')}结果如下

2、通过模板html文件img标签引入,这时需要使用${require('')}将相对路径包裹一次
//webpack.config.jsvar webpack = require('webpack');var HtmlWebpackPlugin = require('html-webpack-plugin');
module.exports = {
entry: './entry.js', //入口文件 output: {
path: __dirname,//出口路径filename: 'js/[id]-[name]-[hash].js'//出口名称 },
module:{
rules:[
{
test:/\.css$/,
use:[ 'style-loader', 'css-loader' ]
},
{
test:/\.(png|jpg|gif|svg)$/i,
use:'file-loader' }
]
},
plugins: [new HtmlWebpackPlugin({
template:'template/template.html'})
]
}//template.html<!DOCTYPE html>
<html lang="en">
<head>
<meta charset="UTF-8">
<title>Document</title>
</head>
<body>
<img src="${require('../src/img/eg_bulbon.gif')}" alt="">
</body>
</html>结果如下

3、若模板使用ejs-compiled-loader插件,则无法使用${require('')}语句,需要使用HtmlWebpackPlugin传参来构造绝对路径
//webpack.config.jsvar webpack = require('webpack');var HtmlWebpackPlugin = require('html-webpack-plugin');
module.exports = {
  entry: './entry.js', //入口文件  output: {
    path: __dirname + '/dist',//出口路径filename: 'js/[id]-[name]-[hash].js'//出口名称  },
  module:{
      rules:[
          {
              test:/\.css$/,
              use:[ 'style-loader', 'css-loader' ]
          },
          {
              test:/\.(png|jpg|gif|svg)$/i,
              use:'file-loader'  }
      ]
  },
  plugins: [new HtmlWebpackPlugin({
        template:'ejs-compiled-loader!template/template.html',
        file:__dirname
    })
  ]
}//template.html<!DOCTYPE html>
<html lang="en">
<head>
    <meta charset="UTF-8">
    <title>Document</title>
</head>
<body>
<div>
    <% include  template/header.html %>
</div>
</body>
</html>//header.html<img src="<%=htmlWebpackPlugin.options.file%>\src\img\eg_bulbon.gif" alt="">结果如下

【file-loader参数】
文件名模板占位符有如下几种
[ext] 资源扩展名
[name] 资源的基本名称
[path] 资源相对于 context 查询参数或者配置的路径
[hash] 内容的哈希值,默认为十六进制编码的 md5
[<hashType>:hash:<digestType>:<length>] 可选配置
  其他的 hashType, 即 sha1, md5, sha256, sha512
  其他的 digestType, 即 hex, base26, base32, base36, base49, base52, base58, base62, base64
  length 字符的长度
[N] 当前文件名按照查询参数 regExp 匹配后获得到第 N 个匹配结果
{
  test:/\.(png|jpg|gif|svg)$/i,
  use:[{
              loader:'file-loader',
            options: {
                name:'[name]-[hash:5].[ext]'}
        }]
}或者
{
  test:/\.(png|jpg|gif|svg)$/i,
  use:['file-loader?name=[name]-[hash:5].[ext]']
}结果如下

【url-loader】
url-loader功能类似于file-loader,但是在文件大小(单位byte)低于指定的限制时,可以返回一个dataURL
可以通过传递查询参数(query parameter)来指定限制(默认为不限制)。
如果文件大小超过限制,将转为使用 file-loader,所有的查询参数也会传过去
npm install url-loader
图片的大小为1.1kb,下面将限制设置为2000,则图片将以base64格式传递
{
  test:/\.(png|jpg|gif|svg)$/i,
  use:['url-loader?limit=2000']
}结果如下

如果将限制大小设置为1000,图片以src的形式传递
{
  test:/\.(png|jpg|gif|svg)$/i,
  use:[{
              loader:'url-loader',
            options: {
                limit:1000,
                name:'[name]-[hash:5].[ext]'}
        }]
}
【image-webpack-loader】
使用image-webpack-loader来压缩图片
npm install image-webpack-loader
插件一张大小为4.1kb的名称为'm.jpg'的图片,配置如下
{
  test:/\.(png|jpg|gif|svg)$/i,
  use:['url-loader?limit=1000&name=[name]-[hash:5].[ext]','image-webpack-loader'
  ]
}结果如下所示,生成大小为3.28kb,名称为'm-c7083.jpg'的图片

实用配置
下面将使用webpack搭建一个实用的开发环境
var webpack = require('webpack');var HtmlWebpackPlugin = require('html-webpack-plugin');var ExtractTextPlugin = require('extract-text-webpack-plugin');
module.exports = {
    entry: './src/app.js',//入口文件    output:{
        path: __dirname,//出口路径filename: 'js/[name].bundle.js'//出口名称    },
    module:{
        rules:[
            {
                test:/\.scss$/,
                use: ExtractTextPlugin.extract({
                    fallback: 'style-loader',
                     use:[
                             'css-loader',
                            {
                                loader: 'postcss-loader',//自动添加前缀options: {plugins: [require('autoprefixer')]}
                            },'sass-loader']
                })
            },
            {
                test:/\.js$/,
                include:/\.\/src/,
                use:{
                        loader: 'babel-loader',//将最新标准的js代码翻译为es5代码options:{presets: ['env']}
                    }
            },
            {
                test:/\.(png|jpg|gif|svg)$/i,
                use:[//当图片大小大于1000byte时,以[name]-[hash:5].[ext]的形式输出//当图片大小小于1000byte时,以baseURL的形式输出'url-loader?limit=1000&name=[name]-[hash:5].[ext]',//压缩图片'image-webpack-loader']
            }
          ]
    },
    plugins: [          //使用模板生成html文件new HtmlWebpackPlugin({template:'ejs-compiled-loader!template/template.html'}),//分离出css到style.cssnew ExtractTextPlugin("style.css?1.1.11")
    ]
}
The above is the detailed content of Detailed introduction to webpack practical configuration. For more information, please follow other related articles on the PHP Chinese website!

Hot AI Tools

Undresser.AI Undress
AI-powered app for creating realistic nude photos

AI Clothes Remover
Online AI tool for removing clothes from photos.

Undress AI Tool
Undress images for free

Clothoff.io
AI clothes remover

AI Hentai Generator
Generate AI Hentai for free.

Hot Article

Hot Tools

Notepad++7.3.1
Easy-to-use and free code editor

SublimeText3 Chinese version
Chinese version, very easy to use

Zend Studio 13.0.1
Powerful PHP integrated development environment

Dreamweaver CS6
Visual web development tools

SublimeText3 Mac version
God-level code editing software (SublimeText3)

Hot Topics
 1385
1385
 52
52
 The working principle and configuration method of GDM in Linux system
Mar 01, 2024 pm 06:36 PM
Title: The working principle and configuration method of GDM in Linux systems In Linux operating systems, GDM (GNOMEDisplayManager) is a common display manager used to control graphical user interface (GUI) login and user session management. This article will introduce the working principle and configuration method of GDM, as well as provide specific code examples. 1. Working principle of GDM GDM is the display manager in the GNOME desktop environment. It is responsible for starting the X server and providing the login interface. The user enters
 Practical tips for converting full-width English letters into half-width form
Mar 26, 2024 am 09:54 AM
Practical tips for converting full-width English letters into half-width forms. In modern life, we often come into contact with English letters, and we often need to input English letters when using computers, mobile phones and other devices. However, sometimes we encounter full-width English letters, and we need to use the half-width form. So, how to convert full-width English letters to half-width form? Here are some practical tips for you. First of all, full-width English letters and numbers refer to characters that occupy a full-width position in the input method, while half-width English letters and numbers occupy a full-width position.
 PyCharm Beginner's Guide: Learn to Delete Projects in PyCharm
Feb 23, 2024 pm 09:39 PM
PyCharm Beginner's Guide: Practical Tips for Deleting Projects PyCharm is a powerful Python integrated development environment (IDE). When developing projects, sometimes you need to delete projects or files in the projects. This article will introduce practical techniques for deleting projects in PyCharm, and provide specific code examples to help novices better understand and apply. 1. Delete the project Deleting the project means deleting the entire project folder, which is very useful when we need to clean or rebuild the project. Delete in PyCharm
 Understand Linux Bashrc: functions, configuration and usage
Mar 20, 2024 pm 03:30 PM
Understanding Linux Bashrc: Function, Configuration and Usage In Linux systems, Bashrc (BourneAgainShellruncommands) is a very important configuration file, which contains various commands and settings that are automatically run when the system starts. The Bashrc file is usually located in the user's home directory and is a hidden file. Its function is to customize the Bashshell environment for the user. 1. Bashrc function setting environment
 How to configure workgroup in win11 system
Feb 22, 2024 pm 09:50 PM
How to configure a workgroup in Win11 A workgroup is a way to connect multiple computers in a local area network, which allows files, printers, and other resources to be shared between computers. In Win11 system, configuring a workgroup is very simple, just follow the steps below. Step 1: Open the "Settings" application. First, click the "Start" button of the Win11 system, and then select the "Settings" application in the pop-up menu. You can also use the shortcut "Win+I" to open "Settings". Step 2: Select "System" In the Settings app, you will see multiple options. Please click the "System" option to enter the system settings page. Step 3: Select "About" In the "System" settings page, you will see multiple sub-options. Please click
 How to configure and install FTPS in Linux system
Mar 20, 2024 pm 02:03 PM
Title: How to configure and install FTPS in Linux system, specific code examples are required. In Linux system, FTPS is a secure file transfer protocol. Compared with FTP, FTPS encrypts the transmitted data through TLS/SSL protocol, which improves Security of data transmission. In this article, we will introduce how to configure and install FTPS in a Linux system and provide specific code examples. Step 1: Install vsftpd Open the terminal and enter the following command to install vsftpd: sudo
 MyBatis Generator configuration parameter interpretation and best practices
Feb 23, 2024 am 09:51 AM
MyBatisGenerator is a code generation tool officially provided by MyBatis, which can help developers quickly generate JavaBeans, Mapper interfaces and XML mapping files that conform to the database table structure. In the process of using MyBatisGenerator for code generation, the setting of configuration parameters is crucial. This article will start from the perspective of configuration parameters and deeply explore the functions of MyBatisGenerator.
 How to enable administrative access from the cockpit web UI
Mar 20, 2024 pm 06:56 PM
Cockpit is a web-based graphical interface for Linux servers. It is mainly intended to make managing Linux servers easier for new/expert users. In this article, we will discuss Cockpit access modes and how to switch administrative access to Cockpit from CockpitWebUI. Content Topics: Cockpit Entry Modes Finding the Current Cockpit Access Mode Enable Administrative Access for Cockpit from CockpitWebUI Disabling Administrative Access for Cockpit from CockpitWebUI Conclusion Cockpit Entry Modes The cockpit has two access modes: Restricted Access: This is the default for the cockpit access mode. In this access mode you cannot access the web user from the cockpit


