How to build a webpack microserver?
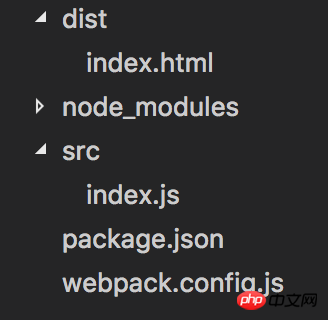
var webpack = require('webpack')var path =require('path')
module.exports = {
entry:{
   app:path.join(__dirname,'src','index.js')
},
output:{
   filename:'bundle.js',
   path:path.join(__dirname,'dist')
  }
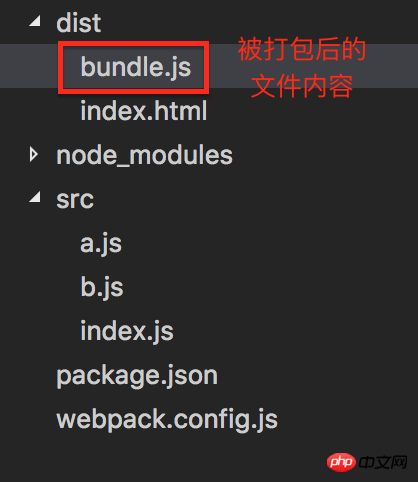
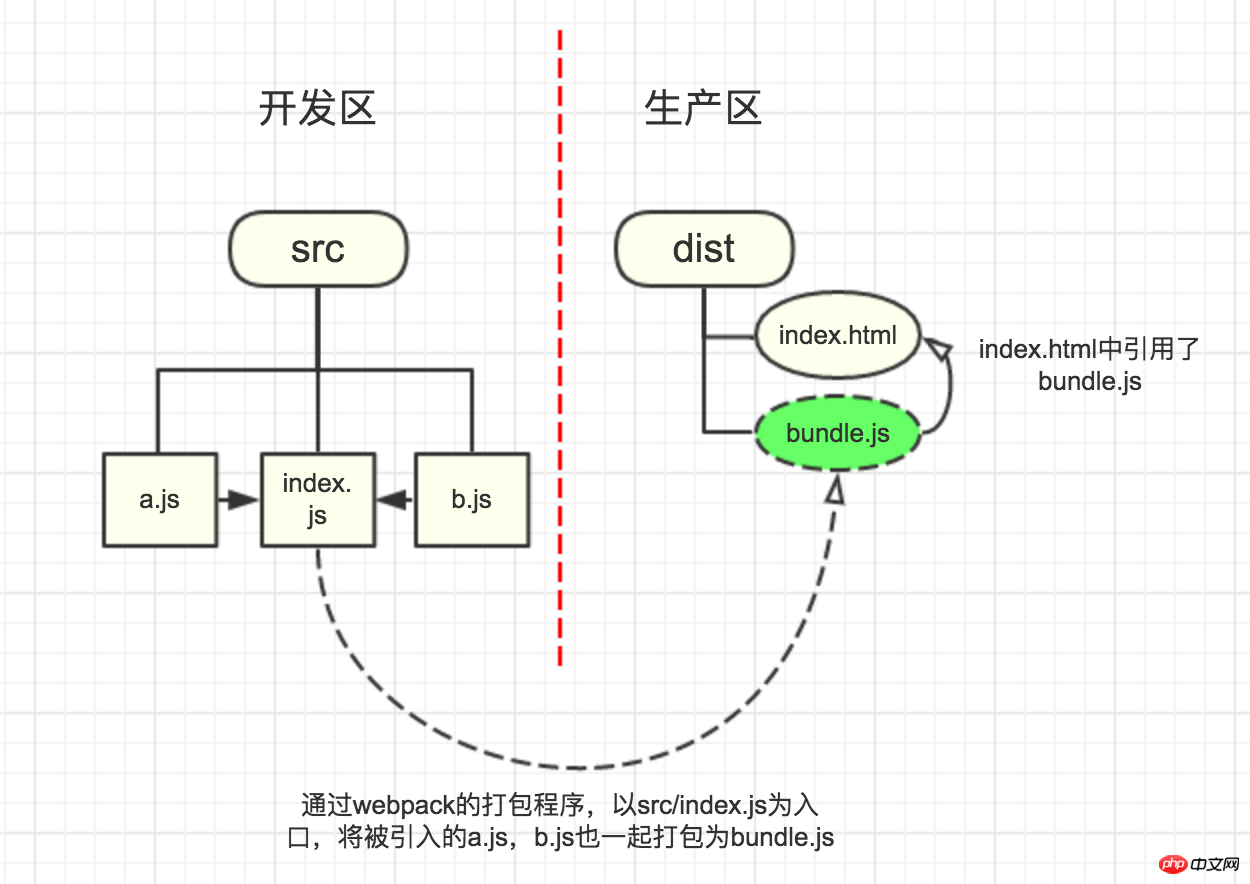
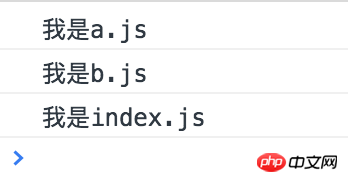
}My src/index .js:
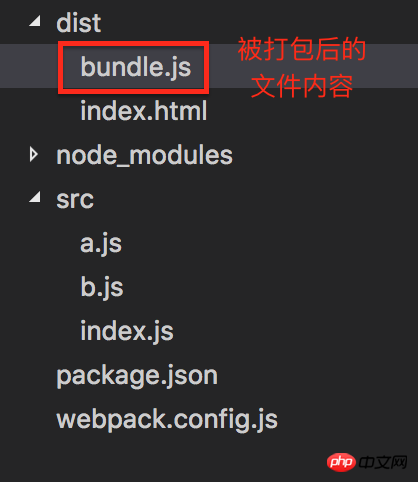
require('./a.js')
require('./b.js')
console.log('我是index.js')console.log('我是a.js')console.log('我是b.js')/*其他部分省略*/<body> <script src="./bundle.js?1.1.11"></script></body>


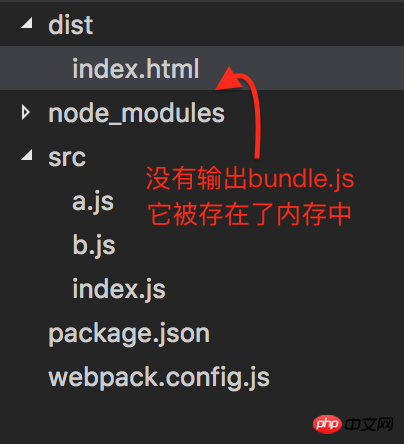
module.exports = {/*这里省略entry和output,参照上面写的内容*/
  devServer: {
       contentBase: path.join(__dirname, "dist")
   }
}
详解webpack-dev-server的配置属性
devServer: {
   port:7000}
devServer: {
   contentBase: path.join(__dirname, "dist"),
   port:7000,
   host:'0.0.0.0'}

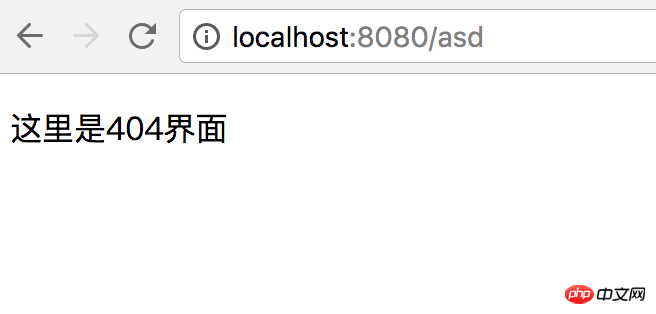
/*剩下的都是很常规的HTML内容,故省略*/<p>这里是404界面</p>
module.exports = {/*这里省略entry和output,参照上面写的内容*/devServer: {
contentBase: path.join(__dirname, "dist"),
historyApiFallback:{
   rewrites:[
      {from:/./,to:'/404.html'}
   ]
  }
 }
}

module.exports = {     /*这里省略entry和output,参照上面写的内容*/
   devServer: {
       contentBase: path.join(__dirname, "dist"),
       overlay: true
   }
}
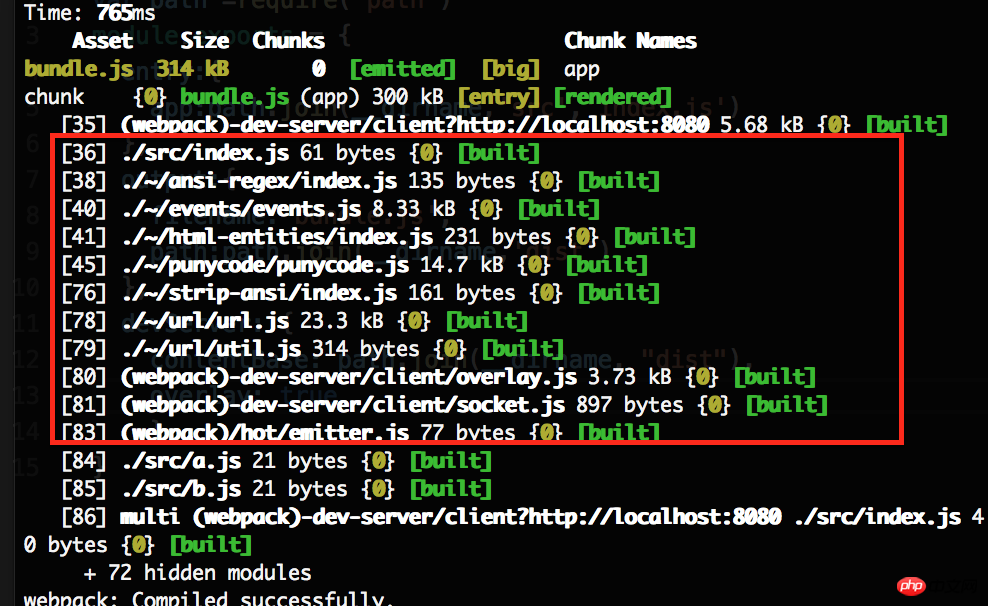
devServer: {
   contentBase: path.join(__dirname, "dist"),
   stats: "errors-only"}


quiet:true
entry:{
    app:path.join(__dirname,'src','index.js')
}entry:{
app:[path.join(__dirname,'src','index.js'), 'webpack-dev-server/client?http://localhost:8080/' ]
}var webpack = require('webpack')
module.exports = { /*省略entry ,output等内容*/
plugins:[new webpack.HotModuleReplacementPlugin()
],
devServer: {
inline:true,
hot:true}
}
{   "name": "webpackTest2",   "dependencies": {},   "devDependencies": {},   "scripts": {       "start": "node_modules/.bin/webpack-dev-server" }
}

var config = require("./webpack.config.js?1.1.11");
config.entry.app.unshift("webpack-dev-server/client?http://localhost:8080/");var compiler = webpack(config);var server = new WebpackDevServer(compiler, {       /*我们写入配置的地方*/});
server.listen(8080);The above is the detailed content of How to build a webpack microserver?. For more information, please follow other related articles on the PHP Chinese website!

Hot AI Tools

Undresser.AI Undress
AI-powered app for creating realistic nude photos

AI Clothes Remover
Online AI tool for removing clothes from photos.

Undress AI Tool
Undress images for free

Clothoff.io
AI clothes remover

AI Hentai Generator
Generate AI Hentai for free.

Hot Article

Hot Tools

Notepad++7.3.1
Easy-to-use and free code editor

SublimeText3 Chinese version
Chinese version, very easy to use

Zend Studio 13.0.1
Powerful PHP integrated development environment

Dreamweaver CS6
Visual web development tools

SublimeText3 Mac version
God-level code editing software (SublimeText3)

Hot Topics
 1377
1377
 52
52
 VUE3 Getting Started Tutorial: Packaging and Building with Webpack
Jun 15, 2023 pm 06:17 PM
Vue is an excellent JavaScript framework that can help us quickly build interactive and efficient web applications. Vue3 is the latest version of Vue, which introduces many new features and functionality. Webpack is currently one of the most popular JavaScript module packagers and build tools, which can help us manage various resources in our projects. This article will introduce how to use Webpack to package and build Vue3 applications. 1. Install Webpack
 Using Jetty7 for Web server processing in Java API development
Jun 18, 2023 am 10:42 AM
Using Jetty7 for Web Server Processing in JavaAPI Development With the development of the Internet, the Web server has become the core part of application development and is also the focus of many enterprises. In order to meet the growing business needs, many developers choose to use Jetty for web server development, and its flexibility and scalability are widely recognized. This article will introduce how to use Jetty7 in JavaAPI development for We
 Real-time protection against face-blocking barrages on the web (based on machine learning)
Jun 10, 2023 pm 01:03 PM
Face-blocking barrage means that a large number of barrages float by without blocking the person in the video, making it look like they are floating from behind the person. Machine learning has been popular for several years, but many people don’t know that these capabilities can also be run in browsers. This article introduces the practical optimization process in video barrages. At the end of the article, it lists some applicable scenarios for this solution, hoping to open it up. Some ideas. mediapipeDemo (https://google.github.io/mediapipe/) demonstrates the mainstream implementation principle of face-blocking barrage on-demand up upload. The server background calculation extracts the portrait area in the video screen, and converts it into svg storage while the client plays the video. Download svg from the server and combine it with barrage, portrait
 How to implement form validation for web applications using Golang
Jun 24, 2023 am 09:08 AM
Form validation is a very important link in web application development. It can check the validity of the data before submitting the form data to avoid security vulnerabilities and data errors in the application. Form validation for web applications can be easily implemented using Golang. This article will introduce how to use Golang to implement form validation for web applications. 1. Basic elements of form validation Before introducing how to implement form validation, we need to know what the basic elements of form validation are. Form elements: form elements are
 How to enable administrative access from the cockpit web UI
Mar 20, 2024 pm 06:56 PM
Cockpit is a web-based graphical interface for Linux servers. It is mainly intended to make managing Linux servers easier for new/expert users. In this article, we will discuss Cockpit access modes and how to switch administrative access to Cockpit from CockpitWebUI. Content Topics: Cockpit Entry Modes Finding the Current Cockpit Access Mode Enable Administrative Access for Cockpit from CockpitWebUI Disabling Administrative Access for Cockpit from CockpitWebUI Conclusion Cockpit Entry Modes The cockpit has two access modes: Restricted Access: This is the default for the cockpit access mode. In this access mode you cannot access the web user from the cockpit
 What are web standards?
Oct 18, 2023 pm 05:24 PM
Web standards are a set of specifications and guidelines developed by W3C and other related organizations. It includes standardization of HTML, CSS, JavaScript, DOM, Web accessibility and performance optimization. By following these standards, the compatibility of pages can be improved. , accessibility, maintainability and performance. The goal of web standards is to enable web content to be displayed and interacted consistently on different platforms, browsers and devices, providing better user experience and development efficiency.
 Is PHP front-end or back-end in web development?
Mar 24, 2024 pm 02:18 PM
PHP belongs to the backend in web development. PHP is a server-side scripting language, mainly used to process server-side logic and generate dynamic web content. Compared with front-end technology, PHP is more used for back-end operations such as interacting with databases, processing user requests, and generating page content. Next, specific code examples will be used to illustrate the application of PHP in back-end development. First, let's look at a simple PHP code example for connecting to a database and querying data:
 Use Spring Boot and Webpack to build front-end projects and plug-in systems
Jun 22, 2023 am 09:13 AM
As the complexity of modern web applications continues to increase, building excellent front-end engineering and plug-in systems has become increasingly important. With the popularity of Spring Boot and Webpack, they have become a perfect combination for building front-end projects and plug-in systems. SpringBoot is a Java framework that creates Java applications with minimal configuration requirements. It provides many useful features, such as automatic configuration, so that developers can build and deploy web applications faster and easier. W


