
 Operation and Maintenance
Linux Operation and Maintenance
Notes on setting up NMP server on Centos7
Operation and Maintenance
Linux Operation and Maintenance
Notes on setting up NMP server on Centos7
Notes on setting up NMP server on Centos7
Install centos7.3
1. Download 7.3 from mirrors.163.com
2. Prepare the virtual machine vitualbox. The network I use is bridged to the wireless network card and connected directly to the router. , IP automatic allocation (I originally wanted to get a static IP, but it took a long time without success, and various problems emerged one after another)
3. The installation mode I chose is Mini installation. Although I need to install various software later to solve the problem, But I learned a lot about Linux. During the installation process, be sure to turn on the network card
4. After the installation is completed, set the system environment
4.1. Set selinux to be turned off. If you don't set this, there will be various problems when setting up the website. I was troubled by permission issues. After struggling for 2 days, this is the weird problem.
Command: setenforce 0 //Temporarily closed, no use
File settings: vi /etc/selinux/config Modification: SELINUX=disabled //This is permanent
It's best to restart here.
4.2. After the installation is completed, first look at the IP: ip addr, and then use the mobaxterm terminal connection software to connect. Pay attention to downloading mobaxterm from the official website to avoid being taken advantage of by software with backdoors.
4.3. After installing mobaxterm, use SSL to connect to the virtual machine.
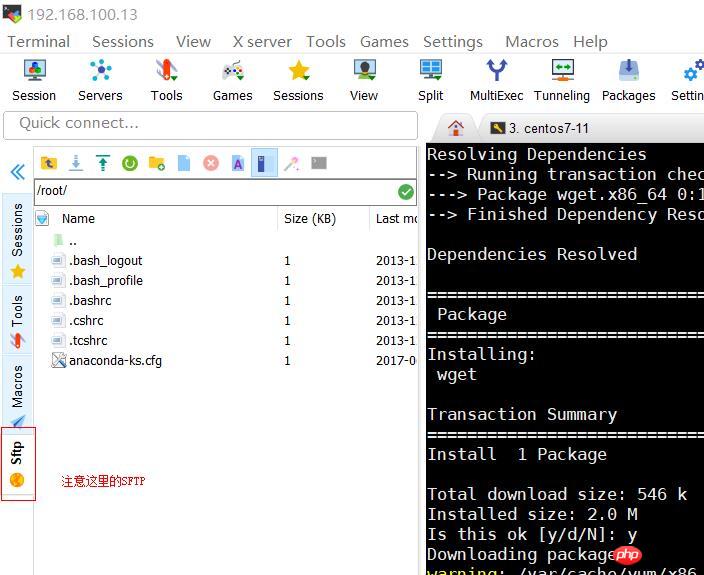
4.4. There is no wget tool available for minimal installation. The first step is to install wget. With this download tool, you can download the software to be installed from a trusted site. Directly yum install wget
4.5. Because rpm installation takes too much time, and the software I need are commonly used software and can be installed from the mirror point, so I use yum to install them all. The next step is to replace the default yum source to 163.
Replace yun source, see NetEase’s documentation:.
After downloading the yum source ( ) of centos7, upload it to the virtual machine. At this time, the terminal software mobaxterm is used for uploading. So you must use this to connect to the server. To upload, just drag the downloaded file to the left window. Then back up the original one first, and then copy the 163 one to the target location.
Command:
mv CentOS-Base.repo CentOS-Base.repo.bak
cp ~/CentOS7-Base-163.repo /etc/yum.repos. d/ CentOS-Base.repo
this is my site
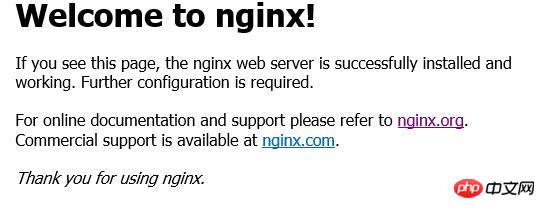
9. Configure yourself Website9.1. Back up nginx configuration file: cp /etc/nginx/conf.d/default.conf /etc/nginx/conf.d/default.conf.bak9.2 . Modify the configuration file: vi /etc/nginx/conf.d/default.conf------------------Just modify the following paragraph---- ----------- location / { root /data/www; index index.html index.htm; }----------------That is: the path behind root----------------9.3. Restart: systemctl restart nginx9.4. Test again on the host, and the index.html page will appear. PHP-FPM5.6 installation1. Install epel:[root@localhost ~]# wget[root@localhost ~]# rpm -ivh epel-release-latest-7.noarch.rpm[root@localhost ~]# yum repolist ##Check whether it has been added to the source list 2. Install remi yum sourcerpm -ivh
or install IUS warehouse
# #rpm -ivh3. Check php version yum search php-fpm4. Install php-fpm #yum --enablerepo=remi,remi-php56 install php-fpm php-common php-mysql php-opcache php-pear php-gd php-devel php-mbstring php-mcrypt php-cli php-pdo php-xml#yum list installed | grep php#systemctl enable php-fpm#systemctl start php-fpm5. Start PHP and set system startup itemssystemctl enable php-fpmsystemctl start php-fpm6.Set NGINX , hand the PHP file to php-fpm for processingvi /etc/nginx/conf.d/default.conf###
location ~ \.php$ {
try_files $uri =404;
fastcgi_pass 127.0.0.1:9000;
fastcgi_index index.php;
include fastcgi_params;
#Enable PATHINFO function
set $real_script_name $fastcgi_script_name;
if ($fastcgi_script_name ~ "^(.+?\.php)(/.+)$") {
set $real_script_name $1;
set $path_info $2;
}
fastcgi_param SCRIPT_FILENAME $document_root$real_script_name;
fastcgi_param SCRIPT_NAME $real_script_name;
fastcgi_param PATH_INFO $path_info;
}
mysql installation:
1. Go to the official website to find the yum source:
2. Download the yum configuration file:
wget
I downloaded version 5.7
3. The downloaded rpm package is the rpm package. Install the rpm package
rpm - Uvh mysql57-community-release-el7-11.noarch.rpm
After installation, you can check whether there is mysql in the warehouse: yum repolist all | grep mysql
4, true Install mysql. The installation file name is found from the Mysql installation document, namely: mysql-community-server
yum install mysql-community-server
mysql installation wizard URL:
5. After installation, start mysql
systemctl start mysqld
systemctl status mysqld Check the startup status
6. Check the root password:
grep 'temporary password' /var/log/mysqld.log
//Looked from the installation wizard on the official website.
7. Change the root password
7.1. First log in to mysql
mysql -uroot -p
7.2. Then you will be prompted to enter the password. Change 6 Copy the password you see and press Enter
Enter password:
//Enter the mysql shell, the prompt appears: mysql>
7.3. Enter after the prompt Command:
alter user 'root'@'localhost' identified by 'Mysql1234~!@';
7.4, test mysql
create database test;
use test;
create table test1(col1 int,col2 varchar(20));
desc test1;
mysql>quit;
8. Install phpMyAdmin
In order not to open the remote 3306 port and enhance security, manage the database through phpMyAdmin
I encountered a pit here and spent an afternoon working on it. Official The phpmyadmin configuration file does not have the port/user/passwd field, and you need to manually add the configuration
8.1. Download phpMyAdmin4.7. It is very slow from the official website, so download it from the Huajun Software Park.
8.2. Upload through Mobaxterm and decompress: unzip -d target path /zip file path
8.3. The most important thing is to change the configuration file. In the unzipped folder, find config.sample.inc.php
and change the name: mv config.sample.inc.php config.inc.php
Ignore other comments and change them as follows Several configuration items:
/* Server parameters */
$cfg['Servers'][$i]['host'] = 'localhost';
$cfg['Servers'][$i]['port'] = '3306';//Note here, this item is not available by default and needs to be added manually
$cfg['Servers'][$i]['user'] = 'root';//Note here, this item is not available by default, you need to add it manually
$cfg ['Servers'][$i]['password']='Mysql1234~!@';//Note here, this item is not available by default, you need to manually add
8.4, ip access, test whether succeed

The above is the detailed content of Notes on setting up NMP server on Centos7. For more information, please follow other related articles on the PHP Chinese website!

Hot AI Tools

Undresser.AI Undress
AI-powered app for creating realistic nude photos

AI Clothes Remover
Online AI tool for removing clothes from photos.

Undress AI Tool
Undress images for free

Clothoff.io
AI clothes remover

Video Face Swap
Swap faces in any video effortlessly with our completely free AI face swap tool!

Hot Article
Hot Tools

Notepad++7.3.1
Easy-to-use and free code editor

SublimeText3 Chinese version
Chinese version, very easy to use

Zend Studio 13.0.1
Powerful PHP integrated development environment

Dreamweaver CS6
Visual web development tools

SublimeText3 Mac version
God-level code editing software (SublimeText3)
Hot Topics
 1386
1386
 52
52

 How to delete Xiaohongshu notes
Mar 21, 2024 pm 08:12 PM
How to delete Xiaohongshu notes
Mar 21, 2024 pm 08:12 PM
How to delete Xiaohongshu notes? Notes can be edited in the Xiaohongshu APP. Most users don’t know how to delete Xiaohongshu notes. Next, the editor brings users pictures and texts on how to delete Xiaohongshu notes. Tutorial, interested users come and take a look! Xiaohongshu usage tutorial How to delete Xiaohongshu notes 1. First open the Xiaohongshu APP and enter the main page, select [Me] in the lower right corner to enter the special area; 2. Then in the My area, click on the note page shown in the picture below , select the note you want to delete; 3. Enter the note page, click [three dots] in the upper right corner; 4. Finally, the function bar will expand at the bottom, click [Delete] to complete.
 How to solve the problem that eMule search cannot connect to the server
Jan 25, 2024 pm 02:45 PM
How to solve the problem that eMule search cannot connect to the server
Jan 25, 2024 pm 02:45 PM
Solution: 1. Check the eMule settings to make sure you have entered the correct server address and port number; 2. Check the network connection, make sure the computer is connected to the Internet, and reset the router; 3. Check whether the server is online. If your settings are If there is no problem with the network connection, you need to check whether the server is online; 4. Update the eMule version, visit the eMule official website, and download the latest version of the eMule software; 5. Seek help.
 CentOS7 various version image download addresses and version descriptions (including Everything version)
Feb 29, 2024 am 09:20 AM
CentOS7 various version image download addresses and version descriptions (including Everything version)
Feb 29, 2024 am 09:20 AM
When loading CentOS-7.0-1406, there are many optional versions. For ordinary users, they don’t know which one to choose. Here is a brief introduction: (1) CentOS-xxxx-LiveCD.ios and CentOS-xxxx- What is the difference between bin-DVD.iso? The former only has 700M, and the latter has 3.8G. The difference is not only in size, but the more essential difference is that CentOS-xxxx-LiveCD.ios can only be loaded into the memory and run, and cannot be installed. Only CentOS-xxx-bin-DVD1.iso can be installed on the hard disk. (2) CentOS-xxx-bin-DVD1.iso, Ce
 Solution to the inability to connect to the RPC server and the inability to enter the desktop
Feb 18, 2024 am 10:34 AM
Solution to the inability to connect to the RPC server and the inability to enter the desktop
Feb 18, 2024 am 10:34 AM
What should I do if the RPC server is unavailable and cannot be accessed on the desktop? In recent years, computers and the Internet have penetrated into every corner of our lives. As a technology for centralized computing and resource sharing, Remote Procedure Call (RPC) plays a vital role in network communication. However, sometimes we may encounter a situation where the RPC server is unavailable, resulting in the inability to enter the desktop. This article will describe some of the possible causes of this problem and provide solutions. First, we need to understand why the RPC server is unavailable. RPC server is a
 Detailed explanation of CentOS installation fuse and CentOS installation server
Feb 13, 2024 pm 08:40 PM
Detailed explanation of CentOS installation fuse and CentOS installation server
Feb 13, 2024 pm 08:40 PM
As a LINUX user, we often need to install various software and servers on CentOS. This article will introduce in detail how to install fuse and set up a server on CentOS to help you complete the related operations smoothly. CentOS installation fuseFuse is a user space file system framework that allows unprivileged users to access and operate the file system through a customized file system. Installing fuse on CentOS is very simple, just follow the following steps: 1. Open the terminal and Log in as root user. 2. Use the following command to install the fuse package: ```yuminstallfuse3. Confirm the prompts during the installation process and enter `y` to continue. 4. Installation completed
 What should I do if the notes I posted on Xiaohongshu are missing? What's the reason why the notes it just sent can't be found?
Mar 21, 2024 pm 09:30 PM
What should I do if the notes I posted on Xiaohongshu are missing? What's the reason why the notes it just sent can't be found?
Mar 21, 2024 pm 09:30 PM
As a Xiaohongshu user, we have all encountered the situation where published notes suddenly disappeared, which is undoubtedly confusing and worrying. In this case, what should we do? This article will focus on the topic of "What to do if the notes published by Xiaohongshu are missing" and give you a detailed answer. 1. What should I do if the notes published by Xiaohongshu are missing? First, don't panic. If you find that your notes are missing, staying calm is key and don't panic. This may be caused by platform system failure or operational errors. Checking release records is easy. Just open the Xiaohongshu App and click "Me" → "Publish" → "All Publications" to view your own publishing records. Here you can easily find previously published notes. 3.Repost. If found
 How to configure Dnsmasq as a DHCP relay server
Mar 21, 2024 am 08:50 AM
How to configure Dnsmasq as a DHCP relay server
Mar 21, 2024 am 08:50 AM
The role of a DHCP relay is to forward received DHCP packets to another DHCP server on the network, even if the two servers are on different subnets. By using a DHCP relay, you can deploy a centralized DHCP server in the network center and use it to dynamically assign IP addresses to all network subnets/VLANs. Dnsmasq is a commonly used DNS and DHCP protocol server that can be configured as a DHCP relay server to help manage dynamic host configurations in the network. In this article, we will show you how to configure dnsmasq as a DHCP relay server. Content Topics: Network Topology Configuring Static IP Addresses on a DHCP Relay D on a Centralized DHCP Server
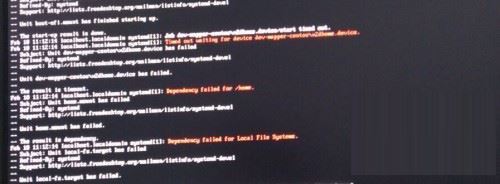 Steps to enter CentOS 7 emergency repair mode
Jan 13, 2024 am 09:36 AM
Steps to enter CentOS 7 emergency repair mode
Jan 13, 2024 am 09:36 AM
Open the centos7 page and appear: welcome to emergency mode! afterloggingin, type "journalctl -xb" to viewsystemlogs, "systemctlreboot" toreboot, "systemctldefault" to tryagaintobootintodefaultmode. giverootpasswordformaintenance(??Control-D???): Solution: execute r
