1. JDK installation
1. Check whether the JDK has been installed on the current Linux system
Enter rpm -qa | grep java

##If there is:
Uninstall two openJDKs, enter rpm -e --nodeps The software to be uninstalled

2, upload the JDK to Linux

3, install the plug-in required for jdk operation yum install glibc.i686 (optional)
4, unzip jdk to /usr/local and tar –xvf jdk-7u71-linux-i586.tar.gz –C /usr/local

5, configure jdk environment variables, open the /etc/profile configuration file, and copy the following configuration into it
#set java environment
JAVA_HOME=/usr/local/jdk1.7.0_71
##CLASSPATH=.:$JAVA_HOME/lib.tools. jarPATH=$JAVA_HOME/bin:$PATH
export JAVA_HOME CLASSPATH PATH

6, reload the /etc/profile configuration file source /etc/profile

7, verify whether the installation is successful
 ## 2. MySQL installation
1, check whether CentOS comes with MySQL
Enter rpm -qa | grep mysql
 If there is: delete the MySQL that comes with it
 2, upload Mysql to linux
3, install mysql dependencies (optional)
yum -y install libaio.so.1 libgcc_s.so.1 libstdc++.so.6
If an error occurs as shown in the figure, add: --setopt=protected_multilib=false
yum update libstdc++-4.4.7-4. el6.x86_64
4, unzip Mysql to the mysql directory under /usr/local/ (the mysql directory needs to be created manually)
cd /usr/ local
mkdir mysql

## tar -xvf MySQL-5.6.22-1.el6.i686 .rpm-bundle.tar -C /usr/local/mysql

5, install mysql under /usr/local/mysql
##Install the server: rpm -ivh MySQL-server-5.6.22-1.el6.i686.rpmInstallation Client: rpm -ivh MySQL-client-5.6.22-1.el6.i686.rpm

##6
, add mysql to the system service and set it to start at boot Add to system service: chkconfig --add mysql
Auto start: chkconfig mysql on
7 , log in to mysql
After mysql is installed, a temporary random password will be generated and the storage location is /root/.mysql_secret
 As shown in the picture:

 ##yum install libncurses.so.5

8, change the password of mysql
The following prompt appears:
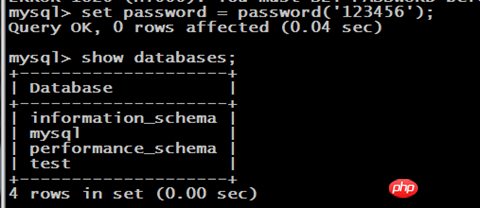
MySQL allows you to change the initial password: set password = password('123456');
You can use it after changing the password:
9, enable remote login of mysql
By default, mysql does not support remote login to mysql for security reasons, so you need to set the permission to enable remote login to mysqlAfter logging in to mysql, enter the following command:
grant all privileges on *.* to 'root' @'%' identified by 'root';
flush privileges;


/etc/rc.d/init.d/iptables save ---Permanently save changes to the firewall

Remote connection:


Three, TOMCAT installation
1, upload Tomcat to linux

2. Unzip Tomcat to /usr/local

3. Open Linux for external access Port 8080
/sbin/iptables -I INPUT -p tcp --dport 8080 -j ACCEPT
/etc/rc.d/init.d/iptables save

4, start and shut down Tomcat
Enter tomcat bin to start: ./startup.sh

Access successful:

Enter tomcat bin and close: ./shutdown.sh
 ##
##
The above is the detailed content of Software installation (JDK+MySQL+TOMCAT). For more information, please follow other related articles on the PHP Chinese website!


