
 Operation and Maintenance
Linux Operation and Maintenance
Summarize the usage examples of disk quotas
Operation and Maintenance
Linux Operation and Maintenance
Summarize the usage examples of disk quotas
Summarize the usage examples of disk quotas
Disk quota
1 Enable disk quota
First create a new partition /dev/sd5 and create the file system.
[root@local ~]# mkfs.ext4 /dev/sda5
Since xfs cannot succeed without disk quota, ext4 is used here.
Then mount the /dev/sda5 partition to /home
[root@local ~]# mount /dev/sda5 /home
[root@ local ~]# blkid /dev/sda5
/dev/sda5: UUID="8879cf63-99a5-43bb-9bfe-de303afb0799" TYPE="ext4"
Modify/etc /fstab file
[root@local ~]# vim /etc/fstab
UUID=dddd23d1-1012-4bac-9717-56b9b469e0c2 / ext4 defaults 1 1
UUID=316d8677-25b8-49af-b4eb-54daa20b6595 /boot ext4 defaults 1 2
UUID=dacd6ddd-d765-4646-b98c-0579f2732749 swap swap defaults 0 0
UUID=8879cf63-99a5-43bb-9bfe-de303afb0799 /home ext4 defaults,usrquota,grpquota 0 0
usrquota enables the user disk quota function of the disk, and grpquota enables the group disk quota function of the disk.
[root@centos7 ~]# mount –a /home/
Check whether the mount is successful
[root@local ~ ]# mount
sysfs on /sys type sysfs (rw,nosuid,nodev,noexec,relatime,seclabel)
proc on /proc type proc (rw,nosuid,nodev, noexec,relatime)
[……]
/dev/sda5 on /home type ext4 (rw,relatime,seclabel,quota,usrquota,grpquota,data=ordered)
You can see that /dev/sda5 has been mounted correctly
2 Create a quota database
[root@centos7 ~] # quotacheck -cug /home
Since the /etc/fstab file sets usrquota and grpquota, so here must be –cug, u corresponds to usrquota, and g corresponds to grpquota.
Now check the /home directory and there will be two more files, indicating that the disk quota database was created successfully.
[root@local ~]# ll /home/
total 36
-rw-------. 1 root root 7168 Apr 25 11:03 aquota.group
-rw-------. 1 root root 7168 Apr 25 11:03 aquota.user
drwx------. 3 centos centos 4096 Apr 16 10:20 centos
drwx------. 2 root root 16384 Apr 25 10:55 lost+found
3 Enable database
[root@local ~]# quotaon /home/
[root@local ~]
# Come down and check it out, you can see that it was successfully enabled.
[root@local ~]# quotaon -p /home/
group quota on /home (/dev/sda5) is on
user quota on /home ( /dev/sda5) is on
4 Disk quota setting
Set user1 disk quota to 100M, and issue a warning when it reaches 80M
[root@local ~]# edquota user1
Disk quotas for user user1 (uid 1001):
Filesystem blocks soft hard inodes soft hard
/dev/sda5 52 80000 100000 13 0 0
The default unit here is block, and 1 block is 1K. soft is the warning value, hard is the maximum value,
Now let’s confirm whether the configuration is successful
[root@local ~]# quota user1    #查看用户user 的磁盘配额
Disk quotas for user user1 (uid 1001):
Filesystem blocks quota limit grace files quota limit grace
/dev/sda5 52 80000 100000 13 0 0
5 Test
(1) Create the test user user1
[root@local ~]# useradd uesr1
Switch to user1 user
[root@local ~]# su - user1
Last login: Tue Apr 25 11:08:41 CST 2017 on pts/1
(2) Create a file test
First create a 50M file testquota.
[user1@local ~]$ dd if=/dev/zero of=testquota bs=1M count=50
50+0 records in
50+0 records out
52428800 bytes (52 MB) copied, 0.562963 s, 93.1 MB/s
You can see that everything is normal
Let’s create a 35M file testquota2.
[user1@local ~]$ dd if=/dev/zero of=testquota2 bs=1M count=35

sda5: warning, user block quota exceeded.
35+0 records in
35+0 records out
36700160 bytes (37 MB) copied, 0.348267 s, 105 MB/s
Because 50M+35M=85M is greater than 80M
Everyone saw a warning issued this time, but the operation was still successful
Come down and create again A 20M file testquota3.
[user1@local ~]$ dd if=/dev/zero of=testquota3 bs=1M count=20

sda5: write failed, user block limit reached.
dd: error writing 'testquota3': Disk quota exceeded
13+0 records in
12+0 records out
13217792 bytes (13 MB) copied, 0.165029 s, 80.1 MB/s
Creation failed because it has exceeded the maximum value of 100M!
The test is completed and the experiment is over!
The above is the detailed content of Summarize the usage examples of disk quotas. For more information, please follow other related articles on the PHP Chinese website!

Hot AI Tools

Undresser.AI Undress
AI-powered app for creating realistic nude photos

AI Clothes Remover
Online AI tool for removing clothes from photos.

Undress AI Tool
Undress images for free

Clothoff.io
AI clothes remover

AI Hentai Generator
Generate AI Hentai for free.

Hot Article
Hot Tools

Notepad++7.3.1
Easy-to-use and free code editor

SublimeText3 Chinese version
Chinese version, very easy to use

Zend Studio 13.0.1
Powerful PHP integrated development environment

Dreamweaver CS6
Visual web development tools

SublimeText3 Mac version
God-level code editing software (SublimeText3)
Hot Topics


 Steps to configure RAID 1 on Windows 11
Sep 22, 2023 pm 03:05 PM
Steps to configure RAID 1 on Windows 11
Sep 22, 2023 pm 03:05 PM
Windows 11 has strict requirements, and after struggling to obtain that storage, losing your hard drive and data would be a shame. Well, we have good news that can help you buffer against hard drive failure. Using built-in Windows tools, you can copy all your data from one drive to another. This way, if one drive fails, you can mirror and rebuild the original data on the replacement drive. Can Windows 11 do RAID? With Windows Storage Spaces feature, you can perform RAID on Windows 11. This feature allows you to create multiple virtual disks using a hard drive connected directly to your computer without degrading performance. Benefits of Raid: Reduce the cost of disk
 How to RAID an external hard drive on Windows 11
Sep 16, 2023 pm 10:05 PM
How to RAID an external hard drive on Windows 11
Sep 16, 2023 pm 10:05 PM
RAID or Redundant Array of Independent Disks is a data storage technology in which multiple external drives are combined into one. It was widely used when large hard drives were expensive, but many people still prefer the RAID external drive method. There are several levels of RAID, each serving a specific purpose. Keep in mind that the average user doesn't have to delve into the complexity, a simple setup of RAID0 or RAID1 should work fine. Reasons to consider raiding an external drive: Improved PC performance Easy to configure, cheaper than existing alternatives Faster data reading and writing Efficient backup solution through mirroring How to RAID an external drive on Windows 11? Before RAID external hard drives, you need to pay attention to the following first things
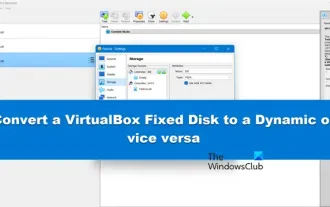 Convert VirtualBox fixed disk to dynamic disk and vice versa
Mar 25, 2024 am 09:36 AM
Convert VirtualBox fixed disk to dynamic disk and vice versa
Mar 25, 2024 am 09:36 AM
When creating a virtual machine, you will be asked to select a disk type, you can select fixed disk or dynamic disk. What if you choose fixed disks and later realize you need dynamic disks, or vice versa? Good! You can convert one to the other. In this post, we will see how to convert VirtualBox fixed disk to dynamic disk and vice versa. A dynamic disk is a virtual hard disk that initially has a small size and grows in size as you store data in the virtual machine. Dynamic disks are very efficient at saving storage space because they only take up as much host storage space as needed. However, as disk capacity expands, your computer's performance may be slightly affected. Fixed disks and dynamic disks are commonly used in virtual machines
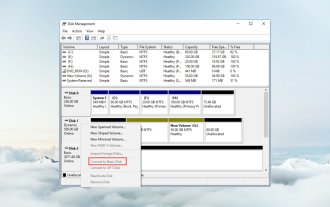 How to convert dynamic disk to basic disk on Windows 11
Sep 23, 2023 pm 11:33 PM
How to convert dynamic disk to basic disk on Windows 11
Sep 23, 2023 pm 11:33 PM
If you want to convert a dynamic disk to a basic disk in Windows 11, you should create a backup first as the process will erase all data in it. Why should you convert dynamic disk to basic disk in Windows 11? According to Microsoft, dynamic disks have been deprecated from Windows and their use is no longer recommended. Additionally, Windows Home Edition does not support dynamic disks, so you will not be able to access these logical drives. If you want to combine more disks into a larger volume, it is recommended to use Basic Disks or Storage Spaces. In this article, we will show you how to convert dynamic disk to basic disk on Windows 11 How to convert dynamic disk to basic disk in Windows 11? In the beginning
 Where to check win11 disk cleanup
Jun 29, 2023 pm 09:25 PM
Where to check win11 disk cleanup
Jun 29, 2023 pm 09:25 PM
Where can I check disk cleanup in win11? As the system is used for a long time, there will often be more than ten gigabytes or more useless junk files in the c drive or other computer disks. At this time, using the disk cleanup function that comes with win11 can help us quickly clean up these useless files. However, many users do not know where the disk cleanup function of win11 is and how to operate it. Today, the editor will bring you the steps to check the junk cleaning function that comes with Win 11, and let me explain it to you. Steps to check win11’s built-in junk cleaning function 1. First, press the [Win] key on the keyboard, or click [Start Menu] on the taskbar, and then select [Settings] under pinned applications; 2. The current path is: System >storage,
![How to increase disk size in VirtualBox [Guide]](https://img.php.cn/upload/article/000/887/227/171064142025068.jpg?x-oss-process=image/resize,m_fill,h_207,w_330) How to increase disk size in VirtualBox [Guide]
Mar 17, 2024 am 10:10 AM
How to increase disk size in VirtualBox [Guide]
Mar 17, 2024 am 10:10 AM
We often encounter situations where the predefined disk size has no room for more data? If you need more virtual machine hard disk space at a later stage, you must expand the virtual hard disk and partitions. In this post, we will see how to increase disk size in VirtualBox. Increasing the disk size in VirtualBox It is important to note that you may want to back up your virtual hard disk files before performing these operations, as there is always the possibility of something going wrong. It is always a good practice to have backups. However, the process usually works fine, just make sure to shut down your machine before continuing. There are two ways to increase disk size in VirtualBox. Expand VirtualBox disk size using GUI using CL
 What does task manager disk 100% mean?
Jan 03, 2024 pm 06:13 PM
What does task manager disk 100% mean?
Jan 03, 2024 pm 06:13 PM
When many friends open the Task Manager CPU, they find that the disk shows 100%. What is going on? Because when Windows Defender is scanning, if other work is performed, the disk usage reaches 100%. Or there are other functions occupied. Let’s take a look at the specific introduction and solutions below. What does Task Manager Disk 100% mean: Answer: The current disk resources are heavily occupied. The biggest problem with disk usage is actually caused by Windows search. This function requires continuous resumes and therefore leads to extremely high usage. What to do if Task Manager disk is 100%? 1. First, right-click the taskbar and open "Task Manager". 2. Then look at the one with the highest occupancy rate and right-click
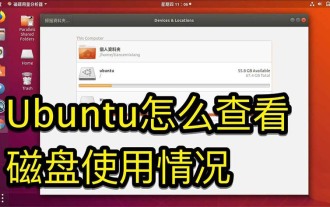 How to master disk usage in Ubuntu system
Jan 03, 2024 pm 11:13 PM
How to master disk usage in Ubuntu system
Jan 03, 2024 pm 11:13 PM
We want to check the hard disk usage in the system. How to check the Ubuntu system? Let's take a look at the tutorial on checking the hard disk usage in Ubuntu system. 1. On the system, click on the lower left corner of the desktop, as shown in the picture. 2. In the system, click Utilities, as shown in the figure. 3. Click Disk Usage, as shown in the picture. 4. Then you can see the disk usage, that is, the disk in the middle is your computer’s hard drive, as shown in the picture. The small print below the disk shows the usage. 5. Or click the disk on the utility program, as shown in the picture. 6. Then under the capacity, you can see the hard disk usage, as shown in the picture. The following is the text version to view disk usage: df-h The results are as follows: FilesystemSizeUsedAvailU
