WeChat Mini Program Development Simple Tutorial 1
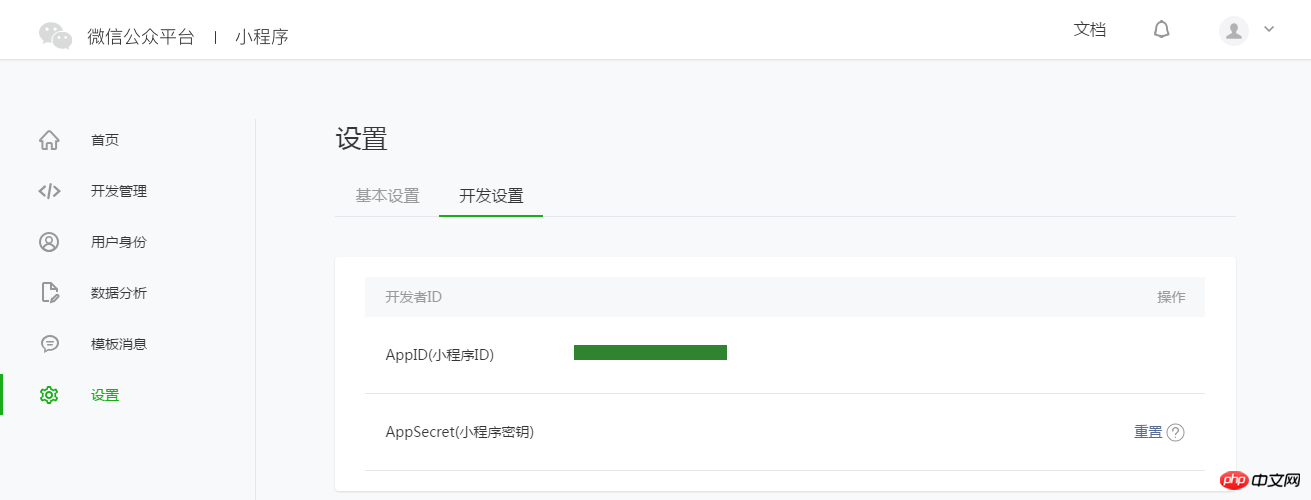
1. Obtain the AppID of the WeChat applet (Note that the AppID here is a special ID for the applet, which can be seen in the applet when logging into the WeChat official account. Without AppID, some functions will be restricted!)
Log in, and you can view the AppID of the WeChat applet in the "Settings" - "Developer Settings" of the website. Note that the AppID of the service account or subscription account cannot be used directly.

Note: If you want to experience the mini program on your mobile phone with a non-administrator WeChat ID, then we also need to operate "Bind Developer". That is, in the "User Identity"-"Developer" module, bind the WeChat ID you need to experience the mini program. By default, this tutorial uses the administrator's WeChat ID to register an account and experience.
2. Create a project (The name of the project is generally in English, try not to use Chinese, as an error may be reported)
We need to use developer tools to complete the mini program Creation and code editing.
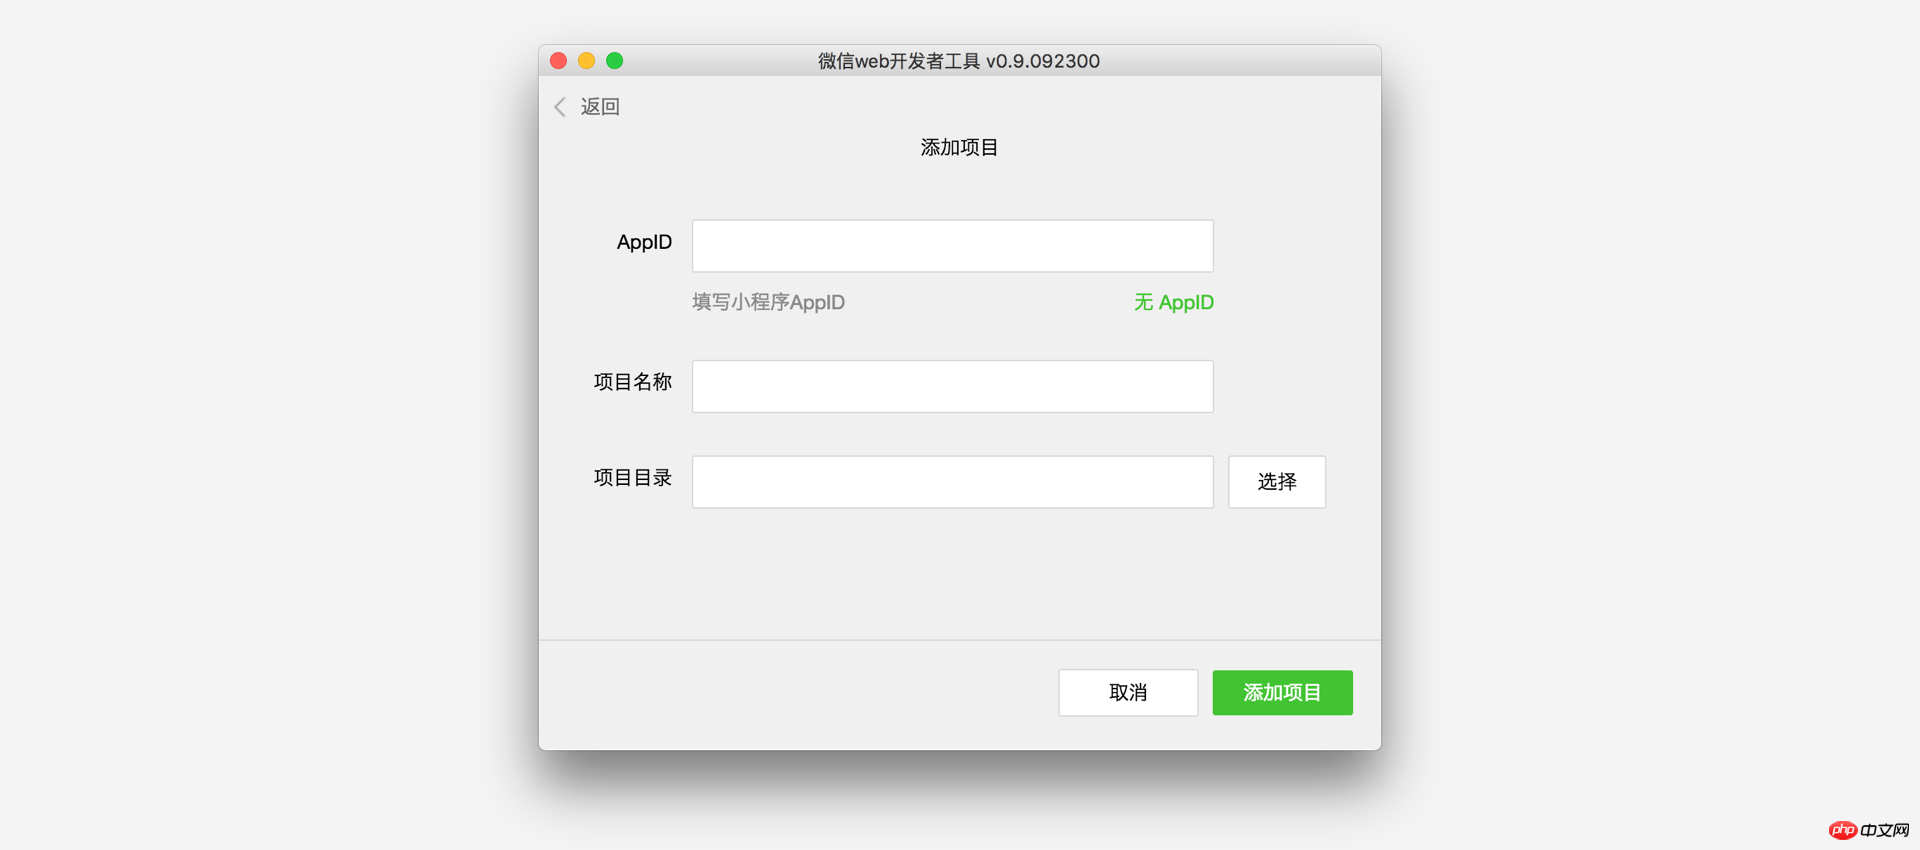
After the developer tools are installed, open and use WeChat to scan the QR code to log in. Select Create "Project", fill in the AppID obtained above, set a local project name (not a mini program name), such as "My First Project", and select a local folder as the directory where the code is stored , just click "New Project".
In order to facilitate beginners to understand the basic code structure of the WeChat applet, during the creation process, if the selected local folder is an empty folder, the developer tool will prompt whether it is necessary to create a quick start project. Select "Yes" and the developer tools will help us generate a simple demo in the development directory.

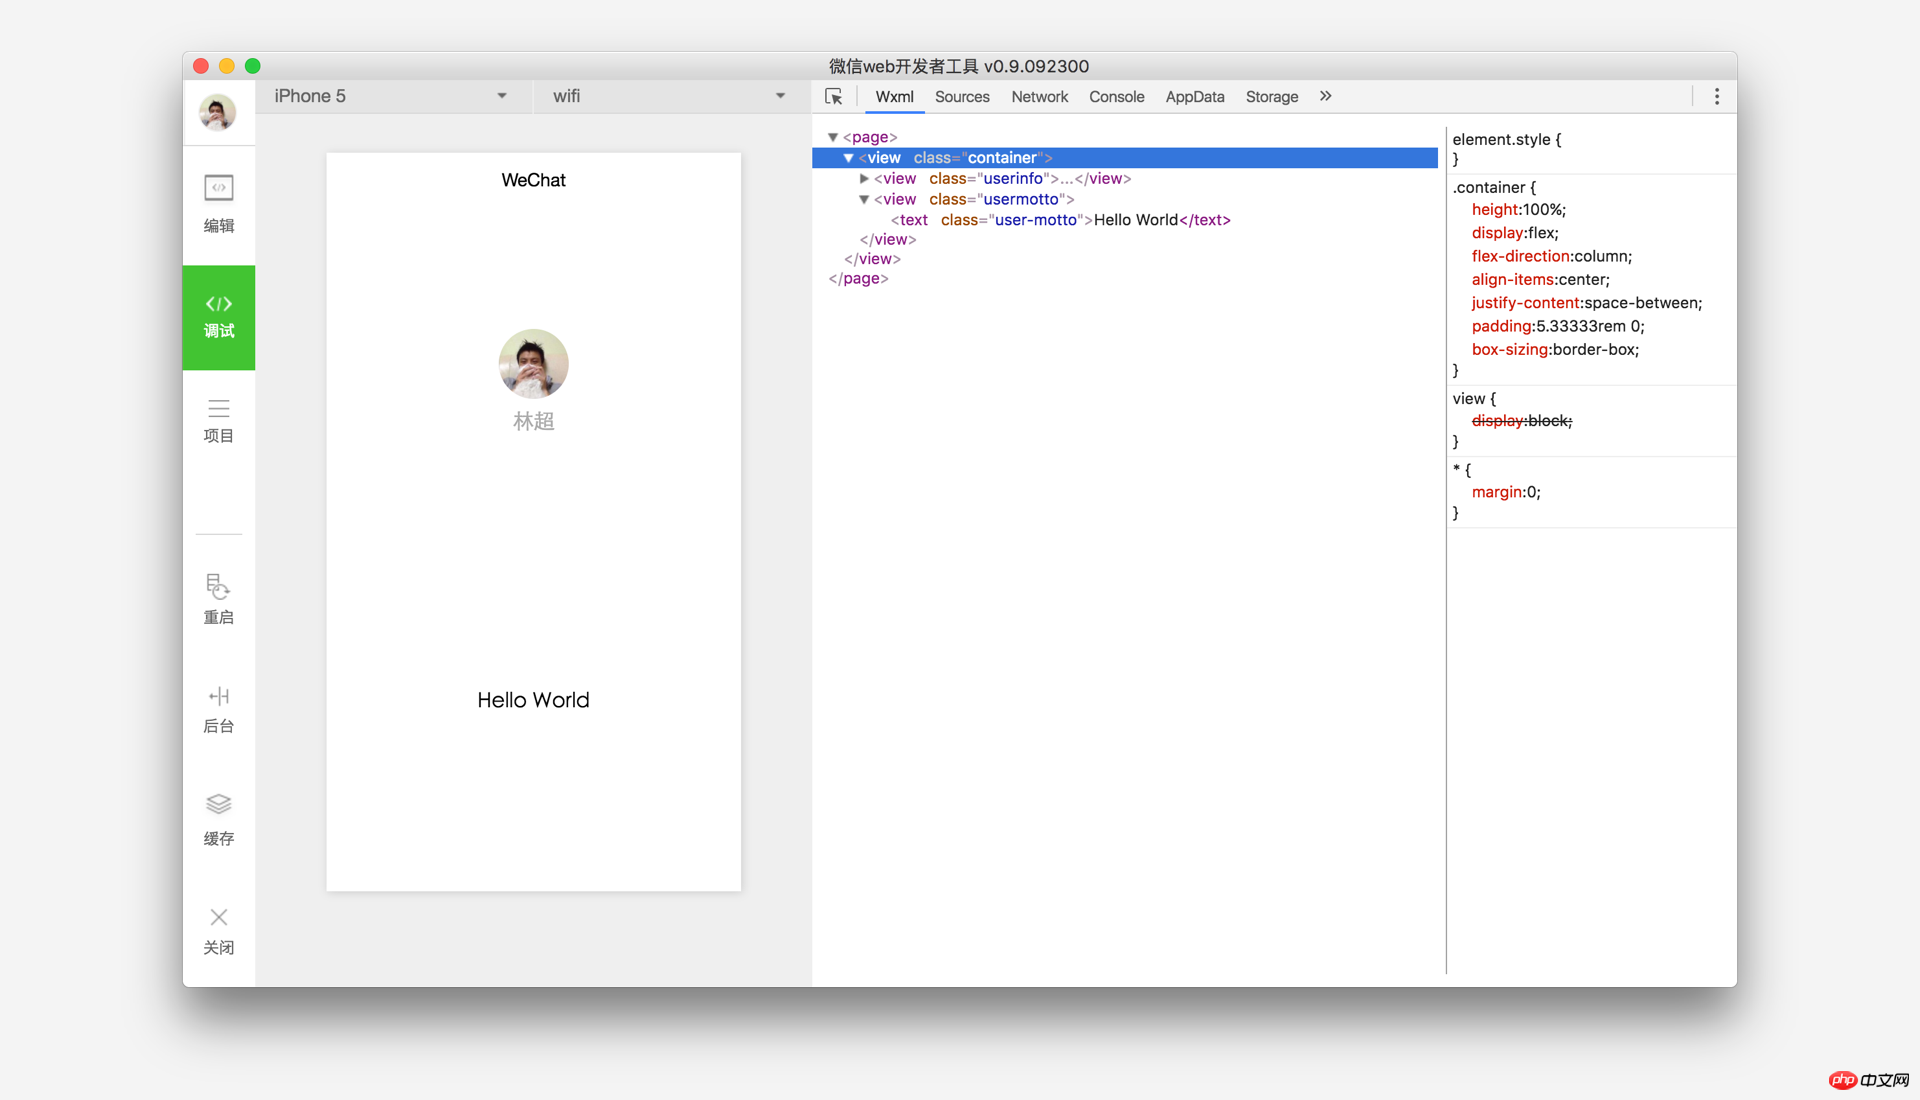
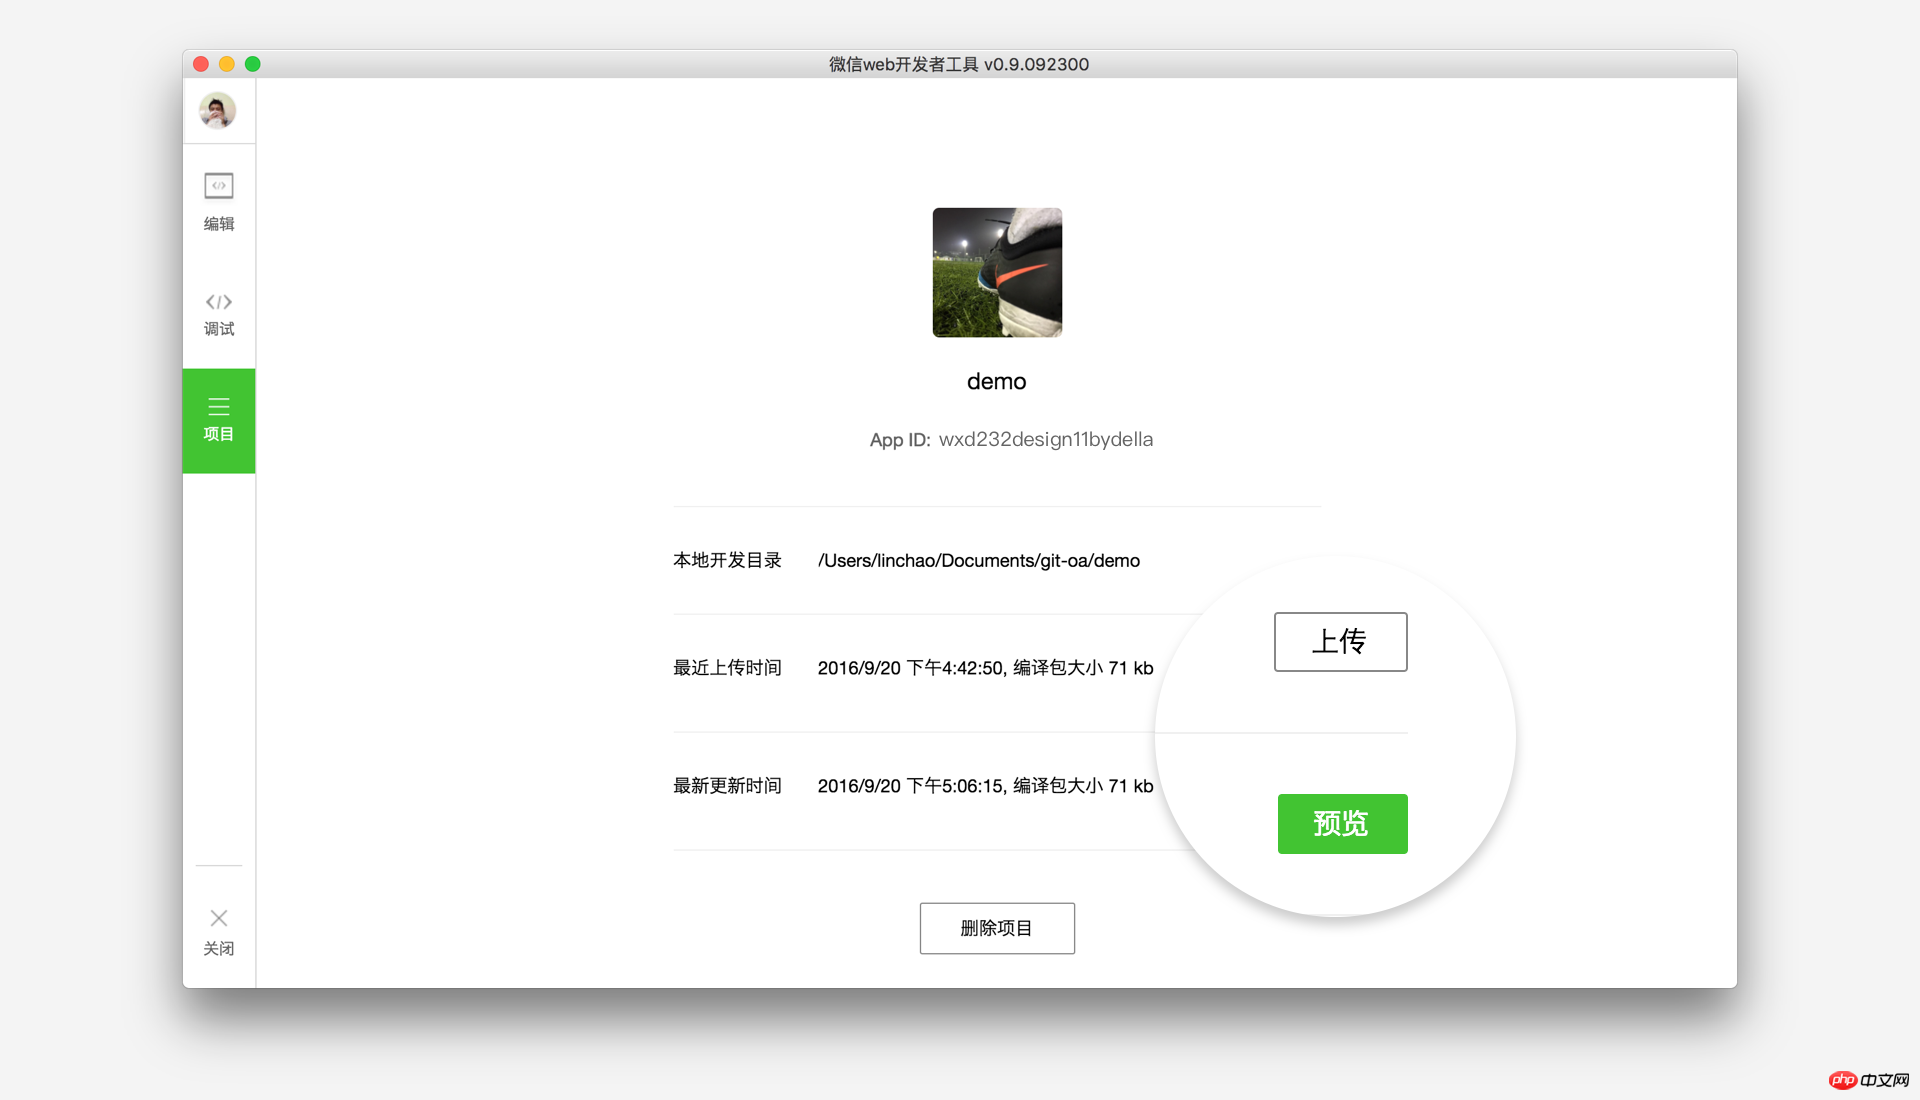
After the project is successfully created, we can click on the project to enter and see the complete developer tools interface, click on the left navigation, and view it in "Edit" And edit our code, in "Debug" you can test the code and simulate the effect of the mini program on the WeChat client, and in "Project" you can send it to your mobile phone to preview the actual effect.
3. Write code (Mini programs have their own specific tags)
Create mini program instances
Click "" in the left navigation of developer tools Edit", we can see that this project has been initialized and contains some simple code files. The most critical and essential ones are app.js, app.json, and app.wxss. Among them, the .js suffix is a script file, the .json suffix is a configuration file, and the .wxss suffix is a style sheet file. The WeChat applet will read these files and generate applet instances.
Let’s briefly understand the functions of these three files to facilitate modification and develop your own WeChat applet from scratch.
app.js is the script code of the mini program. We can monitor and process the life cycle functions of the applet and declare global variables in this file. Call the rich API provided by the framework, such as synchronous storage and synchronous reading of local data in this example. To learn more about the available APIs, please refer to the API document
//app.js
App({
  onLaunch: function () {//调用API从本地缓存中获取数据var logs = wx.getStorageSync('logs') || []
    logs.unshift(Date.now())
    wx.setStorageSync('logs', logs)
  },
  getUserInfo:function(cb){var that = this;if(this.globalData.userInfo){      typeof cb == "function" && cb(this.globalData.userInfo)
    }else{      //调用登录接口
      wx.login({
        success: function () {
          wx.getUserInfo({
            success: function (res) {
              that.globalData.userInfo = res.userInfo;              typeof cb == "function" && cb(that.globalData.userInfo)
            }
          })
        }
      });
    }
  },
  globalData:{
    userInfo:null
  }
})app.json is the global configuration of the entire applet. In this file, we can configure which pages the mini program consists of, configure the window background color of the mini program, configure the navigation bar style, and configure the default title. Note that no comments can be added to this file. For more configurable items, please refer to the configuration details
{  "pages":["pages/index/index","pages/logs/logs"
  ],  "window":{"backgroundTextStyle":"light","navigationBarBackgroundColor": "#fff","navigationBarTitleText": "WeChat","navigationBarTextStyle":"black"
  }
}app.wxss is the common style sheet for the entire applet. We can directly use the style rules declared in app.wxss on the class attribute of the page component.
/**app.wxss**/.container {  height: 100%;  display: flex;  flex-direction: column;  align-items: center;  justify-content: space-between;  padding: 200rpx 0;  box-sizing: border-box;
}Create page
In this tutorial, we have two pages, the index page and the logs page, namely the welcome page and the display page of the mini program startup log. They are both in the pages directory. . The [path + page name] of each page in the WeChat mini program needs to be written in pages of app.json, and the first page in pages is the homepage of the mini program.
Each mini program page is composed of four different suffix files with the same name in the same path, such as: index.js, index.wxml, index.wxss, index.json. The file with the suffix .js is a script file, the file with the suffix .json is a configuration file, the file with the suffix .wxss is a style sheet file, .wxml The file with the suffix is the page structure file.
index.wxml is the structure file of the page:
<!--index.wxml--><view class="container"> <view bindtap="bindViewTap" class="userinfo"><image class="userinfo-avatar" src="{{userInfo.avatarUrl}}" background-size="cover"></image><text class="userinfo-nickname">{{userInfo.nickName}}</text> </view> <view class="usermotto"><text class="user-motto">{{motto}}</text> </view></view>In this example, <view/>, <image/># are used ##, to build the page structure, bind data and interactive processing functions.
//index.js//获取应用实例var app = getApp()
Page({
  data: {
    motto: 'Hello World',
    userInfo: {}
  },  //事件处理函数
  bindViewTap: function() {
    wx.navigateTo({
      url: '../logs/logs'
    })
  },
  onLoad: function () {console.log('onLoad')var that = this//调用应用实例的方法获取全局数据
    app.getUserInfo(function(userInfo){      //更新数据
      that.setData({
        userInfo:userInfo
      })
    })
  }
})/**index.wxss**/.userinfo { display: flex; flex-direction: column; align-items: center;
}.userinfo-avatar { width: 128rpx; height: 128rpx; margin: 20rpx; border-radius: 50%;
}.userinfo-nickname { color: #aaa;
}.usermotto { margin-top: 200px;
}页面的样式表是非必要的。当有页面样式表时,页面的样式表中的样式规则会层叠覆盖 app.wxss 中的样式规则。如果不指定页面的样式表,也可以在页面的结构文件中直接使用 app.wxss 中指定的样式规则。
index.json 是页面的配置文件:
页面的配置文件是非必要的。当有页面的配置文件时,配置项在该页面会覆盖 app.json 的 window 中相同的配置项。如果没有指定的页面配置文件,则在该页面直接使用 app.json 中的默认配置。
logs 的页面结构
<!--logs.wxml--><view class="container log-list"> <block wx:for="{{logs}}" wx:for-item="log"><text class="log-item">{{index + 1}}. {{log}}</text> </block></view>logs 页面使用 <block/> 控制标签来组织代码,在 <block/> 上使用 wx:for 绑定 logs 数据,并将 logs 数据循环展开节点
//logs.jsvar util = require('../../utils/util.js')
Page({
  data: {
    logs: []
  },
  onLoad: function () {this.setData({
      logs: (wx.getStorageSync('logs') || []).map(function (log) {return util.formatTime(new Date(log))
      })
    })
  }
})运行结果如下:

4. 手机预览(加入开发者或者运营者可以生成二维码直接扫码进入!)
开发者工具左侧菜单栏选择"项目",点击"预览",扫码后即可在微信客户端中体验。

The above is the detailed content of WeChat Mini Program Development Simple Tutorial 1. For more information, please follow other related articles on the PHP Chinese website!

Hot AI Tools

Undresser.AI Undress
AI-powered app for creating realistic nude photos

AI Clothes Remover
Online AI tool for removing clothes from photos.

Undress AI Tool
Undress images for free

Clothoff.io
AI clothes remover

AI Hentai Generator
Generate AI Hentai for free.

Hot Article

Hot Tools

Notepad++7.3.1
Easy-to-use and free code editor

SublimeText3 Chinese version
Chinese version, very easy to use

Zend Studio 13.0.1
Powerful PHP integrated development environment

Dreamweaver CS6
Visual web development tools

SublimeText3 Mac version
God-level code editing software (SublimeText3)

Hot Topics
 Tutorial on how to use Dewu
Mar 21, 2024 pm 01:40 PM
Dewu APP is currently a very popular brand shopping software, but most users do not know how to use the functions in Dewu APP. The most detailed usage tutorial guide is compiled below. Next is the Dewuduo that the editor brings to users. A summary of function usage tutorials. Interested users can come and take a look! Tutorial on how to use Dewu [2024-03-20] How to use Dewu installment purchase [2024-03-20] How to obtain Dewu coupons [2024-03-20] How to find Dewu manual customer service [2024-03-20] How to check the pickup code of Dewu [2024-03-20] Where to find Dewu purchase [2024-03-20] How to open Dewu VIP [2024-03-20] How to apply for return or exchange of Dewu
 Tutorial on how to turn off the payment sound on WeChat
Mar 26, 2024 am 08:30 AM
1. First open WeChat. 2. Click [+] in the upper right corner. 3. Click the QR code to collect payment. 4. Click the three small dots in the upper right corner. 5. Click to close the voice reminder for payment arrival.
 What software is photoshopcs5? -photoshopcs5 usage tutorial
Mar 19, 2024 am 09:04 AM
PhotoshopCS is the abbreviation of Photoshop Creative Suite. It is a software produced by Adobe and is widely used in graphic design and image processing. As a novice learning PS, let me explain to you today what software photoshopcs5 is and how to use photoshopcs5. 1. What software is photoshop cs5? Adobe Photoshop CS5 Extended is ideal for professionals in film, video and multimedia fields, graphic and web designers who use 3D and animation, and professionals in engineering and scientific fields. Render a 3D image and merge it into a 2D composite image. Edit videos easily
 In summer, you must try shooting a rainbow
Jul 21, 2024 pm 05:16 PM
After rain in summer, you can often see a beautiful and magical special weather scene - rainbow. This is also a rare scene that can be encountered in photography, and it is very photogenic. There are several conditions for a rainbow to appear: first, there are enough water droplets in the air, and second, the sun shines at a low angle. Therefore, it is easiest to see a rainbow in the afternoon after the rain has cleared up. However, the formation of a rainbow is greatly affected by weather, light and other conditions, so it generally only lasts for a short period of time, and the best viewing and shooting time is even shorter. So when you encounter a rainbow, how can you properly record it and photograph it with quality? 1. Look for rainbows. In addition to the conditions mentioned above, rainbows usually appear in the direction of sunlight, that is, if the sun shines from west to east, rainbows are more likely to appear in the east.
 DisplayX (monitor testing software) tutorial
Mar 04, 2024 pm 04:00 PM
Testing a monitor when buying it is an essential part to avoid buying a damaged one. Today I will teach you how to use software to test the monitor. Method step 1. First, search and download the DisplayX software on this website, install it and open it, and you will see many detection methods provided to users. 2. The user clicks on the regular complete test. The first step is to test the brightness of the display. The user adjusts the display so that the boxes can be seen clearly. 3. Then click the mouse to enter the next link. If the monitor can distinguish each black and white area, it means the monitor is still good. 4. Click the left mouse button again, and you will see the grayscale test of the monitor. The smoother the color transition, the better the monitor. 5. In addition, in the displayx software we
 Experts teach you! The Correct Way to Cut Long Pictures on Huawei Mobile Phones
Mar 22, 2024 pm 12:21 PM
With the continuous development of smart phones, the functions of mobile phones have become more and more powerful, among which the function of taking long pictures has become one of the important functions used by many users in daily life. Long screenshots can help users save a long web page, conversation record or picture at one time for easy viewing and sharing. Among many mobile phone brands, Huawei mobile phones are also one of the brands highly respected by users, and their function of cropping long pictures is also highly praised. This article will introduce you to the correct method of taking long pictures on Huawei mobile phones, as well as some expert tips to help you make better use of Huawei mobile phones.
 PHP Tutorial: How to convert int type to string
Mar 27, 2024 pm 06:03 PM
PHP Tutorial: How to Convert Int Type to String In PHP, converting integer data to string is a common operation. This tutorial will introduce how to use PHP's built-in functions to convert the int type to a string, while providing specific code examples. Use cast: In PHP, you can use cast to convert integer data into a string. This method is very simple. You only need to add (string) before the integer data to convert it into a string. Below is a simple sample code
 How to cut out pictures in ps - tutorial on cutting out pictures in ps
Mar 04, 2024 pm 12:07 PM
Many friends still don’t know how to cut out pictures in PS, so the editor below explains the tutorial on cutting out pictures in PS. If you are in need, please take a look. I believe it will be helpful to everyone. 1. First, open the picture that needs to be cut out in PS (as shown in the picture). After opening the software, click the Magic Wand tool in the left toolbar. Then, use the mouse to click on the background area of the image and press the inverse selection shortcut key [Ctrl+shift+I] to select the main part of the image. 3. After selecting the subject, press the shortcut key [Ctrl+J] to copy the next layer; then close the background layer and the picture will be cut out (as shown in the picture). The above is all the tutorials on how to cut out pictures in PS brought by the editor. I hope it will be helpful to you.


