Regarding the fixed attribute, when does it need to be used and how to use it? First of all, we should first understand the description of the fixed attribute: fixed always uses the body as the object when positioning, and always uses the element according to the browser window. Positioning is performed through the "left", "top", "right", and "bottom" attributes.
So, after we understand the description of the fixed attribute, we can know its function. When we need to automatically adjust the position of a layer relative to the browser, if you use the absolute attribute of position to position the layer, you will find that the absolute attribute cannot achieve the CSS effect you want. At this time, you need to use the fixed attribute to locate the layer. Of course, if you don't want to use the fixed attribute, you canuse JavaScript statements instead. Let's demonstrate an example below:
1. We add 2 layers to the code: div1 and div2, the code is as follows:
<div class="div1">层1</div>
<div class="div2">层2</div>
2. Write the corresponding For the css code, let’s try it without adding the fixed attribute:
.div1{background-color:#FF0000;width:100px;height:100px;}
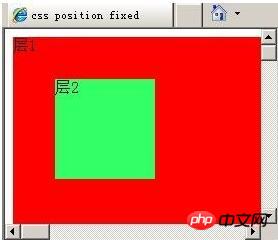
.div2{background-color:#33FF66;width:100px;height:100px;}3. Then let’s run it in F12 to see the effect. I’m using Dreamweaver 8. You can also test the code directly in Notepad. , Figure 1 is the effect without adding the fixed attribute:

#4. Next we add the fixed attribute. In order to facilitate our observation, we let the layer div1 The width and height are large enough. The css code is as follows:
.div1{
background-color:#FF0000;
width:2000px;
height:2000px;
}
.div2{
background-color:#33FF66;
width:100px;
height:100px;
position:fixed;
left:50px;
top:50px;
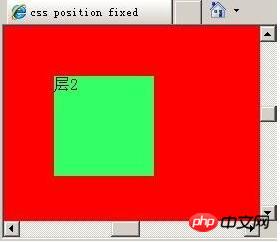
}Run it to see the effect, as shown in Figure 2:

5.
Below We pull the up and down scroll bars and the left and right scroll bars on the browser to the middle position, as shown in Figure 3:

You will find that the position given to div2 After adding the fixed attribute, no matter how we pull the browser's scroll bar, the position of layer 2 in the browser will not change. If you feel eager to try it, then hurry up and try it out.
The above is the detailed content of CSS position attribute: Detailed explanation of the use of fixed. For more information, please follow other related articles on the PHP Chinese website!


