Spring boot knowledge point 1: Hello World
Preface
As programmers, whether they are .net programmers or java programmers, they don’t really like various configuration files. I remember that when I first started learning java SSH, I always installed B. Look at how many configurations I have. Programmers who started writing Java from .net are even more confused when it comes to various spring configuration files. Then Spring Boot was born. Spring Boot was born only for the current popular microservice framework. It simplifies development, and there is no need to deal with various configuration files at the beginning.
It’s a cliché, let’s start with Hello World. This article builds a spring boot development environment based on idea and maven.
Project structure
Let’s take a look at the general structure of the project first. The basic skeleton and ssm project structure remain the same. The difference is that there is an additional Application.java class. It is recommended to put Under default package.
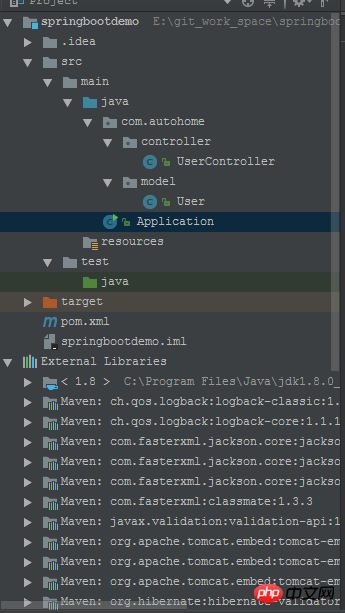
Creating a spring boot project based on idea+maven
1. When I created the project, the latest version of spring boot was 1.5. 4
2. Use the default maven project to create without checking any skeleton.
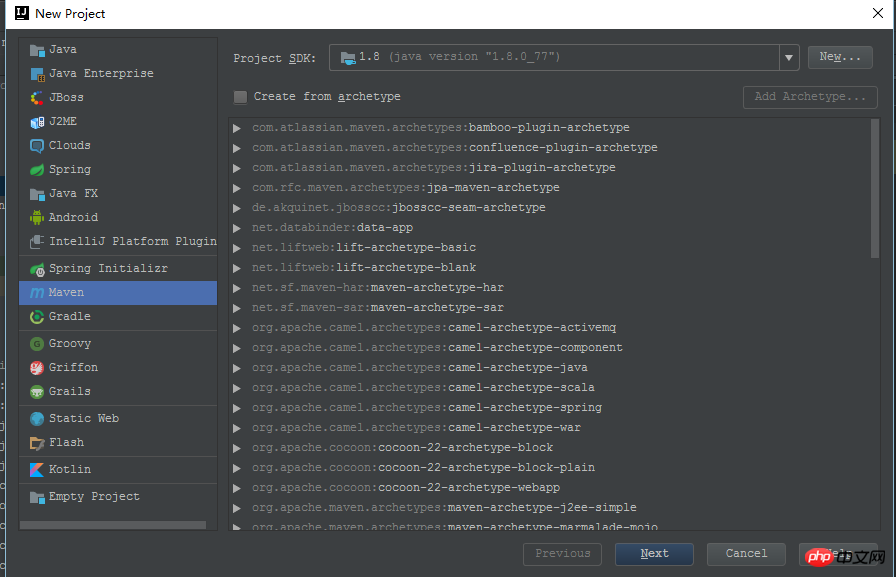
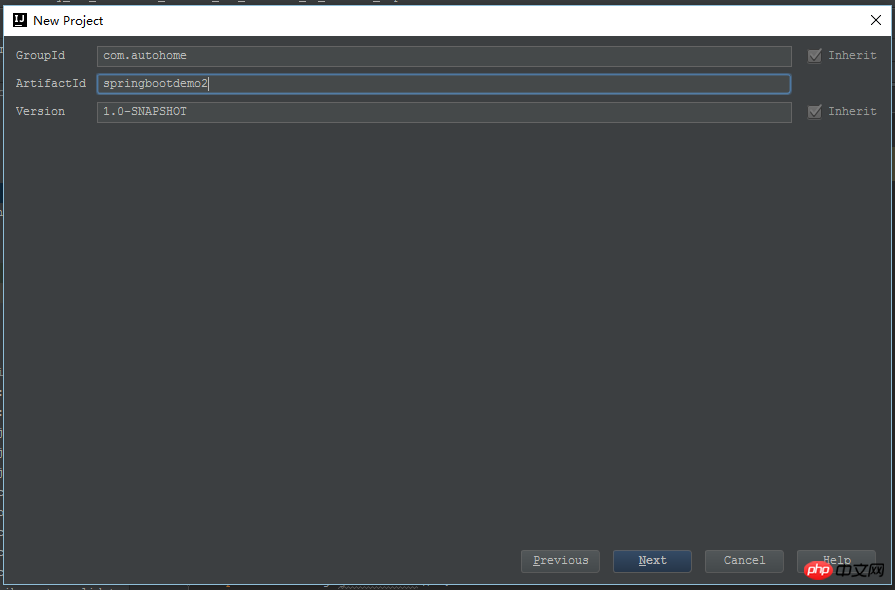
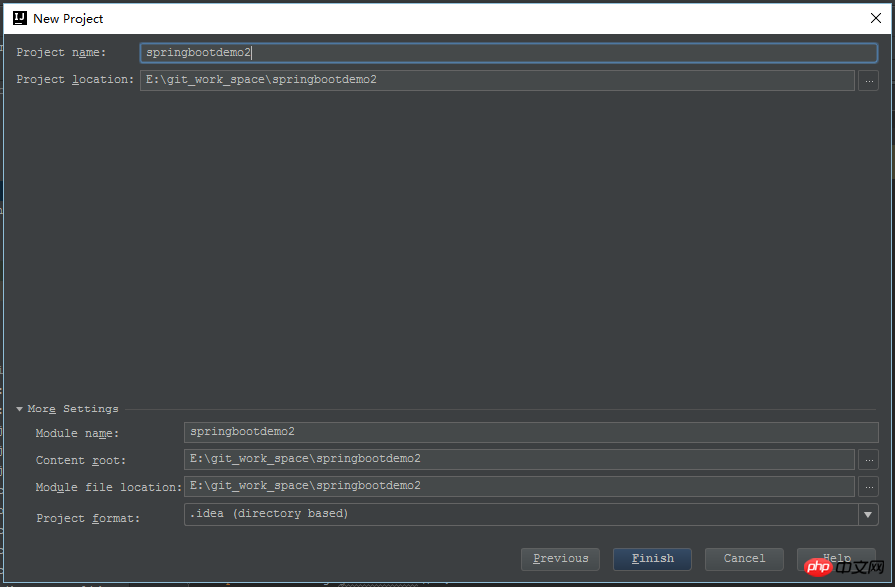
OK, such a default maven project is started. Of course, it is not yet available. Call a spring boot program, open pom.xml, and add the dependency packages required by spring boot. The most important ones are spring-boot-starter-parent and
spring-boot-start-web. You can create a spring mvc program with just two dependencies. Isn’t it very happy?
<?xml version="1.0" encoding="UTF-8"?>
<project xmlns="http://maven.apache.org/POM/4.0.0"
         xmlns:xsi="http://www.w3.org/2001/XMLSchema-instance"
         xsi:schemaLocation="http://maven.apache.org/POM/4.0.0 ">
    <modelVersion>4.0.0</modelVersion>

    <parent>
        <groupId>org.springframework.boot</groupId>
        <artifactId>spring-boot-starter-parent</artifactId>
        <version>1.5.4.RELEASE</version>
    </parent>

    <groupId>com.autohome</groupId>
    <artifactId>springbootdemo</artifactId>
    <version>1.0-SNAPSHOT</version>
    <packaging>war</packaging>
    <name>springbootdemo</name>

    <dependencies>
        <dependency>
            <groupId>org.springframework.boot</groupId>
            <artifactId>spring-boot-starter-web</artifactId>
        </dependency>
    </dependencies>


</project>
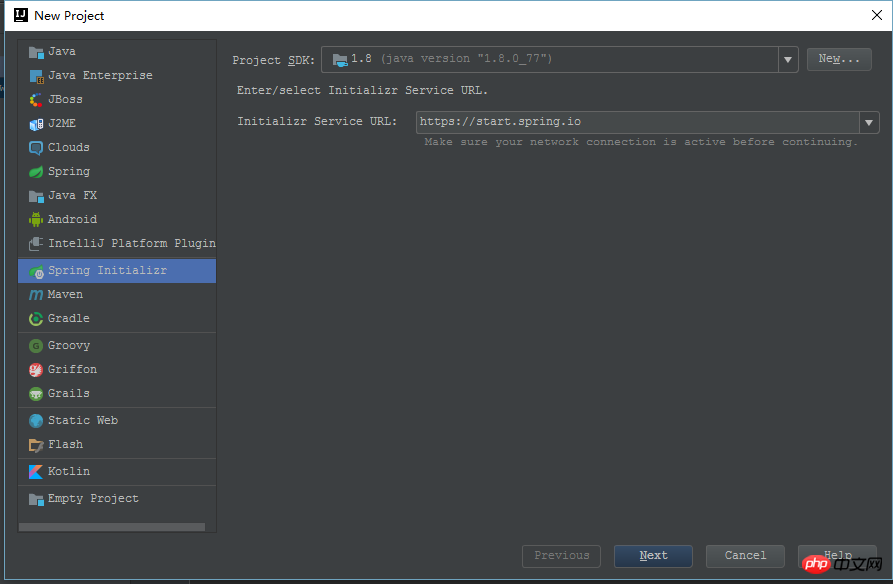
3. You can also use the Spring Initializer skeleton to create
It is more convenient to create a spring boot project based on Spring Initializer, and it will directly let you choose your Required modules, such as AOP, Web, JPA, etc. But I also saw that it relies on https://start.spring.io. When I created it, it prompted me that I couldn't connect to the server, and I couldn't see the next step of the interface, so sorry.
Spring Boot Hello World
User.java
public class User {

    private Integer id;
    private String name;
    private String address;

    public Integer getId() {
        return id;
    }

    public void setId(Integer id) {
        this.id = id;
    }

    public String getName() {
        return name;
    }

    public void setName(String name) {
        this.name = name;
    }

    public String getAddress() {
        return address;
    }

    public void setAddress(String address) {
        this.address = address;
    }
}UserController.java
package com.autohome.controller;

import com.autohome.model.User;
import org.springframework.stereotype.Controller;
import org.springframework.web.bind.annotation.RequestMapping;
import org.springframework.web.bind.annotation.ResponseBody;


@Controller
@RequestMapping("/user")
public class UserController {


    @ResponseBody
    @RequestMapping("/detail")
    public  User detail(Integer id){
        User user=new User();
        user.setId(id);
        user.setName("zhangsan");
        user.setAddress("china");
        return user;
    }

}## Application.java
Three annotation attributes are used here:
SpringBootApplication: It is a collection of three annotations: Configuration, ComponentScan, and EnableAutoConfiguration. In other words, using @SpringBootApplication(scanBasePackages = "com.autohome") can replace the previous three annotations, which is spring syntax sugar.
ComponentScan: Will automatically scan classes containing annotation attributes under the specified package, such as @Service, @Controller, @Repository.
EnableAutoConfiguration: Able to automatically configure the context, trying to guess and configure the classes you want.
import org.springframework.boot.SpringApplication;
import org.springframework.boot.autoconfigure.EnableAutoConfiguration;
import org.springframework.boot.autoconfigure.SpringBootApplication;
import org.springframework.context.annotation.ComponentScan;

/**
 * Created by zhangfei on 2017/6/22.
 */

@SpringBootApplication
@ComponentScan("com.autohome")
@EnableAutoConfiguration
public class Application {
    public static void main(String[] args){
        System.out.println("server is running at 8080....");
        SpringApplication.run(Application.class,args);
    }
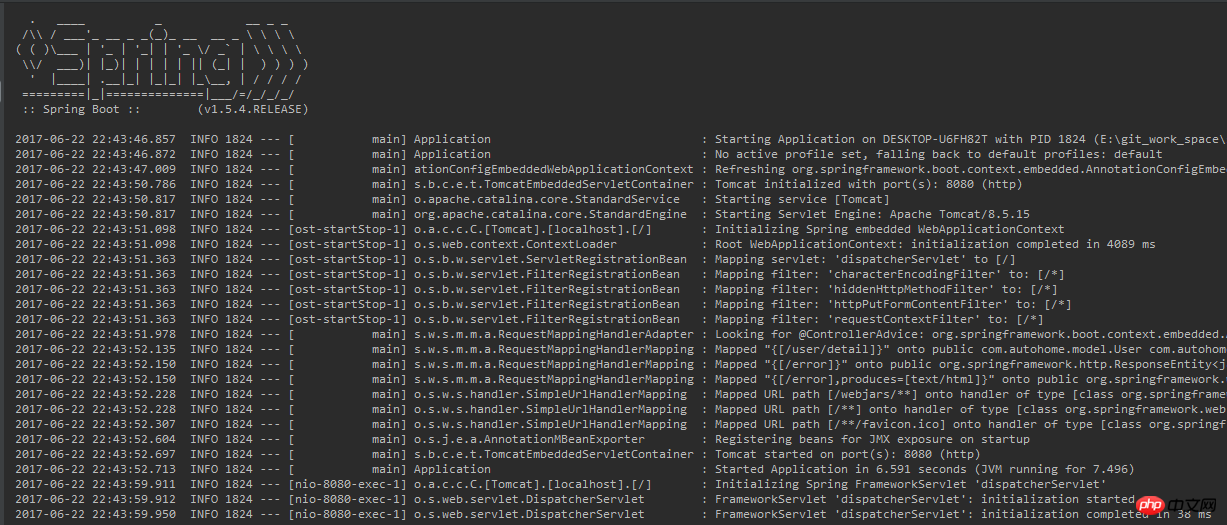
}
The above is the detailed content of Spring boot knowledge point 1: Hello World. For more information, please follow other related articles on the PHP Chinese website!

Hot AI Tools

Undresser.AI Undress
AI-powered app for creating realistic nude photos

AI Clothes Remover
Online AI tool for removing clothes from photos.

Undress AI Tool
Undress images for free

Clothoff.io
AI clothes remover

Video Face Swap
Swap faces in any video effortlessly with our completely free AI face swap tool!

Hot Article

Hot Tools

Notepad++7.3.1
Easy-to-use and free code editor

SublimeText3 Chinese version
Chinese version, very easy to use

Zend Studio 13.0.1
Powerful PHP integrated development environment

Dreamweaver CS6
Visual web development tools

SublimeText3 Mac version
God-level code editing software (SublimeText3)

Hot Topics
 1386
1386
 52
52
![Windows ISO file too large BootCamp error [Fixed]](https://img.php.cn/upload/article/000/887/227/170831702395455.jpg?x-oss-process=image/resize,m_fill,h_207,w_330) Windows ISO file too large BootCamp error [Fixed]
Feb 19, 2024 pm 12:30 PM
Windows ISO file too large BootCamp error [Fixed]
Feb 19, 2024 pm 12:30 PM
If you get the error message "The Windows ISO file is too large" when using BootCampAssistant on a Mac computer, this may be because the ISO file size exceeds the limit supported by BootCampAssistant. The solution to this problem is to use other tools to compress the ISO file size to ensure that it can be processed in BootCamp Assistant. BootCampAssistant is a convenient tool provided by Apple for installing and running Windows operating system on Mac computers. It helps users set up a dual-boot system, allowing them to easily choose to use MacOS or Wind at startup
 A new programming paradigm, when Spring Boot meets OpenAI
Feb 01, 2024 pm 09:18 PM
In 2023, AI technology has become a hot topic and has a huge impact on various industries, especially in the programming field. People are increasingly aware of the importance of AI technology, and the Spring community is no exception. With the continuous advancement of GenAI (General Artificial Intelligence) technology, it has become crucial and urgent to simplify the creation of applications with AI functions. Against this background, "SpringAI" emerged, aiming to simplify the process of developing AI functional applications, making it simple and intuitive and avoiding unnecessary complexity. Through "SpringAI", developers can more easily build applications with AI functions, making them easier to use and operate.
 Use Spring Boot and Spring AI to build generative artificial intelligence applications
Apr 28, 2024 am 11:46 AM
As an industry leader, Spring+AI provides leading solutions for various industries through its powerful, flexible API and advanced functions. In this topic, we will delve into the application examples of Spring+AI in various fields. Each case will show how Spring+AI meets specific needs, achieves goals, and extends these LESSONSLEARNED to a wider range of applications. I hope this topic can inspire you to understand and utilize the infinite possibilities of Spring+AI more deeply. The Spring framework has a history of more than 20 years in the field of software development, and it has been 10 years since the Spring Boot 1.0 version was released. Now, no one can dispute that Spring
 What are the implementation methods of spring programmatic transactions?
Jan 08, 2024 am 10:23 AM
How to implement spring programmatic transactions: 1. Use TransactionTemplate; 2. Use TransactionCallback and TransactionCallbackWithoutResult; 3. Use Transactional annotations; 4. Use TransactionTemplate in combination with @Transactional; 5. Customize the transaction manager.
 How to implement scheduled tasks in Java Spring
May 24, 2023 pm 01:28 PM
Java implements scheduled tasks In the library that comes with Jdk, there are two ways to implement scheduled tasks, one is Timer, and the other is ScheduledThreadPoolExecutor. When Timer+TimerTask creates a Timer, it creates a thread, which can be used to schedule TimerTask tasks. Timer has four construction methods, and you can specify the name of the Timer thread and whether to set it as a daemon thread. The default name is Timer-number, and the default is not a daemon thread. There are three main methods: cancel(): terminate task scheduling, cancel all currently scheduled tasks, running tasks will not be affected purge(): remove tasks from the task queue
 The differences and connections between Spring Boot and Spring Cloud
Jun 22, 2023 pm 06:25 PM
SpringBoot and SpringCloud are both extensions of Spring Framework that help developers build and deploy microservice applications faster, but they each have different purposes and functions. SpringBoot is a framework for quickly building Java applications, allowing developers to create and deploy Spring-based applications faster. It provides a simple, easy-to-understand way to build stand-alone, executable Spring applications
 The 7 most commonly used annotations in Spring, the most powerful organization in history!
Jul 26, 2023 pm 04:38 PM
With the update and iteration of technology, Java5.0 began to support annotations. As the leading framework in Java, spring has slowly begun to abandon xml configuration since it was updated to version 2.5, and more annotations are used to control the spring framework.
 How to set transaction isolation level in Spring
Jan 26, 2024 pm 05:38 PM
How to set the transaction isolation level in Spring: 1. Use the @Transactional annotation; 2. Set it in the Spring configuration file; 3. Use PlatformTransactionManager; 4. Set it in the Java configuration class. Detailed introduction: 1. Use the @Transactional annotation, add the @Transactional annotation to the class or method that requires transaction management, and set the isolation level in the attribute; 2. In the Spring configuration file, etc.


