Development and use of ionic2 custom cordova plug-in
This article mainly introduces the development and use of ionic2 custom cordova plug-in in detail. It has certain reference value. Interested friends can refer to
How to write a cordova for ionic2 project After a search, I found that they were all the same. I even suspected that all those articles were copied over and over again, and none of them were very detailed. I also tinkered with it all afternoon and stepped on many pitfalls. So I am writing this article to record it.
Assume that the requirement is to write a log plug-in that can write logs in the sdcard of the mobile phone.
1.Install plugman
npm install -g plugman
2.create a plug-in framework
plugman creat --name plug-in name-- plugin_id plug-in id --plugin_version plug-in version number
For example:
The code is as follows:
plugman create --name cordovaHeaLog --plugin_id cordova-plugin-hea-log --plugin_version 1.0
Press Enter and a project with such a structure will be generated
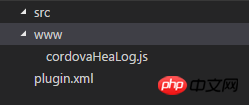
3. Add the Android platform Support
plugman platform add --platform_name android
We can see that there is an android folder under src and a java file under it.
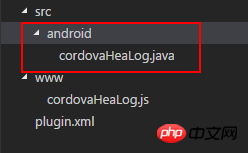
4. Implement the log function
In src/android I added a logUtil.java file.
The contents are as follows:
package cordova.plugin.hea.log;

import android.os.Environment;
import java.io.BufferedWriter;
import java.io.File;
import java.io.FileWriter;
import java.io.IOException;
import java.text.SimpleDateFormat;
import java.util.Calendar;
import java.util.Date;


public class logUtil{
 private static int SDCARD_LOG_FILE_SAVE_DAYS = 180; // sd卡中日志文件的最多保存天数
 private static String LOG_PATH_SDCARD_DIR = Environment.getExternalStorageDirectory().toString()+"/VP2/log/"; // 日志文件在sdcard中的路径

 // 日志的输出格式
 private static SimpleDateFormat LogSdf = new SimpleDateFormat("yyyy-MM-dd HH:mm:ss");
 private static SimpleDateFormat logDay = new SimpleDateFormat("dd");
 private static SimpleDateFormat logTime = new SimpleDateFormat("yyyy-MM");

 /**
  * 打开日志文件并写入日志
  *
  * @return
  * **/
 public static void writeLogtoFile(String mylogtype, String tag, String text) {
  delFile();
  Date nowtime = new Date();
  String needWriteMessage = LogSdf.format(nowtime) + " " + tag + "\n" + text+"\n";
  String logFileName;
  String logFolder=logTime.format(new Date());

  if(mylogtype=="error"){
   logFileName="error("+logDay.format(new Date())+").log";
  }else if(mylogtype=="crash"){
   logFileName="crash("+logDay.format(new Date())+").log";
  }else {
   logFileName="info("+logDay.format(new Date())+").log";
  }

  File file = new File(LOG_PATH_SDCARD_DIR+logFolder);
  if (!file.exists()) {
   file.mkdirs();
  }

  File f = new File(LOG_PATH_SDCARD_DIR+logFolder,logFileName);
  try {
   FileWriter filerWriter = new FileWriter(f, true);
   BufferedWriter bufWriter = new BufferedWriter(filerWriter);
   bufWriter.write(needWriteMessage);
   bufWriter.newLine();
   bufWriter.close();
   filerWriter.close();
  } catch (IOException e) {
   e.printStackTrace();
  }
 }

 /**
  * 删除制定的日志文件
  * */
 private static void delFile(){
  String needDelFiel = logTime.format(getDateBefore());
  File file = new File(LOG_PATH_SDCARD_DIR, needDelFiel );
  if (file.exists()) {
   file.delete();
  }
 }

 private static Date getDateBefore() {
  Date nowtime = new Date();
  Calendar now = Calendar.getInstance();
  now.setTime(nowtime);
  now.set(Calendar.DATE, now.get(Calendar.DATE) - SDCARD_LOG_FILE_SAVE_DAYS);
  return now.getTime();
 }
}package cordova.plugin.hea.log;
import org.apache.cordova.CordovaPlugin;
import org.apache.cordova.CallbackContext;
import org.json.JSONArray;
import org.json.JSONException;
import org.json.JSONObject;
import cordova.plugin.hea.log.logUtil;
/**
* This class echoes a string called from JavaScript.
*/
public class cordovaHeaLog extends CordovaPlugin {
@Override
public boolean execute(String action, JSONArray args, CallbackContext callbackContext) throws JSONException {
if (action.equals("log")) {
this.log(args.getString(0),args.getString(1),args.getString(2), callbackContext);
return true;
}
return false;
}
private void log(String mylogtype, String tag,String text,CallbackContext callbackContext) {
if (mylogtype != null && mylogtype.length() > 0&&text!=null&&text.length()>0&&tag!=null&&tag.length()>0) {
logUtil.writeLogtoFile(mylogtype, tag, text);
callbackContext.success(mylogtype+" "+tag+" "+text);
} else {
callbackContext.error("参数不可为空");
}
}
}var exec = require('cordova/exec');
exports.log = function(arg0,arg1,arg2,success, error) {
exec(success, error, "Logjava", "log", [arg0,arg1,arg2]);
};<?xml version='1.0' encoding='utf-8'?>
<plugin id="cordova-plugin-hea-log" version="1"
xmlns="http://apache.org/cordova/ns/plugins/1.0"
xmlns:android="http://schemas.android.com/apk/res/android">
<name>cordovaHeaLog</name>
<js-module name="cordovaHeaLog" src="www/cordovaHeaLog.js">
<clobbers target="cordovaHeaLog" />
</js-module>
<platform name="android">
<config-file parent="/*" target="res/xml/config.xml">
<feature name="Logjava">
<param name="android-package" value="cordova.plugin.hea.log.cordovaHeaLog" />
</feature>
</config-file>
<config-file parent="/*" target="AndroidManifest.xml"></config-file>
<source-file src="src/android/cordovaHeaLog.java" target-dir="src/cordova/plugin/hea/log/cordovaHeaLog" />
<source-file src="src/android/logUtil.java" target-dir="src/cordova/plugin/hea/log/logUtil" />
</platform>
</plugin>Generally, this is how you add a plug-in
cordova plugin add cordova-plugin-hea-log
##If you add a local plug-in, you add it like this. For example, I add it myself The definition plug-in is added like this
cordova plugin add E:\cordovaHeaLog
Explanation: Why is addcordova-plugin-hea-log? Please scroll up because the id in plugin.xml is cordova-plugin-hea-log
Result:
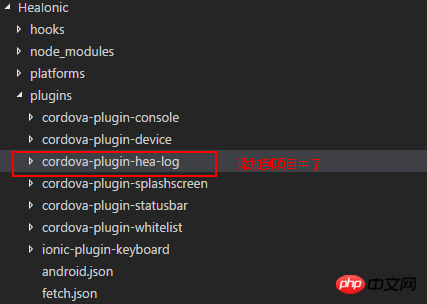 6. Add Android platform, set permissions, use plug-ins, run and view the results
Add Android platform
cordova platform add android
Then in the path of the project HeaIonic/android/AndroidManifest.xml this file
<uses-permission android:name="android.permission.ACCESS_NETWORK_STATE" />
<uses-permission android:name="android.permission.ACCESS_WIFI_STATE" />
<uses-permission android:name="android.permission.WRITE_EXTERNAL_STORAGE" />
How to use the plug-in
In HeaIonic/platforms/android/assets/ www This file cordova_plugins.js under this path opens
We can see thisWe use the 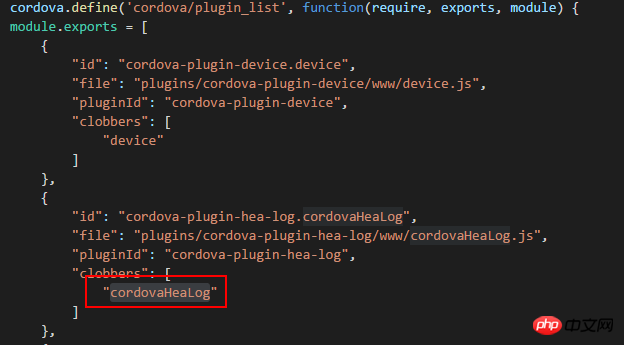
Then ionic serve, then cordova build android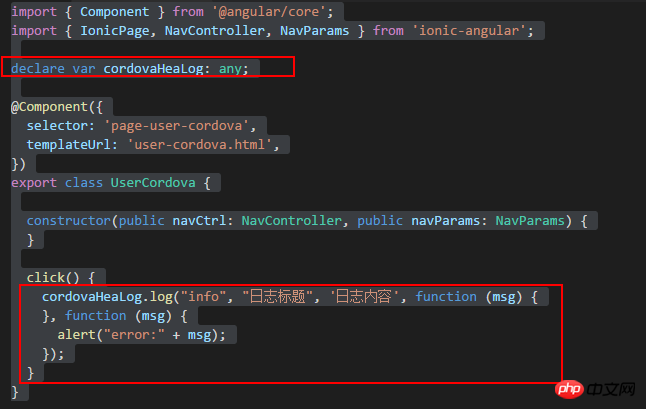
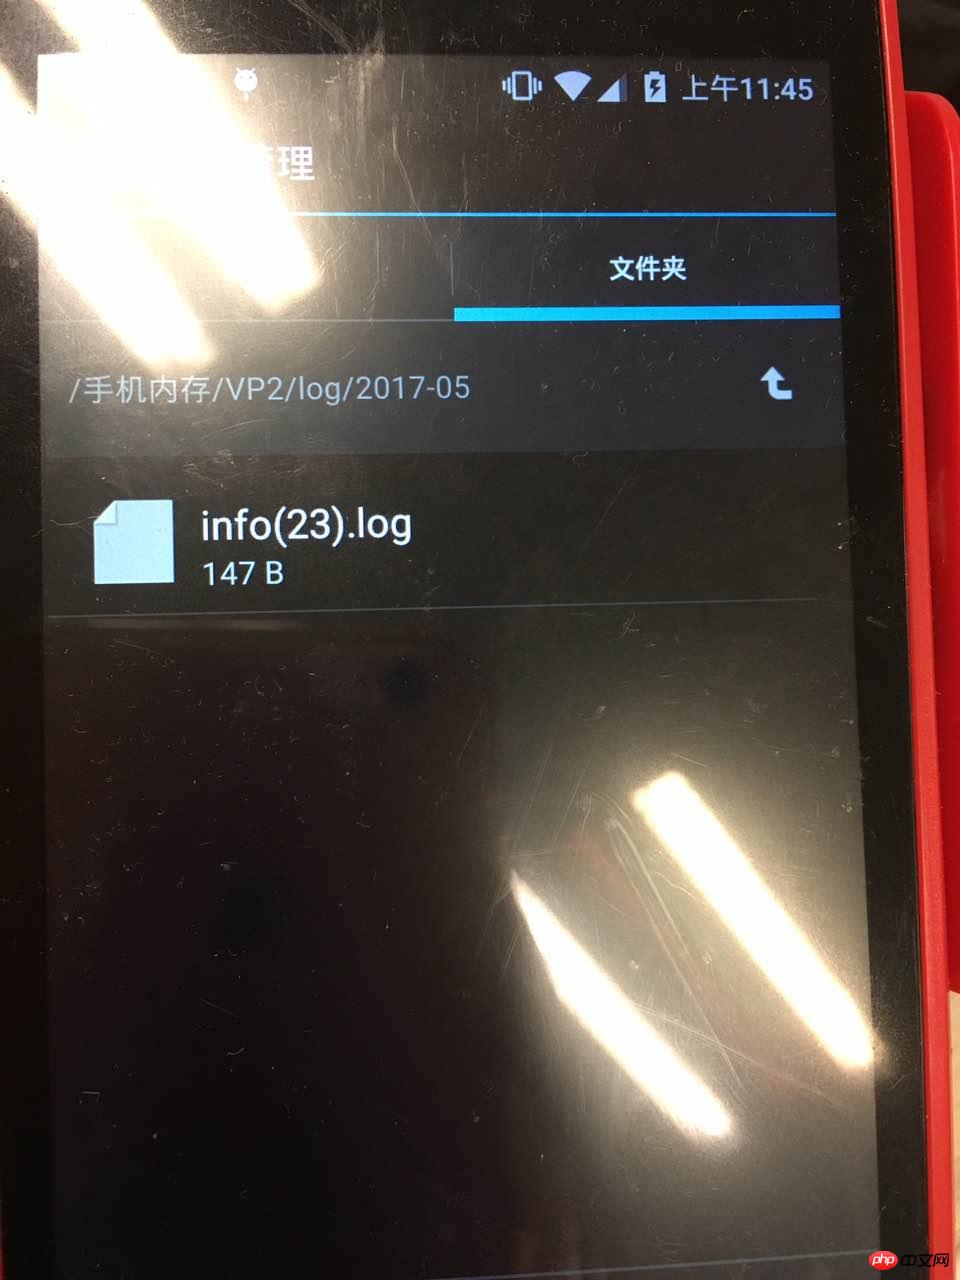
Log writing
Success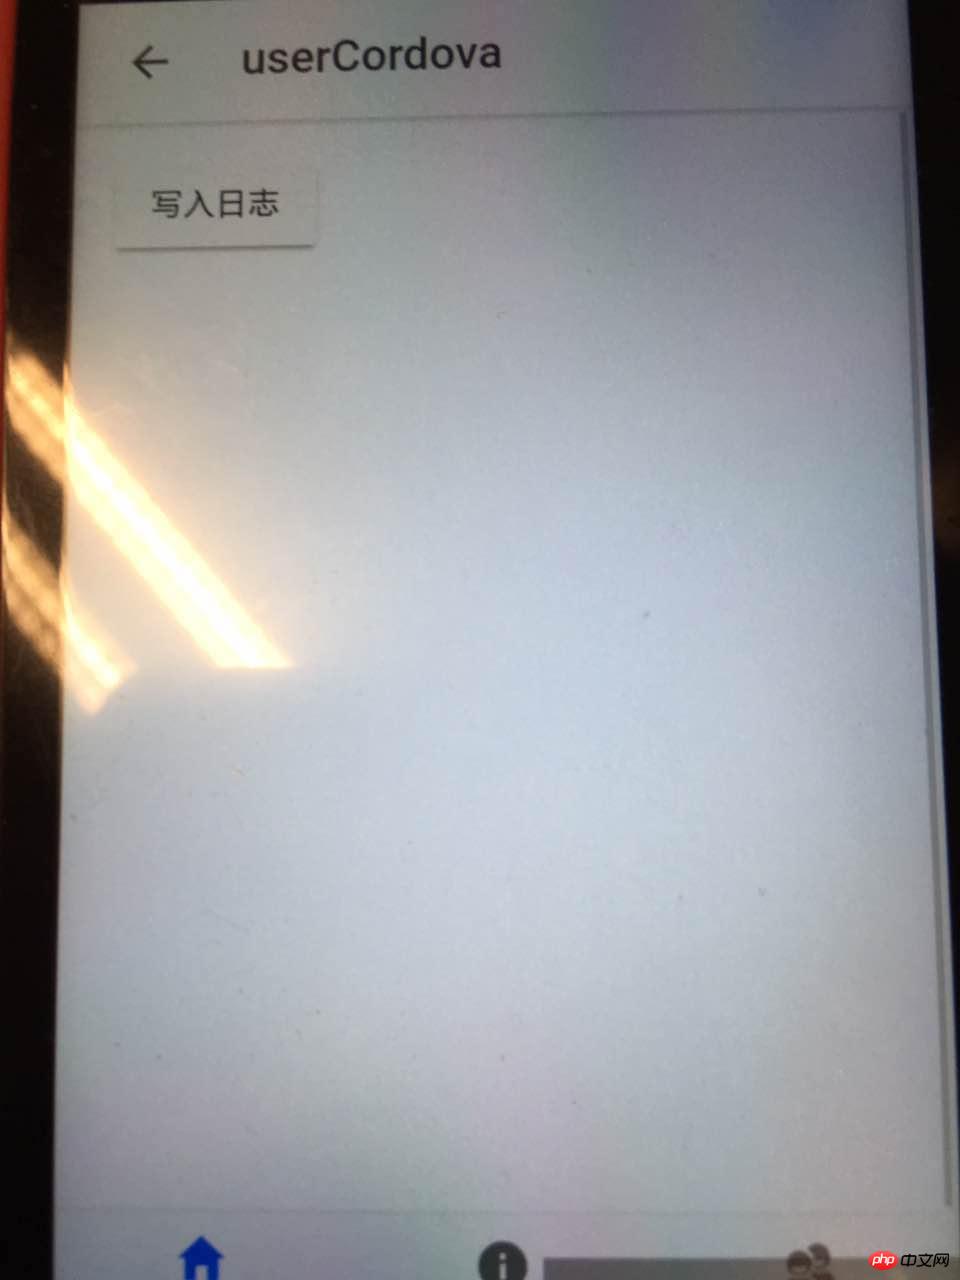 ##Summary:
1. I feel that I have the most problems with plugin.xml configuration, so please first understand how to configure plugin.xml. 2. There is also the logUtil.java file. You can write the test function and then copy it into the plug-in.
3. Regarding debugging, if a problem occurs after adding the plug-in, you can check where the problem occurred in the Logcat window in android studio and debug it. It will output what the problem is and then solve it by yourself. I was confused at the beginning. I didn’t know where to debug the plug-in. After writing it, it’s not perfect at once. I always have to debug it to see where there are mistakes. After all, I am still a newbie.
Refer to: Android Plugin Development Guide →Android Plugin Development Guide
The above is the entire content of this article. I hope it will be helpful to everyone's learning, and I also hope that everyone will support Script Home.
The above is the detailed content of Development and use of ionic2 custom cordova plug-in. For more information, please follow other related articles on the PHP Chinese website!

Hot AI Tools

Undresser.AI Undress
AI-powered app for creating realistic nude photos

AI Clothes Remover
Online AI tool for removing clothes from photos.

Undress AI Tool
Undress images for free

Clothoff.io
AI clothes remover

Video Face Swap
Swap faces in any video effortlessly with our completely free AI face swap tool!

Hot Article

Hot Tools

Notepad++7.3.1
Easy-to-use and free code editor

SublimeText3 Chinese version
Chinese version, very easy to use

Zend Studio 13.0.1
Powerful PHP integrated development environment

Dreamweaver CS6
Visual web development tools

SublimeText3 Mac version
God-level code editing software (SublimeText3)

Hot Topics
 1386
1386
 52
52
 How to quickly set up a custom avatar in Netflix
Feb 19, 2024 pm 06:33 PM
An avatar on Netflix is a visual representation of your streaming identity. Users can go beyond the default avatar to express their personality. Continue reading this article to learn how to set a custom profile picture in the Netflix app. How to quickly set a custom avatar in Netflix In Netflix, there is no built-in feature to set a profile picture. However, you can do this by installing the Netflix extension on your browser. First, install a custom profile picture for the Netflix extension on your browser. You can buy it in the Chrome store. After installing the extension, open Netflix on your browser and log into your account. Navigate to your profile in the upper right corner and click
 How to customize background image in Win11
Jun 30, 2023 pm 08:45 PM
How to customize background image in Win11? In the newly released win11 system, there are many custom functions, but many friends do not know how to use these functions. Some friends think that the background image is relatively monotonous and want to customize the background image, but don’t know how to customize the background image. If you don’t know how to define the background image, the editor has compiled the steps to customize the background image in Win11 below. If you are interested If so, take a look below! Steps for customizing background images in Win11: 1. Click the win button on the desktop and click Settings in the pop-up menu, as shown in the figure. 2. Enter the settings menu and click Personalization, as shown in the figure. 3. Enter Personalization and click on Background, as shown in the picture. 4. Enter background settings and click to browse pictures
 How to create and customize Venn diagrams in Python?
Sep 14, 2023 pm 02:37 PM
A Venn diagram is a diagram used to represent relationships between sets. To create a Venn diagram we will use matplotlib. Matplotlib is a commonly used data visualization library in Python for creating interactive charts and graphs. It is also used to create interactive images and charts. Matplotlib provides many functions to customize charts and graphs. In this tutorial, we will illustrate three examples to customize Venn diagrams. The Chinese translation of Example is: Example This is a simple example of creating the intersection of two Venn diagrams; first, we imported the necessary libraries and imported venns. Then we create the dataset as a Python set, after that we use the "venn2()" function to create
 How to customize shortcut key settings in Eclipse
Jan 28, 2024 am 10:01 AM
How to customize shortcut key settings in Eclipse? As a developer, mastering shortcut keys is one of the keys to improving efficiency when coding in Eclipse. As a powerful integrated development environment, Eclipse not only provides many default shortcut keys, but also allows users to customize them according to their own preferences. This article will introduce how to customize shortcut key settings in Eclipse and give specific code examples. Open Eclipse First, open Eclipse and enter
 How to create custom pagination in CakePHP?
Jun 04, 2023 am 08:32 AM
CakePHP is a powerful PHP framework that provides developers with many useful tools and features. One of them is pagination, which helps us divide large amounts of data into several pages, making browsing and manipulation easier. By default, CakePHP provides some basic pagination methods, but sometimes you may need to create some custom pagination methods. This article will show you how to create custom pagination in CakePHP. Step 1: Create a custom pagination class First, we need to create a custom pagination class. this
 How to enable and customize crossfades in Apple Music on iPhone with iOS 17
Jun 28, 2023 pm 12:14 PM
The iOS 17 update for iPhone brings some big changes to Apple Music. This includes collaborating with other users on playlists, initiating music playback from different devices when using CarPlay, and more. One of these new features is the ability to use crossfades in Apple Music. This will allow you to transition seamlessly between tracks, which is a great feature when listening to multiple tracks. Crossfading helps improve the overall listening experience, ensuring you don't get startled or dropped out of the experience when the track changes. So if you want to make the most of this new feature, here's how to use it on your iPhone. How to Enable and Customize Crossfade for Apple Music You Need the Latest
 How to implement custom middleware in CodeIgniter
Jul 29, 2023 am 10:53 AM
How to implement custom middleware in CodeIgniter Introduction: In modern web development, middleware plays a vital role in applications. They can be used to perform some shared processing logic before or after the request reaches the controller. CodeIgniter, as a popular PHP framework, also supports the use of middleware. This article will introduce how to implement custom middleware in CodeIgniter and provide a simple code example. Middleware overview: Middleware is a kind of request
 render function in Vue3: custom rendering function
Jun 18, 2023 pm 06:43 PM
Vue is a popular JavaScript framework that provides many convenient functions and APIs to help developers build interactive front-end applications. With the release of Vue3, the render function has become an important update. This article will introduce the concept and purpose of the render function in Vue3 and how to use it to customize the rendering function. What is the render function? In Vue, template is the most commonly used rendering method, but in Vue3, you can use another method: r


