 Web Front-end
 HTML Tutorial
 Detailed explanation of quickly creating menus using Menu and Menuitem elements in HTML
Detailed explanation of quickly creating menus using Menu and Menuitem elements in HTML
Today I will introduce to you two elements in HTML 5: Menu and Menuitem. These two elements are part of the W3C interactive elements. Now the evolution of the Web is not limited to links between documents. In APPs, pages have more and more behaviors. Therefore, it is time to form a standard for Web interaction.
Menu and Menuitem are the two most talked about elements among developers, probably due to the lack of sufficient support for them in mainstream browsers. As I write this article, FireFox has implemented this element.
Comparison between Menu and Nav
When it comes to Menu, it is inevitable not to be confused with the Nav element. To differentiate between these two elements, document specifications are a good tool.
Nav element is an HTML navigation element, representing the navigation block of a Web page. It generally contains a collection of links, allowing users to jump within the page or to other website pages.
Menu is a collection of menu commands, somewhat similar to desktop or mobile applications. Desktop applications typically use toolbar menus or context menus to present various tasks. The most fundamental difference between Nav and Menu is that the Nav element contains navigation links to help users jump between Web pages, while Menu should allow users to perform specific tasks.
Using the Menu element
In a container, the Menu element is used to create context, toolbars, and pop-up menus. However, the latter two features have not yet been implemented in browsers, including FireFox. At the moment, it's hard to guess how browsing will implement them and what it will look like. However, it is also a good opportunity to make some changes to the specifications of toolbar and popup menu in the next generation of interaction design.
For now, we will focus on context.
Context
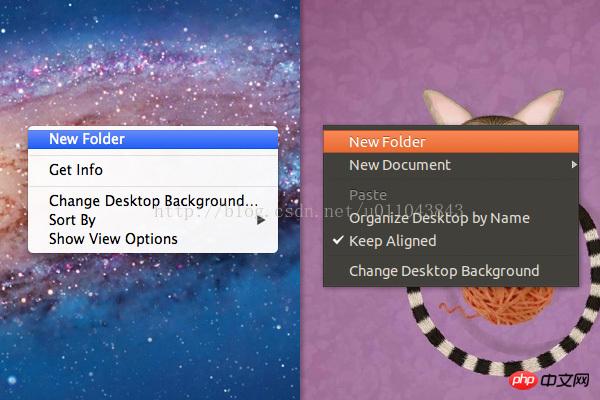
When we right-click an application, a context menu will appear. The options shown depend on where the user clicks.

JavaScript Options
on the web page via JavaScript and the JQuery plugin Adding context menu is possible. The problem is that this approach requires additional markup, and the script removes the menu native to the browser, which if not handled properly will frustrate the user.
Local solution
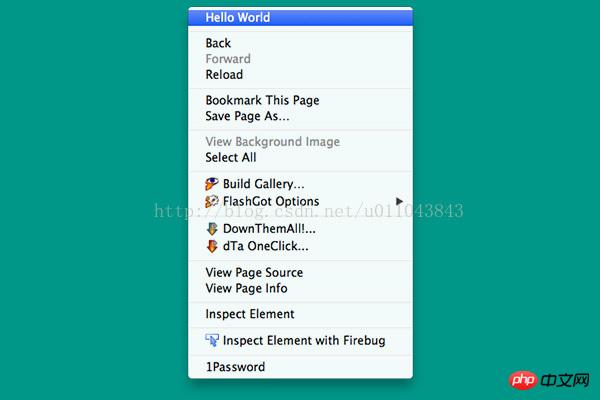
Used together with Menu and Menuitem, the new menu will be merged into the local context menu. For example, add a menu called "Hello World" to the body
<body contextmenu="new-context-menu">
<menu id="new-context-menu" type="context">
    <menuitem>Hello World</menuitem>
</menu>
</body>In the above code snippet, the basic attributes included are id, type and contextmenu - it specifies that the menu type is context , and also specifies the area where the new menu item should be displayed.
In the example, when the mouse is right-clicked, the new menu item will appear anywhere in the document because we specified that its scope is the body.
Of course, you can limit the scope of the new menu item by assigning values to contextmenu on specific elements, such as p, main, section, etc.
<body>
    <p contextmenu="new-context-menu">
    <!-- content -->
    </p>
    <menu id="new-context-menu" type="context">
        <menuitem>Hello World</menuitem>
    </menu>
</body>When viewed in FireFox, you will find that the newly added menu item is added to the top.

Add submenus and icons
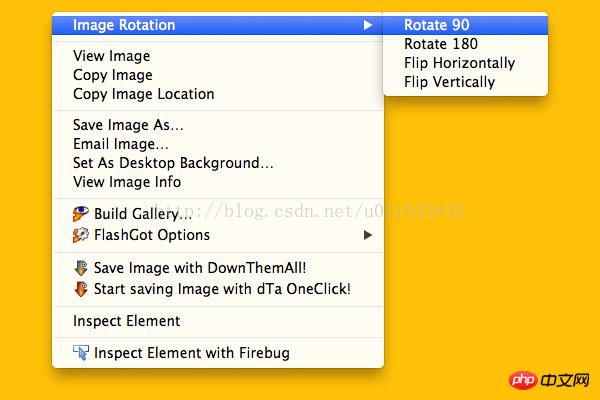
A submenu consists of a group of similar or mutual menu items. Image Rotation in PS is a typical example. Adding submenus using Menu is very easy and intuitive. Check out the sample code below:
<menu id="demo-image" type="context">
    <menu label="Image Rotation">
        <menuitem>Rotate 90</menuitem>
        <menuitem>Rotate 180</menuitem>
        <menuitem>Flip Horizontally</menuitem>
        <menuitem>Flip Vertically</menuitem>
    </menu>
</menu>When run in a browser that supports the Menu element, you will see four submenus added to the new menu:

Icon
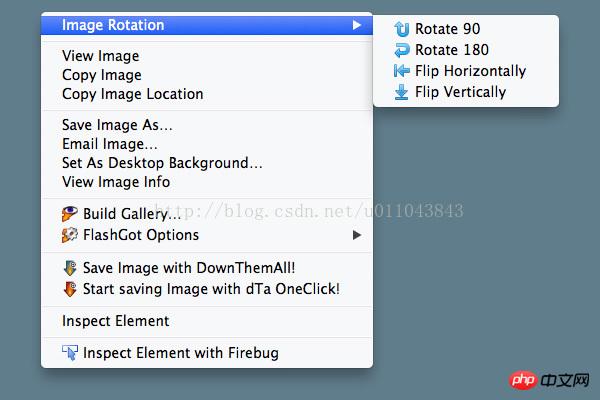
Introduces a new attribute: icon. Use this attribute to add an icon next to the menu. It is worth mentioning that the icon attribute can only be used in menuitem elements. Sample code:
<menu id="demo-image" type="context">
    <menu label="Image Rotation">
        <menuitem icon="img/arrow-return-090.png">Rotate 90</menuitem>
        <menuitem icon="img/arrow-return-180.png">Rotate 180</menuitem>
        <menuitem icon="img/arrow-stop-180.png">Flip Horizontally</menuitem>
        <menuitem icon="img/arrow-stop-270.png">Flip Vertically</menuitem>
    </menu>
</menu>The result is as you can see:

Add function in menu
us Some examples have been built that look like menus, but don't have any functionality. When clicking on a menu, users expect something to happen. For example, clicking Copy should copy text or links, and clicking New Folder should create a new folder. These functions can be implemented using JavaScript.
Note: Before you get started, I recommend checking out Jeremy McPeak’s course at JavaScript Fundamentals, which is a great place to start for anyone who wants to learn JavaScript.
Using the "Image Rotation" example above, let's add a function that rotates the image when clicked. CSS 3's Transform and Transition can implement this function for us in the browser. The style to rotate an image 90 degrees is as follows:
.rotate-90 {
    transform: rotate(90deg);
}为了使用这个样式,需要写一个函数将它应用到图像。
function imageRotation(name) {
    document.getElementById('image').className = name;
}把这个函数和每一个menuitem的onclick属性关联,并且传递一个参数:rotate-90
<menu id="demo-image" type="context">
<menu label="Image Rotation">
<menuitem onclick="imageRotation('rotate-90')" icon="img/arrow-return-090.png">Rotate 90</menuitem>
<menuitem icon="img/arrow-return-180.png">Rotate 180</menuitem>
<menuitem icon="img/arrow-stop-180.png">Flip Horizontally</menuitem>
<menuitem icon="img/arrow-stop-270.png">Flip Vertically</menuitem>
</menu>
</menu>完成这个之后,再创建将图片旋转180度和裁剪图片的样式,将每一个函数添加到独立的menuitem中,记得传参数 。
The above is the detailed content of Detailed explanation of quickly creating menus using Menu and Menuitem elements in HTML. For more information, please follow other related articles on the PHP Chinese website!

Hot AI Tools

Undresser.AI Undress
AI-powered app for creating realistic nude photos

AI Clothes Remover
Online AI tool for removing clothes from photos.

Undress AI Tool
Undress images for free

Clothoff.io
AI clothes remover

AI Hentai Generator
Generate AI Hentai for free.

Hot Article

Hot Tools

Notepad++7.3.1
Easy-to-use and free code editor

SublimeText3 Chinese version
Chinese version, very easy to use

Zend Studio 13.0.1
Powerful PHP integrated development environment

Dreamweaver CS6
Visual web development tools

SublimeText3 Mac version
God-level code editing software (SublimeText3)

Hot Topics
 Table Border in HTML
Sep 04, 2024 pm 04:49 PM
Guide to Table Border in HTML. Here we discuss multiple ways for defining table-border with examples of the Table Border in HTML.
 Nested Table in HTML
Sep 04, 2024 pm 04:49 PM
This is a guide to Nested Table in HTML. Here we discuss how to create a table within the table along with the respective examples.
 HTML margin-left
Sep 04, 2024 pm 04:48 PM
Guide to HTML margin-left. Here we discuss a brief overview on HTML margin-left and its Examples along with its Code Implementation.
 HTML Table Layout
Sep 04, 2024 pm 04:54 PM
Guide to HTML Table Layout. Here we discuss the Values of HTML Table Layout along with the examples and outputs n detail.
 HTML Ordered List
Sep 04, 2024 pm 04:43 PM
Guide to the HTML Ordered List. Here we also discuss introduction of HTML Ordered list and types along with their example respectively
 How do you parse and process HTML/XML in PHP?
Feb 07, 2025 am 11:57 AM
This tutorial demonstrates how to efficiently process XML documents using PHP. XML (eXtensible Markup Language) is a versatile text-based markup language designed for both human readability and machine parsing. It's commonly used for data storage an
 Moving Text in HTML
Sep 04, 2024 pm 04:45 PM
Guide to Moving Text in HTML. Here we discuss an introduction, how marquee tag work with syntax and examples to implement.
 HTML Input Placeholder
Sep 04, 2024 pm 04:54 PM
Guide to HTML Input Placeholder. Here we discuss the Examples of HTML Input Placeholder along with the codes and outputs.


