

Comprehensive explanation of Jquery selector

1 Overview
We have used the jQuery selection function with a simple CSS selector: $(). Now it's time to dive into jQuery selector syntax and some methods for extracting and expanding the set of selected elements.
1. jQuery selector
In the selector syntax defined by the CSS3 selector standard draft, jQuery supports a fairly complete set of subsets, and also adds some non-standard but useful ones. pseudo-class. Note: This section is about jQuery selectors. Many of these selectors (but not all) can be used in CSS style sheets. Selector syntax has a three-level structure. You've no doubt seen selectors in their simplest form. "#te st" selects the element with the id attribute "test". "blockquote" selects all
elements in the document, while "div.note" selects allelements with the class attribute "note". Simple selectors can be combined into "combined selectors", such as "div.note>p" and "blockquote i", as long as the combining characters are used as separators. Simple and combined selectors can also be grouped into comma-separated lists. This type of selector group is the most common form of selection passed to the $() function. Before explaining combined selectors and selector groups, we must first understand the syntax of simple selectors.
##2.1 List##2 Basic Selector
##2.2 Sample code
(1)id selector
Set the background color of the element with id lastname to blue
##1 <!DOCTYPE html> 2 3 <html> 4 <head> 5 <meta name="viewport" content="width=device-width" /> 6 <script src="~/Scripts/jquery-1.10.2.js"></script> 7 <title>JQuery函数</title> 8 <script type="text/javascript"> 9 $(document).ready(function () {10 $("#lastname").css("background-color", "#0000ff");11 12 });13 14 </script>15 </head>16 <body>17 <div id="lastname">id为lastname的选择器</div>18 </body>19 </html>Copy after loginSet the background color of the intro element with class to blue
1 <!DOCTYPE html> 2 3 <html> 4 <head> 5 <meta name="viewport" content="width=device-width" /> 6 <script src="~/Scripts/jquery-1.10.2.js"></script> 7 <title>JQuery函数</title> 8 <script type="text/javascript"> 9 $(document).ready(function () {10 $(".intro").css("background-color", "#0000ff");11 12 });13 14 </script>15 </head>16 <body>17 <div class="intro">div选择器测试</div>18 <p class="intro">p测试选择器</p>19 </body>20 </html>Copy after loginSet the background color of the p element to blue
##1 <!DOCTYPE html> 2 3 <html> 4 <head> 5 <meta name="viewport" content="width=device-width" /> 6 <script src="~/Scripts/jquery-1.10.2.js"></script> 7 <title>JQuery函数</title> 8 <script type="text/javascript"> 9 $(document).ready(function () {10 $("p").css("background-color", "#0000ff");11 12 });13 14 </script>15 </head>16 <body>17 <p>p测试选择器</p>18 </body>19 </html>Copy after loginTraverse all elements under the body and set their background color to blue
1 <!DOCTYPE html> 2 3 <html> 4 <head> 5 <meta name="viewport" content="width=device-width" /> 6 <script src="~/Scripts/jquery-1.10.2.js"></script> 7 <title>JQuery函数</title> 8 <script type="text/javascript"> 9 $(document).ready(function () {10 $("body *").css("background-color", "#0000ff");11 12 });13 14 </script>15 </head>16 <body>17 <div>选择器测试</div>18 <p>p元素</p>19 </body>20 </html>Copy after login(5)并列选择器
将元素p和元素div背景色设置为蓝色
View Code1 <!DOCTYPE html> 2 3 <html> 4 <head> 5 <meta name="viewport" content="width=device-width" /> 6 <script src="~/Scripts/jquery-1.10.2.js"></script> 7 <title>JQuery函数</title> 8 <script type="text/javascript"> 9 $(document).ready(function () {10 $("p,div").css("background-color", "#0000ff");11 12 });13 14 </script>15 </head>16 <body>17 <div>选择器测试</div>18 <p>p元素</p>19 </body>20 </html>Copy after login3 层次选择器
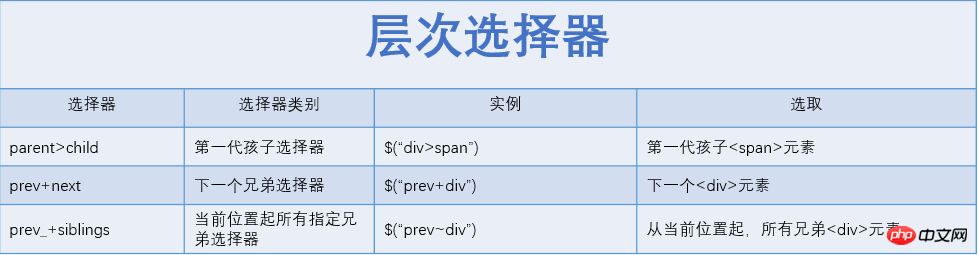
3.1 一览表
3.2 示例代码
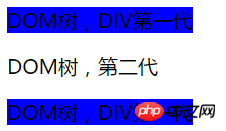
(1)parent>child(直系子元素,即直接下一代元素)
设置div元素的第一代元素为span的元素的背景色为蓝色
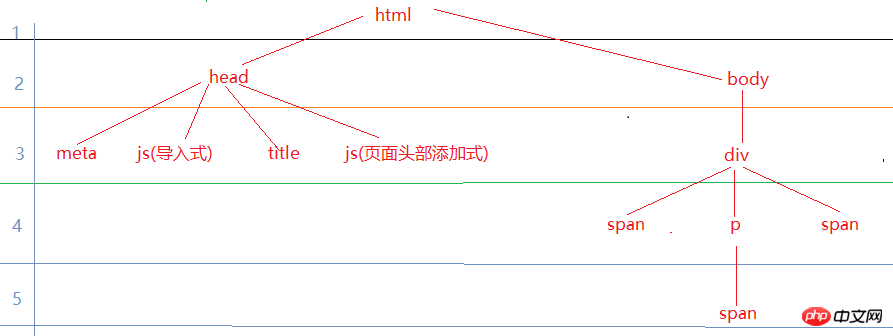
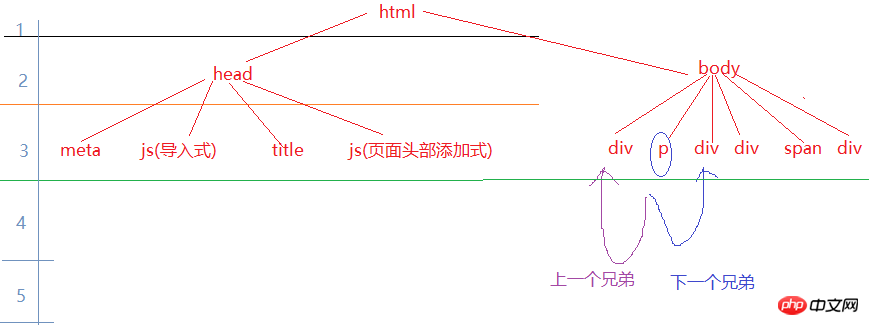
View Code1 <!DOCTYPE html> 2 3 <html> 4 <head> 5 <meta name="viewport" content="width=device-width" /> 6 <script src="~/Scripts/jquery-1.10.2.js"></script> 7 <title>JQuery函数</title> 8 <script type="text/javascript"> 9 $(document).ready(function () {10 $("div>span").css("background-color", "#0000ff");11 12 });13 14 </script>15 </head>16 <body>17 <div>18 <span>DOM树,DIV第一代</span>19 <p>20 <span>DOM树,第二代</span>21 </p>22 <span>DOM树,DIV第一代</span>23 </div>24 </body>25 </html>Copy after login测试结果:
结果分析:根据如上代码画出的DOM树如下,可以很清晰看出,DIV有三个直接孩子,即第一代span,p,span,代码中div>span,表示div下的直接第一代span,因此,测试结果就不难理解了。
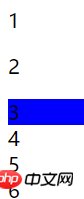
(2)prev+next(prev元素的下一个兄弟元素,等同于next()方法)
设置类为intro元素的下一个兄弟元素背景色为蓝色
View Code1 <!DOCTYPE html> 2 3 <html> 4 <head> 5 <meta name="viewport" content="width=device-width" /> 6 <script src="~/Scripts/jquery-1.10.2.js"></script> 7 <title>JQuery函数</title> 8 <script type="text/javascript"> 9 $(document).ready(function () {10 $(".intro+div").css("background-color", "#0000ff");11 //$(".intro").next("div").css("background-color", "#0000ff");12 13 });14 15 </script>16 </head>17 <body>18 <div>1</div>19 <p class="intro">2</p>20 <div>3</div>21 <div>4</div>22 <span class="item">5</span>23 <div>6</div>24 </body>25 </html>Copy after login测试结果:
结果分析:根据如上代码画出DOM树如下图,测试结果显而易见。
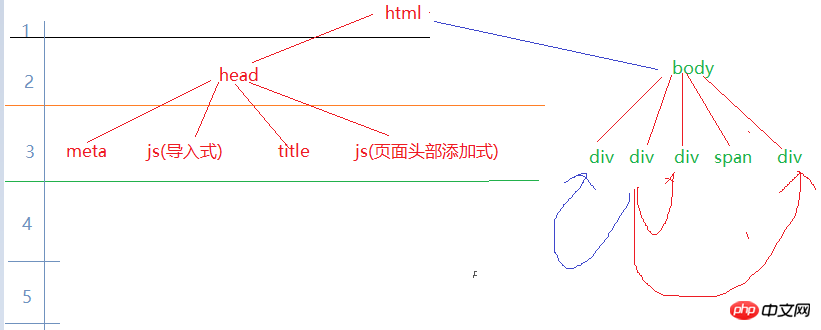
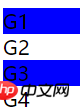
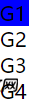
(3)prev~siblings(prev元素的所有兄弟元素,等同于nextAll()方法)
设置类为intro元素之后的所有兄弟元素为div元素的背景色为蓝色
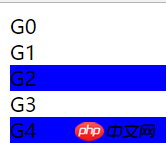
View Code1 <!DOCTYPE html> 2 3 <html> 4 <head> 5 <meta name="viewport" content="width=device-width" /> 6 <script src="~/Scripts/jquery-1.10.2.js"></script> 7 <title>JQuery函数</title> 8 <script type="text/javascript"> 9 $(document).ready(function () {10 $(".intro~div").css("background-color", "#0000ff");11 });12 13 </script>14 </head>15 <body>16 <div>G0</div>17 <div class="intro">G1</div>18 <div>G2</div>19 <span>G3</span>20 <div>G4</div>21 </body>22 </html>Copy after login测试结果:
分析测试结果:根据如上代码画出DOM树如下图,测试结果显而易见。
4 过滤选择器
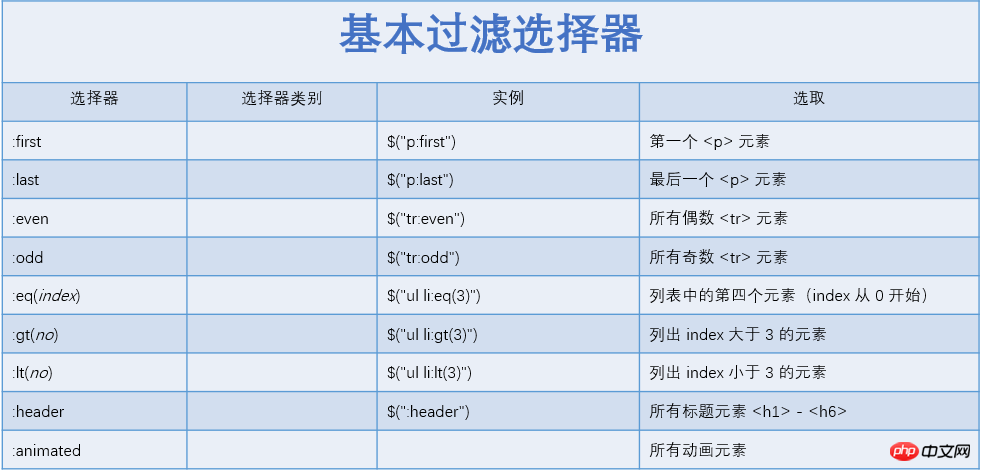
4.1 基本过滤选择器
4.1.1 一览表
4.1.2 代码示例
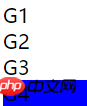
(1):first(选取第一个元素)
View Code1 <!DOCTYPE html> 2 3 <html> 4 <head> 5 <meta name="viewport" content="width=device-width" /> 6 <script src="~/Scripts/jquery-1.10.2.js"></script> 7 <title>JQuery函数</title> 8 <script type="text/javascript"> 9 $(document).ready(function () {10 $("span:first").css("background-color", "#0000ff");11 });12 13 </script>14 </head>15 <body>16 <span>G1</span>17 <span>G2</span>18 <span>G3</span>19 </body>20 </html>Copy after login测试结果:
(2):last(选取最后一个元素)
View Code1 <!DOCTYPE html> 2 3 <html> 4 <head> 5 <meta name="viewport" content="width=device-width" /> 6 <script src="~/Scripts/jquery-1.10.2.js"></script> 7 <title>JQuery函数</title> 8 <script type="text/javascript"> 9 $(document).ready(function () {10 $("span:last").css("background-color", "#0000ff");11 });12 13 </script>14 </head>15 <body>16 <span>G1</span>17 <span>G2</span>18 <span>G3</span>19 </body>20 </html>Copy after login测试结果:
(3):not(取非元素)
View Code1 <!DOCTYPE html> 2 3 <html> 4 <head> 5 <meta name="viewport" content="width=device-width" /> 6 <script src="~/Scripts/jquery-1.10.2.js"></script> 7 <title>JQuery函数</title> 8 <script type="text/javascript"> 9 $(document).ready(function () {10 $("div:not(.wrap)").css("background-color", "#0000ff");11 });12 13 </script>14 </head>15 <body>16 <div>G1</div>17 <div class="wrap">G2</div>18 </body>19 </html>Copy after login但是,请注意下面的代码:当G1所在div和G2所在div是父子关系时,G1和G2都会变色。
View Code1 <div>2 G1 <div class="wrap">G2</div>3 </div>Copy after login(4):even(索引为偶数,索引 index从0开始)
View Code1 <!DOCTYPE html> 2 3 <html> 4 <head> 5 <meta name="viewport" content="width=device-width" /> 6 <script src="~/Scripts/jquery-1.10.2.js"></script> 7 <title>JQuery函数</title> 8 <script type="text/javascript"> 9 $(document).ready(function () {10 $("div:even").css("background-color", "#0000ff");11 });12 13 </script>14 </head>15 <body>16 <div>G1</div>17 <div>G2</div>18 <div>G3</div>19 <div>G4</div>20 </body>21 </html>Copy after login测试结果:
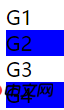
(5):odd(索引为奇数,索引 index从0开始)
View Code1 <!DOCTYPE html> 2 3 <html> 4 <head> 5 <meta name="viewport" content="width=device-width" /> 6 <script src="~/Scripts/jquery-1.10.2.js"></script> 7 <title>JQuery函数</title> 8 <script type="text/javascript"> 9 $(document).ready(function () {10 $("div:odd").css("background-color", "#0000ff");11 });12 13 </script>14 </head>15 <body>16 <div>G1</div>17 <div>G2</div>18 <div>G3</div>19 <div>G4</div>20 </body>21 </html>Copy after login测试结果:
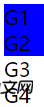
(6):eq(x)(取指定索引的元素,x为从0开始的索引)
设置索引为2的div元素背景为蓝色
View Code1 <!DOCTYPE html> 2 3 <html> 4 <head> 5 <meta name="viewport" content="width=device-width" /> 6 <script src="~/Scripts/jquery-1.10.2.js"></script> 7 <title>JQuery函数</title> 8 <script type="text/javascript"> 9 $(document).ready(function () {10 $("div:eq(2)").css("background-color", "#0000ff");11 });12 13 </script>14 </head>15 <body>16 <div>G1</div>17 <div>G2</div>18 <div>G3</div>19 <div>G4</div>20 </body>21 </html>Copy after login测试结果:
(7):lt(x))(取小于指定索引的元素,x为从0开始的索引)
View Code1 <!DOCTYPE html> 2 3 <html> 4 <head> 5 <meta name="viewport" content="width=device-width" /> 6 <script src="~/Scripts/jquery-1.10.2.js"></script> 7 <title>JQuery函数</title> 8 <script type="text/javascript"> 9 $(document).ready(function () {10 $("div:lt(2)").css("background-color", "#0000ff");11 });12 13 </script>14 </head>15 <body>16 <div>G1</div>17 <div>G2</div>18 <div>G3</div>19 <div>G4</div>20 </body>21 </html>Copy after login测试结果:
(8):gt(x))(取大于指定索引的元素,x为从0开始的索引)
View Code1 <!DOCTYPE html> 2 3 <html> 4 <head> 5 <meta name="viewport" content="width=device-width" /> 6 <script src="~/Scripts/jquery-1.10.2.js"></script> 7 <title>JQuery函数</title> 8 <script type="text/javascript"> 9 $(document).ready(function () {10 $("div:gt(2)").css("background-color", "#0000ff");11 });12 13 </script>14 </head>15 <body>16 <div>G1</div>17 <div>G2</div>18 <div>G3</div>19 <div>G4</div>20 </body>21 </html>Copy after login测试结果:
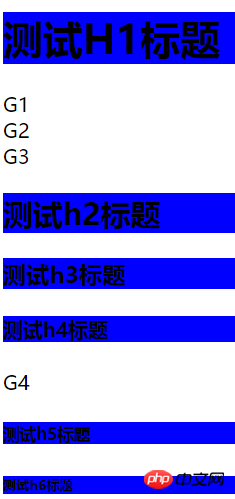
(8):header(取h1-h6标题元素)
View Code1 <!DOCTYPE html> 2 3 <html> 4 <head> 5 <meta name="viewport" content="width=device-width" /> 6 <script src="~/Scripts/jquery-1.10.2.js"></script> 7 <title>JQuery函数</title> 8 <script type="text/javascript"> 9 $(document).ready(function () {10 $(":header").css("background-color", "#0000ff");11 });12 13 </script>14 </head>15 <body>16 <h1>测试H1标题</h1>17 <div>G1</div>18 <div>G2</div>19 <div>G3</div>20 <h2>测试h2标题</h2>21 <h3>测试h3标题</h3>22 <h4>测试h4标题</h4>23 <div>G4</div>24 <h5>测试h5标题</h5>25 <h6>测试h6标题</h6>26 </body>27 </html>Copy after login测试结果:
(9):animated(所有动画元素)
View Code1 <!DOCTYPE html> 2 3 <html> 4 <head> 5 <meta name="viewport" content="width=device-width" /> 6 <script src="~/Scripts/jquery-1.10.2.js"></script> 7 <title>JQuery函数</title> 8 <script type="text/javascript"> 9 $(document).ready(function () {10 function aniDiv() {11 $("#box").animate({ width: 300 }, "slow");12 $("#box").animate({ width: 100 }, "slow", aniDiv);13 }14 aniDiv();15 $(".btn1").click(function () {16 $(":animated").css("background-color", "#0000ff");17 });18 });19 20 </script>21 <style>22 div {23 background: #98bf21;24 height: 40px;25 width: 100px;26 position: relative;27 margin-bottom: 5px;28 }29 </style>30 </head>31 <body>32 <div></div>33 <div id="box"></div>34 <div></div>35 <button class="btn1">Mark animated element</button>36 </body>37 </html>Copy after login测试结果:
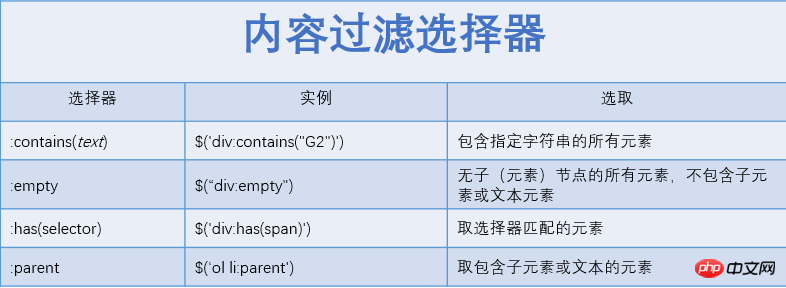
4.2 内容过滤选择器
4.2.1 一览表
4.2.2 示例代码
(1):contains(text)(取包含text文本的元素)
View Code1 <!DOCTYPE html> 2 3 <html> 4 <head> 5 <meta name="viewport" content="width=device-width" /> 6 <script src="~/Scripts/jquery-1.10.2.js"></script> 7 <title>JQuery函数</title> 8 <script type="text/javascript"> 9 $(document).ready(function () {10 $('div:contains("G2")').css("background-color", "#0000ff");11 });12 13 </script>14 15 </head>16 <body>17 <div>G1</div>18 <div>G2</div>19 <div>G3</div>20 </body>21 </html>Copy after login测试结果:
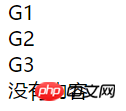
(2):empty(取不包含子元素或文本为空的元素)
View Code1 <!DOCTYPE html> 2 3 <html> 4 <head> 5 <meta name="viewport" content="width=device-width" /> 6 <script src="~/Scripts/jquery-1.10.2.js"></script> 7 <title>JQuery函数</title> 8 <script type="text/javascript"> 9 $(document).ready(function () {10 $('div:empty').html('没有内容');11 });12 13 </script>14 15 </head>16 <body>17 <div>G1</div>18 <div>G2</div>19 <div>G3</div>20 <div></div>21 </body>22 </html>Copy after login测试结果:
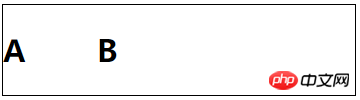
(3) :has(selector)(取选择器匹配的元素)
即使span不是div的直系子元素,也会生效
View Code1 <!DOCTYPE html> 2 3 <html> 4 <head> 5 <meta name="viewport" content="width=device-width" /> 6 <script src="~/Scripts/jquery-1.10.2.js"></script> 7 <title>JQuery函数</title> 8 <script type="text/javascript"> 9 $(document).ready(function () {10 // 为包含span元素的div添加边框11 $('div:has(span)').css('border', '1px solid #000');12 });13 14 </script>15 16 </head>17 <body>18 <div>19 <h2>20 A <span>B</span>21 </h2>22 </div>23 </body>24 </html>Copy after login测试结果:
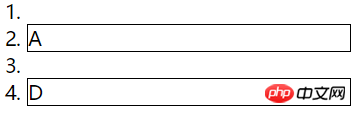
(4):parent(取包含子元素或文本的元素)
View Code1 <!DOCTYPE html> 2 3 <html> 4 <head> 5 <meta name="viewport" content="width=device-width" /> 6 <script src="~/Scripts/jquery-1.10.2.js"></script> 7 <title>JQuery函数</title> 8 <script type="text/javascript"> 9 $(document).ready(function () {10 $('ol li:parent').css('border', '1px solid #000');11 });12 13 </script>14 15 </head>16 <body>17 <ol>18 <li></li>19 <li>A</li>20 <li></li>21 <li>D</li>22 </ol>23 </body>24 </html>Copy after login测试结果:
4.3 可见性过滤选择器
4.3.1 一览表
4.3.2 示例代码
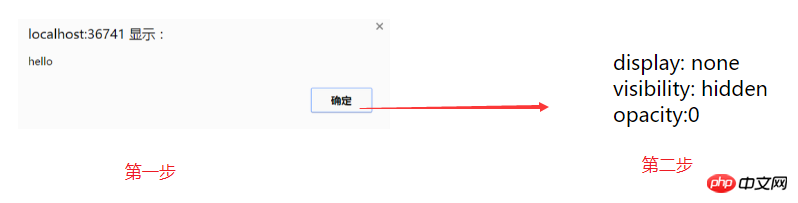
(1):hidden(取不可见的元素)
匹配display:none,,visibility:hidden,capacity:0元素
View Code1 <!DOCTYPE html> 2 3 <html> 4 <head> 5 <meta name="viewport" content="width=device-width" /> 6 <script src="~/Scripts/jquery-1.10.2.js"></script> 7 <title>JQuery函数</title> 8 <script type="text/javascript"> 9 $(document).ready(function () {10 $('div:hidden').show(500);11 alert($('input:hidden').val());12 });13 </script>14 <style type="text/css">15 div 16 {17 margin: 10px;18 width: 200px;19 height: 40px;20 border: 1px solid #FF0000;21 display:block;22 }23 24 .hid-1 25 {26 display: none;27 }28 29 .hid-2 30 {31 visibility: hidden;32 }33 34 </style>35 </head>36 <body>37 <div class="hid-1">display: none</div>38 <div class="hid-2">visibility: hidden</div>39 <input type="hidden" value="hello" />40 </body>41 </html>Copy after login测试结果:
(2):visible(取可见的元素)
View Code1 <!DOCTYPE html> 2 3 <html> 4 <head> 5 <meta name="viewport" content="width=device-width" /> 6 <script src="~/Scripts/jquery-1.10.2.js"></script> 7 <title>JQuery函数</title> 8 <script type="text/javascript"> 9 $(document).ready(function () {10 $('div:visible').css("background-color", "#0000ff");11 });12 13 </script>14 15 </head>16 <body>17 <div style="display:none">G1</div>18 <div>G2</div>19 <div style="display:none">G3</div>20 <div>G4</div>21 22 </body>23 </html>24 25 26Copy after login测试结果:
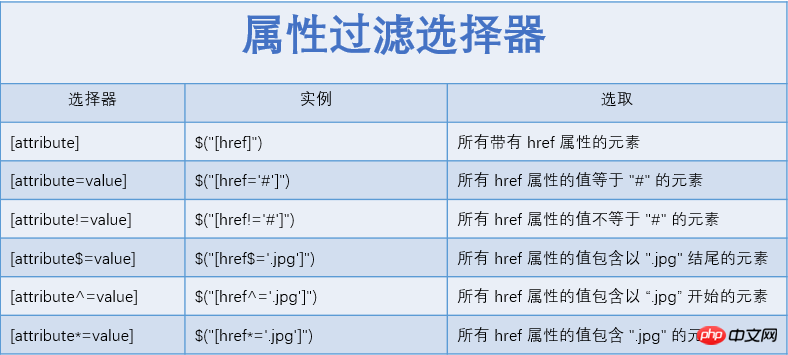
4.4 属性过滤选择器
4.4.1 一览表
4.4.2 代码示例
(1)[attribute](取拥有attribute属性的元素)
View Code1 <!DOCTYPE html> 2 3 <html> 4 <head> 5 <meta name="viewport" content="width=device-width" /> 6 <script src="~/Scripts/jquery-1.10.2.js"></script> 7 <title>JQuery函数</title> 8 <script type="text/javascript"> 9 $(document).ready(function () {10 $('div[class]').css("background-color", "#0000ff");11 });12 13 </script>14 15 </head>16 <body>17 <div>G1</div>18 <div>G2</div>19 <div>G3</div>20 <div class="div4">G4</div>21 22 </body>23 </html>24 25 26Copy after login测试结果:
(2)[attribute = value](取attribute属性值等于value)
View Code1 <!DOCTYPE html> 2 3 <html> 4 <head> 5 <meta name="viewport" content="width=device-width" /> 6 <script src="~/Scripts/jquery-1.10.2.js"></script> 7 <title>JQuery函数</title> 8 <script type="text/javascript"> 9 $(document).ready(function () {10 $('div[class=div3]').css("background-color", "#0000ff");11 });12 13 </script>14 15 </head>16 <body>17 <div>G1</div>18 <div>G2</div>19 <div class="div3">G3</div>20 <div class="div4">G4</div>21 22 </body>23 </html>24 25 26Copy after login测试结果:
(3) [attribute != value](取attribute属性值不等于value的元素)
View Code1 <!DOCTYPE html> 2 3 <html> 4 <head> 5 <meta name="viewport" content="width=device-width" /> 6 <script src="~/Scripts/jquery-1.10.2.js"></script> 7 <title>JQuery函数</title> 8 <script type="text/javascript"> 9 $(document).ready(function () {10 $('div[class!=div3]').css("background-color", "#0000ff");11 });12 13 </script>14 15 </head>16 <body>17 <div>G1</div>18 <div>G2</div>19 <div class="div3">G3</div>20 <div class="div4">G4</div>21 22 </body>23 </html>24 25 26Copy after login测试结果:
(4)[attribute $= value](attribute属性值以value结束)
View Code1 <!DOCTYPE html> 2 3 <html> 4 <head> 5 <meta name="viewport" content="width=device-width" /> 6 <script src="~/Scripts/jquery-1.10.2.js"></script> 7 <title>JQuery函数</title> 8 <script type="text/javascript"> 9 $(document).ready(function () {10 $('[id$=div]').css("background-color", "#0000ff");11 });12 13 </script>14 15 </head>16 <body>17 <div id="first_div">G1</div>18 <div id="second_div">G2</div>19 <div class="div3" title="3div">G3</div>20 <div class="div4">G4</div>21 22 </body>23 </html>Copy after login测试结果:
(5))[attribute^= value](attribute属性值以value开始)
View Code1 <!DOCTYPE html> 2 3 <html> 4 <head> 5 <meta name="viewport" content="width=device-width" /> 6 <script src="~/Scripts/jquery-1.10.2.js"></script> 7 <title>JQuery函数</title> 8 <script type="text/javascript"> 9 $(document).ready(function () {10 $('[id^=first]').css("background-color", "#0000ff");11 });12 13 </script>14 15 </head>16 <body>17 <div id="first_div">G1</div>18 <div id="second_div">G2</div>19 <div class="div3" title="3div">G3</div>20 <div class="div4">G4</div>21 22 </body>23 </html>24 25 26Copy after login测试结果:
(6)[attribute *= value](attribute属性值包含value值)
View Code1 <!DOCTYPE html> 2 3 <html> 4 <head> 5 <meta name="viewport" content="width=device-width" /> 6 <script src="~/Scripts/jquery-1.10.2.js"></script> 7 <title>JQuery函数</title> 8 <script type="text/javascript"> 9 $(document).ready(function () {10 $('[id*=first]').css("background-color", "#0000ff");11 });12 13 </script>14 15 </head>16 <body>17 <div id="first_div">G1</div>18 <div id="second_div">G2</div>19 <div class="div3" title="3div">G3</div>20 <div class="div4">G4</div>21 22 </body>23 </html>Copy after login测试结果:
注释:在属性选择器中,^$符号和正则表达式的开始结束符号表示的含义是一致的,*模糊匹配,类似于sql中的like '%str%'。
(7)[selector1][selector2](复合型属性过滤器,同时满足多个条件)
View Code1 <!DOCTYPE html> 2 3 <html> 4 <head> 5 <meta name="viewport" content="width=device-width" /> 6 <script src="~/Scripts/jquery-1.10.2.js"></script> 7 <title>JQuery函数</title> 8 <script type="text/javascript"> 9 $(document).ready(function () {10 $('div[class=div3][title=3div]').css("background-color", "#0000ff");11 });12 13 </script>14 15 </head>16 <body>17 <div>G1</div>18 <div>G2</div>19 <div class="div3" title="3div">G3</div>20 <div class="div4">G4</div>21 22 </body>23 </html>24 25 26Copy after login测试结果:
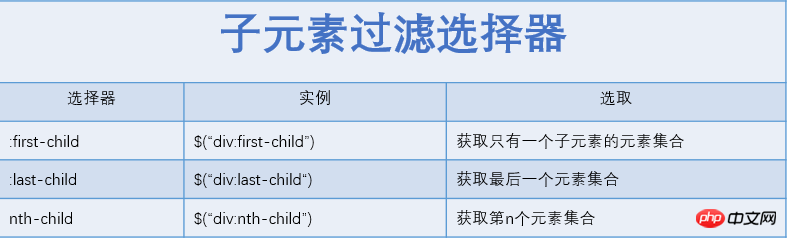
4.5 子元素过滤选择器
4.5.1 一览表
4.5.2 代码示例
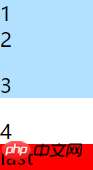
(1)first-child(表示匹配的第一个元素)和last-child(表示匹配的最后一个子元素)
需要大家注意的是,:fisrst和:last返回的都是单个元素,而:first-child和:last-child返回的都是集合元素。举个 例子:div:first返回的是整个DOM文档中第一个div元素,而div:first-child是返回所有div元素下的第一个元素合并后的集 合。
View Code1 <!DOCTYPE html> 2 3 <html> 4 <head> 5 <meta name="viewport" content="width=device-width" /> 6 <script src="~/Scripts/jquery-1.10.2.js"></script> 7 <title>JQuery函数</title> 8 <script type="text/javascript"> 9 $(document).ready(function () {10 $("div:first-child").css("background-color", "#B2E0FF");11 $("div:last-child").css("background-color", "red");12 });13 </script>14 </head>15 <body>16 <div>17 <div>1</div>18 <div>2</div>19 <p>3</p>20 </div>21 <div>4</div>22 <div>last</div>23 </body>24 </html>Copy after login测试结果:
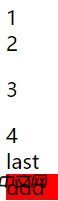
(3)only-child(当某个元素有且仅有一个子元素时,:only-child才会生效)
View Code1 <!DOCTYPE html> 2 3 <html> 4 <head> 5 <meta name="viewport" content="width=device-width" /> 6 <script src="~/Scripts/jquery-1.10.2.js"></script> 7 <title>JQuery函数</title> 8 <script type="text/javascript"> 9 $(document).ready(function () {10 $("div:only-child").css("background-color", "red");11 });12 </script>13 </head>14 <body>15 <div>16 <div>1</div>17 <div>2</div>18 <p>3</p>19 </div>20 <div>4</div>21 <div>last22 <div>ddd</div>23 </div>24 </body>25 </html>Copy after login测试结果:
(4)nth-child
看到这个就想起英文单词里的,fourth, fifth, sixth……,nth表示第n个,:nth-child就表示第n个child元素。要注意的是,这儿的n不像eq(x)、gt(x)或lt(x)是从 0开始的,它是从1开始的,英文里好像也没有zeroth这样的序号词吧。
:nth-child有三种用法:
1) :nth-child(x),获取第x个子元素
2) :nth-child(even)和:nth-child(odd),从1开始,获取第偶数个元素或第奇数个元素
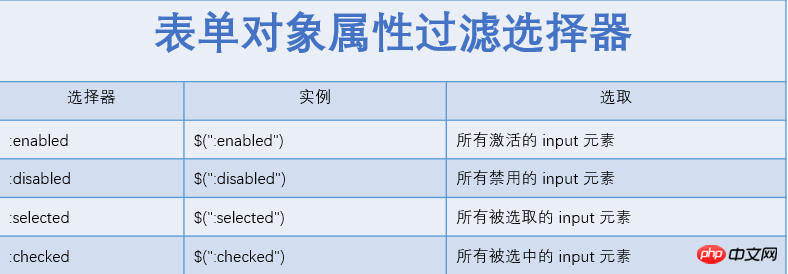
3) :nth-child(xn+y),x>=0,y>=0。例如x = 3, y = 0时就是3n,表示取第3n个元素(n>=0)。实际上xn+y是上面两种的通项式。(当x=0,y>=0时,等同于:hth- child(x);当x=2,y=0时,等同于nth-child(even);当x=2,y=1时,等同于:nth-child(odd))4.6 表单对象属性过滤选择器
4.6.1 一览表
4.6.2 代码示例
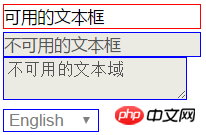
(1):enabled和:disabled(取可用或不可用元素)
:enabled和:diabled的匹配范围包括input, select, textarea
View Code1 <!DOCTYPE html> 2 3 <html> 4 <head> 5 <meta name="viewport" content="width=device-width" /> 6 <script src="~/Scripts/jquery-1.10.2.js"></script> 7 <title>JQuery函数</title> 8 <script type="text/javascript"> 9 $(document).ready(function () {10 $(':enabled').css('border', '1px solid #FF0000');11 $(':disabled').css('border', '1px solid #0000FF');12 });13 14 </script>15 16 </head>17 <body>18 <div>19 <input type="text" value="可用的文本框" />20 </div>21 <div>22 <input type="text" disabled="disabled" value="不可用的文本框" />23 </div>24 <div>25 <textarea disabled="disabled">不可用的文本域</textarea>26 </div>27 <div>28 <select disabled="disabled">29 <option>English</option>30 <option>简体中文</option>31 </select>32 </div>33 </body>34 </html>Copy after login测试结果:
(2):checked(取选中的单选框或复选框元素)
View Code1 <!DOCTYPE html> 2 3 <html> 4 <head> 5 <meta name="viewport" content="width=device-width" /> 6 <script src="~/Scripts/jquery-1.10.2.js"></script> 7 <title>JQuery函数</title> 8 <script type="text/javascript"> 9 $(document).ready(function () {10 $(".btn1").click(function () {11 $(":checked").hide();12 });13 });14 </script>15 16 </head>17 <body>18 <input type="radio" name="sex" value="male" checked="checked" /> Male19 <br />20 <input type="radio" name="sex" value="female" /> Female21 <br />22 I have a bike:23 <input type="checkbox" name="vehicle" value="Bike" />24 <br />25 I have a car:26 <input type="checkbox" name="vehicle" value="Car" checked="checked" />27 <br />28 I have an airplane:29 <input type="checkbox" name="vehicle" value="Airplane" />30 <button class="btn1">Hide Checked Options</button>31 32 </body>33 </html>Copy after login(3):selected(取下拉列表被选中的元素)
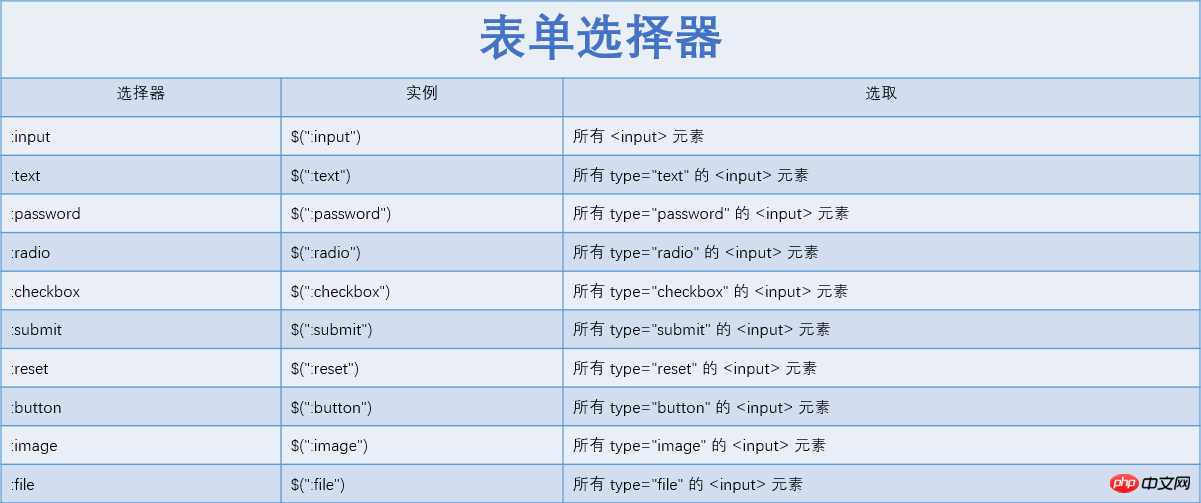
View Code1 <html> 2 <head> 3 <script type="text/javascript" src="/jquery/jquery.js"></script> 4 <script type="text/javascript"> 5 $(document).ready(function(){ 6 $(".btn1").click(function(){ 7 $(":selected").hide(); 8 }); 9 });10 </script>11 </head>12 <body>13 14 <select multiple="multiple">15 <option>Volvo</option>16 <option selected="selected">Saab</option>17 <option>Mercedes</option>18 <option>Audi</option>19 </select>20 <br />21 <button class="btn1">Hide Selected</button>22 </body>23 </html>Copy after login5 表单选择器
5.1 一览表
5.2 测试代码
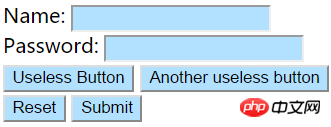
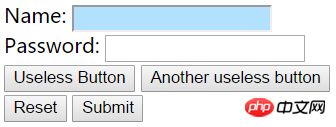
(1):input()(选择所有input元素)
View Code1 <!DOCTYPE html> 2 3 <html> 4 <head> 5 <meta name="viewport" content="width=device-width" /> 6 <script src="~/Scripts/jquery-1.10.2.js"></script> 7 <title>JQuery函数</title> 8 <script type="text/javascript"> 9 $(document).ready(function () {10 $(":input").css("background-color", "#B2E0FF");11 });12 </script>13 </head>14 <body>15 <form action="">16 Name: <input type="text" name="user" />17 <br />18 Password: <input type="password" name="password" />19 <br />20 <button type="button">Useless Button</button>21 <input type="button" value="Another useless button" />22 <br />23 <input type="reset" value="Reset" />24 <input type="submit" value="Submit" />25 <br />26 </form>27 </body>28 </html>Copy after login测试结果:
(2):text(选取所有text元素)
View Code1 <!DOCTYPE html> 2 3 <html> 4 <head> 5 <meta name="viewport" content="width=device-width" /> 6 <script src="~/Scripts/jquery-1.10.2.js"></script> 7 <title>JQuery函数</title> 8 <script type="text/javascript"> 9 $(document).ready(function () {10 $(":text").css("background-color", "#B2E0FF");11 });12 </script>13 </head>14 <body>15 <form action="">16 Name: <input type="text" name="user" />17 <br />18 Password: <input type="password" name="password" />19 <br />20 <button type="button">Useless Button</button>21 <input type="button" value="Another useless button" />22 <br />23 <input type="reset" value="Reset" />24 <input type="submit" value="Submit" />25 <br />26 </form>27 </body>28 </html>Copy after login测试结果:
(3):select和:button
(4)其他表单元素比较简单,在此不列举。
The above is the detailed content of Comprehensive explanation of Jquery selector. For more information, please follow other related articles on the PHP Chinese website!


 View Code
 View Code
 View Code
 View Code


Hot AI Tools

Undresser.AI Undress
AI-powered app for creating realistic nude photos

AI Clothes Remover
Online AI tool for removing clothes from photos.

Undress AI Tool
Undress images for free

Clothoff.io
AI clothes remover

Video Face Swap
Swap faces in any video effortlessly with our completely free AI face swap tool!

Hot Article
Hot Tools

Notepad++7.3.1
Easy-to-use and free code editor

SublimeText3 Chinese version
Chinese version, very easy to use

Zend Studio 13.0.1
Powerful PHP integrated development environment

Dreamweaver CS6
Visual web development tools

SublimeText3 Mac version
God-level code editing software (SublimeText3)
Hot Topics
 1389
1389
 52
52

 Detailed explanation of jQuery reference methods: Quick start guide
Feb 27, 2024 pm 06:45 PM
Detailed explanation of jQuery reference methods: Quick start guide
Feb 27, 2024 pm 06:45 PM
Detailed explanation of jQuery reference method: Quick start guide jQuery is a popular JavaScript library that is widely used in website development. It simplifies JavaScript programming and provides developers with rich functions and features. This article will introduce jQuery's reference method in detail and provide specific code examples to help readers get started quickly. Introducing jQuery First, we need to introduce the jQuery library into the HTML file. It can be introduced through a CDN link or downloaded
 How to use PUT request method in jQuery?
Feb 28, 2024 pm 03:12 PM
How to use PUT request method in jQuery?
Feb 28, 2024 pm 03:12 PM
How to use PUT request method in jQuery? In jQuery, the method of sending a PUT request is similar to sending other types of requests, but you need to pay attention to some details and parameter settings. PUT requests are typically used to update resources, such as updating data in a database or updating files on the server. The following is a specific code example using the PUT request method in jQuery. First, make sure you include the jQuery library file, then you can send a PUT request via: $.ajax({u
 How to remove the height attribute of an element with jQuery?
Feb 28, 2024 am 08:39 AM
How to remove the height attribute of an element with jQuery?
Feb 28, 2024 am 08:39 AM
How to remove the height attribute of an element with jQuery? In front-end development, we often encounter the need to manipulate the height attributes of elements. Sometimes, we may need to dynamically change the height of an element, and sometimes we need to remove the height attribute of an element. This article will introduce how to use jQuery to remove the height attribute of an element and provide specific code examples. Before using jQuery to operate the height attribute, we first need to understand the height attribute in CSS. The height attribute is used to set the height of an element
 jQuery Tips: Quickly modify the text of all a tags on the page
Feb 28, 2024 pm 09:06 PM
jQuery Tips: Quickly modify the text of all a tags on the page
Feb 28, 2024 pm 09:06 PM
Title: jQuery Tips: Quickly modify the text of all a tags on the page In web development, we often need to modify and operate elements on the page. When using jQuery, sometimes you need to modify the text content of all a tags in the page at once, which can save time and energy. The following will introduce how to use jQuery to quickly modify the text of all a tags on the page, and give specific code examples. First, we need to introduce the jQuery library file and ensure that the following code is introduced into the page: <
 Use jQuery to modify the text content of all a tags
Feb 28, 2024 pm 05:42 PM
Use jQuery to modify the text content of all a tags
Feb 28, 2024 pm 05:42 PM
Title: Use jQuery to modify the text content of all a tags. jQuery is a popular JavaScript library that is widely used to handle DOM operations. In web development, we often encounter the need to modify the text content of the link tag (a tag) on the page. This article will explain how to use jQuery to achieve this goal, and provide specific code examples. First, we need to introduce the jQuery library into the page. Add the following code in the HTML file:
 Understand the role and application scenarios of eq in jQuery
Feb 28, 2024 pm 01:15 PM
Understand the role and application scenarios of eq in jQuery
Feb 28, 2024 pm 01:15 PM
jQuery is a popular JavaScript library that is widely used to handle DOM manipulation and event handling in web pages. In jQuery, the eq() method is used to select elements at a specified index position. The specific usage and application scenarios are as follows. In jQuery, the eq() method selects the element at a specified index position. Index positions start counting from 0, i.e. the index of the first element is 0, the index of the second element is 1, and so on. The syntax of the eq() method is as follows: $("s
 How to tell if a jQuery element has a specific attribute?
Feb 29, 2024 am 09:03 AM
How to tell if a jQuery element has a specific attribute?
Feb 29, 2024 am 09:03 AM
How to tell if a jQuery element has a specific attribute? When using jQuery to operate DOM elements, you often encounter situations where you need to determine whether an element has a specific attribute. In this case, we can easily implement this function with the help of the methods provided by jQuery. The following will introduce two commonly used methods to determine whether a jQuery element has specific attributes, and attach specific code examples. Method 1: Use the attr() method and typeof operator // to determine whether the element has a specific attribute
 Introduction to how to add new rows to a table using jQuery
Feb 29, 2024 am 08:12 AM
Introduction to how to add new rows to a table using jQuery
Feb 29, 2024 am 08:12 AM
jQuery is a popular JavaScript library widely used in web development. During web development, it is often necessary to dynamically add new rows to tables through JavaScript. This article will introduce how to use jQuery to add new rows to a table, and provide specific code examples. First, we need to introduce the jQuery library into the HTML page. The jQuery library can be introduced in the tag through the following code:
