

js implementation of digital increment special effects example code

This article mainly introduces the JS implementation of the digital increment effect in imitating Alipay My Wealth, which has a good reference value. Let’s take a look at it with the editor.
Last Friday, in response to the company’s temporary needs, we solved the official website in one day (ps: relatively simple haha). There is a special effect in the demand that is to increase the number to a specified value. , in fact, writing JS is not complicated, but I found a small js plug-in. This plug-in is light and simple, and it is also very simple and practical to use. Share it here with your little friends, take it if you like it.
The above is the effect of this plug-in, let’s take a look at how to use it
First: Here is a brief list of the HTML part
1 2 3 4 |
|
Let’s understand two key things above:
data-to This attribute Control the value you want to eventually increment
data-speed The meaning of this in English is very clear, it means The speed of data increment is
ps: The class and id here can be adjusted according to everyone’s own modifications,
Second: The JS part is also the core code of the plug-in
1 2 3 4 5 6 7 8 9 10 11 12 13 14 15 16 17 18 19 20 21 22 23 24 25 26 27 28 29 30 31 32 33 34 35 36 37 38 39 40 41 42 43 44 45 46 47 48 49 50 51 52 53 54 55 56 57 58 59 60 61 62 63 64 65 66 67 68 69 70 71 72 |
|
The above is all the code, the css part will not be displayed here. If you want to download the demo, click to download it below!
In fact, this plug-in is very scalable. As for what kind of display your friends like, you can modify it yourself!
The above is the detailed content of js implementation of digital increment special effects example code. For more information, please follow other related articles on the PHP Chinese website!

Hot AI Tools

Undresser.AI Undress
AI-powered app for creating realistic nude photos

AI Clothes Remover
Online AI tool for removing clothes from photos.

Undress AI Tool
Undress images for free

Clothoff.io
AI clothes remover

Video Face Swap
Swap faces in any video effortlessly with our completely free AI face swap tool!
Hot Article
Hot Tools

Notepad++7.3.1
Easy-to-use and free code editor

SublimeText3 Chinese version
Chinese version, very easy to use

Zend Studio 13.0.1
Powerful PHP integrated development environment

Dreamweaver CS6
Visual web development tools

SublimeText3 Mac version
God-level code editing software (SublimeText3)
Hot Topics
 1386
1386
 52
52

 How to implement an online speech recognition system using WebSocket and JavaScript
Dec 17, 2023 pm 02:54 PM
How to implement an online speech recognition system using WebSocket and JavaScript
Dec 17, 2023 pm 02:54 PM
How to use WebSocket and JavaScript to implement an online speech recognition system Introduction: With the continuous development of technology, speech recognition technology has become an important part of the field of artificial intelligence. The online speech recognition system based on WebSocket and JavaScript has the characteristics of low latency, real-time and cross-platform, and has become a widely used solution. This article will introduce how to use WebSocket and JavaScript to implement an online speech recognition system.
 WebSocket and JavaScript: key technologies for implementing real-time monitoring systems
Dec 17, 2023 pm 05:30 PM
WebSocket and JavaScript: key technologies for implementing real-time monitoring systems
Dec 17, 2023 pm 05:30 PM
WebSocket and JavaScript: Key technologies for realizing real-time monitoring systems Introduction: With the rapid development of Internet technology, real-time monitoring systems have been widely used in various fields. One of the key technologies to achieve real-time monitoring is the combination of WebSocket and JavaScript. This article will introduce the application of WebSocket and JavaScript in real-time monitoring systems, give code examples, and explain their implementation principles in detail. 1. WebSocket technology
 How to use JavaScript and WebSocket to implement a real-time online ordering system
Dec 17, 2023 pm 12:09 PM
How to use JavaScript and WebSocket to implement a real-time online ordering system
Dec 17, 2023 pm 12:09 PM
Introduction to how to use JavaScript and WebSocket to implement a real-time online ordering system: With the popularity of the Internet and the advancement of technology, more and more restaurants have begun to provide online ordering services. In order to implement a real-time online ordering system, we can use JavaScript and WebSocket technology. WebSocket is a full-duplex communication protocol based on the TCP protocol, which can realize real-time two-way communication between the client and the server. In the real-time online ordering system, when the user selects dishes and places an order
 How to implement an online reservation system using WebSocket and JavaScript
Dec 17, 2023 am 09:39 AM
How to implement an online reservation system using WebSocket and JavaScript
Dec 17, 2023 am 09:39 AM
How to use WebSocket and JavaScript to implement an online reservation system. In today's digital era, more and more businesses and services need to provide online reservation functions. It is crucial to implement an efficient and real-time online reservation system. This article will introduce how to use WebSocket and JavaScript to implement an online reservation system, and provide specific code examples. 1. What is WebSocket? WebSocket is a full-duplex method on a single TCP connection.
 JavaScript and WebSocket: Building an efficient real-time weather forecasting system
Dec 17, 2023 pm 05:13 PM
JavaScript and WebSocket: Building an efficient real-time weather forecasting system
Dec 17, 2023 pm 05:13 PM
JavaScript and WebSocket: Building an efficient real-time weather forecast system Introduction: Today, the accuracy of weather forecasts is of great significance to daily life and decision-making. As technology develops, we can provide more accurate and reliable weather forecasts by obtaining weather data in real time. In this article, we will learn how to use JavaScript and WebSocket technology to build an efficient real-time weather forecast system. This article will demonstrate the implementation process through specific code examples. We
 Simple JavaScript Tutorial: How to Get HTTP Status Code
Jan 05, 2024 pm 06:08 PM
Simple JavaScript Tutorial: How to Get HTTP Status Code
Jan 05, 2024 pm 06:08 PM
JavaScript tutorial: How to get HTTP status code, specific code examples are required. Preface: In web development, data interaction with the server is often involved. When communicating with the server, we often need to obtain the returned HTTP status code to determine whether the operation is successful, and perform corresponding processing based on different status codes. This article will teach you how to use JavaScript to obtain HTTP status codes and provide some practical code examples. Using XMLHttpRequest
 Steps to turn off mouse track effects in Windows 10
Dec 31, 2023 pm 09:53 PM
Steps to turn off mouse track effects in Windows 10
Dec 31, 2023 pm 09:53 PM
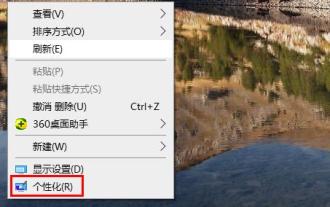
When we use the win10 system, we can make many personalized settings, including mouse track special effects. However, many users do not know how to turn off the mouse track special effects in win10. For this reason, we have provided detailed methods. How to turn off the mouse track effects in Windows 10: 1. First, right-click on a blank space on the desktop, and then click "Personalize". 2. Then click "Theme" on the left and select "Mouse Cursor" on the right. 3. After entering the properties, you can see and select "Pointer Options". 4. Then scroll down to see the visibility, and the √ is checked at this time. 5. Uncheck, then click Apply and OK.
 Demystifying the Canvas API: everything from simple drawing to advanced special effects
Jan 17, 2024 am 09:44 AM
Demystifying the Canvas API: everything from simple drawing to advanced special effects
Jan 17, 2024 am 09:44 AM
CanvasAPI is a powerful drawing tool provided by HTML5, which can implement various functions from basic drawing to advanced special effects. This article will give you an in-depth understanding of how to use CanvasAPI and provide specific code examples. Basic drawing The most basic part of Canvas API is to draw simple graphics, such as rectangles, circles, straight lines, etc. Here is a code example that creates a rectangle and fills it with color: constcanvas=document.getElementB
