Django learning to create web page examples
1. Select the default storage address of the project
The default address is C:\Users\Lee, which is the address to enter the cmd console. After creating the project, command django -admin startproject project_test creates a new project folder at the default address.
The project contains a manage.py file and the project_test folder


##2. Change the project storage address
The address I want to change is G:\Django. The cmd operation is to switch to the G drive first (the same goes for other drives) C:\Users\Lee> g: , and then G:\> appears. We then switch to the G:\Django folder and operate cd Django or cd G:\Django. The operation address is G:\Django 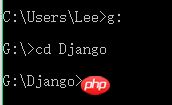
3. Create the first project hello at the new address
The command is django-admin startproject hello. If django-admin appears and it is not an internal or external command, then Try django-admin.py startproject helloIf there is no error, the creation is successful. The hello project folder has already appeared in the Django folder on the G drive

4. Create the first custom app——HelloWorld
First you have to enter the hello folder, command cd hello Now you have entered the hello file folder, command manage startapp HelloWorld. If no error occurs, the creation is successful. If an error occurs, try manage.py startapp HelloWorld

Please put the cmd console aside for the following 5-7 operations. There is no need to use the cmd console for the time being.
5. Add setting information
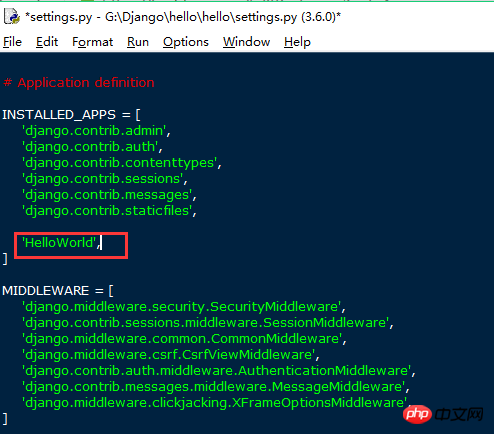
Add the customized HelloWorld to INSTALL_APPS## in G:\Django\hello\hello\settings.py#, if the newly created app is not added to INSTALL_APPS, django will not be able to automatically find the template files (files under app-name/templates/) and static files (files in app-name/static/) )

Open the HelloWorld folder View function views.py, add the following code content, define an index function, pass in the request parameter, and send a web page request.
from django.http import HttpResponse
def index(request):
    return HttpResponse("Hello World!")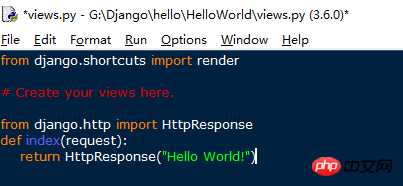
Return to the previous level G:\ Django\hello Enter urls.py in the G:\Django\hello\hello folder again, add from HelloWorld import views to the head of the code, and add the following code to the urlpatterns list. As can be seen from the picture, django has already been installed by default. An admin URL has been added. We can access this admin URL later. r'^index/' in the url part is a regular expression, views.index is the associated address, name='Index' is the alias you gave this web page (not the title of the website), it is optional, even if it is The previous r'^index/' becomes r'^index2/', and index2 can also be accessed through this Index.
url(r'^index/',views.index,name='Index'),

Save the above file. So far we have completed the website construction. Let’s start the local server to browse the website we just built.
8. Use the cmd console command to start the local website server.
In the G:\Django\hello directory (because the manage command is required to run the server, this manage.py is only available in this project directory) enter manage runserver, and if nothing unexpected happens, the website server is set up It worked. But there is always a bug in everything, UnicodeDecodeError encoding error. For details, see "Django's Pitfalls (1)".

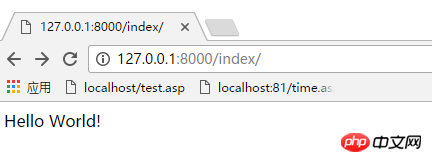
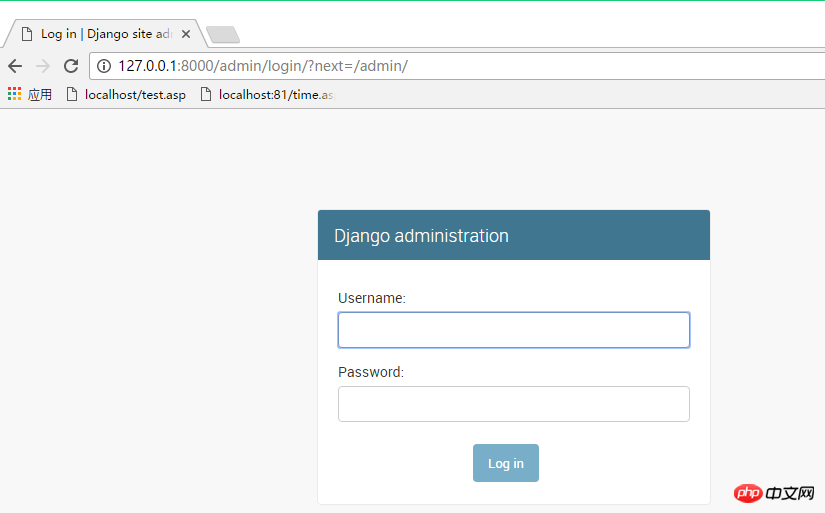
No error occurred, indicating that the operation was successful. The website access index address is http://127.0.0.1:8000/index/ or http://localhost:8000/ index/, and then you can see your first page. Do you remember the admin page? We visited http://127.0.0.1:8000/admin/ and found that the redirection 302 jumps to the login page. Because the super user has not been created yet, we cannot log in. At the same time, you can also find that the cmd console updates your operations synchronously, and the console has corresponding access records.

#Finally summarize the idea:
The new app is reported in the settings.py in the project name (hello) at the same level—> The views.py in the new app folder is used to set the web content—> The new app associates the URL in urls.py in the project name (hello) at the same level—>Start the server—>Access the corresponding websiteThe above is the detailed content of Django learning to create web page examples. For more information, please follow other related articles on the PHP Chinese website!

Hot AI Tools

Undresser.AI Undress
AI-powered app for creating realistic nude photos

AI Clothes Remover
Online AI tool for removing clothes from photos.

Undress AI Tool
Undress images for free

Clothoff.io
AI clothes remover

Video Face Swap
Swap faces in any video effortlessly with our completely free AI face swap tool!

Hot Article

Hot Tools

Notepad++7.3.1
Easy-to-use and free code editor

SublimeText3 Chinese version
Chinese version, very easy to use

Zend Studio 13.0.1
Powerful PHP integrated development environment

Dreamweaver CS6
Visual web development tools

SublimeText3 Mac version
God-level code editing software (SublimeText3)

Hot Topics
 1386
1386
 52
52
 How to send web pages to desktop as shortcut in Edge browser?
Mar 14, 2024 pm 05:22 PM
How to send web pages to the desktop as a shortcut in Edge browser? Many of our users want to display frequently used web pages on the desktop as shortcuts for the convenience of directly opening access pages, but they don’t know how to do it. In response to this problem, the editor of this issue will share the solution with the majority of users. , let’s take a look at the content shared in today’s software tutorial. The shortcut method of sending web pages to the desktop in Edge browser: 1. Open the software and click the "..." button on the page. 2. Select "Install this site as an application" in "Application" from the drop-down menu option. 3. Finally, click it in the pop-up window
 How to check django version
Dec 01, 2023 pm 02:25 PM
Steps to check the Django version: 1. Open a terminal or command prompt window; 2. Make sure Django has been installed. If Django is not installed, you can use the package management tool to install it and enter the pip install django command; 3. After the installation is complete , you can use python -m django --version to check the Django version.
 What should I do if the images on the webpage cannot be loaded? 6 solutions
Mar 15, 2024 am 10:30 AM
Some netizens found that when they opened the browser web page, the pictures on the web page could not be loaded for a long time. What happened? I checked that the network is normal, so where is the problem? The editor below will introduce to you six solutions to the problem that web page images cannot be loaded. Web page images cannot be loaded: 1. Internet speed problem The web page cannot display images. It may be because the computer's Internet speed is relatively slow and there are more softwares opened on the computer. And the images we access are relatively large, which may be due to loading timeout. As a result, the picture cannot be displayed. You can turn off the software that consumes more network speed. You can go to the task manager to check. 2. Too many visitors. If the webpage cannot display pictures, it may be because the webpages we visited were visited at the same time.
 Possible reasons why the network connection is normal but the browser cannot access the web page
Feb 19, 2024 pm 03:45 PM
The browser cannot open the web page but the network is normal. There are many possible reasons. When this problem occurs, we need to investigate step by step to determine the specific cause and solve the problem. First, determine whether the webpage cannot be opened is limited to a specific browser or whether all browsers cannot open the webpage. If only one browser cannot open the web page, you can try to use other browsers, such as Google Chrome, Firefox, etc., for testing. If other browsers are able to open the page correctly, the problem is most likely with that specific browser, possibly
 Django vs. Flask: A comparative analysis of Python web frameworks
Jan 19, 2024 am 08:36 AM
Django and Flask are both leaders in Python Web frameworks, and they both have their own advantages and applicable scenarios. This article will conduct a comparative analysis of these two frameworks and provide specific code examples. Development Introduction Django is a full-featured Web framework, its main purpose is to quickly develop complex Web applications. Django provides many built-in functions, such as ORM (Object Relational Mapping), forms, authentication, management backend, etc. These features allow Django to handle large
 Django Framework Pros and Cons: Everything You Need to Know
Jan 19, 2024 am 09:09 AM
Django is a complete development framework that covers all aspects of the web development life cycle. Currently, this framework is one of the most popular web frameworks worldwide. If you plan to use Django to build your own web applications, then you need to understand the advantages and disadvantages of the Django framework. Here's everything you need to know, including specific code examples. Django advantages: 1. Rapid development-Djang can quickly develop web applications. It provides a rich library and internal
 What to do if the webpage cannot be opened
Feb 21, 2024 am 10:24 AM
How to solve the problem of web pages not opening With the rapid development of the Internet, people increasingly rely on the Internet to obtain information, communicate and entertain. However, sometimes we encounter the problem that the web page cannot be opened, which brings us a lot of trouble. This article will introduce you to some common methods to help solve the problem of web pages not opening. First, we need to determine why the web page cannot be opened. Possible reasons include network problems, server problems, browser settings problems, etc. Here are some solutions: Check network connection: First, we need
 How to check django version
Nov 30, 2023 pm 03:08 PM
How to check the django version: 1. To check through the command line, enter the "python -m django --version" command in the terminal or command line window; 2. To check in the Python interactive environment, enter "import django print(django. get_version())" code; 3. Check the settings file of the Django project and find a list named INSTALLED_APPS, which contains installed application information.


