

Windows 10 + MySQL 5.5 installation and usage tutorial sharing

1. To install MySQL 5.5, use
. Click the MySQL installation file directly to install, but there are relatively large ones. Probability of 2502 error and 2503 error
Solution:
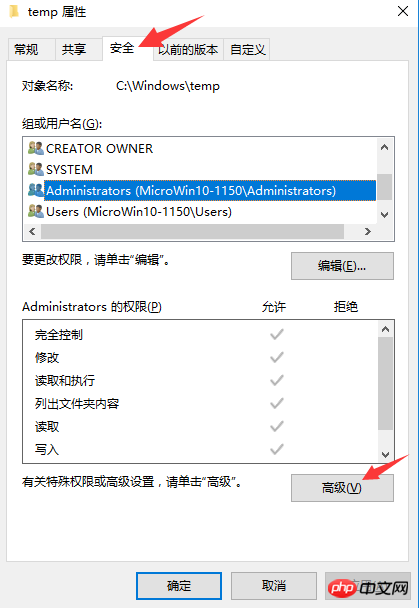
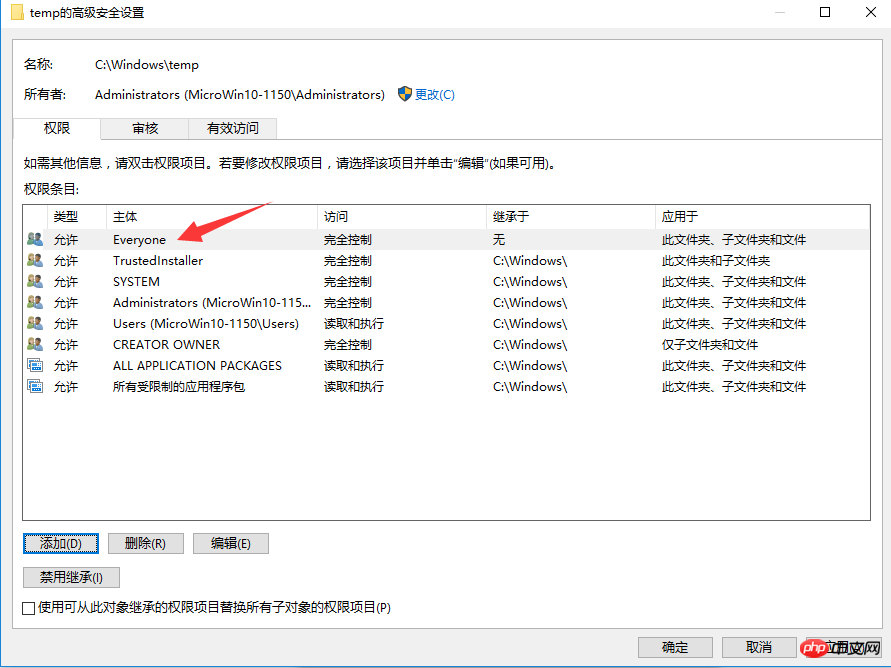
##1) Find the directory :C:\Windows\temp
2) Right-click on the directory----->"Properties"----->"Security "
3) In the pop-up window, click "Advanced"
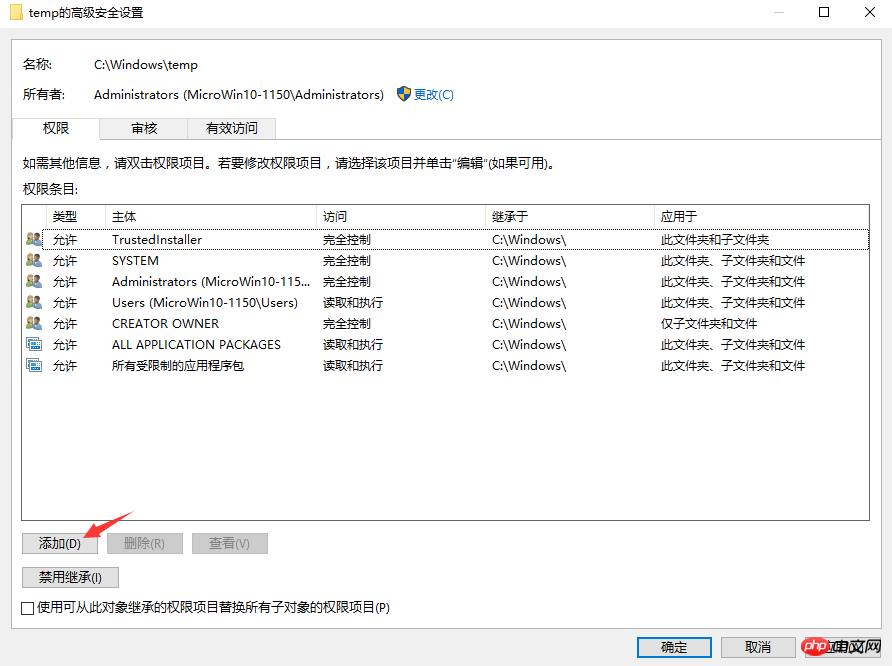
4)In the pop-up window, click "Add"
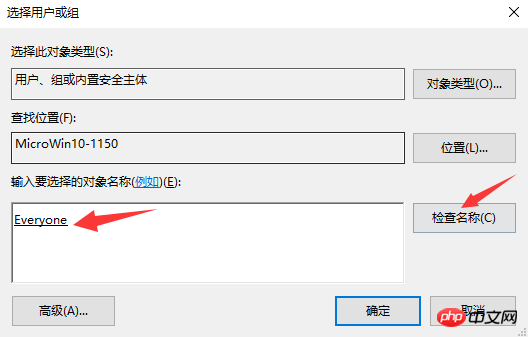
##5)In the pop-up window, click "Select Subject"

6)In the pop-up window, enter every and click "Check Name", you will find "Everyone"
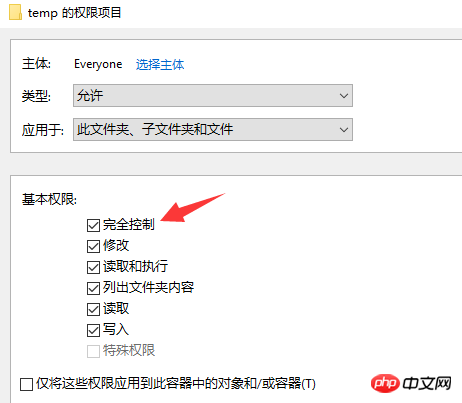
 ##9) After clicking Apply , a security warning pops up, select "Yes"
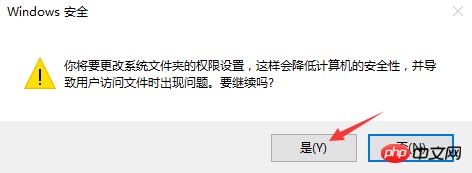 ##10) Then use MySQL Installation files, there will be no 2502 errors and 2503 errors
Note: There is a pit here, even if you set up the installation If the path is elsewhere, MySQL will still be installed in the C:\Program Files path. Of course, it will have no impact on use
------- -------------------------------------------------- ---------------------------------------
2. Use the free installation of MySQL 5.5
1) Unzip the MySQL free installation file, such as Place it in D:\Java\mysql
2) Copy the my-small.ini file in the directory and name it my.ini
3) Modify the contents in my.ini
Find the [client] node, append: default-character-set = utf8
Find the [mysqld] node, append:
basedir = "D:\\Java\\MySQL"
datadir = "D: \\Java\\MySQL\\data"
##character_set_server = utf8
##collation-server = utf8_general_ci
Create a new [WinMySQLadmin] node and add: Server = D:\Java\mysql\bin\mysqld.exe
4) Append in the system variable name Path of the environment variable: D:\Java\mysql\bin;
5) In D :\Java\mysql\bin directory, execute the command (you can shift+right-click to find "Open command window here", or you can enter this directory in command line window mode): mysqld -install
This command is used to register the mysql service into the windows service. If "Service successfully installed." appears after the operation, it means that the service has been installed successfully
You can find the service through the control panel to see if there is a service named MySQL, or you can enter services.msc with win+r to directly enter the service window to see
For the corresponding uninstall service, you can execute the command: enter: mysqld -remove, prompting to uninstall the MySQL service
Similarly, the MySQL service can have a graphical interface Operate to start or close the service. You can also start the service through net start mysql in the command line window, and close the service with net stop mysql
##6) win+r input cmd to enter the command line window, enter: mysql -uroot -p and press Enter. At this time, mysql has no password by default. If "Welcome to the MySQL monitor." is displayed, it means successful login to MySQL7) Check the character set settings of the database, enter in the command line window: SHOW VARIABLES LIKE "character%"; If the displayed results are "character_set_server" and
"character_set_client" and other series of values They are all utf8, indicating that the character set is set successfully
8) Change the login password to sa, and enter in the command line window: set password for root@localhost = password( 'sa'); After logging out and logging in again, you need to enter: mysql -uroot -psa to log in successfully--------- -------------------------------------------------- -------------------------------------------------- -------------------------------------------------- --------
3. Use of MySQL client
After repeated comparisons, I personally recommend the SQLyog client. It is simple, easy to use, powerful, and has intelligent prompts
As a coder, you may not want to go back and forth with many tools Switch, myeclipse or idea have built-in database connection tools.
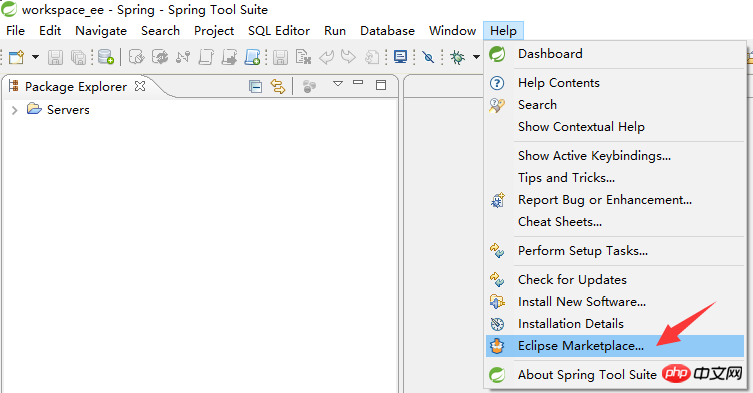
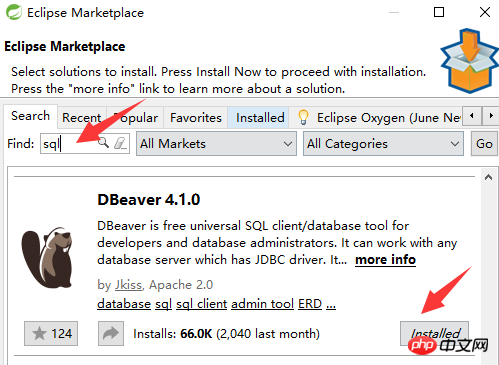
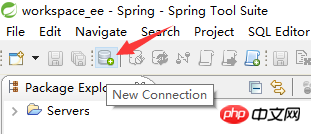
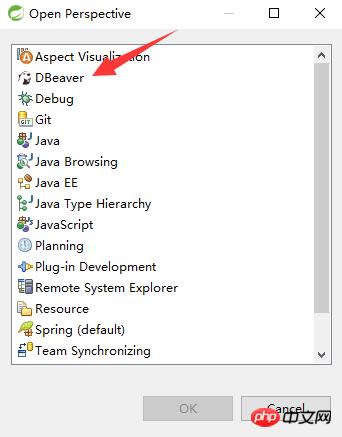
Here we recommend DBeaver Core, a plug-in for eclipse. The icon looks like a cute little squirrel.
Installation method: STS is used here, of course eclipse is the same
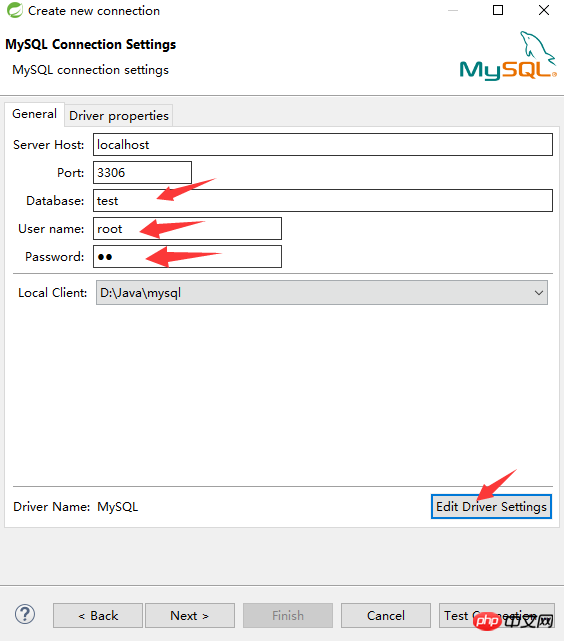
 ##Fill in the connection information
 Choose to load the database driver jar package
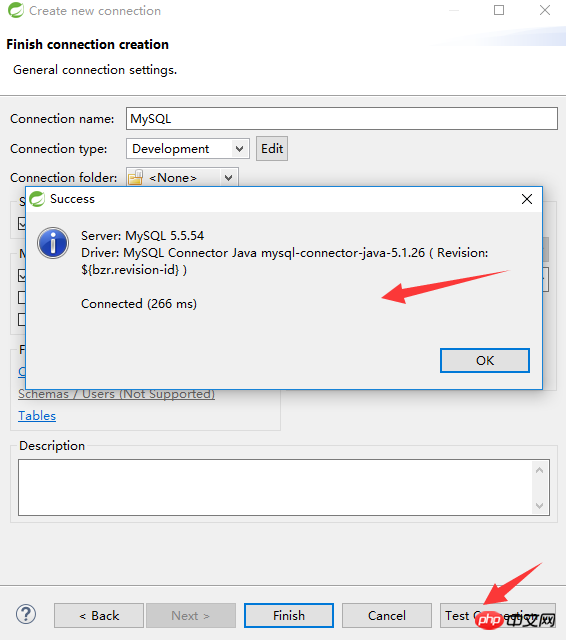
Test whether the connection is successful ## You can switch to the database operation view to perform operations ##There are some Smart prompts. It’s a pity that there are not enough smart prompts at present. For example, auto_increment doesn’t prompt, so just use it. ^_^ 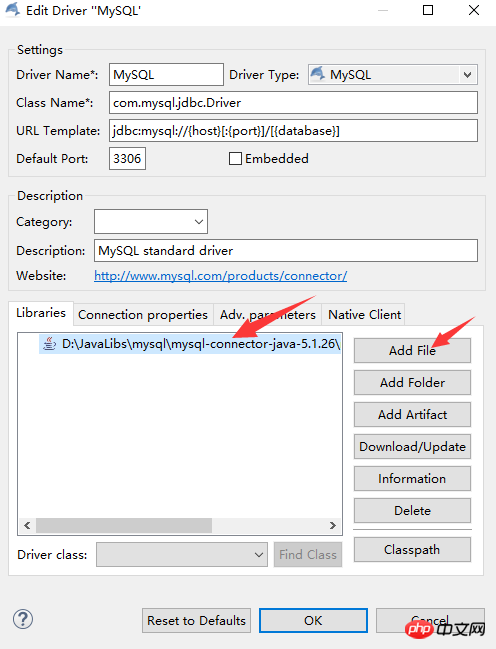

The above is the detailed content of Windows 10 + MySQL 5.5 installation and usage tutorial sharing. For more information, please follow other related articles on the PHP Chinese website!

Hot AI Tools

Undresser.AI Undress
AI-powered app for creating realistic nude photos

AI Clothes Remover
Online AI tool for removing clothes from photos.

Undress AI Tool
Undress images for free

Clothoff.io
AI clothes remover

Video Face Swap
Swap faces in any video effortlessly with our completely free AI face swap tool!

Hot Article
Hot Tools

Notepad++7.3.1
Easy-to-use and free code editor

SublimeText3 Chinese version
Chinese version, very easy to use

Zend Studio 13.0.1
Powerful PHP integrated development environment

Dreamweaver CS6
Visual web development tools

SublimeText3 Mac version
God-level code editing software (SublimeText3)
Hot Topics
 1392
1392
 52
52

 How to start mysql by docker
Apr 15, 2025 pm 12:09 PM
How to start mysql by docker
Apr 15, 2025 pm 12:09 PM
The process of starting MySQL in Docker consists of the following steps: Pull the MySQL image to create and start the container, set the root user password, and map the port verification connection Create the database and the user grants all permissions to the database
 Centos install mysql
Apr 14, 2025 pm 08:09 PM
Centos install mysql
Apr 14, 2025 pm 08:09 PM
Installing MySQL on CentOS involves the following steps: Adding the appropriate MySQL yum source. Execute the yum install mysql-server command to install the MySQL server. Use the mysql_secure_installation command to make security settings, such as setting the root user password. Customize the MySQL configuration file as needed. Tune MySQL parameters and optimize databases for performance.
 Can vs code run in Windows 8
Apr 15, 2025 pm 07:24 PM
Can vs code run in Windows 8
Apr 15, 2025 pm 07:24 PM
VS Code can run on Windows 8, but the experience may not be great. First make sure the system has been updated to the latest patch, then download the VS Code installation package that matches the system architecture and install it as prompted. After installation, be aware that some extensions may be incompatible with Windows 8 and need to look for alternative extensions or use newer Windows systems in a virtual machine. Install the necessary extensions to check whether they work properly. Although VS Code is feasible on Windows 8, it is recommended to upgrade to a newer Windows system for a better development experience and security.
 How to install mysql in centos7
Apr 14, 2025 pm 08:30 PM
How to install mysql in centos7
Apr 14, 2025 pm 08:30 PM
The key to installing MySQL elegantly is to add the official MySQL repository. The specific steps are as follows: Download the MySQL official GPG key to prevent phishing attacks. Add MySQL repository file: rpm -Uvh https://dev.mysql.com/get/mysql80-community-release-el7-3.noarch.rpm Update yum repository cache: yum update installation MySQL: yum install mysql-server startup MySQL service: systemctl start mysqld set up booting
 vscode cannot install extension
Apr 15, 2025 pm 07:18 PM
vscode cannot install extension
Apr 15, 2025 pm 07:18 PM
The reasons for the installation of VS Code extensions may be: network instability, insufficient permissions, system compatibility issues, VS Code version is too old, antivirus software or firewall interference. By checking network connections, permissions, log files, updating VS Code, disabling security software, and restarting VS Code or computers, you can gradually troubleshoot and resolve issues.
 MySQL's Role: Databases in Web Applications
Apr 17, 2025 am 12:23 AM
MySQL's Role: Databases in Web Applications
Apr 17, 2025 am 12:23 AM
The main role of MySQL in web applications is to store and manage data. 1.MySQL efficiently processes user information, product catalogs, transaction records and other data. 2. Through SQL query, developers can extract information from the database to generate dynamic content. 3.MySQL works based on the client-server model to ensure acceptable query speed.
 Can vscode be used for mac
Apr 15, 2025 pm 07:36 PM
Can vscode be used for mac
Apr 15, 2025 pm 07:36 PM
VS Code is available on Mac. It has powerful extensions, Git integration, terminal and debugger, and also offers a wealth of setup options. However, for particularly large projects or highly professional development, VS Code may have performance or functional limitations.
 What is vscode What is vscode for?
Apr 15, 2025 pm 06:45 PM
What is vscode What is vscode for?
Apr 15, 2025 pm 06:45 PM
VS Code is the full name Visual Studio Code, which is a free and open source cross-platform code editor and development environment developed by Microsoft. It supports a wide range of programming languages and provides syntax highlighting, code automatic completion, code snippets and smart prompts to improve development efficiency. Through a rich extension ecosystem, users can add extensions to specific needs and languages, such as debuggers, code formatting tools, and Git integrations. VS Code also includes an intuitive debugger that helps quickly find and resolve bugs in your code.
