
Recently I helped others install a JAVA virtual machine. After the installation, there were still problems, which took a long time to be solved, so I’m here to share my experience with you.
First of all, if JAVA exists in the computer machine and you don’t want this version, you can uninstall it (remember, you cannot directly delete the contents of the JDK file, otherwise the uninstallation will not be clean), because generally installing JDK It is installed under the C drive. Although the JDK has been deleted, some registries related to JAVA have not been deleted, so the relevant uninstallation should be performed in the Control Panel -> Add/Remove Programs.
Then go to the official website to download JDK: Select the version that matches your machine.
After the download is completed, start installing the JDK:

Then install, the default is C drive
After the installation is completed, start the setup Environment variables, JVM (java virtual machine).
Right click on my computer properties
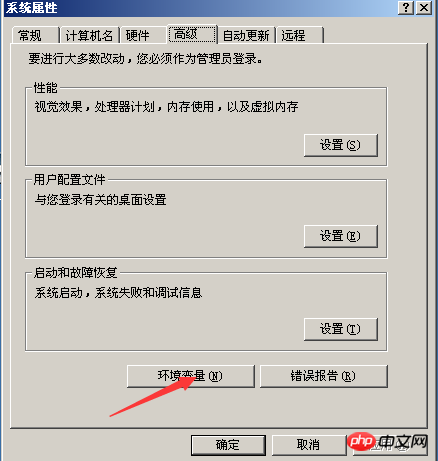
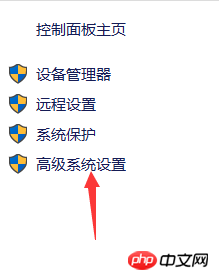
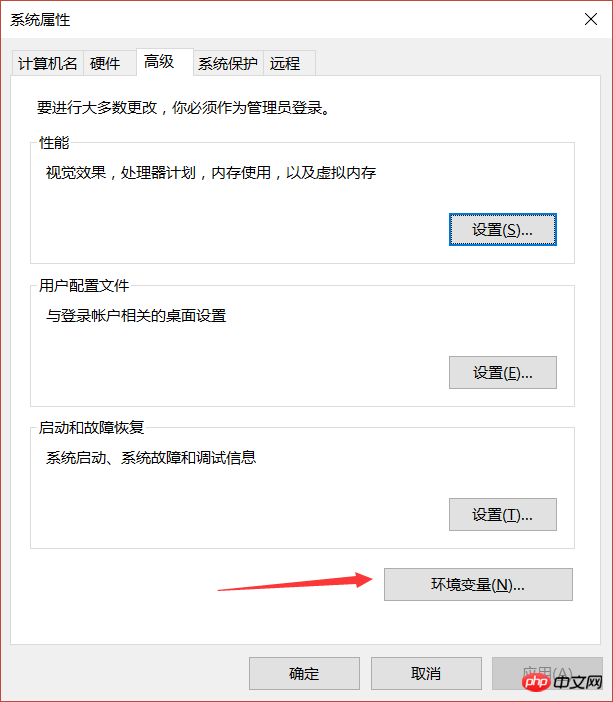
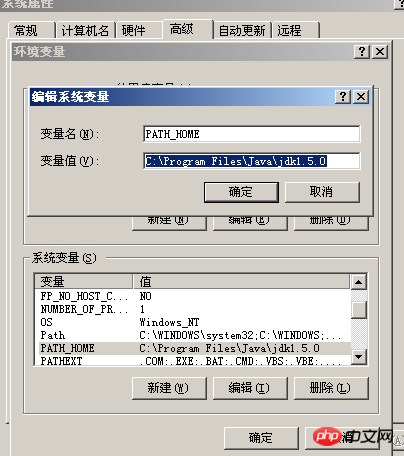
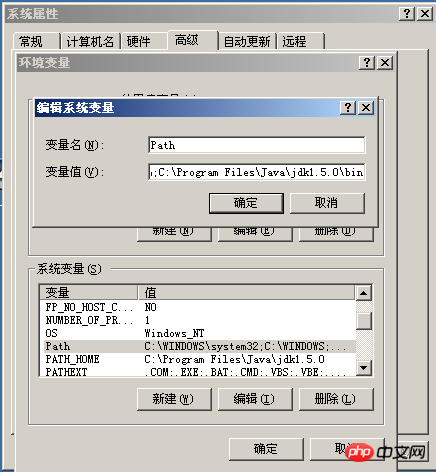
.;" and then type ; means that this has been completed; otherwise, write the variable value after other variable values; After writing, type;
3. Create a new CLASSPATH (the path to the java class library). Whether it can be executed depends on it,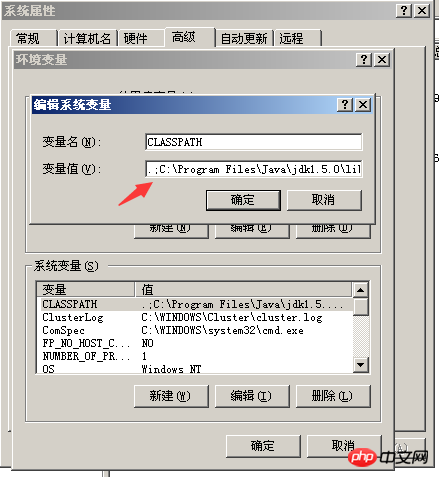
.;" in front, and then write down the dt.jar and tools in the lib directory under the jdk installation directory .jar path, write it separately, such as:
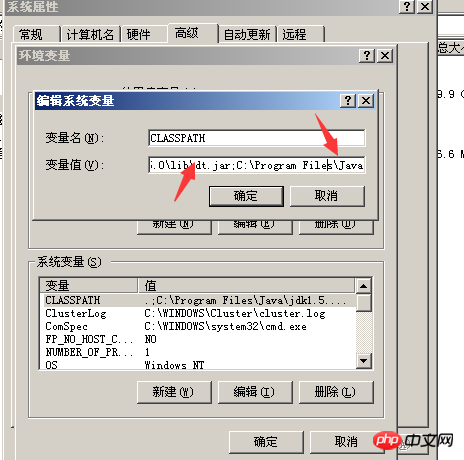
;" when writing the next one, and then write the second one, and then the installation is basically completed. ,start testing.
Open the command line interface, shortcut key (WIN+R) and enter CMDFirst enterjavac -versioncommand
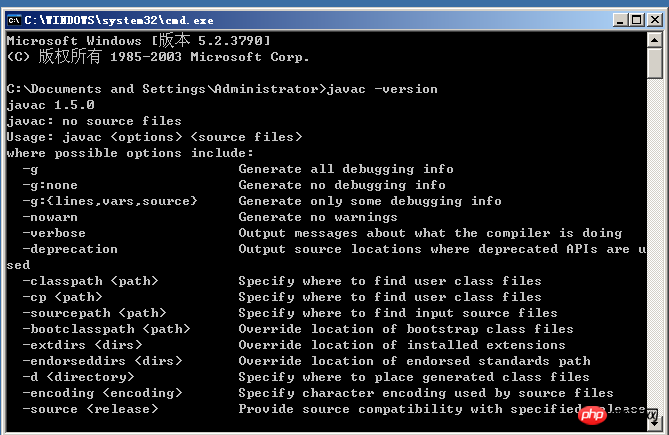
java -version
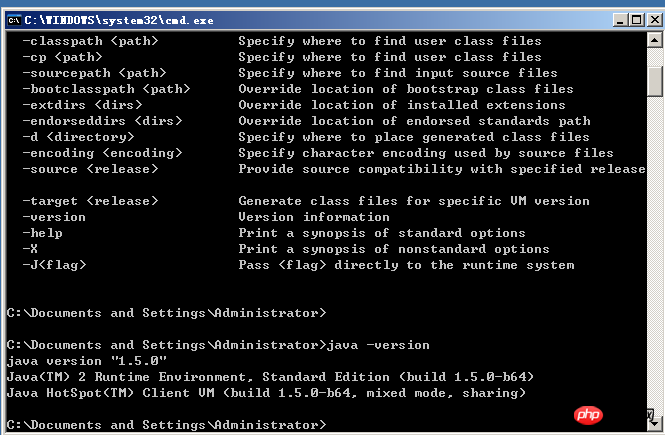
##Indicates that the installation is successful, start testing the program, use Notepad to write a program for testing
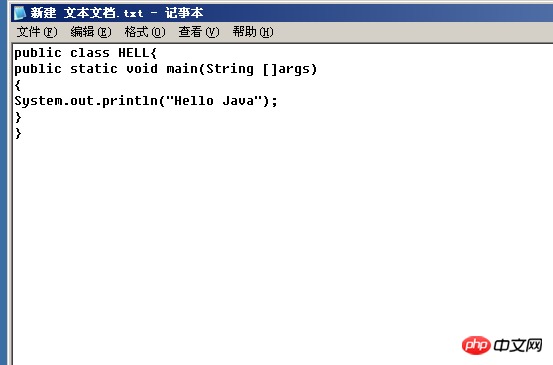 Compile the program using the command line ( I put the source program file in the administrator's directory. If it is not here, enter cd to another location, such as: cd D:HELL.java)
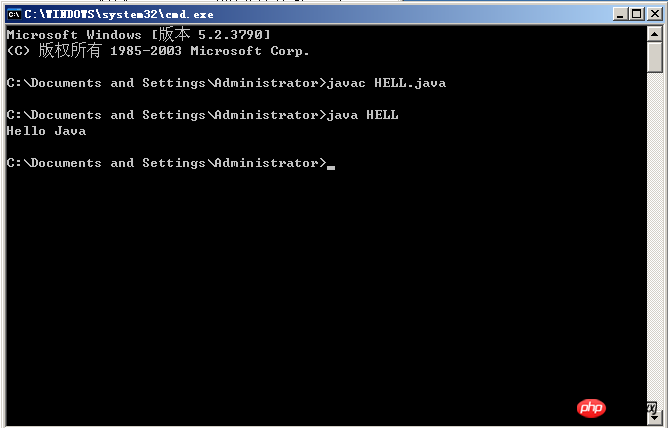 It says there is no problem and the installation has been successful.
The above is the detailed content of Detailed introduction to JAVA virtual machine. For more information, please follow other related articles on the PHP Chinese website!


