HTML5 Canvas to draw graphics
1. Canvas tag:
1. The HTML5
2. The
3. There are many ways to draw paths, boxes, circles, characters and add images through Canvas.
2. Draw graphics with Canvas
1. Draw a rectangle


<br>
2. Draw a circle
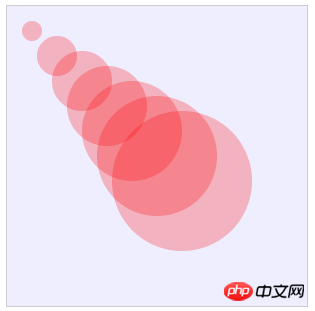
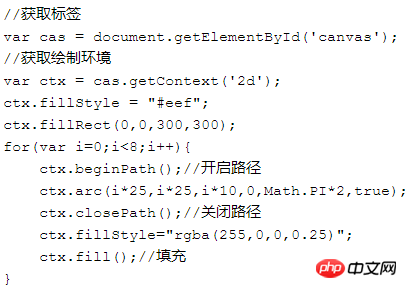
## 3. moveTo and lineTo
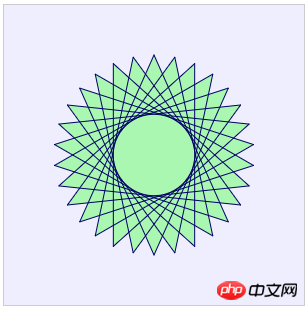
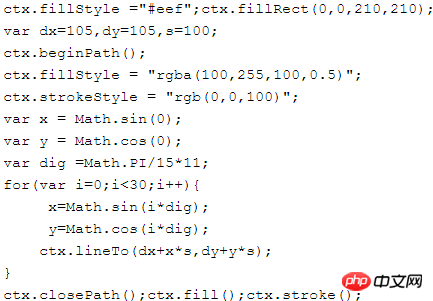
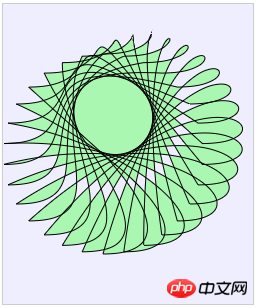
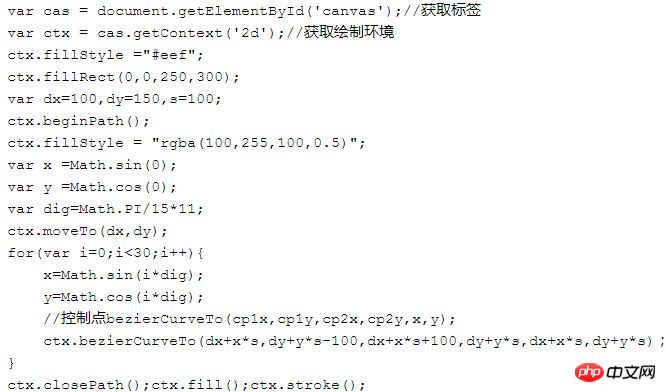
4. Use bezierCurveTo to draw the Bezier curve
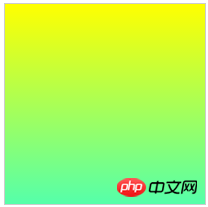
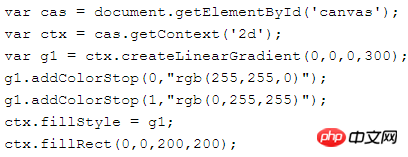
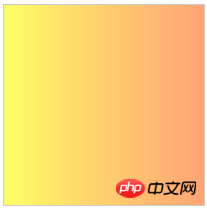
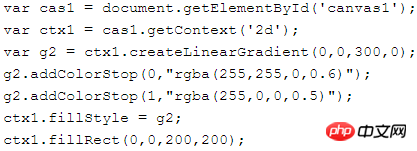
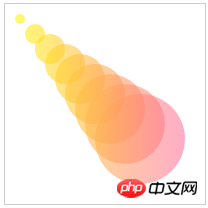
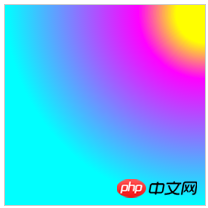
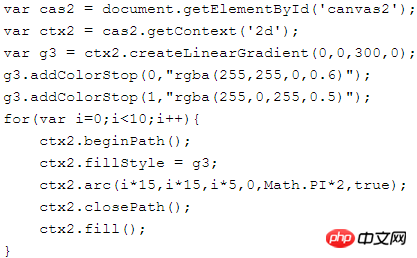 ## 6. Draw a radial gradient
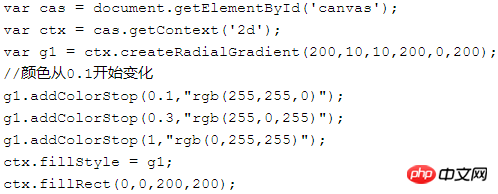
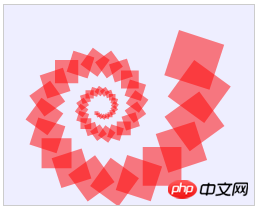
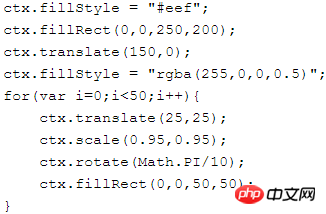
 ## 7. Draw deformed graphics
 8. Draw graphics and synthesize globablCompositeOperation properties
Use different The globalCompositeOperation value draws the rectangle. The orange rectangle is the target image. The pink rectangle is the source image.
Definition and Usage
The globalCompositeOperation property sets or returns how to draw a source (new) image onto the target (existing) image.Source image = the drawing you intend to place on the canvas.
Target Image = The drawing you have placed on the canvas.
Attribute value:
| 值 | 属性 |
| source-atop | <br>在先绘制的图形顶部显示后绘制的图形。后绘制的图形位于先绘制的图形之外的部分是不可见的。 |
| source-in | 只绘制相交部分,由后绘制图形的填充覆盖,其余部分透明。 |
| source-out | 只绘制后绘制图形不相交的部分,由后绘制图形的填充覆盖,其余部分透明。 |
| source-over | 在先绘制的图形上显示后绘制的图形。相交部分由后绘制的图形填充(颜色,渐变,纹理)覆盖 |
| destination-atop | 在后绘制的图形顶部显示先绘制的图形。源图像之外的目标图像部分不会被显示。 |
| destination-in | 在后绘制的图形中显示先绘制的图形。只绘制相交部分,由先绘制图形的填充覆盖,其余部分透明 |
| destination-out | 只有后绘制的图形外的目标图像部分会被显示,源图像是透明的。 |
| destination-over | 相交部分由先绘制图形的填充(颜色,渐变,纹理)覆盖. |
| lighter | 相交部分由根据先后图形填充来增加亮度。 |
| copy | <br>显示后绘制的图形。只绘制后绘制图形。 |
| xor | 相交部分透明 |
<br>
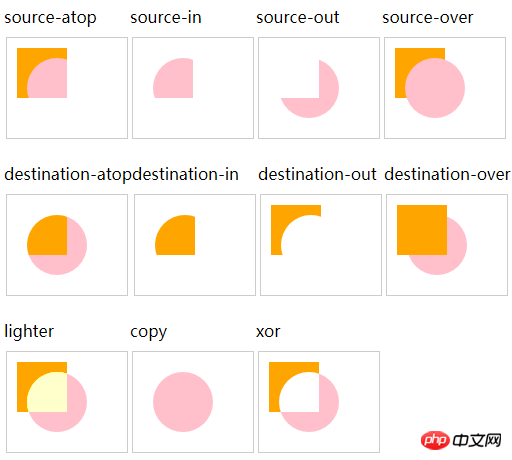
以上效果图的代码如下:
<!DOCTYPE html>
<html>
<head>
<meta charset="utf-8">
<title></title>
<script src="../js/jquery-1.12.4.min.js"></script>
<script>
$(function(){
var options = new Array(
"source-atop",
"source-in",
"source-out",
"source-over",
"destination-atop",
"destination-in",
"destination-out",
"destination-over",
"lighter",
"copy",
"xor"
);
var str="";
for(var i=0;i<options.length;i++){
str = "<div id='p_"+i+"' style='float:left'>"+options[i]+"<br/>
<canvas id='canvas"+i+"' width='120px' height='100px' style='border:1px solid #ccc;margin:10px 2px 20px;'>
</canvas></div>";
$("body").append(str);
var cas = document.getElementById('canvas'+i);
var ctx = cas.getContext('2d');
ctx.fillStyle = "orange";
ctx.fillRect(10,10,50,50);
ctx.globalCompositeOperation = options[i];
ctx.beginPath();
ctx.fillStyle = "pink";
ctx.arc(50,50,30,0,2*Math.PI);
ctx.fill();
}
})
</script>
</head>
<body></body>
</html>图形合成
9、给图形绘制阴影
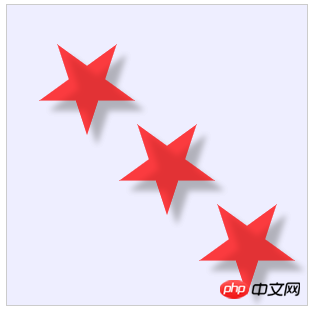
代码如下:
<!DOCTYPE html>
<html>
<head>
<meta charset="UTF-8">
<title>canvas基础api</title>
<style>
canvas{
border:1px solid #ccc;
margin:50px;
}
</style>
<script src="../js/jquery-1.12.4.min.js"></script>
<script>
$(function(){
//获取标签
var cas = document.getElementById('canvas');
//获取绘制环境
var ctx = cas.getContext('2d');
ctx.fillStyle ="#eef";
ctx.fillRect(0,0,300,300);
ctx.shadowOffsetX = 10;
ctx.shadowOffsetY = 10;
ctx.shadowColor = "rgba(100,100,100,0.5)";
ctx.shadowBlur = 7;
for(var j=0;j<3;j++){
ctx.translate(80,80);
create5star(ctx);
ctx.fill();
}
function create5star(ctx){
var dx =0;
var dy=0;
var s=50;
ctx.beginPath();
ctx.fillStyle ='rgba(255,0,0,0.5)';
var x =Math.sin(0);
var y =Math.cos(0);
var dig = Math.PI/5*4;
for(var i=0;i<5;i++){
x=Math.sin(i*dig);
y=Math.cos(i*dig);
ctx.lineTo(dx+x*s,dy+y*s)
}
ctx.closePath();
ctx.fill();
}
})
</script>
</head>
<body>
<canvas id="canvas" width="300" height="300">您的浏览器不支持canvas</canvas>
</body>
</html>五角星阴影
10、canvas使用图像
语法:ctx.drawImage(imgobj,left,top,width,height)

<!DOCTYPE html>
<html>
<head>
<meta charset="UTF-8">
<title>canvas基础api</title>
<style>
canvas{
border:1px solid #ccc;
}
</style>
<script src="../js/jquery-1.12.4.min.js"></script>
<script>
$(function(){
//获取标签
var cas = document.getElementById('canvas');
//获取绘制环境
var ctx = cas.getContext('2d');
//导入图片
var img = new Image();
img.src="../images/002.png";
//图片加载完之后,再开始绘制图片
img.onload = function(){
//绘制图片ctx.drawImage(imgobj,left,top,width,height)
ctx.drawImage(img,100,50,300,200)
}
})
</script>
</head>
<body>
<canvas id="canvas" width="500" height="300">您的浏览器不支持canvas</canvas>
</body>
</html>The above is the detailed content of HTML5 Canvas to draw graphics. For more information, please follow other related articles on the PHP Chinese website!

Hot AI Tools

Undresser.AI Undress
AI-powered app for creating realistic nude photos

AI Clothes Remover
Online AI tool for removing clothes from photos.

Undress AI Tool
Undress images for free

Clothoff.io
AI clothes remover

AI Hentai Generator
Generate AI Hentai for free.

Hot Article

Hot Tools

Notepad++7.3.1
Easy-to-use and free code editor

SublimeText3 Chinese version
Chinese version, very easy to use

Zend Studio 13.0.1
Powerful PHP integrated development environment

Dreamweaver CS6
Visual web development tools

SublimeText3 Mac version
God-level code editing software (SublimeText3)

Hot Topics
 Table Border in HTML
Sep 04, 2024 pm 04:49 PM
Guide to Table Border in HTML. Here we discuss multiple ways for defining table-border with examples of the Table Border in HTML.
 Nested Table in HTML
Sep 04, 2024 pm 04:49 PM
This is a guide to Nested Table in HTML. Here we discuss how to create a table within the table along with the respective examples.
 HTML margin-left
Sep 04, 2024 pm 04:48 PM
Guide to HTML margin-left. Here we discuss a brief overview on HTML margin-left and its Examples along with its Code Implementation.
 HTML Table Layout
Sep 04, 2024 pm 04:54 PM
Guide to HTML Table Layout. Here we discuss the Values of HTML Table Layout along with the examples and outputs n detail.
 HTML Ordered List
Sep 04, 2024 pm 04:43 PM
Guide to the HTML Ordered List. Here we also discuss introduction of HTML Ordered list and types along with their example respectively
 Moving Text in HTML
Sep 04, 2024 pm 04:45 PM
Guide to Moving Text in HTML. Here we discuss an introduction, how marquee tag work with syntax and examples to implement.
 HTML Input Placeholder
Sep 04, 2024 pm 04:54 PM
Guide to HTML Input Placeholder. Here we discuss the Examples of HTML Input Placeholder along with the codes and outputs.
 HTML onclick Button
Sep 04, 2024 pm 04:49 PM
Guide to HTML onclick Button. Here we discuss their introduction, working, examples and onclick Event in various events respectively.


