
This article mainly introduces JavaScript to achieve image switching effect and the application of custom attributes in detail. It has certain reference value. Interested friends can refer to it.
The examples in this article are for everyone. Shared JavaScript to achieve image switching effect and application of custom attributes for your reference. The specific content is as follows
<!DOCTYPE html>
<html>
<head>
<meta charset="UTF-8">
<title>图片切换实例</title>
<style>
body{
background-color: #A9A9A9;
margin:0px;
}
ul{
padding: 0;
margin: 0;
}
li{
list-style: none;
}
#pic{
width:670px;
height: 420px;
position:relative;
margin: 0 auto;/*整个p放到页面中间的位置*/
background:url(img/loading.png) no-repeat center;
background-color:#fff;
}
#pic img{
width:670px;
height: 420px;
}
#pic ul{
position: absolute;
top: 0px;
right: -50px;
}
#pic li{
width:40px;
height:40px;
margin-bottom: 4px;
background:#666;
}
#pic .active{
background: cadetblue;
}
#pic span{
top:0px;
}
#pic p{
bottom:0px;
margin:0;
}
#pic p,#pic span{
width: 670px;
height: 30px;
line-height: 30px;
text-align: center;
position:absolute;
left:0px;
color:#fff;
background-color:#333;
}
</style>
<script>
window.onload = function(){
var op = document.getElementById("pic");
var oImg = document.getElementsByTagName("img")[0];//有tag标签的地方就得有数组[0],否则不提示错误,但却会加载不出来需要的内容。
var oP = document.getElementsByTagName("p")[0];
var oNum = document.getElementsByTagName("span")[0];
var oUl = document.getElementsByTagName("ul")[0];
var aLi = oUl.getElementsByTagName("li");//通过父标签找到的子标签,这里不能加数组[0]
var arrUrl = ["img/1.jpg","img/2.jpg","img/3.jpg","img/4.jpg","img/5.png"];
var arrText = ["中原工学院图书馆","中工宿舍楼","玫瑰花","小猫咪","绿色盆栽"];
for(var i=0;i<arrUrl.length;i++){
oUl.innerHTML += "<li></li>";//添加用“+=”,该写用“=”
}
//初始化
//有数组的地方,大部分都有一个数字在静静的等待.数组配合数字以便找到需要的内容。
var num = 0;
oImg.src = arrUrl[num];
oP.innerHTML = arrText[num];
oNum.innerHTML = 1+num+'/'+arrUrl.length;
//在ul中添加li,根据数组的长度,为ul添加li的数量
aLi[num].className = "active";//为标签添加class属性,需要用到className
for(i=0;i<aLi.length;i++){
aLi[i].index = i;//索引值,需要添加对应关系,就要想到添加索引值
//定义的有数组,就不能忘记加[0]
aLi[i].onclick = function(){
//点击按钮,找到与之对应的图片
oImg.src = arrUrl[this.index];
oP.innerHTML = arrText[this.index];
oNum.innerHTML = 1+this.index+'/'+arrUrl.length;
//添加对应的点击时,li的图标发生变化,两种思路
//思路1:清空当前所有active样式,为当前添加此class属性(扩展性好,但是运行速度可能不好)
for(var i=0; i<aLi.length; i++){
aLi[i].className = "";
}
this.className = "active";
//思路2:清空前一个点击li的样式,为当前添加class属性(定点清除)
}
}
}
</script>
</head>
<body>
<p id="pic" >
<img src=""/>
<span>数量正在加载中......</span>
<p>文字说明正在加载中......</p>
<ul>
</ul>
</p>
</body>
</html>The JavaScript code snippet can be simplified as follows:
<script>
window.onload = function(){
var op = document.getElementById("pic");
var oImg = document.getElementsByTagName("img")[0];
var oP = document.getElementsByTagName("p")[0];
var oNum = document.getElementsByTagName("span")[0];
var oUl = document.getElementsByTagName("ul")[0];
var aLi = oUl.getElementsByTagName("li");
var arrUrl = ["img/1.jpg","img/2.jpg","img/3.jpg","img/4.jpg","img/5.png"];
var arrText = ["中原工学院图书馆","中工宿舍楼","玫瑰花","小猫咪","绿色盆栽"];
for(var i=0;i<arrUrl.length;i++){
oUl.innerHTML += "<li></li>";
}
//初始化
var num = 0;
function fnTab(){
oImg.src = arrUrl[num];
oP.innerHTML = arrText[num];
oNum.innerHTML = 1+num+'/'+arrUrl.length;
aLi[num].className = "";
}
fnTab();
for(i=0;i<aLi.length;i++){
aLi[i].index = i;
aLi[i].onclick = function(){
num = this.index;
fnTab();
}
aLi[num].className = "active";
}
}
}
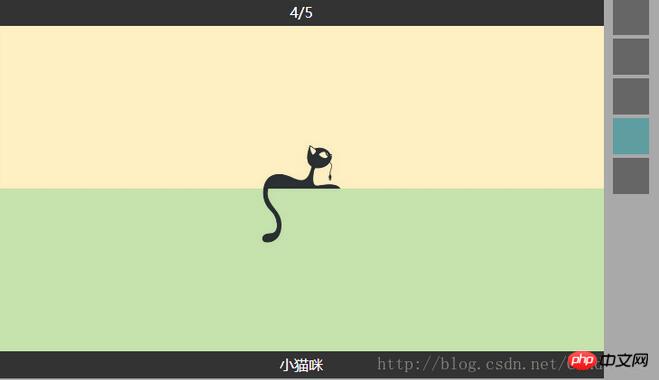
</script>Rendering:
The above is the detailed content of Introduction to how to use JavaScript to create image switching. For more information, please follow other related articles on the PHP Chinese website!


![[Web front-end] Node.js quick start](https://img.php.cn/upload/course/000/000/067/662b5d34ba7c0227.png)


