The first time I installed mysql on my own virtual machine, I encountered many problems. I wrote them down here. I hereby share them on the Script Home platform for your reference.
The first time I installed mysql on my own virtual machine, I encountered many problems. Many questions are written down here and shared.
linux centOS 6
mysql versionmysql-5.7.19-linux-glibc2.12-x86_64.tar.gz
1,groupadd mysql ## Add a mysql group
2, useradd -r -g mysql mysql ## Add a user
3, unzip and download package, tar -xzvf /usr/local/mysql-5.7.13-linux-glibc2.5-x86_64.tar.gz
4, mv /usr/local /mysql-5.7.13-linux-glibc2.5-x86_64 /usr/local/mysql ##Rename
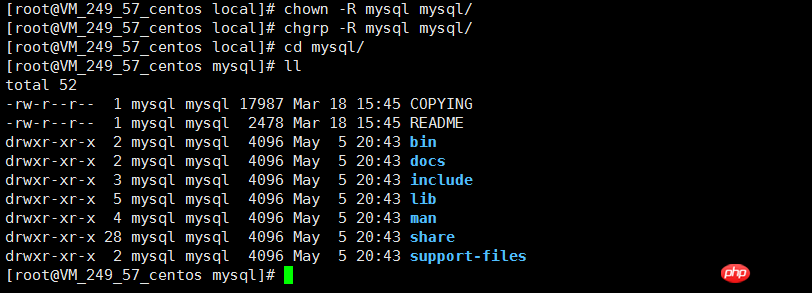
After decompression directory:

5, mkdir /usr/local/mysql/data ## By default, there is no such folder and it must be used to store data
6, chown -R mysql:mysql. / ##Enter the mysql package, authorize this package to mysql
7, chgrp -R mysql:mysql ./ ##Enter the mysql package
8, bin/mysqld --initialize --user=mysql --basedir=/usr/local/mysql --datadir=/usr/local/mysql/data ##Enter the mysql file name basedir is The path of mysql, datadir is the data package of mysql, which stores mysql's own package, such as user
many tutorials on the Internetmysql_install_db . This is how I installed it at the beginning. Error, failure, mysql_install_db command is not recommended, just follow the above command

You need to pay attention to recording the generated temporary password, as above: YLi>7ecpe;YP
9、bin/mysql_ssl_rsa_setup --datadir=/usr/local/mysql/data
10、Enter mysql support-file
11, cp my-default.cnf /etc/my.cnf
I found that this version does not existmy-default

This is the time for us to create one ourselves (the internal code is as shown in the figure): The key point is that the values corresponding to the two sockets (red) below must be consistent, otherwise the link will not be able to connect after startup
#dvice on how to change settings please see # http://dev.mysql.com/doc/refman/5.7/en/server-configuration-defaults.html # *** DO NOT EDIT THIS FILE. It's a template which will be copied to the # *** default location during install, and will be replaced if you # *** upgrade to a newer version of MySQL. [mysqld] sql_mode=NO_ENGINE_SUBSTITUTION,STRICT_TRANS_TABLES # 一般配置选项 basedir = /usr/local/mysql datadir = /usr/local/mysql/data port = 3306 #socket = /temp/mysqld.sock socket = /var/run/mysqld/mysqld.sock character-set-server=utf8 #下面是可选项,要不要都行,如果出现启动错误,则全部注释掉,保留最基本的配置选项,然后尝试添加某些配置项后启动,检测配置项是否有误 back_log = 300 max_connections = 3000 max_connect_errors = 50 table_open_cache = 4096 max_allowed_packet = 32M #binlog_cache_size = 4M max_heap_table_size = 128M read_rnd_buffer_size = 16M sort_buffer_size = 16M join_buffer_size = 16M thread_cache_size = 16 query_cache_size = 128M query_cache_limit = 4M ft_min_word_len = 8 thread_stack = 512K transaction_isolation = REPEATABLE-READ tmp_table_size = 128M #log-bin=mysql-bin long_query_time = 6 server_id=1 innodb_buffer_pool_size = 1G innodb_thread_concurrency = 16 innodb_log_buffer_size = 16M innodb_log_file_size = 512M innodb_log_files_in_group = 3 innodb_max_dirty_pages_pct = 90 innodb_lock_wait_timeout = 120 innodb_file_per_table = on [mysqldump] quick max_allowed_packet = 32M [mysql] no-auto-rehash socket = /var/run/mysqld/mysqld.sock default-character-set=utf8 safe-updates [myisamchk] key_buffer = 16M sort_buffer_size = 16M read_buffer = 8M write_buffer = 8M [mysqlhotcopy] interactive-timeout [mysqld_safe] open-files-limit = 8192 [client] loose-default-character-set = utf8
12、cp mysql.server /etc/init.d/mysql
13、vim /etc/init.d/mysql ##Modify basedir= own path Modify datadir= own path
14, bin/mysqld_safe --user=mysql & ## Start mysql
13, ./mysql -uroot -p ##In the bin directory
14. Enter the temporary password
15. Modify the MySQL root password

At this time, mysql can only be accessed by localhost
16 Modify remote access


Restart the MySQL service

At this time, MySQL can be used normally locally

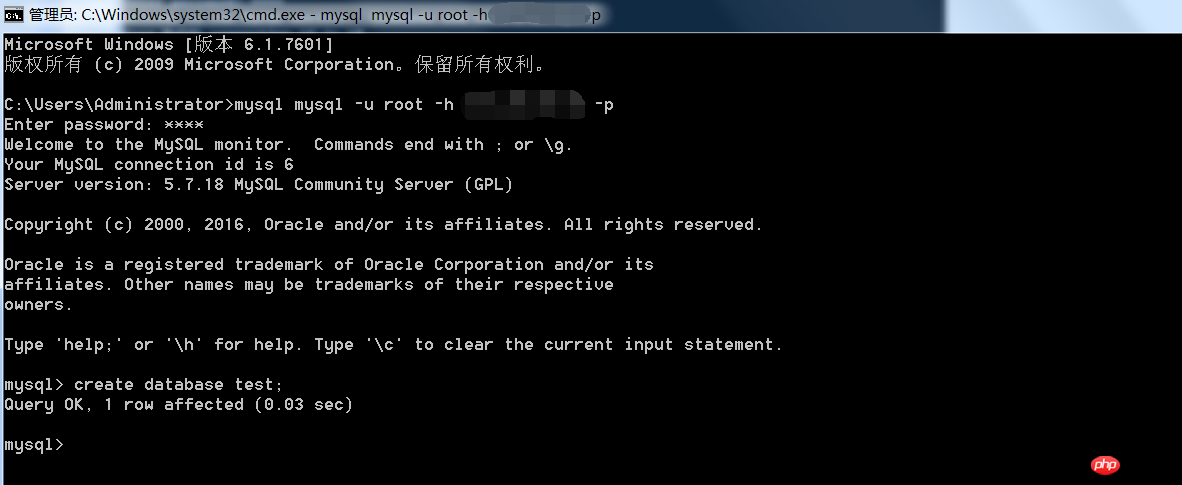
Test remote connection

Summarize
The above is the detailed content of Detailed graphic and text explanation of the problems encountered during the installation of MySQL5.7.19 under Linux. For more information, please follow other related articles on the PHP Chinese website!


