
 Web Front-end
JS Tutorial
Introduction to methods of deleting specific elements from JavaScript arrays
Web Front-end
JS Tutorial
Introduction to methods of deleting specific elements from JavaScript arrays
Introduction to methods of deleting specific elements from JavaScript arrays
Deleting specified elements from js arrays is a problem that each of us encounters. There is a lot of information on this aspect on the Internet, but some of it is too old and some of the content is not comprehensive enough, so I will sort it out myself. This article This article mainly summarizes and introduces various methods for deleting specific elements in JavaScript arrays. Friends in need can refer to it.
Preface
Maybe when it comes to deleting specific elements of an array, you estimate that there is more than one way to achieve it, so let’s take a look. Check out these methods I’ve summarized, they may be helpful to you! Not much to say, let’s take a look at the detailed introduction.
Source array
##
var arr = ["George", "John", "Thomas", "James", "Adrew", "Martin"];
Pseudo delete
arr[ arr.indexOf( 'Thomas' ) ] = null;
["George", "John", null, "James", "Adrew", "Martin"]
Complete deletion
Array.prototype.splice = function(start,deleteCount,items) {};- start: starting point index value
- deleteCount: the number of elements to be deleted
- items: elements replaced/appended after deletion
When the parameter is not added, it means deleting the element, and it must be combined with the parameter value of deleteCount
If deleteCount is 1 and a parameter value is given in the items parameter position, it means replacing
If deleteCount is 1 and the items parameter position is given to more than one parameter value, it means replacing and appending elements
arr.splice( arr.indexOf( null ), 1 );
["George", "John", "James", "Adrew", "Martin"]
splice function - replace elements
["George", "John", "James", "Adrew", "Martin"]
##
arr.splice( arr.indexOf( 'James' ), 1, 'Tom' );
The replaced array structure looks like this:
["George", "John", "Tom", "Adrew", "Martin"]
splice function - replace and append elements
Now the current array structure is like this:
["George", "John", "Tom", "Adrew", "Martin"]
Want to replace the array element Tom with Judy and append Linda and Alisa
arr.splice( arr.indexOf( 'Tom' ), 1, 'Judy', 'Linda', 'Alisa' );
The array after replacement and appending The structure looks like this:
["George", "John", "Judy", "Linda", "Alisa", "Adrew", "Martin"]
splice function - append elements
You can choose to append elements Any position depends on your specific needs. The key lies in the value index position of start! The current array structure is as follows:
["George", "John", "Judy", "Linda", "Alisa", "Adrew", "Martin"]
For example, if you want to add Bill and Blake between Linda and Alisa
arr.splice( arr.indexOf( 'Linda' ) + 1, 0, 'Bill', 'Blake' );
The appended array structure looks like this:
["George", "John", "Judy", "Linda", "Bill", "Blake", "Alisa", "Adrew", "Martin"]
- Starting position
- arr .indexOf( 'Linda' ) + 1
is after the array element Linda
The number parameter of deleted elements is set here to 0. This is the key to appending elements, that is Say not to delete elements - 'Bill', 'Blake' This is the last parameter items of the splice method of the built-in object Array. It means 0 or more, according to the deleteCount parameter value Different representations have different meanings. The deleteCount parameter here is 0 and items has two values to represent this parameter. The example is to append the element values 'Bill', 'Blake'
Delete the first element in the array
arr.shift();
The deleted array looks like this:
["John", "Judy", "Linda", "Bill", "Blake", "Alisa", "Adrew", "Martin"]
arr.pop();
The deleted array looks like this:
["John", "Judy", "Linda", "Bill", "Blake", "Alisa", "Adrew"]
The above is the detailed content of Introduction to methods of deleting specific elements from JavaScript arrays. For more information, please follow other related articles on the PHP Chinese website!

Hot AI Tools

Undresser.AI Undress
AI-powered app for creating realistic nude photos

AI Clothes Remover
Online AI tool for removing clothes from photos.

Undress AI Tool
Undress images for free

Clothoff.io
AI clothes remover

AI Hentai Generator
Generate AI Hentai for free.

Hot Article
Hot Tools

Notepad++7.3.1
Easy-to-use and free code editor

SublimeText3 Chinese version
Chinese version, very easy to use

Zend Studio 13.0.1
Powerful PHP integrated development environment

Dreamweaver CS6
Visual web development tools

SublimeText3 Mac version
God-level code editing software (SublimeText3)
Hot Topics
 1378
1378
 52
52

 Recommended: Excellent JS open source face detection and recognition project
Apr 03, 2024 am 11:55 AM
Recommended: Excellent JS open source face detection and recognition project
Apr 03, 2024 am 11:55 AM
Face detection and recognition technology is already a relatively mature and widely used technology. Currently, the most widely used Internet application language is JS. Implementing face detection and recognition on the Web front-end has advantages and disadvantages compared to back-end face recognition. Advantages include reducing network interaction and real-time recognition, which greatly shortens user waiting time and improves user experience; disadvantages include: being limited by model size, the accuracy is also limited. How to use js to implement face detection on the web? In order to implement face recognition on the Web, you need to be familiar with related programming languages and technologies, such as JavaScript, HTML, CSS, WebRTC, etc. At the same time, you also need to master relevant computer vision and artificial intelligence technologies. It is worth noting that due to the design of the Web side
 PHP and JS Development Tips: Master the Method of Drawing Stock Candle Charts
Dec 18, 2023 pm 03:39 PM
PHP and JS Development Tips: Master the Method of Drawing Stock Candle Charts
Dec 18, 2023 pm 03:39 PM
With the rapid development of Internet finance, stock investment has become the choice of more and more people. In stock trading, candle charts are a commonly used technical analysis method. It can show the changing trend of stock prices and help investors make more accurate decisions. This article will introduce the development skills of PHP and JS, lead readers to understand how to draw stock candle charts, and provide specific code examples. 1. Understanding Stock Candle Charts Before introducing how to draw stock candle charts, we first need to understand what a candle chart is. Candlestick charts were developed by the Japanese
 Simple JavaScript Tutorial: How to Get HTTP Status Code
Jan 05, 2024 pm 06:08 PM
Simple JavaScript Tutorial: How to Get HTTP Status Code
Jan 05, 2024 pm 06:08 PM
JavaScript tutorial: How to get HTTP status code, specific code examples are required. Preface: In web development, data interaction with the server is often involved. When communicating with the server, we often need to obtain the returned HTTP status code to determine whether the operation is successful, and perform corresponding processing based on different status codes. This article will teach you how to use JavaScript to obtain HTTP status codes and provide some practical code examples. Using XMLHttpRequest
 The relationship between js and vue
Mar 11, 2024 pm 05:21 PM
The relationship between js and vue
Mar 11, 2024 pm 05:21 PM
The relationship between js and vue: 1. JS as the cornerstone of Web development; 2. The rise of Vue.js as a front-end framework; 3. The complementary relationship between JS and Vue; 4. The practical application of JS and Vue.
 How to get HTTP status code in JavaScript the easy way
Jan 05, 2024 pm 01:37 PM
How to get HTTP status code in JavaScript the easy way
Jan 05, 2024 pm 01:37 PM
Introduction to the method of obtaining HTTP status code in JavaScript: In front-end development, we often need to deal with the interaction with the back-end interface, and HTTP status code is a very important part of it. Understanding and obtaining HTTP status codes helps us better handle the data returned by the interface. This article will introduce how to use JavaScript to obtain HTTP status codes and provide specific code examples. 1. What is HTTP status code? HTTP status code means that when the browser initiates a request to the server, the service
 The AI era of JS is here!
Apr 08, 2024 am 09:10 AM
The AI era of JS is here!
Apr 08, 2024 am 09:10 AM
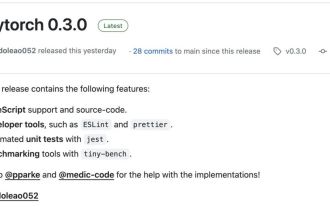
Introduction to JS-Torch JS-Torch is a deep learning JavaScript library whose syntax is very similar to PyTorch. It contains a fully functional tensor object (can be used with tracked gradients), deep learning layers and functions, and an automatic differentiation engine. JS-Torch is suitable for deep learning research in JavaScript and provides many convenient tools and functions to accelerate deep learning development. Image PyTorch is an open source deep learning framework developed and maintained by Meta's research team. It provides a rich set of tools and libraries for building and training neural network models. PyTorch is designed to be simple, flexible and easy to use, and its dynamic computation graph features make
 js method to refresh current page
Jan 24, 2024 pm 03:58 PM
js method to refresh current page
Jan 24, 2024 pm 03:58 PM
js methods to refresh the current page: 1. location.reload(); 2. location.href; 3. location.assign(); 4. window.location. Detailed introduction: 1. location.reload(), use the location.reload() method to reload the current page; 2. location.href, you can refresh the current page by setting the location.href attribute, etc.
 The difference between __proto__ and prototype in JS
Feb 19, 2024 pm 01:38 PM
The difference between __proto__ and prototype in JS
Feb 19, 2024 pm 01:38 PM
__proto__ and prototype are two attributes related to prototypes in JS. They have slightly different functions. This article will introduce and compare the differences between the two in detail, and provide corresponding code examples. First, let’s understand what they mean and what they are used for. proto__proto__ is a built-in property of an object that points to the prototype of the object. Every object has a __proto__ attribute, including custom objects, built-in objects, and function objects. By __proto__ genus
