

A brief introduction to using ParticlesJS with JS library
ParticlesJS is a lightweight JavaScript library for creating particle backgrounds. Next, I will share with you an introduction to the use of JS library ParticlesJS through this article. Friends who are interested should take a look
particles.js
A lightweight JavaScript library for creating particles.
A lightweight JavaScript library for creating particle backgrounds
Let’s take a look at the renderings first:
Standard Version:

Starry sky version:

Bubble version:

Snow version:

What can we do with this?
I think this is more suitable for pages without background, or if you can’t find a suitable picture to use as the background, then we can all use this.
For example:
or

<!DOCTYPE html>
<html lang="en">
<head>
 <meta charset="utf-8">
 <title>particles.js</title>
 <meta name="description" content="particles.js is a lightweight JavaScript library for creating particles.">
 <meta name="author" content="Vincent Garreau" />
 <meta name="viewport" content="width=device-width, initial-scale=1.0, minimum-scale=1.0, maximum-scale=1.0, user-scalable=no">
 <link rel="stylesheet" media="screen" href="css/style.css" rel="external nofollow" >
</head>
<body>
<p id="particles-js"></p>
<!-- scripts -->
<script src="js/particles.js"></script>
<script src="js/app.js"></script>
</body>
</html>
Use p to encapsulate the functional code block we want to implement, and in Set absolute positioning for this p in css.
{
 "particles": {
 "number": {
  "value": 80,
  "density": {
  "enable": true,
  "value_area": 800
  }
 },
 "color": {
  "value": "#ffffff"
 },
 "shape": {
  "type": "polygon",
  "stroke": {
  "width": 0,
  "color": "#000000"
  },
  "polygon": {
  "nb_sides": 5
  },
  "image": {
  "src": "img/github.svg",
  "width": 100,
  "height": 100
  }
 },
 "opacity": {
  "value": 0.5,
  "random": false,
  "anim": {
  "enable": false,
  "speed": 1,
  "opacity_min": 0.1,
  "sync": false
  }
 },
 "size": {
  "value": 3,
  "random": true,
  "anim": {
  "enable": false,
  "speed": 40,
  "size_min": 0.1,
  "sync": false
  }
 },
 "line_linked": {
  "enable": true,
  "distance": 150,
  "color": "#ffffff",
  "opacity": 0.4,
  "width": 1
 },
 "move": {
  "enable": true,
  "speed": 6,
  "direction": "none",
  "random": false,
  "straight": false,
  "out_mode": "out",
  "bounce": false,
  "attract": {
  "enable": false,
  "rotateX": 600,
  "rotateY": 1200
  }
 }
 },
 "interactivity": {
 "detect_on": "canvas",
 "events": {
  "onhover": {
  "enable": true,
  "mode": "repulse"
  },
  "onclick": {
  "enable": true,
  "mode": "push"
  },
  "resize": true
 },
 "modes": {
  "grab": {
  "distance": 400,
  "line_linked": {
   "opacity": 1
  }
  },
  "bubble": {
  "distance": 400,
  "size": 40,
  "duration": 2,
  "opacity": 8,
  "speed": 3
  },
  "repulse": {
  "distance": 200,
  "duration": 0.4
  },
  "push": {
  "particles_nb": 4
  },
  "remove": {
  "particles_nb": 2
  }
 }
 },
 "retina_detect": false
}{
"particles": {
"number": {
"value": 160,
"density": {
"enable": true,
"value_area": 800
}
},
"color": {
"value": "#ffffff"
},
"shape": {
"type": "circle",
"stroke": {
"width": 0,
"color": "#000000"
},
"polygon": {
"nb_sides": 5
},
"image": {
"src": "img/github.svg",
"width": 100,
"height": 100
}
},
"opacity": {
"value": 1,
"random": true,
"anim": {
"enable": true,
"speed": 1,
"opacity_min": 0,
"sync": false
}
},
"size": {
"value": 3,
"random": true,
"anim": {
"enable": false,
"speed": 4,
"size_min": 0.3,
"sync": false
}
},
"line_linked": {
"enable": false,
"distance": 150,
"color": "#ffffff",
"opacity": 0.4,
"width": 1
},
"move": {
"enable": true,
"speed": 1,
"direction": "none",
"random": true,
"straight": false,
"out_mode": "out",
"bounce": false,
"attract": {
"enable": false,
"rotateX": 600,
"rotateY": 600
}
}
},
"interactivity": {
"detect_on": "canvas",
"events": {
"onhover": {
"enable": true,
"mode": "bubble"
},
"onclick": {
"enable": true,
"mode": "repulse"
},
"resize": true
},
"modes": {
"grab": {
"distance": 400,
"line_linked": {
"opacity": 1
}
},
"bubble": {
"distance": 250,
"size": 0,
"duration": 2,
"opacity": 0,
"speed": 3
},
"repulse": {
"distance": 400,
"duration": 0.4
},
"push": {
"particles_nb": 4
},
"remove": {
"particles_nb": 2
}
}
},
"retina_detect": true
}The above is the detailed content of A brief introduction to using ParticlesJS with JS library. For more information, please follow other related articles on the PHP Chinese website!

Hot AI Tools

Undresser.AI Undress
AI-powered app for creating realistic nude photos

AI Clothes Remover
Online AI tool for removing clothes from photos.

Undress AI Tool
Undress images for free

Clothoff.io
AI clothes remover

Video Face Swap
Swap faces in any video effortlessly with our completely free AI face swap tool!

Hot Article
Hot Tools

Notepad++7.3.1
Easy-to-use and free code editor

SublimeText3 Chinese version
Chinese version, very easy to use

Zend Studio 13.0.1
Powerful PHP integrated development environment

Dreamweaver CS6
Visual web development tools

SublimeText3 Mac version
God-level code editing software (SublimeText3)
Hot Topics
 1387
1387
 52
52

 Detailed introduction to what wapi is
Jan 07, 2024 pm 09:14 PM
Detailed introduction to what wapi is
Jan 07, 2024 pm 09:14 PM
Users may have seen the term wapi when using the Internet, but for some people they definitely don’t know what wapi is. The following is a detailed introduction to help those who don’t know to understand. What is wapi: Answer: wapi is the infrastructure for wireless LAN authentication and confidentiality. This is like functions such as infrared and Bluetooth, which are generally covered near places such as office buildings. Basically they are owned by a small department, so the scope of this function is only a few kilometers. Related introduction to wapi: 1. Wapi is a transmission protocol in wireless LAN. 2. This technology can avoid the problems of narrow-band communication and enable better communication. 3. Only one code is needed to transmit the signal
 Detailed explanation of whether win11 can run PUBG game
Jan 06, 2024 pm 07:17 PM
Detailed explanation of whether win11 can run PUBG game
Jan 06, 2024 pm 07:17 PM
Pubg, also known as PlayerUnknown's Battlegrounds, is a very classic shooting battle royale game that has attracted a lot of players since its popularity in 2016. After the recent launch of win11 system, many players want to play it on win11. Let's follow the editor to see if win11 can play pubg. Can win11 play pubg? Answer: Win11 can play pubg. 1. At the beginning of win11, because win11 needed to enable tpm, many players were banned from pubg. 2. However, based on player feedback, Blue Hole has solved this problem, and now you can play pubg normally in win11. 3. If you meet a pub
 Detailed introduction to whether i5 processor can install win11
Dec 27, 2023 pm 05:03 PM
Detailed introduction to whether i5 processor can install win11
Dec 27, 2023 pm 05:03 PM
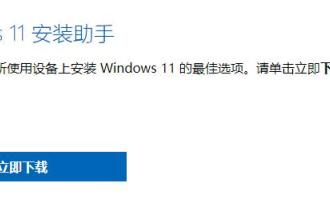
i5 is a series of processors owned by Intel. It has various versions of the 11th generation i5, and each generation has different performance. Therefore, whether the i5 processor can install win11 depends on which generation of the processor it is. Let’s follow the editor to learn about it separately. Can i5 processor be installed with win11: Answer: i5 processor can be installed with win11. 1. The eighth-generation and subsequent i51, eighth-generation and subsequent i5 processors can meet Microsoft’s minimum configuration requirements. 2. Therefore, we only need to enter the Microsoft website and download a "Win11 Installation Assistant" 3. After the download is completed, run the installation assistant and follow the prompts to install Win11. 2. i51 before the eighth generation and after the eighth generation
 Introducing the latest Win 11 sound tuning method
Jan 08, 2024 pm 06:41 PM
Introducing the latest Win 11 sound tuning method
Jan 08, 2024 pm 06:41 PM
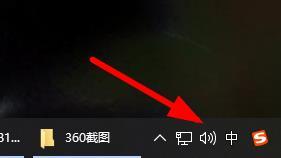
After updating to the latest win11, many users find that the sound of their system has changed slightly, but they don’t know how to adjust it. So today, this site brings you an introduction to the latest win11 sound adjustment method for your computer. It is not difficult to operate. And the choices are diverse, come and download and try them out. How to adjust the sound of the latest computer system Windows 11 1. First, right-click the sound icon in the lower right corner of the desktop and select "Playback Settings". 2. Then enter settings and click "Speaker" in the playback bar. 3. Then click "Properties" on the lower right. 4. Click the "Enhance" option bar in the properties. 5. At this time, if the √ in front of "Disable all sound effects" is checked, cancel it. 6. After that, you can select the sound effects below to set and click
 PyCharm Beginner's Guide: Comprehensive Analysis of Replacement Functions
Feb 25, 2024 am 11:15 AM
PyCharm Beginner's Guide: Comprehensive Analysis of Replacement Functions
Feb 25, 2024 am 11:15 AM
PyCharm is a powerful Python integrated development environment with rich functions and tools that can greatly improve development efficiency. Among them, the replacement function is one of the functions frequently used in the development process, which can help developers quickly modify the code and improve the code quality. This article will introduce PyCharm's replacement function in detail, combined with specific code examples, to help novices better master and use this function. Introduction to the replacement function PyCharm's replacement function can help developers quickly replace specified text in the code
 Simple JavaScript Tutorial: How to Get HTTP Status Code
Jan 05, 2024 pm 06:08 PM
Simple JavaScript Tutorial: How to Get HTTP Status Code
Jan 05, 2024 pm 06:08 PM
JavaScript tutorial: How to get HTTP status code, specific code examples are required. Preface: In web development, data interaction with the server is often involved. When communicating with the server, we often need to obtain the returned HTTP status code to determine whether the operation is successful, and perform corresponding processing based on different status codes. This article will teach you how to use JavaScript to obtain HTTP status codes and provide some practical code examples. Using XMLHttpRequest
 Detailed information on the location of the printer driver on your computer
Jan 08, 2024 pm 03:29 PM
Detailed information on the location of the printer driver on your computer
Jan 08, 2024 pm 03:29 PM
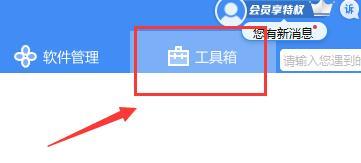
Many users have printer drivers installed on their computers but don't know how to find them. Therefore, today I bring you a detailed introduction to the location of the printer driver in the computer. For those who don’t know yet, let’s take a look at where to find the printer driver. When rewriting content without changing the original meaning, you need to The language is rewritten to Chinese, and the original sentence does not need to appear. First, it is recommended to use third-party software to search. 2. Find "Toolbox" in the upper right corner. 3. Find and click "Device Manager" below. Rewritten sentence: 3. Find and click "Device Manager" at the bottom 4. Then open "Print Queue" and find your printer device. This time it is your printer name and model. 5. Right-click the printer device and you can update or uninstall it.
 What is Dogecoin
Apr 01, 2024 pm 04:46 PM
What is Dogecoin
Apr 01, 2024 pm 04:46 PM
Dogecoin is a cryptocurrency created based on Internet memes, with no fixed supply cap, fast transaction times, low transaction fees, and a large meme community. Uses include small transactions, tips, and charitable donations. However, its unlimited supply, market volatility, and status as a joke coin also bring risks and concerns. What is Dogecoin? Dogecoin is a cryptocurrency created based on internet memes and jokes. Origin and History: Dogecoin was created in December 2013 by two software engineers, Billy Markus and Jackson Palmer. Inspired by the then-popular "Doge" meme, a comical photo featuring a Shiba Inu with broken English. Features and Benefits: Unlimited Supply: Unlike other cryptocurrencies such as Bitcoin
