Below I drew a picture to demonstrate the handshake part when establishing a websocket connection between client and server. This part can be completed very easily in node, because the net module provided by node has already encapsulated the socket. When developers use it, they only need to consider the interaction of data and do not need to deal with the establishment of connections. However, PHP does not. From socket connection, establishment, binding, monitoring, etc., we need to operate these ourselves, so it is necessary to take it out and talk about it.
    +--------+    1.发送Sec-WebSocket-Key        +---------+
    |        | --------------------------------> |        |
    |        |    2.加密返回Sec-WebSocket-Accept  |        |
    | client | <-------------------------------- | server |
    |        |    3.本地校验                      |        |
    |        | --------------------------------> |        |
+--------+ +--------+Students who read the last article I wrote should have a relatively comprehensive understanding of the above picture. ① and ② are actually an HTTP request and response, but what we get during the processing is an unparsed string. For example:
GET /chat HTTP/1.1Host: server.example.com
Origin: http://example.com
The request we usually see looks like this. When this thing reaches the server, we can get this information directly through some code libraries.
WebSocket connection is initiated by the client, so everything must start from the client. The first step is to parse the Sec-WebSocket-Key string sent by the client.
GET /chat HTTP/1.1Host: server.example.com
Upgrade: websocket
Connection: UpgradeSec-WebSocket-Key: dGhlIHNhbXBsZSBub25jZQ==Origin: http://example.com
Sec-WebSocket-Protocol: chat, superchat
Sec-WebSocket-Version: 13
The format of the client request is also mentioned in the previous article (as above). First, php establishes a socket connection and listens for the port information.
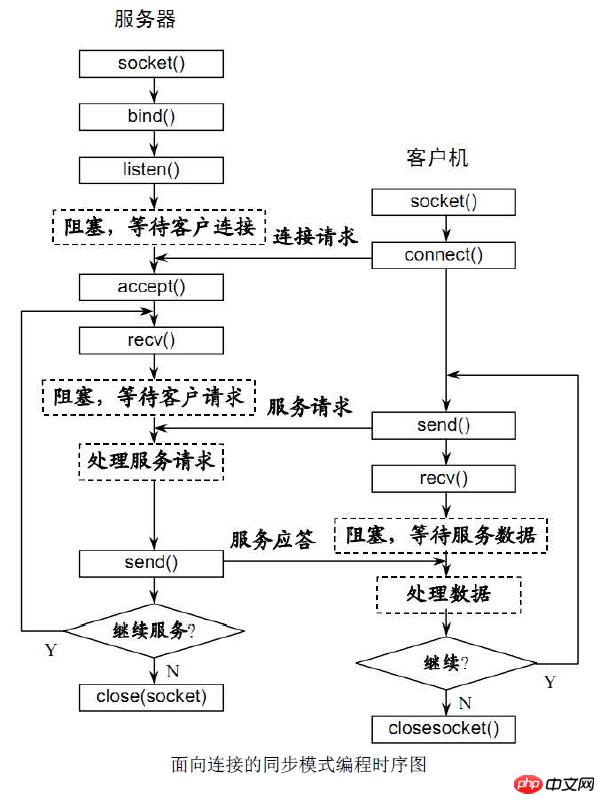
Regarding the establishment of socket, I believe many people who have studied computer network in college know it. The following is a process of establishing a connection:

// 建立一个 socket 套接字$master = socket_create(AF_INET, SOCK_STREAM, SOL_TCP);
socket_set_option($master, SOL_SOCKET, SO_REUSEADDR, 1);
socket_bind($master, $address, $port);
socket_listen($master);
Compared with node, the processing of this place is too troublesome. The above lines of code do not establish a connection, but these codes It is something that must be written to establish a socket. Since the processing process is slightly complicated, I wrote various processes into a class to facilitate management and calling.
//demo.php
Class WS {
    var $master;  // 连接 server 的 client
    var $sockets = array(); // 不同状态的 socket 管理
    var $handshake = false; // 判断是否握手

    function __construct($address, $port){
        // 建立一个 socket 套接字
        $this->master = socket_create(AF_INET, SOCK_STREAM, SOL_TCP)
            or die("socket_create() failed");
        socket_set_option($this->master, SOL_SOCKET, SO_REUSEADDR, 1)
            or die("socket_option() failed");
        socket_bind($this->master, $address, $port)
            or die("socket_bind() failed");
        socket_listen($this->master, 2)
            or die("socket_listen() failed");

        $this->sockets[] = $this->master;

        // debug
        echo("Master socket  : ".$this->master."\n");

        while(true) {
            //自动选择来消息的 socket 如果是握手 自动选择主机
            $write = NULL;
            $except = NULL;
            socket_select($this->sockets, $write, $except, NULL);

            foreach ($this->sockets as $socket) {
                //连接主机的 client
                if ($socket == $this->master){
                    $client = socket_accept($this->master);
                    if ($client < 0) {
                        // debug
                        echo "socket_accept() failed";
                        continue;
                    } else {
                        //connect($client);
                        array_push($this->sockets, $client);
                        echo "connect client\n";
                    }
                } else {
                    $bytes = @socket_recv($socket,$buffer,2048,0);
                    if($bytes == 0) return;
                    if (!$this->handshake) {
                        // 如果没有握手,先握手回应
                        //doHandShake($socket, $buffer);
                        echo "shakeHands\n";
                    } else {
                        // 如果已经握手,直接接受数据,并处理
                        $buffer = decode($buffer);
                        //process($socket, $buffer);
                        echo "send file\n";
                    }
                }
            }
        }
    }
}
The above code has been debugged by me. There is no big problem. If you want to test it, you can type php /path/to in the cmd command line. /demo.php;Of course, the above is just a class. If you want to test, you have to create a new instance.
$ws = new WS('localhost', 4000);
The client code can be slightly simpler:
var ws = new WebSocket("ws://localhost:4000");
ws.onopen = function(){
    console.log("握手成功");
};
ws.onerror = function(){
    console.log("error");
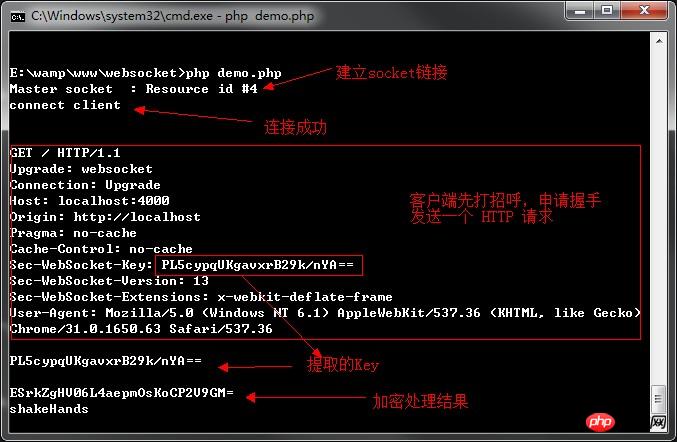
};Run the server code when the client connects , we can see:

#The entire communication process can be clearly seen through the above code. The first is to establish a connection. This step in node has been encapsulated in the net and http modules, and then determines whether to shake hands. If not, shakeHands. For the handshake here, I directly echoed a word to indicate that this thing was carried out. We mentioned the handshake algorithm earlier, so I wrote it directly here.
function getKey($req) {
$key = null;
if (preg_match("/Sec-WebSocket-Key: (.*)\r\n/", $req, $match)) {
        $key = $match[1];
    }    return $key;
}This is relatively simple, direct regular matching, the websocket information header must contain Sec-WebSocket-Key, So we can match it faster~
function encry($req){
$key = $this->getKey($req);
$mask = "258EAFA5-E914-47DA-95CA-C5AB0DC85B11";
return base64_encode(sha1($key . '258EAFA5-E914-47DA-95CA-C5AB0DC85B11', true));
}Encrypt the SHA-1 encrypted string again base64 encryption. If the encryption algorithm is wrong, the client will directly report an error when checking:

function dohandshake($socket, $req){
// 获取加密key
$acceptKey = $this->encry($req);
$upgrade = "HTTP/1.1 101 Switching Protocols\r\n" .
               "Upgrade: websocket\r\n" .
               "Connection: Upgrade\r\n" .
               "Sec-WebSocket-Accept: " . $acceptKey . "\r\n" .
               "\r\n";    // 写入socket
    socket_write(socket,$upgrade.chr(0), strlen($upgrade.chr(0)));
    // 标记握手已经成功,下次接受数据采用数据帧格式
    $this->handshake = true;
}Be sure to pay attention here. Each request and corresponding format has a blank line at the end, which is \r\n. I lost this when I started testing. , struggled for a long time.

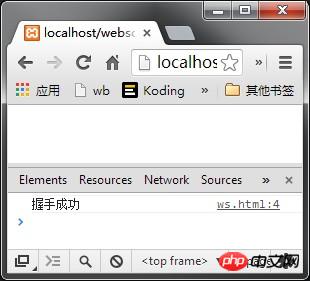
When the client successfully checks the key, the onopen function will be triggered:

// 解析数据帧
function decode($buffer)  {
$len = $masks = $data = $decoded = null;
$len = ord($buffer[1]) & 127;
if ($len === 126)  {
$masks = substr($buffer, 4, 4);
$data = substr($buffer, 8);
    } else if ($len === 127)  {
    $masks = substr($buffer, 10, 4);
    $data = substr($buffer, 14);
    } else  {
    $masks = substr($buffer, 2, 4);
    $data = substr($buffer, 6);
    }    for ($index = 0; $index < strlen($data); $index++) {
    $decoded .= $data[$index] ^ $masks[$index % 4];
    }    return $decoded;
}The encoding issues involved here have been mentioned in the previous article, so I won’t go into details here. PHP has too many functions for character processing, and I don’t remember them very clearly. There is no detailed introduction to the decoding program here. The data sent by the client is directly returned as it is. It can be regarded as a chat room mode.
// 返回帧信息处理
function frame($s) {
$a = str_split($s, 125);
if (count($a) == 1) {
return "\x81" . chr(strlen($a[0])) . $a[0];
    }    $ns = "";    foreach ($a as $o) {
    $ns .= "\x81" . chr(strlen($o)) . $o;
    }    return $ns;
}// 返回数据
function send($client, $msg){
$msg = $this->frame($msg);
    socket_write($client, $msg, strlen($msg));
}Client code:
var ws = new WebSocket("ws://localhost:4000");
ws.onopen = function(){
    console.log("握手成功");
};
ws.onmessage = function(e){
    console.log("message:" + e.data);
};
ws.onerror = function(){
    console.log("error");
};
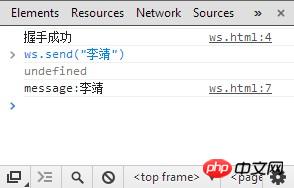
ws.send("李靖");Send data after the connection, and the server returns as is:

The client has in the request during handshake Sec-WebSocket-Version: 13, such a version identification, this is an upgraded version, and current browsers use this version. The previous version was more troublesome in the data encryption part. It would send two keys:
GET /chat HTTP/1.1Host: server.example.com
Upgrade: websocket
Connection: Upgrade
Origin: http://example.com
Sec-WebSocket-Protocol: chat, superchatSec-WebSocket-Key1: xxxxSec-WebSocket-Key2: xxxx
如果是这种版本(比较老,已经没在使用了),需要通过下面的方式获取
function encry($key1,$key2,$l8b){ //Get the numbers preg_match_all('/([\d]+)/', $key1, $key1_num); preg_match_all('/([\d]+)/', $key2, $key2_num);
$key1_num = implode($key1_num[0]);
$key2_num = implode($key2_num[0]);
//Count spaces
preg_match_all('/([ ]+)/', $key1, $key1_spc);
preg_match_all('/([ ]+)/', $key2, $key2_spc);
if($key1_spc==0|$key2_spc==0){ $this->log("Invalid key");
return; }    //Some math
$key1_sec = pack("N",$key1_num / $key1_spc);
$key2_sec = pack("N",$key2_num / $key2_spc);
return md5($key1_sec.$key2_sec.$l8b,1);
}只能无限吐槽这种验证方式!相比 nodeJs 的 websocket 操作方式:
//服务器程序var crypto = require('crypto');var WS = '258EAFA5-E914-47DA-95CA-C5AB0DC85B11';
require('net').createServer(function(o){    var key;
    o.on('data',function(e){        if(!key){            //握手
            key = e.toString().match(/Sec-WebSocket-Key: (.+)/)[1];
            key = crypto.createHash('sha1').update(key + WS).digest('base64');
            o.write('HTTP/1.1 101 Switching Protocols\r\n');
            o.write('Upgrade: websocket\r\n');
            o.write('Connection: Upgrade\r\n');
            o.write('Sec-WebSocket-Accept: ' + key + '\r\n');
            o.write('\r\n');
        }else{
            console.log(e);
        };
    });
}).listen(8000);多么简洁,多么方便!有谁还愿意使用 php 呢。。。。
The above is the detailed content of Detailed introduction to websocket in php. For more information, please follow other related articles on the PHP Chinese website!


