Border operations are something that every front-end engineer often encounters. The following article mainly introduces you to the relevant information on how to use CSS to achieve multiple border effects on a single element. The article introduces the implementation in detail through sample code. The process has certain reference learning value for everyone's study or work. Friends who need it can come and study together.
Preface
I recently encountered a problem worth thinking about at work. In CSS, there may be many ways to achieve the same effect. Methods, such as the multiple borders we are going to talk about today, some people may think, isn’t that simple? Just nest as many p elements with borders as you want!
Yes, this is indeed simple and crude, but it will also produce many elements that have no practical meaning.
In fact, to achieve the same effect, one element is enough!
Next I will share with you how to achieve multiple border effects on a single element~~
1. Double border effect
<!--HTML-->
<p class="box"></p>
/*CSS*/
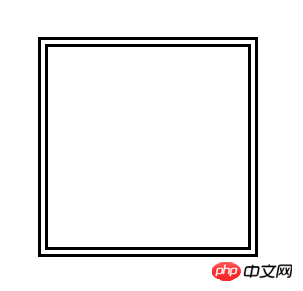
.box{ width: 200px; height: 200px; border: 10px double #000;}Use border-style: double to achieve a simple double border effect. The effect is as follows:

border-style: double
Although the implementation method is simple, the shortcomings are also very obvious:
① The thickness and space of the double border cannot be accurately controlled interval;
② Unable to change the style of double borders, such as double dotted borders;
③ Unable to achieve more levels of border effects.
2. Double diversified border effect
/*CSS*/
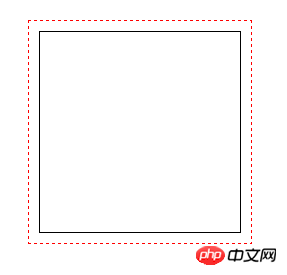
.box{ width: 200px; height: 200px; border: 1px solid #000; outline: 1px dashed #f00; outline-offset: 10px;}For the outline attribute, we usually use it more Rarely, it represents the outer outline of the element and is displayed outside the border. In most cases, it seems to be just used to clear the default focus style of the form control: outline: none;
In fact, outline can be made similar to border The properties have almost the same effect, and there is almost no difference in writing, but here is a summary of the subtle differences between the two:
① Outline does not occupy the actual space, which is very similar to box-shadow ;
② Outline cannot be split into attributes such as border-left and border-right like border;
③ Outline cannot be set to rounded corners.
The outline-offset attribute is also used in the above example. This attribute is actually a newly added attribute of outline in CSS3. This attribute cannot be combined with the abbreviation in outline. It is used to control the distance between the outer border and the outer outline. distance.

outline attribute
This implementation method is also very simple and more flexible, but it also has several shortcomings:
① outline attribute Rounded corners cannot be set (you can set the -moz-outline-radius attribute under Firefox to achieve rounded corners, but unfortunately there is no such attribute in other browsers), so rounded double borders cannot be achieved;
② It is also impossible Achieve more levels of border effects.
3. Multiple diversified border effects
/*CSS*/
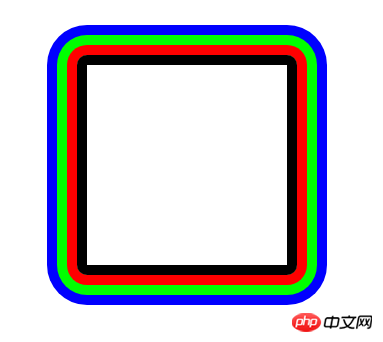
.box{ width: 200px; height: 200px; border: 10px solid #000; border-radius: 10px; box-shadow: 0 0 0 10px #f00, 0 0 0 20px #0f0, 0 0 0 30px #00f;}The box-shadow attribute is used here to replace the outline attribute. The superposition of multiple shadow effects can achieve countless layers of borders. At the same time, you can also use the rounded corner attribute border-radius to achieve multiple rounded border effects.

box-shadow property
Although this implementation seems to have achieved the effect we originally wanted to achieve, there is a very significant problem with this method. The disadvantage is that you cannot set a dotted border like outline or border, so you cannot achieve multiple dotted border effects using this method.
Compatibility: Of course, border has the best compatibility; followed by outline, which is compatible with IE8, but outline-offset is completely wiped out under IE; and finally, box-shadow, Compatible to IE9.
Conclusion
The methods introduced in this article each have their own advantages and disadvantages. In actual application, they can be flexibly selected according to the application scenario. Of course, In addition to the three methods written above, we can also combine pseudo elements to achieve multiple borders. In fact, the final implementation principle is still the methods in this article. Regarding pseudo elements, you can take a look at the pseudo elements written::before and This article uses ::after.
The above is the detailed content of Detailed explanation of examples of using CSS to achieve multiple border effects on a single element. For more information, please follow other related articles on the PHP Chinese website!


