This article mainly introduces in detail the implementation of sending and receiving emails with pictures and attachments in JavaMail. It has a certain reference value. Interested friends can refer to it.
Okay, enter this This is the most important step in the series of tutorials. We all understand the theoretical knowledge of emails in the previous article, so in this blog we will use code to complete the sending of emails. This is widely used in actual projects. For example, registration requires sending an email for account activation. Another example is the use of emails for task reminders in OA projects. What we are talking about here is to use JavaMail to complete the sending and receiving functions of emails.
PS: The source code download link for this blog: https://github.com/YSOcean/cnblogs
1. Introduction to JavaMail
JavaMail is Sun (now acquired by Oracle) provides a set of standard development kits to facilitate Java developers to implement email sending and receiving functions in applications. It supports some commonly used email protocols, such as SMTP and POP3 mentioned earlier. IMAP, MIME, etc. When we use the JavaMail API to write emails, we do not need to consider the underlying implementation details of the email. We only need to call the corresponding API class in the JavaMail development kit.
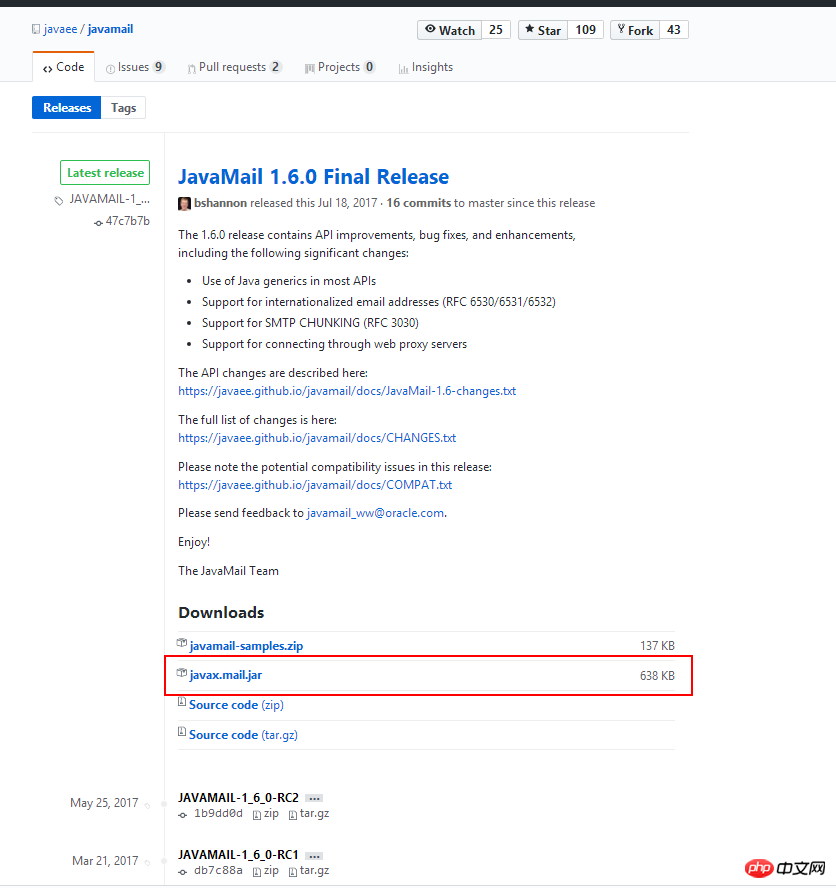
JavaMail download address: https://github.com/javaee/javamail/releases

Download this version of JavaMail, including SMTP, IMAP, and implementation of the POP3 protocol.
2. JavaMail API
The JavaMail API can be divided into the following three categories according to its functions:
① API for creating and parsing emails
②、API for sending emails
③、API for receiving emails
The above three types of APIs are composed of multiple classes in JavaMail, but there are mainly four core classes. , when we write a program, we can easily write a Java mail processing program by remembering these four core classes.

①. Message class: javax.mail.Message class is the core API for creating and parsing emails. This is an abstract class, and its subclass javax.mail is usually used. .internet.MimeMessage class. Its instance object represents an email. When the client program sends an email, it first uses the JavaMail API that creates the email to create a Message object that encapsulates the email data, and then passes this object to the email sending API (Transport class) for sending. When the client program receives mail, the mail receiving API encapsulates the received mail data in an instance of the Message class. The client program uses the mail parsing API to parse the received mail data from this object.
②. Transport class: javax.mail.Transport class is the core API class for sending mail. Its instance object represents the mail sending object that implements a certain mail sending protocol, such as SMTP protocol. The client program creates After getting the Message object, you only need to use the mail sending API to get the Transport object, then pass the Message object to the Transport object and call its sending method to send the mail to the specified SMTP server.
③Store class: javax.mail.Store class is the core API class for receiving mail. Its instance object represents a mail receiving object that implements a certain mail receiving protocol, such as POP3 protocol, and the client program receives When receiving mail, you only need to use the mail receiving API to obtain the Store object, and then call the receiving method of the Store object to obtain the mail data from the specified POP3 server, and encapsulate the mail data into the Message object representing the mail.
④. Session class: javax.mail.Session class is used to define the environment information required by the entire application, and to collect session information for the client to establish a network connection with the mail server, such as the host name of the mail server, Port number, email sending and receiving protocol used, etc. The Session object builds Transport and Store objects for sending and receiving emails based on this information, and provides information support when creating Message objects for the client.
3. Use JavaMail to send a simple plain text email
When understanding the following code to implement email sending, we can imagine the email sending as a rocket carrying the satellite send. Among them, Message is a satellite, and Transport is a rocket. The construction of satellites and rockets requires the help of Session. This relationship is easier to remember.
package com.ys.mail;

import java.io.ObjectInputStream.GetField;
import java.util.Date;
import java.util.Properties;

import javax.mail.Address;
import javax.mail.Message;
import javax.mail.MessagingException;
import javax.mail.Session;
import javax.mail.Transport;
import javax.mail.internet.AddressException;
import javax.mail.internet.InternetAddress;
import javax.mail.internet.MimeMessage;
import javax.swing.text.html.MinimalHTMLWriter;

public class SendMailText {
 //发件人地址
 public static String senderAddress = "xxx@163.com";
 //收件人地址
 public static String recipientAddress = "xxx@qq.com";
 //发件人账户名
 public static String senderAccount = "xxx";
 //发件人账户密码
 public static String senderPassword = "xxx";

 public static void main(String[] args) throws Exception {
 //1、连接邮件服务器的参数配置
 Properties props = new Properties();
 //设置用户的认证方式
 props.setProperty("mail.smtp.auth", "true");
 //设置传输协议
 props.setProperty("mail.transport.protocol", "smtp");
 //设置发件人的SMTP服务器地址
 props.setProperty("mail.smtp.host", "smtp.163.com");
 //2、创建定义整个应用程序所需的环境信息的 Session 对象
 Session session = Session.getInstance(props);
 //设置调试信息在控制台打印出来
 session.setDebug(true);
 //3、创建邮件的实例对象
 Message msg = getMimeMessage(session);
 //4、根据session对象获取邮件传输对象Transport
 Transport transport = session.getTransport();
 //设置发件人的账户名和密码
 transport.connect(senderAccount, senderPassword);
 //发送邮件,并发送到所有收件人地址,message.getAllRecipients() 获取到的是在创建邮件对象时添加的所有收件人, 抄送人, 密送人
 transport.sendMessage(msg,msg.getAllRecipients());

 //如果只想发送给指定的人,可以如下写法
 //transport.sendMessage(msg, new Address[]{new InternetAddress("xxx@qq.com")});

 //5、关闭邮件连接
 transport.close();
 }

 /**
 * 获得创建一封邮件的实例对象
 * @param session
 * @return
 * @throws MessagingException
 * @throws AddressException
 */
 public static MimeMessage getMimeMessage(Session session) throws Exception{
 //创建一封邮件的实例对象
 MimeMessage msg = new MimeMessage(session);
 //设置发件人地址
 msg.setFrom(new InternetAddress(senderAddress));
 /**
  * 设置收件人地址(可以增加多个收件人、抄送、密送),即下面这一行代码书写多行
  * MimeMessage.RecipientType.TO:发送
  * MimeMessage.RecipientType.CC:抄送
  * MimeMessage.RecipientType.BCC:密送
  */
 msg.setRecipient(MimeMessage.RecipientType.TO,new InternetAddress(recipientAddress));
 //设置邮件主题
 msg.setSubject("邮件主题","UTF-8");
 //设置邮件正文
 msg.setContent("简单的纯文本邮件!", "text/html;charset=UTF-8");
 //设置邮件的发送时间,默认立即发送
 msg.setSentDate(new Date());

 return msg;
 }

}The above code has detailed comments. If you don’t understand, you can leave a message. Note: Please change the recipient, sender and other information to your own when running.
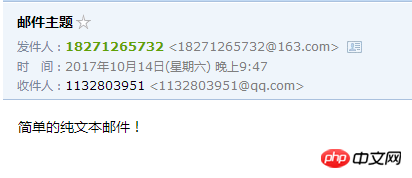
After executing the above code, then we check the inbox:

Then a simple plain text file has been sent.
4. Problems with sending emails
①. The sender’s email account name and password: Some emails have separate passwords, and others must log in with an authorization code. (qq mailbox), which is introduced in the blog Manual experience of SMTP and pop3 protocols.
②、发件人的SMTP服务器地址:一般是 smtp.xxx.com,比如163邮箱是smtp.163.com,qq邮箱是smtp.qq.com。
③、有可能你收件人地址,发件人地址等信息都正确了,控制台也打印了正确的信息,但是在收件箱就是收不到信息。这是因为可能收件箱服务器拒收了你发的邮件(比如认为你的邮件是广告),这时候可能在垃圾箱里能找到,可能找不到。解决办法是重复的邮件内容不要多次发送,或者更换收件箱试试。
④、本实例使用的是JavaMail1.6版本,支持的JDK必须是jdk1.7版本!!!
5、使用 JavaMail 接收邮件
由于接收邮件的用处不多,这里我们就简单的给出一个实例:
package com.ys.mail;

import java.util.Properties;
import javax.mail.Address;
import javax.mail.Folder;
import javax.mail.Message;
import javax.mail.Session;
import javax.mail.Store;

public class RecipientMail {
 //收件人地址
 public static String recipientAddress = "xxx@163.com";
 //收件人账户名
 public static String recipientAccount = "xxx";
 //收件人账户密码
 public static String recipientPassword = "xxx";

 public static void main(String[] args) throws Exception {
 //1、连接邮件服务器的参数配置
 Properties props = new Properties();
 //设置传输协议
 props.setProperty("mail.store.protocol", "pop3");
 //设置收件人的POP3服务器
 props.setProperty("mail.pop3.host", "pop3.163.com");
 //2、创建定义整个应用程序所需的环境信息的 Session 对象
 Session session = Session.getInstance(props);
 //设置调试信息在控制台打印出来
 //session.setDebug(true);

 Store store = session.getStore("pop3");
 //连接收件人POP3服务器
 store.connect("pop3.163.com", recipientAccount, recipientPassword);
 //获得用户的邮件账户,注意通过pop3协议获取某个邮件夹的名称只能为inbox
 Folder folder = store.getFolder("inbox");
 //设置对邮件账户的访问权限
 folder.open(Folder.READ_WRITE);

 //得到邮件账户的所有邮件信息
 Message [] messages = folder.getMessages();
 for(int i = 0 ; i < messages.length ; i++){
  //获得邮件主题
  String subject = messages[i].getSubject();
  //获得邮件发件人
  Address[] from = messages[i].getFrom();
  //获取邮件内容(包含邮件内容的html代码)
  String content = (String) messages[i].getContent();
 }

 //关闭邮件夹对象
 folder.close();
 //关闭连接对象
 store.close();
 }

}6、使用 JavaMail 发送带图片、附件的邮件
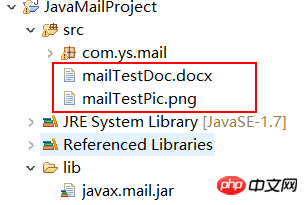
我们先看项目结构,在src目录下包含图片和附件:

然后看代码:
package com.ys.mail;
import java.util.Date;
import java.util.Properties;
import javax.activation.DataHandler;
import javax.activation.FileDataSource;
import javax.mail.Message;
import javax.mail.MessagingException;
import javax.mail.Session;
import javax.mail.Transport;
import javax.mail.internet.AddressException;
import javax.mail.internet.InternetAddress;
import javax.mail.internet.MimeBodyPart;
import javax.mail.internet.MimeMessage;
import javax.mail.internet.MimeMultipart;
import javax.mail.internet.MimeUtility;
public class SendMailText_Picture_Enclosure {
//发件人地址
public static String senderAddress = "xxx@163.com";
//收件人地址
public static String recipientAddress = "xxx@qq.com";
//发件人账户名
public static String senderAccount = "xxx";
//发件人账户密码
public static String senderPassword = "xxx";
public static void main(String[] args) throws Exception {
//1、连接邮件服务器的参数配置
Properties props = new Properties();
//设置用户的认证方式
props.setProperty("mail.smtp.auth", "true");
//设置传输协议
props.setProperty("mail.transport.protocol", "smtp");
//设置发件人的SMTP服务器地址
props.setProperty("mail.smtp.host", "smtp.163.com");
//2、创建定义整个应用程序所需的环境信息的 Session 对象
Session session = Session.getInstance(props);
//设置调试信息在控制台打印出来
session.setDebug(true);
//3、创建邮件的实例对象
Message msg = getMimeMessage(session);
//4、根据session对象获取邮件传输对象Transport
Transport transport = session.getTransport();
//设置发件人的账户名和密码
transport.connect(senderAccount, senderPassword);
//发送邮件,并发送到所有收件人地址,message.getAllRecipients() 获取到的是在创建邮件对象时添加的所有收件人, 抄送人, 密送人
transport.sendMessage(msg,msg.getAllRecipients());
//5、关闭邮件连接
transport.close();
}
/**
* 获得创建一封邮件的实例对象
* @param session
* @return
* @throws MessagingException
* @throws AddressException
*/
public static MimeMessage getMimeMessage(Session session) throws Exception{
//1.创建一封邮件的实例对象
MimeMessage msg = new MimeMessage(session);
//2.设置发件人地址
msg.setFrom(new InternetAddress(senderAddress));
/**
* 3.设置收件人地址(可以增加多个收件人、抄送、密送),即下面这一行代码书写多行
* MimeMessage.RecipientType.TO:发送
* MimeMessage.RecipientType.CC:抄送
* MimeMessage.RecipientType.BCC:密送
*/
msg.setRecipient(MimeMessage.RecipientType.TO,new InternetAddress(recipientAddress));
//4.设置邮件主题
msg.setSubject("邮件主题(包含图片和附件)","UTF-8");
//下面是设置邮件正文
//msg.setContent("简单的纯文本邮件!", "text/html;charset=UTF-8");
// 5. 创建图片"节点"
MimeBodyPart image = new MimeBodyPart();
// 读取本地文件
DataHandler dh = new DataHandler(new FileDataSource("src\\mailTestPic.png"));
// 将图片数据添加到"节点"
image.setDataHandler(dh);
// 为"节点"设置一个唯一编号(在文本"节点"将引用该ID)
image.setContentID("mailTestPic");
// 6. 创建文本"节点"
MimeBodyPart text = new MimeBodyPart();
// 这里添加图片的方式是将整个图片包含到邮件内容中, 实际上也可以以 http 链接的形式添加网络图片
text.setContent("这是一张图片<br/><a href='http://www.cnblogs.com/ysocean/p/7666061.html'><img src='cid:mailTestPic'/></a>", "text/html;charset=UTF-8");
// 7. (文本+图片)设置 文本 和 图片"节点"的关系(将 文本 和 图片"节点"合成一个混合"节点")
MimeMultipart mm_text_image = new MimeMultipart();
mm_text_image.addBodyPart(text);
mm_text_image.addBodyPart(image);
mm_text_image.setSubType("related"); // 关联关系
// 8. 将 文本+图片 的混合"节点"封装成一个普通"节点"
// 最终添加到邮件的 Content 是由多个 BodyPart 组成的 Multipart, 所以我们需要的是 BodyPart,
// 上面的 mailTestPic 并非 BodyPart, 所有要把 mm_text_image 封装成一个 BodyPart
MimeBodyPart text_image = new MimeBodyPart();
text_image.setContent(mm_text_image);
// 9. 创建附件"节点"
MimeBodyPart attachment = new MimeBodyPart();
// 读取本地文件
DataHandler dh2 = new DataHandler(new FileDataSource("src\\mailTestDoc.docx"));
// 将附件数据添加到"节点"
attachment.setDataHandler(dh2);
// 设置附件的文件名(需要编码)
attachment.setFileName(MimeUtility.encodeText(dh2.getName()));
// 10. 设置(文本+图片)和 附件 的关系(合成一个大的混合"节点" / Multipart )
MimeMultipart mm = new MimeMultipart();
mm.addBodyPart(text_image);
mm.addBodyPart(attachment); // 如果有多个附件,可以创建多个多次添加
mm.setSubType("mixed"); // 混合关系
// 11. 设置整个邮件的关系(将最终的混合"节点"作为邮件的内容添加到邮件对象)
msg.setContent(mm);
//设置邮件的发送时间,默认立即发送
msg.setSentDate(new Date());
return msg;
}
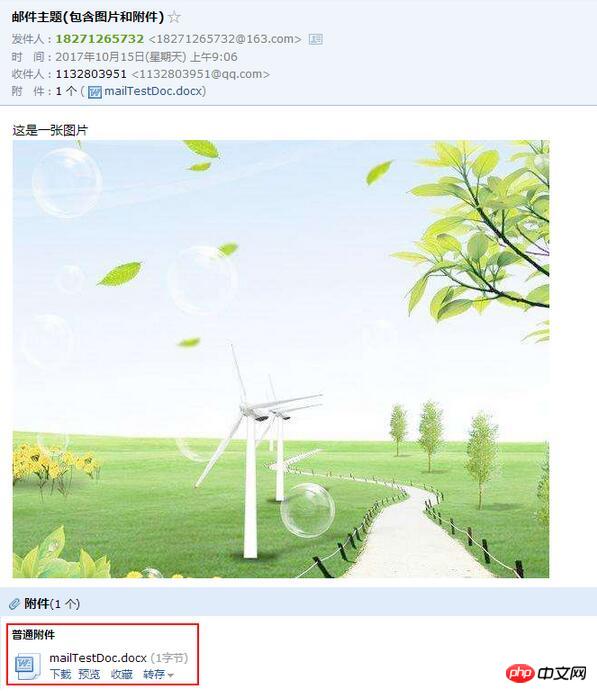
}执行程序后,我们查看邮箱:

那么一封包含图片(点击图片跳转到指定超链接),和附件的邮件就生成了。
The above is the detailed content of Detailed explanation of how to send pictures and attachments and receive emails using JavaMail. For more information, please follow other related articles on the PHP Chinese website!


