AngularJS is currently widely used by different types of web developers, and this excellent framework has fully proven its ability to meet various needs. As a web developer, whether you are just getting started or have rich practical experience, choosing an excellent framework is a necessary prerequisite for work, and AngularJS is such an ideal solution. In the process of using AnguarJS, you can learn more about application development and how to build better and more attractive application results. If you want to adopt best practices in creating applications, AngularJS can also be of great help. All in all, the powerful functions and features of this framework will never disappoint friends with application development needs.

AngularJS has many outstanding features. Today we will take a simple application as an example to help you understand how to use it. With Firebase, our simple but practical application can be easily built. As a finished product, the developed app allows everyone to log in at any time or log in and publish articles on it.
Introduction to AngularJS and Firebase

AngularJS is currently the most popular JavaScript MVC framework among web developers. If you want to create a unique application, then it is definitely the best choice for you - thanks to its powerful HTML function extension features. With the help of AngularJS, we no longer need to use a lot of code to build applications. Its amazing dependency injection and binding mechanism will make application development extremely convenient.
On the other hand, Firebase provides excellent support for AngularJS, which saves you the trouble of developing backend support for the applications you create. With the help of Firebase, our application will be able to perform data backup in real-time - of course, the necessary API calls are still indispensable.
Although AngularJS itself is already quite powerful, with the help of Firebase, we will be able to take our application results to the next level.
Start here
Before you start using AngularJS to create this simple small web application, you first need to download the angular-seed project. After the download is completed, you need to open the corresponding download directory and install the dependencies in it to run it. The specific code is as follows:
The next step is to start the node server using the following delegate:
After the node server is up and running, we need to open the browser and visit http://localhost:8000/app/index.html, where the running default application will be displayed.
Next visit the application directory under the angular-seed project folder, where the application code is saved.
As the core of the application, app.js will also be stored in the application folder. All application-level modules and routes within app.js need to be declared.
In addition, you will also find two views of angular-seed here, namely view 1 and view 2. They always exist in their default form. We need to delete these views in the application folder.
Now we are going to create the application from scratch: you first need to open app.js and delete all existing code in it. Defining our application routes in app.js requires us to use ngRoute, one of the modules in AngularJS. By default app.js does not contain this module, so we need to manually inject it into the application to use it. You can use the following code to complete the addition of the AngularJS module:
1 2 3 |
|
The ngRoute module will bring an important component, $routeProvider, which can perfectly configure routing. We need to use the following code to inject $routeProvider into the configuration method of angular-module to complete the route definition:
1 2 3 4 5 6 7 |
|
完成以上步骤后,现在我们就可以打开index.html了。将index.html当中的全部内容清除,只保留脚本引用以及div。
每一次进行路由变更时,我们都需要按照以上方法对div内容进行调整。
在视图当中创建符号
我们需要在app目录当中创建一个新的文件夹并将其命名为home。在该文件夹当中,我们额外再创建两个文件夹,分别为home.js与home.html。首先打开home.html并将以下代码添加进去:
1 2 3 4 5 6 7 8 9 10 11 12 13 14 15 16 17 18 19 20 21 22 23 24 25 |
|
在home.js当中,我们则需要创建一套路由机制以访问home视图。另外还需要为由home视图创建的$scope设置一套控制器。控制器永远负责控制与之对应的特定视图。具体代码如下所示:
1 2 3 4 5 6 7 8 9 10 11 12 |
|
现在应用程序已经准备就绪。打开app.js,而后将myApp.home home模块添加到该应用当中。利用$routeProvider.otherwise方法为我们的应用程序声明一套指向home视图的默认路由,具体代码如下所示:
1 2 3 4 5 6 7 8 9 10 11 |
|
如果大家希望显示自己的home页面,则将home.js添加到该应用的主HTML模板文件当中。要完成这项操作,请打开index.html文件并湢以下代码:
1 |
|
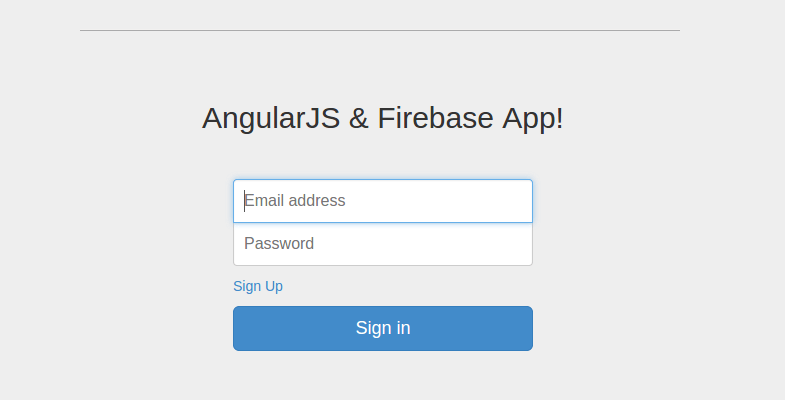
现在一切工作已经完成,该应用随时准备加以运行了!要开始使用这款应用,我们需要重启服务器并将自己的浏览器指向http://localhost:8000/app/index.html以访问登入页面,在这里大家可以实现对该应用程序的访问。

如果大家需要使用Firebase(具体理由如前文所述),则需要首先创建一个Firebase账户。在账户创建完成后,我们将屏幕上所显示的已创建应用url添加进来,而后点击“管理该应用”。
创建自己的应用程序感觉不错吧?Angular.js能够为此类开发工作提供我们所需要的一切。而且只需几分钟,我们的这款简单小应用就已经正式上线啦!


