The principle and use of TP5 Cache
在当今大流量的互联网之中,Cache的重要性不言而喻。ThinkPhp5作为国内主流框架,提供了强大的Cache功能。让我们跟随本文,来剖析TP5 Cache的原理及使用。
为什么需要Cache(缓存)?
假设现在有一个小说网,有非常多的读者,有一篇新的章节更新了,那么可能一分钟内有几万几十万的访问量.
如果没有缓存,同样的内容就要去数据库重复查询,那可能网站一下就挂掉了.
追求性能的web站点应该充分利用缓存,常见的缓存类型有File,Memcache,Redis等,这里就不说他们的区别了
今天我们分析下TP5 Cache的内部实现原理.
首先看官方文档如何使用缓存的.

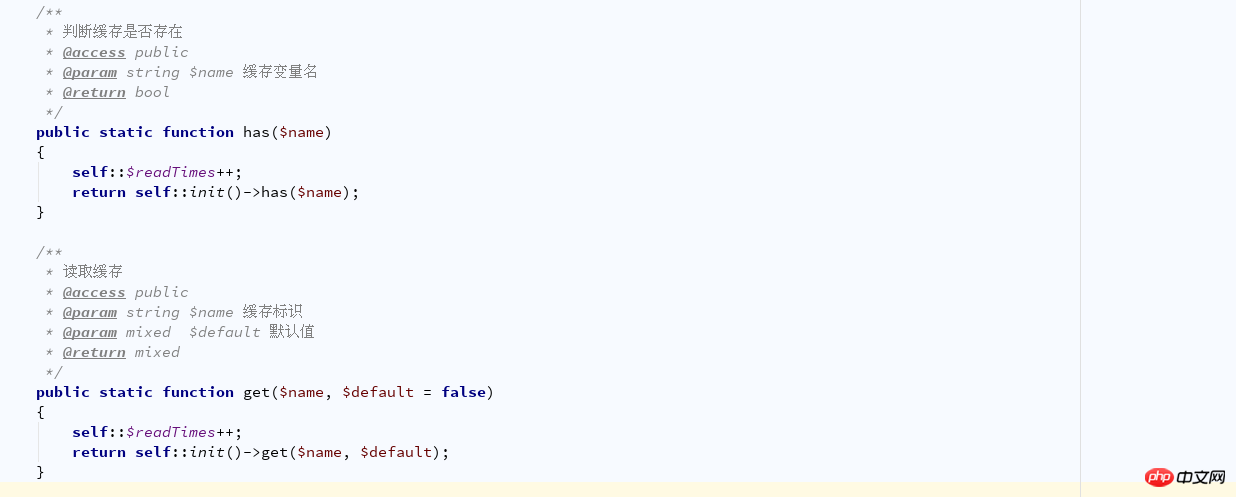
如上图,调用Cache类的的静态方法set就可以直接使用了,我们查看Cache类文件 在application/thinkphp/library/think目录下
   protected static $instance = [];
   public static $readTimes   = 0;
   public static $writeTimes  = 0;
   /**
     * 操作句柄
     * @var object
     * @access protected     */
    protected static $handler;     /**
     * 写入缓存
     * @access public
     * @param string        $name 缓存标识
     * @param mixed         $value  存储数据
     * @param int|null      $expire  有效时间 0为永久
     * @return boolean     */
    public static function set($name, $value, $expire = null)
    {
        self::$writeTimes++;
         return self::init()->set($name, $value, $expire);
}看到原来set方法是这样的, 其中writeTimes 是Cache类的静态变量,主要记录缓存的读取次数,这不是重点.
注意到了吗,有个静态变量命名为 $instance, 上次说过这样命名大概率就是 单例模式了.
set方法的重点是init方法
我们再看init方法
  public static function init(array $options = [])
    {        if (is_null(self::$handler)) {            // 自动初始化缓存
            if (!empty($options)) {
            $connect = self::connect($options);
            } elseif ('complex' == Config::get('cache.type')) {
            $connect = self::connect(Config::get('cache.default'));
            } else {
            $connect = self::connect(Config::get('cache'));
            }
            self::$handler = $connect;
        }        return self::$handler;
}handler就是操作的句柄(巨饼:-) ), 这里一看,果然是单例模式了,如果句柄为空才去初始化对象,不然直接返回.句柄
同样,这里重点是connect函数, 传入的参数是 配置信息
同样,我们查看connect方法
/**
     * 连接缓存
     * @access public
     * @param array         $options  配置数组
     * @param bool|string   $name 缓存连接标识 true 强制重新连接
     * @return Driver
     */
    public static function connect(array $options = [], $name = false)
    {

        $type = !empty($options['type']) ? $options['type'] : 'File';
        if (false === $name) {
            $name = md5(serialize($options));
        }

        if (true === $name || !isset(self::$instance[$name])) {
            $class = false !== strpos($type, '\\') ? $type : '\\think\\cache\\driver\\' . ucwords($type);
            // 记录初始化信息
            App::$debug && Log::record('[ CACHE ] INIT ' . $type, 'info');
            if (true === $name) {
                return new $class($options);
            } else {
                self::$instance[$name] = new $class($options);
            }
        }

        return self::$instance[$name];
} self::$instance[$name] = new $class($options); 这一句里,我们就可以知道句柄的真实身份拉,
$class = false !== strpos($type, '\\') ? $type : '\\think\\cache\\driver\\' . ucwords($type);
这一句的意思是class的名字由type决定, 如果type没有包含反斜线, 则class = \think\cache\driver\.ucwords($type)
thinkPhp 是把think作为核心目录的别名的,所以他真实路径就是 \thinkphp\libray\\think\driver\.ucwords($type)
根据自动加载的尿性,自然是去该文件夹下加载对应的对象
(额外提一句,这利用的是PHP动态变量的一个特性,其实就和工厂模式一个原理,运行中动态决定实例化的对象)
type是什么呢? type就是函数传入的参数,也就是配置信息,我们看下配置信息 type就是驱动方式,如果我们type填写的是File,那么就使用文件驱动,实例化的是 \think\cache\driver\File.class
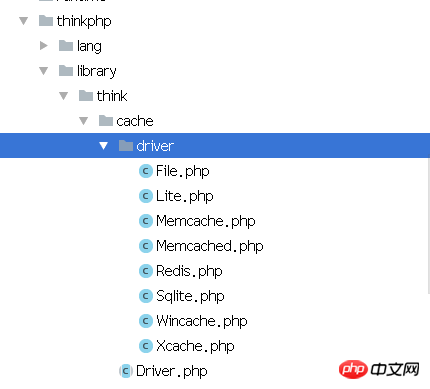
我们看下 \think\cache\driver文件下有什么文件,那就知道thinkphp为我们提供了多少种缓存驱动了

原来有这么多!
点进去
每个文件,我们可以发现一个共同点, 每个类都是继承了 抽象类 Driver
Driver决定了 每一个Cache驱动应该是什么样子的,他们的方法基本是一样的,而实现方式因每个驱动不同而异
其实这就是 适配器模式,如果是我们自己写,当然不会写那么多拉,不过TP5是为了造福广大PHP开发者,所以编写了那么多不同的驱动供我们使用.
我们重点看Redis吧, 如果要去实验,记得把 config中的 Cache.type更改为 redis
Redis类的方法很少,先看看构造函数
public function __construct($options = [])
    {
        if (!extension_loaded('redis')) {
            throw new \BadFunctionCallException('not support: redis');
        }
        if (!empty($options)) {
            $this->options = array_merge($this->options, $options);
        }
        $func          = $this->options['persistent'] ? 'pconnect' : 'connect';
        $this->handler = new \Redis;
        $this->handler->$func($this->options['host'], $this->options['port'], $this->options['timeout']);
        if ('' != $this->options['password']) {
            $this->handler->auth($this->options['password']);
        }
        if (0 != $this->options['select']) {
            $this->handler->select($this->options['select']);
        }
}可见TP5的 redis驱动 是基于phpredis的阿, handler 就是实例化的phpredis类, 因此选了哪个驱动,Cache的类自然就是哪些驱动.
所以说如果要使用 TP5的 redis,必须要先安装phpredis扩展.
这里就顺便解析下 redis重写的 set方法
/**
     * 写入缓存
     * @access public
     * @param string    $name 缓存变量名
     * @param mixed     $value  存储数据
     * @param integer   $expire  有效时间(秒)
     * @return boolean
     */
    public function set($name, $value, $expire = null)
    {
        if (is_null($expire)) {
            $expire = $this->options['expire'];
        }
        if ($this->tag && !$this->has($name)) {
            $first = true;
        }
        $key = $this->getCacheKey($name);
        //对数组/对象数据进行缓存处理,保证数据完整性  byron sampson<xiaobo.sun@qq.com>
        $value = (is_object($value) || is_array($value)) ? json_encode($value) : $value;
        if (is_int($expire) && $expire) {
            $result = $this->handler->setex($key, $expire, $value);
        } else {
            $result = $this->handler->set($key, $value);
        }
        isset($first) && $this->setTagItem($key);
        return $result;
}原本的phpredis set方法 只能是 普通的键值对, 而重写的set方法现在可以是 键,数组啦,这是非常有用的方法
可以看到实现的 原理是把 数组或者对象 序列化为json, 取值的时候则反序列化成为数组.
到这里我们就基本分析完了一个驱动是如何实现的,首先必须 继承Driver类,实现Driver规定的方法,然后将handler交给Cache类去使用
我们回到Cache类

可以看到Cache类调用函数的方法基本斗是这样, init()获取 到handler,然后操作handler对象,也就是我们真正的 操作对象,这里就是 phpredis类啦,
当然我们是没办法直接操作 phpredis类的, 只能使用Cache类 的寥寥几种方法,所以有些人不满意,因为队列,集和,哈希都认为没办法使用了,我也在网上看到有些同学 重写TP5的 redis类
其实大可不必, Cache类还是暴露了一个接口给我们的.
我们可以这样
        $res  = Cache::init();
        $redis = $res->handler();
        $redis->lpush('test',111);
        $redis->rpush('test',111);
$redis->lpop('test');获得了 handler 也就是获得了 phpredis,这样就可以随便使用 phpredis原生的方法啦,而且还是单例模式哦, 没有新建对象额外的消耗
本文就到这里结束啦, 如果要知道更多Cache类的使用方法,可以按上文的方式直接看源代码,或者再去查阅官方文档.
虽然没有讲解如何使用,但是分析了 Cache的实现原理有助于提高我们的编程抽象水平, 上文分析源码的方式也同样可以用来分析其他的核心类库.
相关阅读:
The above is the detailed content of The principle and use of TP5 Cache. For more information, please follow other related articles on the PHP Chinese website!

Hot AI Tools

Undresser.AI Undress
AI-powered app for creating realistic nude photos

AI Clothes Remover
Online AI tool for removing clothes from photos.

Undress AI Tool
Undress images for free

Clothoff.io
AI clothes remover

AI Hentai Generator
Generate AI Hentai for free.

Hot Article

Hot Tools

Notepad++7.3.1
Easy-to-use and free code editor

SublimeText3 Chinese version
Chinese version, very easy to use

Zend Studio 13.0.1
Powerful PHP integrated development environment

Dreamweaver CS6
Visual web development tools

SublimeText3 Mac version
God-level code editing software (SublimeText3)

Hot Topics
 1378
1378
 52
52
 PHP 8.4 Installation and Upgrade guide for Ubuntu and Debian
Dec 24, 2024 pm 04:42 PM
PHP 8.4 brings several new features, security improvements, and performance improvements with healthy amounts of feature deprecations and removals. This guide explains how to install PHP 8.4 or upgrade to PHP 8.4 on Ubuntu, Debian, or their derivati
 How To Set Up Visual Studio Code (VS Code) for PHP Development
Dec 20, 2024 am 11:31 AM
Visual Studio Code, also known as VS Code, is a free source code editor — or integrated development environment (IDE) — available for all major operating systems. With a large collection of extensions for many programming languages, VS Code can be c
 How do you parse and process HTML/XML in PHP?
Feb 07, 2025 am 11:57 AM
This tutorial demonstrates how to efficiently process XML documents using PHP. XML (eXtensible Markup Language) is a versatile text-based markup language designed for both human readability and machine parsing. It's commonly used for data storage an
 PHP Program to Count Vowels in a String
Feb 07, 2025 pm 12:12 PM
A string is a sequence of characters, including letters, numbers, and symbols. This tutorial will learn how to calculate the number of vowels in a given string in PHP using different methods. The vowels in English are a, e, i, o, u, and they can be uppercase or lowercase. What is a vowel? Vowels are alphabetic characters that represent a specific pronunciation. There are five vowels in English, including uppercase and lowercase: a, e, i, o, u Example 1 Input: String = "Tutorialspoint" Output: 6 explain The vowels in the string "Tutorialspoint" are u, o, i, a, o, i. There are 6 yuan in total
 Explain JSON Web Tokens (JWT) and their use case in PHP APIs.
Apr 05, 2025 am 12:04 AM
JWT is an open standard based on JSON, used to securely transmit information between parties, mainly for identity authentication and information exchange. 1. JWT consists of three parts: Header, Payload and Signature. 2. The working principle of JWT includes three steps: generating JWT, verifying JWT and parsing Payload. 3. When using JWT for authentication in PHP, JWT can be generated and verified, and user role and permission information can be included in advanced usage. 4. Common errors include signature verification failure, token expiration, and payload oversized. Debugging skills include using debugging tools and logging. 5. Performance optimization and best practices include using appropriate signature algorithms, setting validity periods reasonably,
 7 PHP Functions I Regret I Didn't Know Before
Nov 13, 2024 am 09:42 AM
If you are an experienced PHP developer, you might have the feeling that you’ve been there and done that already.You have developed a significant number of applications, debugged millions of lines of code, and tweaked a bunch of scripts to achieve op
 Explain late static binding in PHP (static::).
Apr 03, 2025 am 12:04 AM
Static binding (static::) implements late static binding (LSB) in PHP, allowing calling classes to be referenced in static contexts rather than defining classes. 1) The parsing process is performed at runtime, 2) Look up the call class in the inheritance relationship, 3) It may bring performance overhead.
 What are PHP magic methods (__construct, __destruct, __call, __get, __set, etc.) and provide use cases?
Apr 03, 2025 am 12:03 AM
What are the magic methods of PHP? PHP's magic methods include: 1.\_\_construct, used to initialize objects; 2.\_\_destruct, used to clean up resources; 3.\_\_call, handle non-existent method calls; 4.\_\_get, implement dynamic attribute access; 5.\_\_set, implement dynamic attribute settings. These methods are automatically called in certain situations, improving code flexibility and efficiency.


