How to add borders in Dreamweaver
How to add borders in Dreamweaver? Dreamweaver wants to create a red border, how to create it? Let's take a look at how to make Dreamweaver borders. Friends who need it can refer to it. I hope it can help everyone.
When designing a web page with Dreamweaver, if you want to add a border, how should you add it? Let’s take a look at the detailed tutorial below.
Software name:
##Adobe Dreamweaver CC 2017 v17.0 Chinese cracked version ( Attached crack patch + installation tutorial) 64-bit
- Software size:
- 758MB
- Update time:
- 2016-11-05

DW Editing Tool

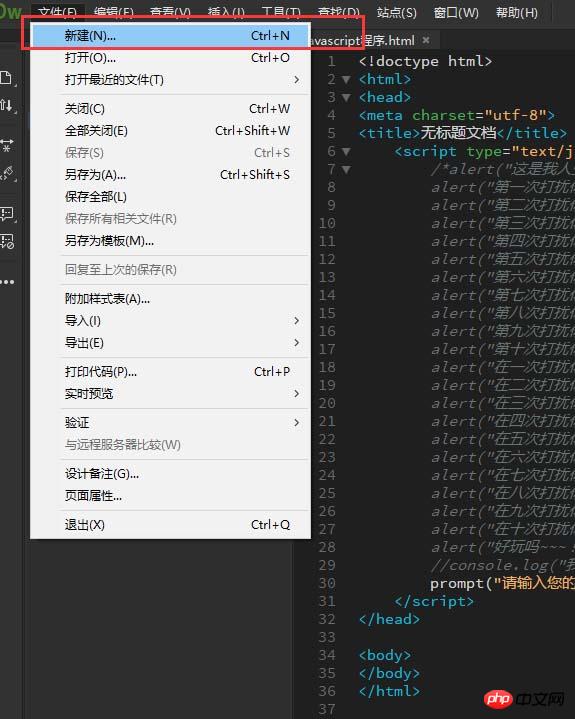
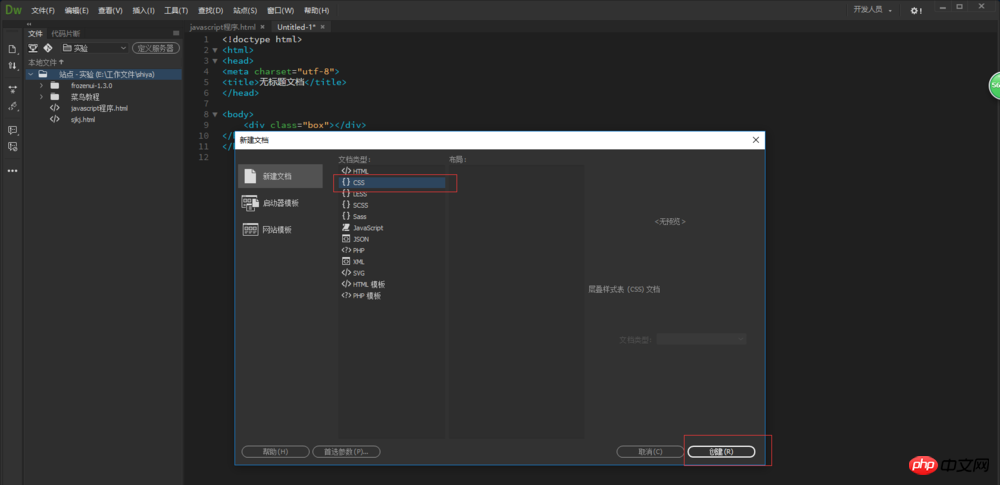
HTML file and click Create.
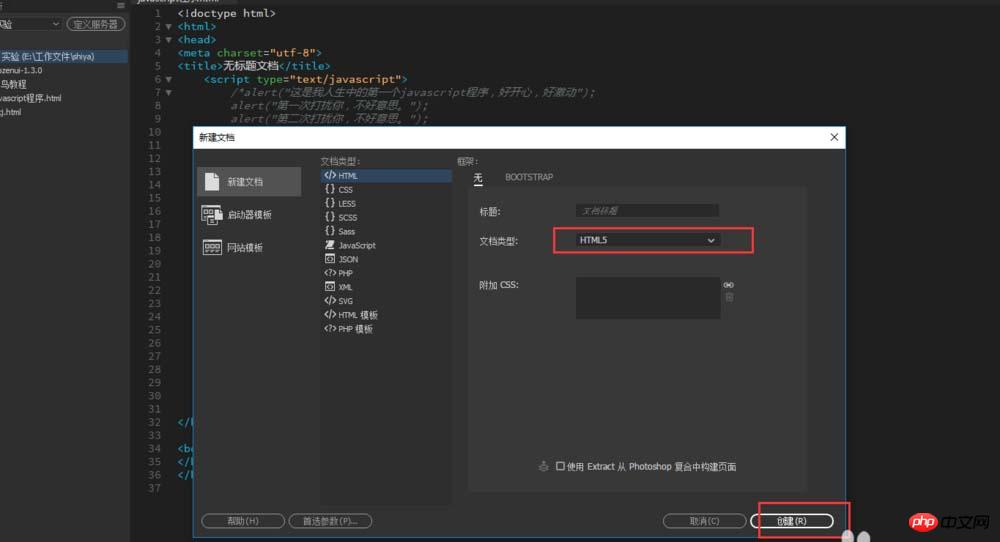
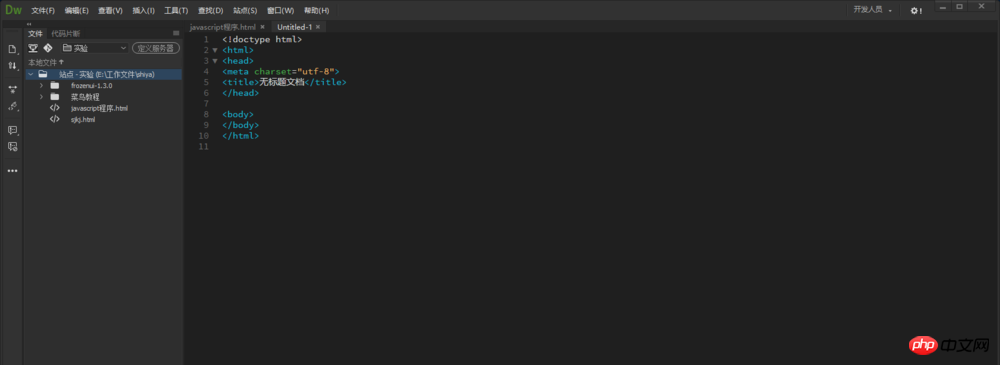
p” tag and name it box.
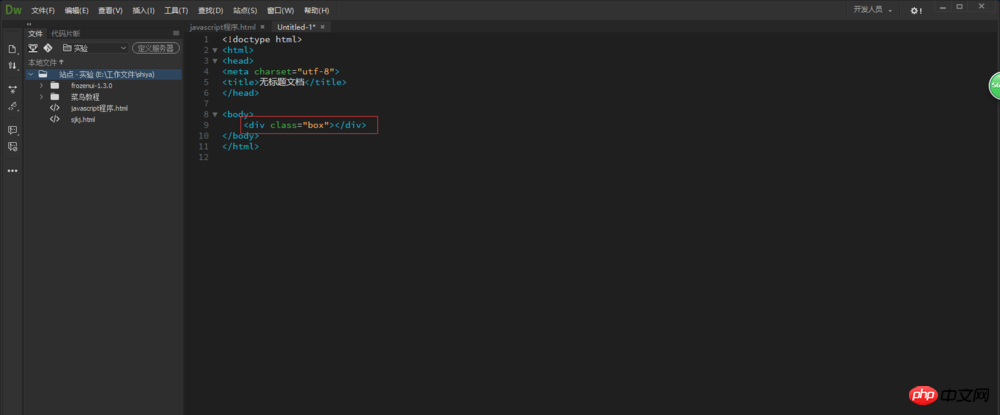
box{ }.
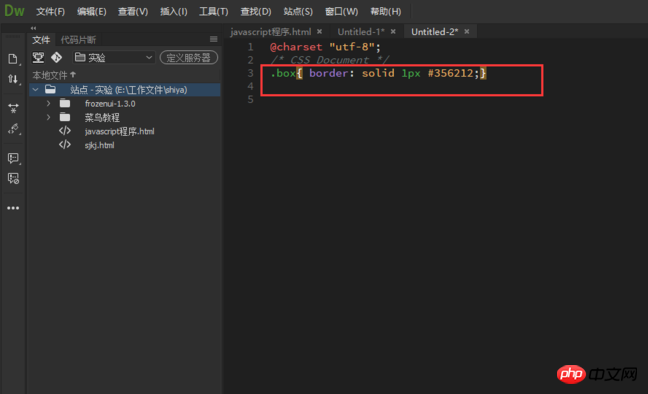
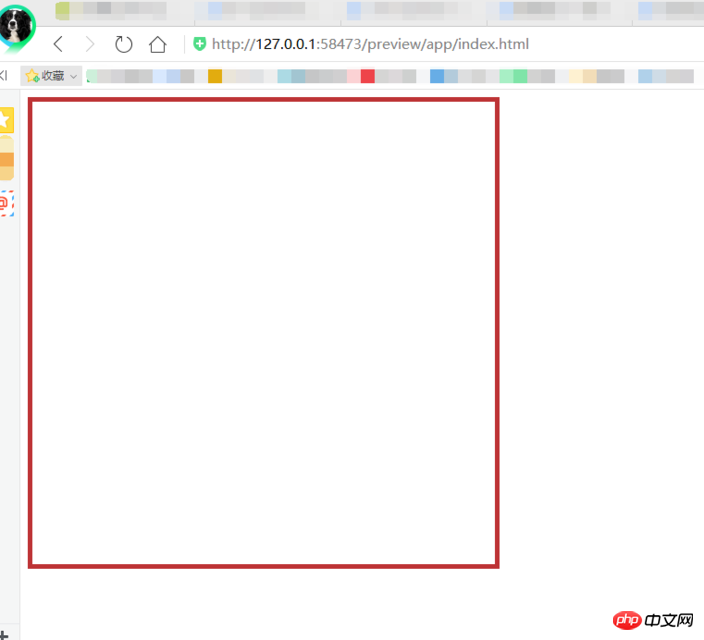
border:solid 1px #333333;" in the css style.box{ }.
CSS3 Example of Gradually Glowing Square Border
html Steps to Implement Dotted Border Line
The above is the detailed content of How to add borders in Dreamweaver. For more information, please follow other related articles on the PHP Chinese website!

Hot AI Tools

Undresser.AI Undress
AI-powered app for creating realistic nude photos

AI Clothes Remover
Online AI tool for removing clothes from photos.

Undress AI Tool
Undress images for free

Clothoff.io
AI clothes remover

AI Hentai Generator
Generate AI Hentai for free.

Hot Article

Hot Tools

Notepad++7.3.1
Easy-to-use and free code editor

SublimeText3 Chinese version
Chinese version, very easy to use

Zend Studio 13.0.1
Powerful PHP integrated development environment

Dreamweaver CS6
Visual web development tools

SublimeText3 Mac version
God-level code editing software (SublimeText3)

Hot Topics
 How to adjust text position in dreamweaver
Apr 09, 2024 am 02:24 AM
Adjusting the text position in Dreamweaver can be completed by the following steps: Select the text and use the text position adjuster to make horizontal adjustments: left alignment, right alignment, center alignment; 2. Make vertical adjustments: top alignment, bottom alignment, vertical center; 3. Press Shift key and use the arrow keys to fine-tune the position; 4. Use shortcut keys to quickly align: left alignment (Ctrl/Cmd + L), right alignment (Ctrl/Cmd + R), center alignment (Ctrl/Cmd + C).
 How to recover deleted contacts on WeChat (simple tutorial tells you how to recover deleted contacts)
May 01, 2024 pm 12:01 PM
Unfortunately, people often delete certain contacts accidentally for some reasons. WeChat is a widely used social software. To help users solve this problem, this article will introduce how to retrieve deleted contacts in a simple way. 1. Understand the WeChat contact deletion mechanism. This provides us with the possibility to retrieve deleted contacts. The contact deletion mechanism in WeChat removes them from the address book, but does not delete them completely. 2. Use WeChat’s built-in “Contact Book Recovery” function. WeChat provides “Contact Book Recovery” to save time and energy. Users can quickly retrieve previously deleted contacts through this function. 3. Enter the WeChat settings page and click the lower right corner, open the WeChat application "Me" and click the settings icon in the upper right corner to enter the settings page.
 How to add video to dreamweaver webpage production
Apr 09, 2024 am 01:42 AM
Embed video using Dreamweaver: Insert a video element. Select and upload a video file. Set video type, URL, size, autoplay and controls. Insert video. Optional: Customize the video appearance.
 The secret of hatching mobile dragon eggs is revealed (step by step to teach you how to successfully hatch mobile dragon eggs)
May 04, 2024 pm 06:01 PM
Mobile games have become an integral part of people's lives with the development of technology. It has attracted the attention of many players with its cute dragon egg image and interesting hatching process, and one of the games that has attracted much attention is the mobile version of Dragon Egg. To help players better cultivate and grow their own dragons in the game, this article will introduce to you how to hatch dragon eggs in the mobile version. 1. Choose the appropriate type of dragon egg. Players need to carefully choose the type of dragon egg that they like and suit themselves, based on the different types of dragon egg attributes and abilities provided in the game. 2. Upgrade the level of the incubation machine. Players need to improve the level of the incubation machine by completing tasks and collecting props. The level of the incubation machine determines the hatching speed and hatching success rate. 3. Collect the resources required for hatching. Players need to be in the game
 How to adjust line spacing in dreamweaver
Apr 09, 2024 am 03:00 AM
Adjusting line spacing in Dreamweaver is a four-step process: select the text, open the Paragraph panel, adjust the Line Spacing options, and finally click OK to apply the changes.
 How to set font size on mobile phone (easily adjust font size on mobile phone)
May 07, 2024 pm 03:34 PM
Setting font size has become an important personalization requirement as mobile phones become an important tool in people's daily lives. In order to meet the needs of different users, this article will introduce how to improve the mobile phone use experience and adjust the font size of the mobile phone through simple operations. Why do you need to adjust the font size of your mobile phone - Adjusting the font size can make the text clearer and easier to read - Suitable for the reading needs of users of different ages - Convenient for users with poor vision to use the font size setting function of the mobile phone system - How to enter the system settings interface - In Find and enter the "Display" option in the settings interface - find the "Font Size" option and adjust it. Adjust the font size with a third-party application - download and install an application that supports font size adjustment - open the application and enter the relevant settings interface - according to the individual
 How to add pictures to dreamweaver
Apr 09, 2024 am 03:30 AM
To insert a picture in Dreamweaver, click the Insert menu and choose Image, then navigate to the picture file and select it. Other methods include dragging and dropping files or inserting HTML code directly. Adjusting properties includes changing size, alignment, adding borders, and entering alt text.
 How to indent text in dreamweaver
Apr 09, 2024 am 02:15 AM
There are four ways to indent text in Dreamweaver: Indent a single paragraph: Format > Paragraph > Indent Indent multiple paragraphs: Set the indent value in the paragraph panel Use style: Set the indent value in the paragraph style dialog box Use indent Key: Tab key to indent right, Shift + Tab key to indent left


