ajax sends data to server
This article mainly introduces the relevant information about the advanced functions of Ajax: ajax sends data to the server. Friends who need it can refer to it. I hope it can help everyone.
1. Prepare to send data to the server
One of the most common uses of Ajax is to send data to the server. The most typical situation is to send form data from the client, that is, the values entered by the user in each input element contained in the form element. The following code shows a simple form:
<!DOCTYPE html>
<html lang="en">
<head>
<meta charset="UTF-8">
<title>基本表单</title>
<style>
.table{display: table;}
.row{display: table-row;}
.cell{display: table-cell;padding: 5px;}
.lable{text-align: right;}
</style>
</head>
<body>
<form id="fruitform" method="post" action="http://127.0.0.1:8080/form">
<p class="lable">
<p class="row">
<p class="cell lable">Apples:</p>
<p class="cell"><input name="apples" value="5" /></p>
</p>
<p class="row">
<p class="cell lable">Bananas:</p>
<p class="cell"><input name="bananas" value="2" /></p>
</p>
<p class="row">
<p class="cell lable">Cherries:</p>
<p class="cell"><input name="cherries" value="20" /></p>
</p>
<p class="row">
<p class="cell lable">Total:</p>
<p id="results" class="cell">0 items</p>
</p>
</p>
<button id="submit" type="submit">Submit Form</button>
</form>
</body>
</html>The form in this example contains three input elements and a submit button. These input elements allow the user to specify the amount of each of three different orders, and the button will submit the form to the server.
1.1 Define the server
Obviously, you need to create the server that handles the requests for these examples. Node.js is used here again, mainly because it is simple and uses Javascript. Create a new fruitcalc.js script file as follows:
var http = require('http');
var querystring = require('querystring');
function writeResponse(res,data){
var total = 0;
for(fruit in data){
total += Number(data[fruit]);
}
res.writeHead(200,"OK",{
"Content-Type":"text/html",
"Access-Control-Allow-Origin":"http://localhost:63342"
});
res.write('<html><head><title>Fruit Total</title></head><body>');
res.write('<p>'+total+' item ordered</p></body></html>');
res.end();
}
http.createServer(function(req,res){
console.log("[200] "+req.method+" to "+req.url);
if(req.method == "OPTIONS"){
res.writeHead(200,"OK",{
"Access-Control-Allow-Header":"Content-Type",
"Access-Control-Allow-Methods":"*",
"Access-Control-Allow-Origin":"*"
});
res.end();
}else if(req.url == '/form'&& req.method == 'POST'){
var dataObj = new Object();
var contentType = req.headers["content-type"];
var fullBody = '';
if(contentType){
if(contentType.indexOf("application/x-www-form-urlencode") > -1){
req.on('data',function(chunk){
fullBody += chunk.toString();
});
req.on('end',function(){
var dBody = querystring.parse(fullBody);
dataObj.apples = dBody["apples"];
dataObj.bananas = dBody["bananas"];
dataObj.cherries = dBody["cherries"];
writeResponse(res,dataObj);
});
}else if(contentType.indexOf("application/json") > -1){
req.on('data',function(chunk){
fullBody += chunk.toString();
});
req.on('end',function(){
dataObj = JSON.parse(fullBody);
writeResponse(res,dataObj);
});
}
}
}
}).listen(8080);The highlighted part in the script: writeResponse function. This function is called after extracting the requested form values and is responsible for producing the response to the browser. Currently, this function will create a simple HTML document, with the following effect:

This response is very simple, and the effect is to let the server calculate the various parameters in the form that the user has passed. The total number of fruits ordered by the input element. The rest of the server-side script is responsible for decoding the various possible data formats sent by the client using Ajax.
1.2 Understand the problem
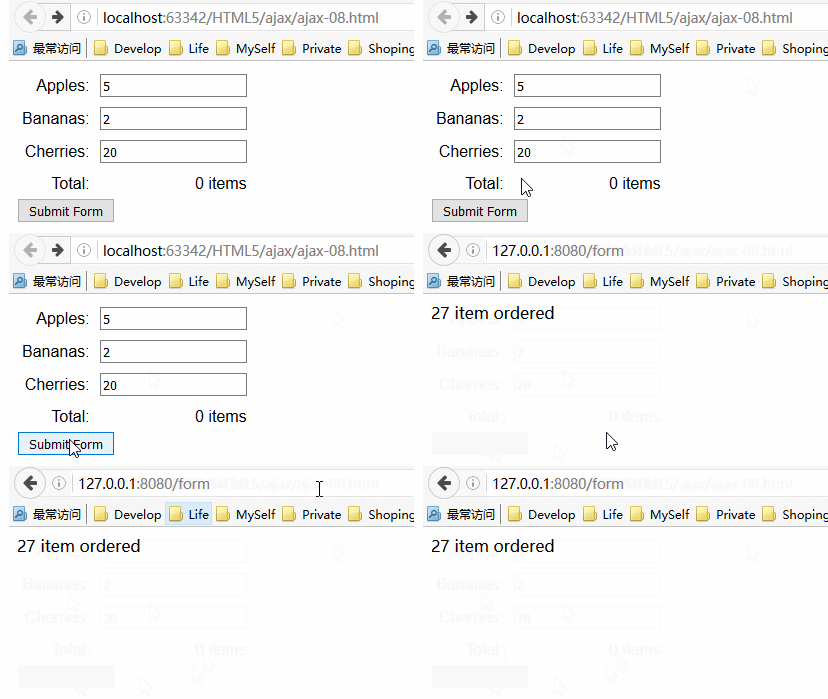
The above picture clearly describes the problem you want to solve with Ajax.
After submitting the form, the browser will display the results on a new page. This means two things:
* The user must wait for the server to process the data and generate a response;
* All document context information is lost because the result is as a new document displayed.
This is the ideal situation for applying Ajax. Requests can be generated asynchronously, allowing the user to continue interacting with the document while the form is being processed.
2. Send a form
#The most basic way to send data to the server is to collect and format it yourself. The following code shows a script added to the previous HTML document example.html. This is the method used:
<!DOCTYPE html>
<html lang="en">
<head>
<meta charset="UTF-8">
<title>手动收集和发送数据</title>
<style>
.table{display: table;}
.row{display: table-row;}
.cell{display: table-cell;padding: 5px;}
.lable{text-align: right;}
</style>
</head>
<body>
<form id="fruitform" method="post" action="http://127.0.0.1:8080/form">
<p class="lable">
<p class="row">
<p class="cell lable">Apples:</p>
<p class="cell"><input name="apples" value="5" /></p>
</p>
<p class="row">
<p class="cell lable">Bananas:</p>
<p class="cell"><input name="bananas" value="2" /></p>
</p>
<p class="row">
<p class="cell lable">Cherries:</p>
<p class="cell"><input name="cherries" value="20" /></p>
</p>
<p class="row">
<p class="cell lable">Total:</p>
<p id="results" class="cell">0 items</p>
</p>
</p>
<button id="submit" type="submit">Submit Form</button>
</form>
<script>
document.getElementById("submit").onclick = handleButtonPress;
var httpRequest;
function handleButtonPress(e){
//对表单里的button元素而言,其默认行为是用常规的非Ajax方式提交表单。这里不想让他发生,所以调用了preventDefault方法
e.preventDefault();
var form = document.getElementById("fruitform");
//收集并格式化各个input的值
var formData ="";
var inputElements = document.getElementsByTagName("input");
for (var i = 0; i < inputElements.length; i++){
formData += inputElements[i].name + "=" + inputElements[i].value +"&";
}
httpRequest = new XMLHttpRequest();
httpRequest.onreadystatechange = handleResponse;
//数据必须通过POST方法发送给服务器,并读取了HTMLFormElement的action属性获得了请求需要发送的URL
httpRequest.open("POST",form.action);
//添加标头来告诉服务器准备接受的数据格式
httpRequest.setRequestHeader('Content-Type','application/x-www-form-urlencoded');
//把想要发送给服务器的字符串作为参数传递给send方法
httpRequest.send(formData);
}
function handleResponse(){
if(httpRequest.readyState == 4 && httpRequest.status == 200){
document.getElementById("results").innerHTML = httpRequest.responseText;
}
}
</script>
</body>
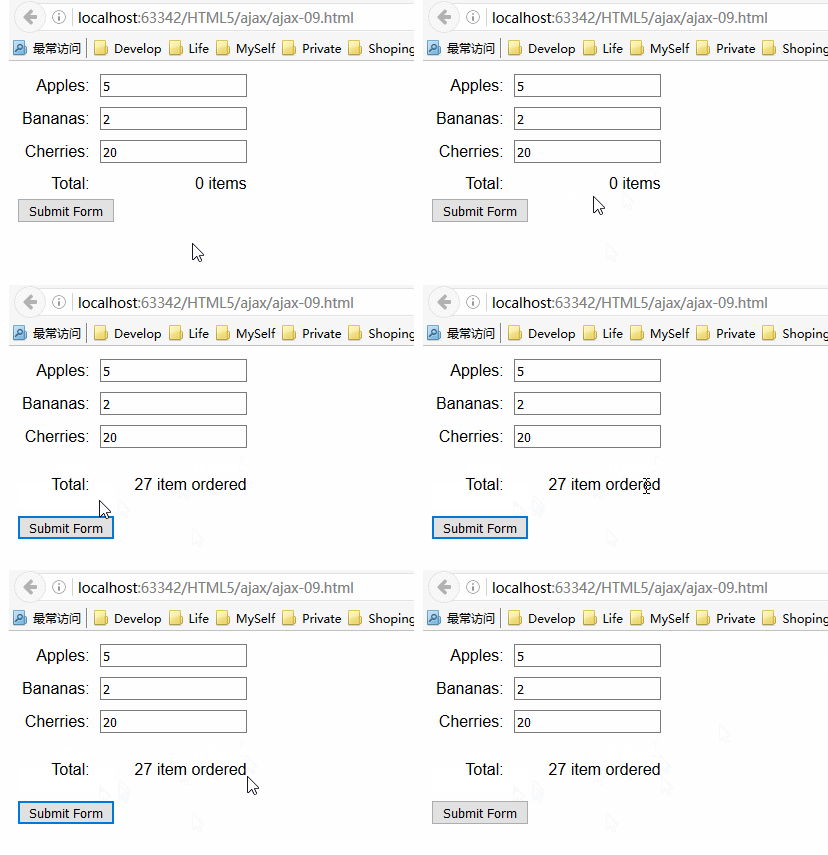
</html>The rendering is as follows:

Server response The HTML document returned after the form is submitted will be displayed on the same page, and the request is executed asynchronously.
3. Sending JSON data
Ajax is not only used to send form data, but can send almost any data, including JavaScript Object Notation (JSON) data, and it has almost become a popular data format. Ajax has its roots in XML, but this format is cumbersome. When running web applications that must transmit large numbers of XML documents, the complexity means real costs in terms of bandwidth and system capacity.
JSON is often referred to as the "skim" alternative to XML. JSON is easy to read and write, more compact than XML, and already has widespread support. JSON originated from JavaScript, but its development has surpassed JavaScript and is understood and used by countless packages and systems.
The following is an example of a simple JavaScript object expressed in JSON:
##
{"bananas":"2","apples":"5","cherries":"20"}<script>
document.getElementById("submit").onclick = handleButtonPress;
var httpRequest;
function handleButtonPress(e){
e.preventDefault();
var form = document.getElementById("fruitform");
var formData = new Object();
var inputElements = document.getElementsByTagName("input");
for(var i=0;i<inputElements.length;i++){
formData[inputElements[i].name] = inputElements[i].value;
}
httpRequest = new XMLHttpRequest();
httpRequest.onreadystatechange = handleResponse;
httpRequest.open("POST",form.action);
httpRequest.setRequestHeader("Content-Type","application/json");
httpRequest.send(JSON.stringify(formData));
}
function handleResponse(){
if(httpRequest.readyState == 4 && httpRequest.status == 200){
document.getElementById("results").innerHTML = httpRequest.responseText;
}
}
</script>Use JSON objects and JSON format to convert each other. (Most browsers support this object directly, but you can also use the script at the following URL to add the same functionality to older browsers: https://github.com/douglascrockford/JSON-js/blob/master/ json2.js) JSON object provides two methods:

在上面的例子中,使用了stringify方法,然后把结果传递给XMLHttpRequest 对象的send方法。此例中只有数据的编码方式发生了变化。提交表单的效果还是一样。
4. 使用FormData对象发送表单数据
另一种更简洁的表单收集方式是使用一个FormData对象,它是在XMLHttpRequest的第二级规范中定义的。
由于原来的Node.js代码有点问题,此处用C#新建文件 fruitcalc.aspx作为处理请求的服务器。其cs代码如下:
using System;
namespace Web4Luka.Web.ajax.html5
{
public partial class fruitcalc : System.Web.UI.Page
{
protected void Page_Load(object sender, EventArgs e)
{
int total = 0;
if (Request.HttpMethod == "POST")
{
if (Request.ContentType.IndexOf("multipart/form-data") > -1)
{
for (int i = 0; i < Request.Form.Count; i++)
{
total += Int32.Parse(Request.Form[i]);
}
}
writeResponse(Response, total);
}
}
private void writeResponse(System.Web.HttpResponse Response, int total)
{
string strHtml;
Response.AddHeader("Access-Control-Allow-Origin", "http://localhost:63342");
strHtml = total + " item ordered";
Response.Write(strHtml);
}
}
}4.1 创建 FormData 对象
创建FormData对象时可以传递一个HTMLFormElement对象,这样表单里所有的元素的值都会被自动收集起来。示例如下:
<!DOCTYPE html>
<html lang="en">
<head>
<meta charset="UTF-8">
<title>使用FormData对象</title>
<style>
.row{display: table-row;}
.cell{display: table-cell;padding: 5px;}
.lable{text-align: right;}
</style>
</head>
<body>
<form id="fruitform" method="post" action="http://localhost:53396/ajax/html5/fruitcalc.aspx">
<p class="lable">
<p class="row">
<p class="cell lable">Apples:</p>
<p class="cell"><input name="apples" value="5" /></p>
</p>
<p class="row">
<p class="cell lable">Bananas:</p>
<p class="cell"><input name="bananas" value="2" /></p>
</p>
<p class="row">
<p class="cell lable">Cherries:</p>
<p class="cell"><input name="cherries" value="20" /></p>
</p>
<p class="row">
<p class="cell lable">Total:</p>
<p id="results" class="cell">0 items</p>
</p>
</p>
<button id="submit" type="submit">Submit Form</button>
</form>
<script>
document.getElementById("submit").onclick = handleButtonPress;
var httpRequest;
function handleButtonPress(e){
e.preventDefault();
var form = document.getElementById("fruitform");
var formData = new FormData(form);
httpRequest = new XMLHttpRequest();
httpRequest.onreadystatechange = handleResponse;
httpRequest.open("POST",form.action);
httpRequest.send(formData);
}
function handleResponse(){
if(httpRequest.readyState == 4 && httpRequest.status == 200){
document.getElementById("results").innerHTML = httpRequest.responseText;
}
}
</script>
</body>
</html>当然,关键的变化是使用了FormData对象:
var formData = new FormData(form);
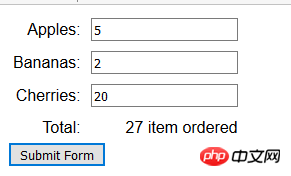
其他需要注意的地方是不再设置Content-Type标头的值了。如果使用FormData对象,数据总是会被编码为multipart/form-data 。本例提交表单后,显示效果如下:

4.2 修改FormData对象
FormData对象定义了一个方法,它允许给要发送到服务器的数据添加名称/值对。

可以用append方法增补从表单中收集的数据,也可以在不使用HTMLFormElement的情况下创建FormData对象。这就意味着可以使用append方法来选择向客户端发送哪些数据值。修改上一示例的JavaScript代码如下:
<script>
document.getElementById("submit").onclick = handleButtonPress;
var httpRequest;
function handleButtonPress(e){
e.preventDefault();
var form = document.getElementById("fruitform");
var formData = new FormData();
var inputElements = document.getElementsByTagName("input");
for(var i=0;i<inputElements.length;i++){
if(inputElements[i].name != "cherries"){
formData.append(inputElements[i].name,inputElements[i].value);
}
}
httpRequest = new XMLHttpRequest();
httpRequest.onreadystatechange = handleResponse;
httpRequest.open("POST",form.action);
httpRequest.send(formData);
}
function handleResponse(){
if(httpRequest.readyState == 4 && httpRequest.status == 200){
document.getElementById("results").innerHTML = httpRequest.responseText;
}
}
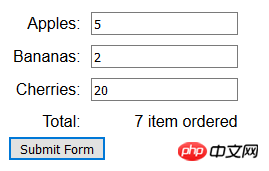
</script>此段脚本里,创建FormData对象时并没有提供HTMLFormElement对象。随后用DOM找到文档里所有的input元素,并为那些name属性的值不是cherries的元素添加名称/值对。此例提交表单后,显示效果如下:

5. 发送文件
可以使用FormData 对象和type 属性为 file 的input 元素向服务器发送文件。当表单提交时,FormData对象会自动确保用户选择的文件内容与其他的表单值一同上传。下面的例子展示了如何以这种方式使用FormData对象。
<!DOCTYPE html>
<html lang="en">
<head>
<meta charset="UTF-8">
<title>使用FormData对象发送文件到服务器</title>
<style>
.row{display: table-row;}
.cell{display: table-cell;padding: 5px;}
.lable{text-align: right;}
</style>
</head>
<body>
<form id="fruitform" method="post" action="http://localhost:53396/ajax/html5/fruitcalc.aspx">
<p class="lable">
<p class="row">
<p class="cell lable">Apples:</p>
<p class="cell"><input name="apples" value="5" /></p>
</p>
<p class="row">
<p class="cell lable">Bananas:</p>
<p class="cell"><input name="bananas" value="2" /></p>
</p>
<p class="row">
<p class="cell lable">Cherries:</p>
<p class="cell"><input name="cherries" value="20" /></p>
</p>
<p class="row">
<p class="cell lable">File:</p>
<p class="cell"><input type="file" name="file" /></p>
</p>
<p class="row">
<p class="cell lable">Total:</p>
<p id="results" class="cell">0 items</p>
</p>
</p>
<button id="submit" type="submit">Submit Form</button>
</form>
<script>
document.getElementById("submit").onclick = handleButtonPress;
var httpRequest;
function handleButtonPress(e){
e.preventDefault();
var form = document.getElementById("fruitform");
var formData = new FormData(form);
httpRequest = new XMLHttpRequest();
httpRequest.onreadystatechange = handleResponse;
httpRequest.open("POST",form.action);
httpRequest.send(formData);
}
function handleResponse(){
if(httpRequest.readyState == 4 && httpRequest.status == 200){
document.getElementById("results").innerHTML = httpRequest.responseText;
}
}
</script>
</body>
</html>此例里,最明显的变化发生在 form元素上。添加了input元素后,FormData对象就会上传用户所选的任意文件。
修改 fruitcalc.aspx 的cs文件如下:
using System;
using System.Web;
namespace Web4Luka.Web.ajax.html5
{
public partial class fruitcalc : System.Web.UI.Page
{
protected void Page_Load(object sender, EventArgs e)
{
int total = 0;
if (Request.HttpMethod == "POST")
{
if (Request.ContentType.IndexOf("multipart/form-data") > -1)
{
for (int i = 0; i < Request.Form.Count; i++)
{
total += Int32.Parse(Request.Form[i]);
}
if (Request.Files["file"] != null)
{
HttpPostedFile file = Request.Files["file"];
file.SaveAs(Server.MapPath("/upload/pictures/" + file.FileName));
}
}
writeResponse(Response, total);
}
}
private void writeResponse(System.Web.HttpResponse Response, int total)
{
string strHtml;
Response.AddHeader("Access-Control-Allow-Origin", "http://localhost:63342");
strHtml = total + " item ordered";
Response.Write(strHtml);
}
}
}此例的显示效果如下:

相关推荐:
The above is the detailed content of ajax sends data to server. For more information, please follow other related articles on the PHP Chinese website!

Hot AI Tools

Undresser.AI Undress
AI-powered app for creating realistic nude photos

AI Clothes Remover
Online AI tool for removing clothes from photos.

Undress AI Tool
Undress images for free

Clothoff.io
AI clothes remover

AI Hentai Generator
Generate AI Hentai for free.

Hot Article

Hot Tools

Notepad++7.3.1
Easy-to-use and free code editor

SublimeText3 Chinese version
Chinese version, very easy to use

Zend Studio 13.0.1
Powerful PHP integrated development environment

Dreamweaver CS6
Visual web development tools

SublimeText3 Mac version
God-level code editing software (SublimeText3)

Hot Topics
 Use ddrescue to recover data on Linux
Mar 20, 2024 pm 01:37 PM
DDREASE is a tool for recovering data from file or block devices such as hard drives, SSDs, RAM disks, CDs, DVDs and USB storage devices. It copies data from one block device to another, leaving corrupted data blocks behind and moving only good data blocks. ddreasue is a powerful recovery tool that is fully automated as it does not require any interference during recovery operations. Additionally, thanks to the ddasue map file, it can be stopped and resumed at any time. Other key features of DDREASE are as follows: It does not overwrite recovered data but fills the gaps in case of iterative recovery. However, it can be truncated if the tool is instructed to do so explicitly. Recover data from multiple files or blocks to a single
 Open source! Beyond ZoeDepth! DepthFM: Fast and accurate monocular depth estimation!
Apr 03, 2024 pm 12:04 PM
0.What does this article do? We propose DepthFM: a versatile and fast state-of-the-art generative monocular depth estimation model. In addition to traditional depth estimation tasks, DepthFM also demonstrates state-of-the-art capabilities in downstream tasks such as depth inpainting. DepthFM is efficient and can synthesize depth maps within a few inference steps. Let’s read about this work together ~ 1. Paper information title: DepthFM: FastMonocularDepthEstimationwithFlowMatching Author: MingGui, JohannesS.Fischer, UlrichPrestel, PingchuanMa, Dmytr
 Google is ecstatic: JAX performance surpasses Pytorch and TensorFlow! It may become the fastest choice for GPU inference training
Apr 01, 2024 pm 07:46 PM
The performance of JAX, promoted by Google, has surpassed that of Pytorch and TensorFlow in recent benchmark tests, ranking first in 7 indicators. And the test was not done on the TPU with the best JAX performance. Although among developers, Pytorch is still more popular than Tensorflow. But in the future, perhaps more large models will be trained and run based on the JAX platform. Models Recently, the Keras team benchmarked three backends (TensorFlow, JAX, PyTorch) with the native PyTorch implementation and Keras2 with TensorFlow. First, they select a set of mainstream
 The vitality of super intelligence awakens! But with the arrival of self-updating AI, mothers no longer have to worry about data bottlenecks
Apr 29, 2024 pm 06:55 PM
I cry to death. The world is madly building big models. The data on the Internet is not enough. It is not enough at all. The training model looks like "The Hunger Games", and AI researchers around the world are worrying about how to feed these data voracious eaters. This problem is particularly prominent in multi-modal tasks. At a time when nothing could be done, a start-up team from the Department of Renmin University of China used its own new model to become the first in China to make "model-generated data feed itself" a reality. Moreover, it is a two-pronged approach on the understanding side and the generation side. Both sides can generate high-quality, multi-modal new data and provide data feedback to the model itself. What is a model? Awaker 1.0, a large multi-modal model that just appeared on the Zhongguancun Forum. Who is the team? Sophon engine. Founded by Gao Yizhao, a doctoral student at Renmin University’s Hillhouse School of Artificial Intelligence.
 Slow Cellular Data Internet Speeds on iPhone: Fixes
May 03, 2024 pm 09:01 PM
Facing lag, slow mobile data connection on iPhone? Typically, the strength of cellular internet on your phone depends on several factors such as region, cellular network type, roaming type, etc. There are some things you can do to get a faster, more reliable cellular Internet connection. Fix 1 – Force Restart iPhone Sometimes, force restarting your device just resets a lot of things, including the cellular connection. Step 1 – Just press the volume up key once and release. Next, press the Volume Down key and release it again. Step 2 – The next part of the process is to hold the button on the right side. Let the iPhone finish restarting. Enable cellular data and check network speed. Check again Fix 2 – Change data mode While 5G offers better network speeds, it works better when the signal is weaker
 How to configure Dnsmasq as a DHCP relay server
Mar 21, 2024 am 08:50 AM
The role of a DHCP relay is to forward received DHCP packets to another DHCP server on the network, even if the two servers are on different subnets. By using a DHCP relay, you can deploy a centralized DHCP server in the network center and use it to dynamically assign IP addresses to all network subnets/VLANs. Dnsmasq is a commonly used DNS and DHCP protocol server that can be configured as a DHCP relay server to help manage dynamic host configurations in the network. In this article, we will show you how to configure dnsmasq as a DHCP relay server. Content Topics: Network Topology Configuring Static IP Addresses on a DHCP Relay D on a Centralized DHCP Server
 The U.S. Air Force showcases its first AI fighter jet with high profile! The minister personally conducted the test drive without interfering during the whole process, and 100,000 lines of code were tested for 21 times.
May 07, 2024 pm 05:00 PM
Recently, the military circle has been overwhelmed by the news: US military fighter jets can now complete fully automatic air combat using AI. Yes, just recently, the US military’s AI fighter jet was made public for the first time and the mystery was unveiled. The full name of this fighter is the Variable Stability Simulator Test Aircraft (VISTA). It was personally flown by the Secretary of the US Air Force to simulate a one-on-one air battle. On May 2, U.S. Air Force Secretary Frank Kendall took off in an X-62AVISTA at Edwards Air Force Base. Note that during the one-hour flight, all flight actions were completed autonomously by AI! Kendall said - "For the past few decades, we have been thinking about the unlimited potential of autonomous air-to-air combat, but it has always seemed out of reach." However now,
 Alibaba 7B multi-modal document understanding large model wins new SOTA
Apr 02, 2024 am 11:31 AM
New SOTA for multimodal document understanding capabilities! Alibaba's mPLUG team released the latest open source work mPLUG-DocOwl1.5, which proposed a series of solutions to address the four major challenges of high-resolution image text recognition, general document structure understanding, instruction following, and introduction of external knowledge. Without further ado, let’s look at the effects first. One-click recognition and conversion of charts with complex structures into Markdown format: Charts of different styles are available: More detailed text recognition and positioning can also be easily handled: Detailed explanations of document understanding can also be given: You know, "Document Understanding" is currently An important scenario for the implementation of large language models. There are many products on the market to assist document reading. Some of them mainly use OCR systems for text recognition and cooperate with LLM for text processing.


