

Nodejs combines Socket.IO to realize instant messaging function

This article mainly introduces the instant messaging function implemented by nodejs combined with Socket.IO. It analyzes the relevant operating skills and precautions of nodejs combined with Socket.IO to implement instant messaging in detail in the form of examples. Friends who need it can refer to it. I hope it can help. Everyone.
Dynamic web
Before HTML5, web design did not consider dynamics. It was always designed around documents. We Looking at the older websites in the past, they were basically used to display a single document at a certain moment. The user requested a web page once and obtained a page. However, as time goes by, people want the web to do more things, and Rather than simply displaying documents, JavaScript has been at the center of how developers have pushed the functionality of web pages.
Ajax is undoubtedly a major development in dynamic Web pages. It no longer requires us to refresh the entire page even if we update a little content. However, in some aspects, it reflects its shortcomings. It's okay if you request data from the server, but what if the server wants to push data to the browser. Ajax technology cannot easily support pushing data to customers. Although it can, it requires many cross-border obstacles, and different browsers work differently. For example, IE and FireBox have different kernels, so their working methods are also different. no the same.
WebSocket is a response to the problem of two-way communication between the server and the client. The idea was to start from the ground up and design a standard that developers could use to create applications in a consistent way, rather than going through complicated settings that didn't always work in all browsers. The idea is to keep a persistent open connection between the web server and the browser, so that both the server and the browser can push data when they want. Because the connection is persistent, the exchange of data is very fast and becomes real-time.
Socket.IO
Having said so much, let’s introduce the author. Socket.IO is a module of Node.js. He Provides a simple way to communicate through WebSocket. The WebSocket protocol is complex, but Socket.IO provides components for both the server and the client, so only one module is needed to add support for WebSocket to the application. It also supports different browsers.
Basic Socket.IO
Socket.IO can work on both the server and the client. To use it, you must add it to the server-side JavaScript (Node.js) and client-side JavaScript (JQuery), this is because internal communication is usually bidirectional, so Sokcet.IO needs to be able to work on both sides.
var server = http.createServer(function (req,res){
  fs.readFile('./index.html',function(error,data){
    res.writeHead(200,{'Content-Type':'text/html'});
    res.end(data,'utf-8');
  });
}).listen(3000,"127.0.0.1");
console.log('Server running at http://127.0.0.1:3000/');And the Socket.IO library must be included to add the Socket.IO function.
var io = require('socket.io').listen(server);
Then add an event to respond to whether the client is connected or disconnected. The event is as follows:
io.sockets.on('connection',function(socket){
  console.log('User connected');
  socket.on('disconnect',function(){
    console.log('User disconnected');
  });
});Do you think it is very simple? Let’s take a look at how the complete code implementation is implemented:
Simple Socket.IO application
New app.js
Create a new folder socket.io, and create a new app under this folder. js, write the following code:
var http = require('http');
var fs = require('fs');
var server = http.createServer(function (req,res){
  fs.readFile('./index.html',function(error,data){
    res.writeHead(200,{'Content-Type':'text/html'});
    res.end(data,'utf-8');
  });
}).listen(3000,"127.0.0.1");
console.log('Server running at http://127.0.0.1:3000/');
var io = require('socket.io').listen(server);
io.sockets.on('connection',function(socket){
  console.log('User connected');
  socket.on('disconnect',function(){
    console.log('User disconnected');
  });
});New index.html
Create a new index.html file, the code is as follows:
<!DOCTYPE html> <html> <head> <meta charset="utf-8" /> <title>Socket.IO Example</title> </head> <body> <h1>Socket.IO Example</h1> <script src="/socket.io/socket.io.js"></script> <script> var socket = io.connect('http://127.0.0.1:3000'); </script> </body> </html>
Create new package.json
Create new package.json to introduce the module.
{
  "name":"socketio_example",
  "version":"4.13.2",
  "private":true,
  "dependencies":{
    "socket.io":"1.4.5"
  }
}Version number You can enter your own nodejs -V, or socket.io -v to check your version number.
Run
If you have not installed Socket.IO, you can run the following code. If you have installed it, this step will be skipped automatically.
npm install socket.io
Run the following command from the terminal to install the module
npm install
Run the following command to start the server
node app.js
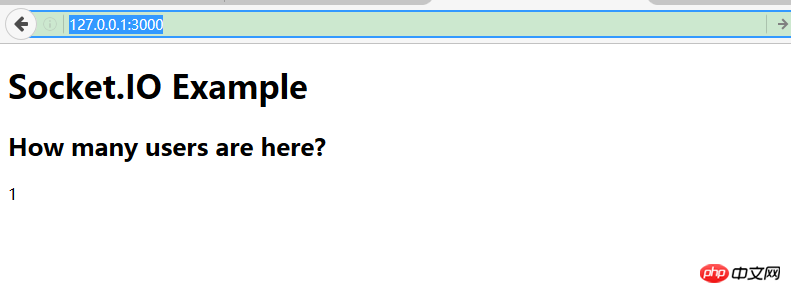
Open the browser, enter http://127.0.0.1:3000/, open a few more tabs, enter the URL in each, then close any tab, and then take a look at our Is the cmd command window as follows:

Here will be recorded in detail how many users are used to connect and how many users are disconnected, so that we can count our web pages of visits.
Sending data from the server to the client
In the above example, we have already implemented the connection or disconnection of the server for recording, but if we What should we do if we want to push messages? For example, if our friend's QQ is online, Tencent will cough to remind us that our friend is online. Let's take a look at this function.
Send to a single user
io.sockets.on('connection',function(socket){
    socket.emit('message',{text:'你上线了'});
});Send to all users
io.sockets.on('connection',function(socket){
    socket.broadcast.emit('message',{'你的好某XXX上线了'});
});Whether it is sent to a single user or all users, this message is written by yourself, but it needs to be used on the client, so pay attention to the naming.
Client
在客户端我们可以添加侦听事件来接收数据。
var socket = io.connect('http://127.0.0.1:3000');
socket.on('message',function(data){
  alert(data.text);
})通过这些功能,我们就在第一个例子的基础上,实现用户数量的统计。这里只需要在服务端设置一个变量,count,如果有一个上线,那么就数量+1,并通知所有用户,最新的在线人数。
新建app.js
var http = require('http');
var fs = require('fs');
var count = 0;
var server = http.createServer(function (req,res){
  fs.readFile('./index.html',function(error,data){
    res.writeHead(200,{'Content-Type':'text/html'});
    res.end(data,'utf-8');
  });
}).listen(3000,"127.0.0.1");
console.log('Server running at http://127.0.0.1:3000/');
var io = require('socket.io').listen(server);
io.sockets.on('connection',function(socket){
  count++;
  console.log('User connected' + count + 'user(s) present');
  socket.emit('users',{number:count});
  socket.broadcast.emit('users',{number:count});
  socket.on('disconnect',function(){
    count--;
    console.log('User disconnected');
    socket.broadcast.emit('users',{number:count});
  });
});创建index.html文件
<!DOCTYPE html>
<html>
<head>
<meta charset="utf-8" />
<title>Socket.IO Example</title>
</head>
<body>
<h1>Socket.IO Example</h1>
<h2>How many users are here?</h2>
<p id="count"></p>
<script src="http://***.***.**.***:9001/jquery.min.js"></script>
<script src="/socket.io/socket.io.js"></script>
<script>
var socket = io.connect('http://127.0.0.1:3000');
var count = document.getElementById('count');
socket.on('users',function(data){
console.log('Got update from the server');
console.log('There are ' + data.number + 'users');
count.innerHTML = data.number
});
</script>
</body>
</html>创建package.json文件
{
  "name":"socketio_example",
  "version":"4.13.2",
  "private":true,
  "dependencies":{
    "socket.io":"1.4.5"
  }
}安装模块npm install
启动服务器node app.js
打开浏览器,输入http://127.0.0.1:3000,可以看到如下图片:
再打开一个连接http://127.0.0.1:3000,可以看到如下结果:
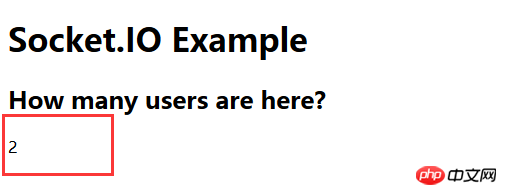
可以看到如果我们打开两个连接,那么两个页签都会显示当前又两个用户在线,如果关闭其中一个,我们可以看到又显示只有一个用户在线。
将数据广播给客户端
接下来我们来看看Socket.IO是如何实现客户端与客户端的通信呢。
要想实现该功能,首先需要客户端将消息发送到服务端,·然后服务端发送给除自己之外的其他客户。服务器将消息发送给客户端的方法在上一个例子中我们已经实现了,那么我们需要的是客户端把接收到的消息发送给服务器。
下边的代码思想是利用表单来实现的。
<form id="message-form" action="#">
<textarea id="message" rows="4" cols="30"></textarea>
<input type="submit" value="Send message" />
</form>
<script src="http://***.***.***.**:9001/jquery.min.js"></script>
<script src="/socket.io/socket.io.js"></script>
<script>
var socket = io.connect('http://127.0.0.1:3000');
var message = document.getElementById('message');
$(message.form).submit(function() {
socket.emit('message', { text: message.value });
return false;
});
socket.on('push message', function (data) {
$('form').after('<p>' + data.text + '</p>');
});
</script>实现的思想是,将JQuery和SocketIO库包含进来,只是浏览器拦截127.0.0.1:3000的服务,使用Jquery的submit方法加入侦听期,等候用户提交表单。
发送消息给Socket>IO服务器,文本区域的内容位消息发送。
添加return false ,防止表单在浏览器窗口提交。
在上边已经说过服务器如何广播消息,下边我们说一下客户端如何显示客户端发送的消息。
socket.on('push message', function (data) {
$('form').after('<p>' + data.text + '</p>');
})实例实现
创建messaging的新文件夹
在文件夹下创建package.json文件,代码如下:
{
  "name":"socketio_example",
  "version":"4.13.2",
  "private":true,
  "dependencies":{
    "socket.io":"1.4.5"
  }
}创建app.js文件,代码如下:
var http = require('http');
var fs = require('fs');
var server = http.createServer(function (req,res){
  fs.readFile('./index.html',function(error,data){
    res.writeHead(200,{'Content-Type':'text/html'});
    res.end(data,'utf-8');
  });
}).listen(3000,"127.0.0.1");
console.log('Server running at http://127.0.0.1:3000/');
var io = require('socket.io').listen(server);
io.sockets.on('connection',function(socket){
  socket.on('message',function(data){
    socket.broadcast.emit('push message',data);
  });
});创建index.html
<!DOCTYPE html>
<html lang="en">
<head>
<meta charset="utf-8" />
<title>Socket.IO Example</title>
</head>
<body>
<h1>Socket.IO Example</h1>
<form id="message-form" action="#">
<textarea id="message" rows="4" cols="30"></textarea>
<input type="submit" value="Send message" />
</form>
<script src="http://222.222.124.77:9001/jquery.min.js"></script>
<script src="/socket.io/socket.io.js"></script>
<script>
var socket = io.connect('http://127.0.0.1:3000');
var message = document.getElementById('message');
$(message.form).submit(function() {
socket.emit('message', { text: message.value });
return false;
});
socket.on('push message', function (data) {
$('form').after('<p>' + data.text + '</p>');
});
</script>
</body>
</html>加载模块npm install
启动服务器node app.js
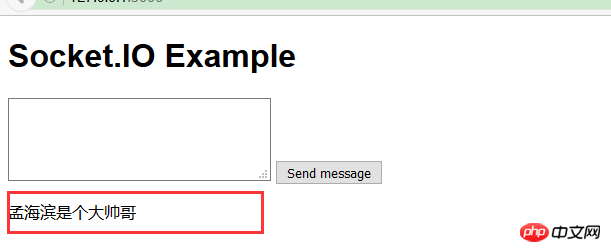
然后打开浏览器的多个页签,都输入http://127.0.0.1:3000
可以看到我们再任何一个窗口输入内容,都会在其他的页面显示我们输入的内容,效果如下:

小结
这篇博客好长,其实说了这么多,还是有很多的东西没有说,但是我们还是讨论了Socket.IO如何实现动态的,通过服务端能显示用户的连接,和统计链接次数统计,到最后的消息的通知和聊天功能的实现。在我们的生活中这种例子比比解释,例如QQ,例如淘宝的抢购,都是可以通过这种方式实现的,这样我们就能实时的实现动态的功能了。
相关推荐:
HTML5+NodeJs实现WebSocket即时通讯的示例代码分享
Workerman+layerIM+ThinkPHP5的webIM,即时通讯系统
The above is the detailed content of Nodejs combines Socket.IO to realize instant messaging function. For more information, please follow other related articles on the PHP Chinese website!

Hot AI Tools

Undresser.AI Undress
AI-powered app for creating realistic nude photos

AI Clothes Remover
Online AI tool for removing clothes from photos.

Undress AI Tool
Undress images for free

Clothoff.io
AI clothes remover

AI Hentai Generator
Generate AI Hentai for free.

Hot Article
Hot Tools

Notepad++7.3.1
Easy-to-use and free code editor

SublimeText3 Chinese version
Chinese version, very easy to use

Zend Studio 13.0.1
Powerful PHP integrated development environment

Dreamweaver CS6
Visual web development tools

SublimeText3 Mac version
God-level code editing software (SublimeText3)
Hot Topics
 1377
1377
 52
52

 Is nodejs a backend framework?
Apr 21, 2024 am 05:09 AM
Is nodejs a backend framework?
Apr 21, 2024 am 05:09 AM
Node.js can be used as a backend framework as it offers features such as high performance, scalability, cross-platform support, rich ecosystem, and ease of development.
 How to connect nodejs to mysql database
Apr 21, 2024 am 06:13 AM
How to connect nodejs to mysql database
Apr 21, 2024 am 06:13 AM
To connect to a MySQL database, you need to follow these steps: Install the mysql2 driver. Use mysql2.createConnection() to create a connection object that contains the host address, port, username, password, and database name. Use connection.query() to perform queries. Finally use connection.end() to end the connection.
 What are the global variables in nodejs
Apr 21, 2024 am 04:54 AM
What are the global variables in nodejs
Apr 21, 2024 am 04:54 AM
The following global variables exist in Node.js: Global object: global Core module: process, console, require Runtime environment variables: __dirname, __filename, __line, __column Constants: undefined, null, NaN, Infinity, -Infinity
 Is there a big difference between nodejs and java?
Apr 21, 2024 am 06:12 AM
Is there a big difference between nodejs and java?
Apr 21, 2024 am 06:12 AM
The main differences between Node.js and Java are design and features: Event-driven vs. thread-driven: Node.js is event-driven and Java is thread-driven. Single-threaded vs. multi-threaded: Node.js uses a single-threaded event loop, and Java uses a multi-threaded architecture. Runtime environment: Node.js runs on the V8 JavaScript engine, while Java runs on the JVM. Syntax: Node.js uses JavaScript syntax, while Java uses Java syntax. Purpose: Node.js is suitable for I/O-intensive tasks, while Java is suitable for large enterprise applications.
 What is the difference between npm and npm.cmd files in the nodejs installation directory?
Apr 21, 2024 am 05:18 AM
What is the difference between npm and npm.cmd files in the nodejs installation directory?
Apr 21, 2024 am 05:18 AM
There are two npm-related files in the Node.js installation directory: npm and npm.cmd. The differences are as follows: different extensions: npm is an executable file, and npm.cmd is a command window shortcut. Windows users: npm.cmd can be used from the command prompt, npm can only be run from the command line. Compatibility: npm.cmd is specific to Windows systems, npm is available cross-platform. Usage recommendations: Windows users use npm.cmd, other operating systems use npm.
 Is nodejs a back-end development language?
Apr 21, 2024 am 05:09 AM
Is nodejs a back-end development language?
Apr 21, 2024 am 05:09 AM
Yes, Node.js is a backend development language. It is used for back-end development, including handling server-side business logic, managing database connections, and providing APIs.
 How to deploy nodejs project to server
Apr 21, 2024 am 04:40 AM
How to deploy nodejs project to server
Apr 21, 2024 am 04:40 AM
Server deployment steps for a Node.js project: Prepare the deployment environment: obtain server access, install Node.js, set up a Git repository. Build the application: Use npm run build to generate deployable code and dependencies. Upload code to the server: via Git or File Transfer Protocol. Install dependencies: SSH into the server and use npm install to install application dependencies. Start the application: Use a command such as node index.js to start the application, or use a process manager such as pm2. Configure a reverse proxy (optional): Use a reverse proxy such as Nginx or Apache to route traffic to your application
 Which one to choose between nodejs and java?
Apr 21, 2024 am 04:40 AM
Which one to choose between nodejs and java?
Apr 21, 2024 am 04:40 AM
Node.js and Java each have their pros and cons in web development, and the choice depends on project requirements. Node.js excels in real-time applications, rapid development, and microservices architecture, while Java excels in enterprise-grade support, performance, and security.
