
This article mainly introduces the installation and pit filling of elastic search on centos7. The editor thinks it is quite good. Now I will share it with you and give it as a reference. Let’s follow the editor to take a look, I hope it can help everyone.
This article introduces the installation and pit filling of elastic search on centos7. I would like to share it with you. Let’s take a look.
Course Recommendation →: "Elasticsearch Full Text Search Practical Combat" (Practical Video)
From the course"Ten Million Level Data concurrency solution (theory + practical)》
Download elastic search 5.3.0
wget https://artifacts.elastic.co/downloads/elasticsearch/elasticsearch-5.3.0.tar.gz
mv elasticsearch-5.3.0.tar.gz /opt
cd /opt
tar -xzvf elasticsearch-5.3.0.tar.gz
cd elasticsearch-5.3.0/
Start ES
cd /bin
./elasticsearch
According to theory, it should be ok, but then various pitfalls appeared one by one, respectively explaining
Error 1: error='Cannot allocate memory' (errno= 12)

error='Cannot allocate memory'
solutions:
Since elasticsearch5.0 allocates jvm space size of 2g by default, it needs to be changed to a smaller size
vim config/jvm.options
-Xms2g → -Xms512m
-Xmx2g → -Xmx512m
Error 2: can not run elasticsearch as root

can not run elasticsearch as root
solutions:
In Linux environment, elasticsearch is not allowed to run as root Run with root privileges! So you need to create a non-root user, start as a non-root user es
groupadd elk # 创建用户组elk
useradd elk -g elk -p 111111 # 创建新用户elk,-g elk 设置其用户组为 elk,-p 111 设置其密码6个1
chown -R elk:elk /opt # 更改 /opt 文件夹及内部文件的所属用户及组为 elk:elk
su elk # 切换到非root用户elk下来
Error 3: (1) max file descriptors [4096] for elasticsearch process is too low, increase to at least [65536]
(2) max virtual memory areas vm.max_map_count [65530] is too low, increase to at least [262144]
This error occurs when modifying network.host in config/elasticsearch.yml to network.host: 0.0.0.0 so that any IP on the external network can access it.
solutions:
Switch to the root user, and then
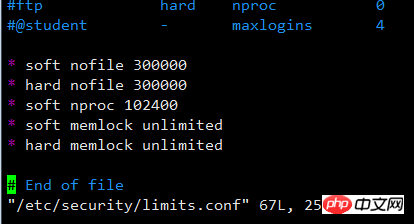
vim /etc/security/limits.conf
* soft nofile 300000
* hard nofile 300000
* soft nproc 102400
* soft memlock unlimited
* hard memlock unlimited
Error 4: max virtual memory areas vm.max_map_count [65530] is too low, increase to at least [262144]
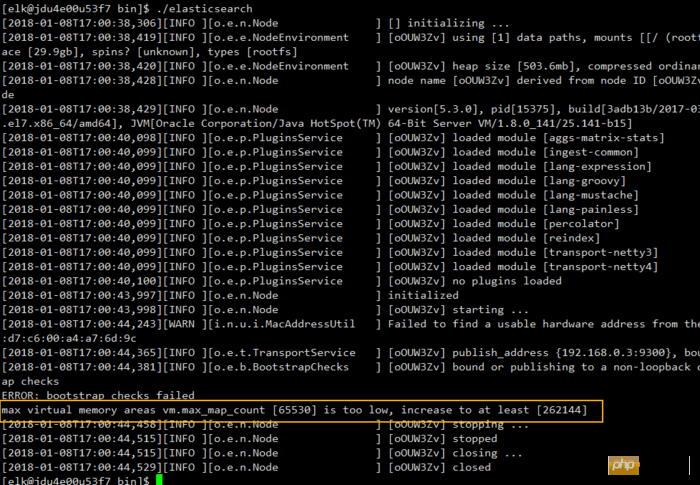
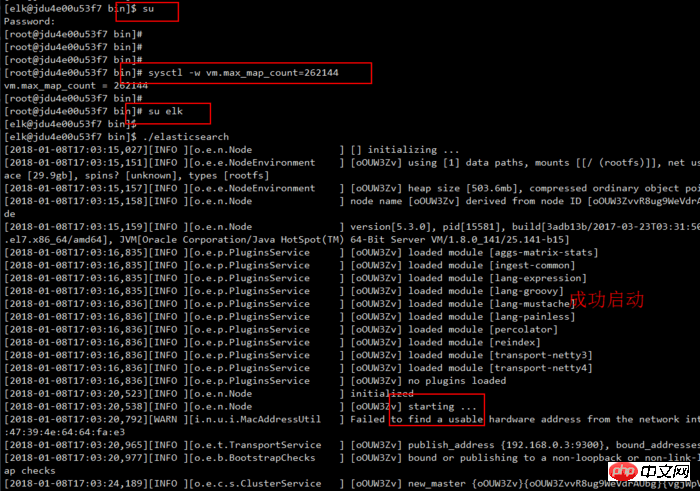
sysctl -w vm.max_map_count=262144
echo "vm.max_map_count=262144" > /etc/sysctl.conf
sysctl -p

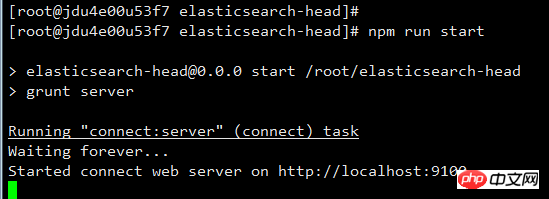
Install the visualization plug-in elasticsearch-head
git clone git://github.com/mobz/elasticsearch-head.git
cd elasticsearch-head
npm install  # 此处我试图用cnpm install有问题,用npm可以
npm run start

Finally, let’s do a simple test
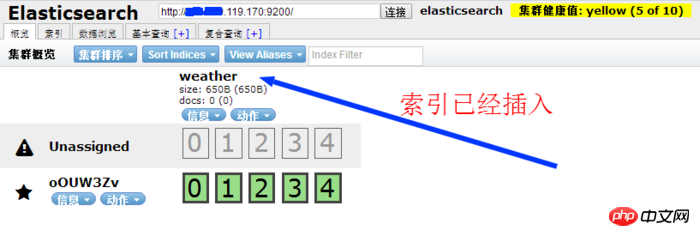
Create a new Index and make a PUT request directly to the Elastic server. The following example creates a new Index named weather.
Detailed installation and configuration of apache, php7 and mysql5.7 in CentOS7
Introduction to the installation method of Mysql5.7.19 under Centos7
What is the difference between installing mysql under centos7 and under linux
The above is the detailed content of Detailed explanation of elastic search installation on centos7. For more information, please follow other related articles on the PHP Chinese website!


