

Learn simple vuex and modularization

Vuex emphasizes the use of a single state tree, that is, there is only one store in a project. This store centrally manages all the data in the project and the operations on the data. But the problem this brings is that the store may be very bloated and difficult to maintain, so the state tree needs to be split into modules.
Example tutorial
The example is built on the basis of vue-cli. The following is the content directory under the src file.
├── App.vue
├── components // 组件文件夹
│ ├── tab1.vue
│ ├── tab2.vue
│ ├── tab3.vue
│ └── tab4.vue
├── main.js // vue的主文件入口
├── router // vue-router文件
│ └── index.js
└── store // vuex文件
 ├── action.js // action
 ├── getter.js // getter
 ├── index.js // vuex的主文件
 ├── module // 模块文件
 │ ├── tab2.js
 │ └── tab3.js
 ├── mutation-type.js // mutation常量名文件
 └── mutation.js // mutation
The effect is like this (don’t dislike the simplicity)
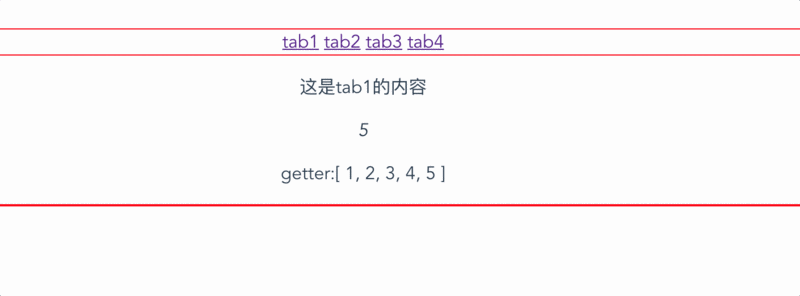
In this example, all the relevant knowledge of vuex mentioned in the document I have used it once, including module-related knowledge, and basically covered all general usage scenarios.
No more nonsense, let’s get started.
First of all, app.vue and router are related to routing. They are very simple things. You can understand them by looking at the documentation.
Modularization of vuex
Before writing this example, I read a lot of open source project code. It was quite fresh at first. After all, I have not used vuex in depth in previous projects. Basically, all the functions of vuex are completed in a store.js, but the project is complex and it cannot be written like this. There is a need now, so I want to write an example to clarify the ideas in this regard. The result is quite simple.
The content in the store file is built according to the five core concepts of vuex. The advantage of doing so is great convenience for sorting out business logic and later maintenance, such as mutation.js and mutation-type.js. Two files:
// mutation-type.js

const CHANGE_COUNT = 'CHANGE_COUNT';


export default {
 CHANGE_COUNT
}// mutation.js
import type from './mutation-type'
let mutations = {
[type.CHANGE_COUNT](state) {
state.count++
}
}
export default mutationsExtract the method names in the mutation as constants, put them in separate files, and quote the relevant content when using them. This is very convenient for management and understanding what methods exist. It is very Intuitive. On the other hand, sometimes you may need to use action. You can use the same method name and just introduce the constant file.
// action.js
import type from './mutation-type'

let actions = {
 [type.CHANGE_COUNT]({ commit }) {

 commit(type.CHANGE_COUNT)

 }
}

export default actionsHow about this, does it look less messy than writing it in a file?
...mapGetters and...mapActions
tab1.vue:
// tab1.vue
<template>
 <p>
 <p>这是tab1的内容</p>
 <em @click="add">{{count}}</em>
 <p>getter:{{NewArr}}</p>
 </p>
</template>


<script>
import { mapActions, mapGetters } from "vuex";
import type from "../store/mutation-type";
export default {
 computed: {
 ...mapGetters([
 'NewArr'
 ]),
 count: function() {
 return this.$store.state.count;
 },
 },
 methods: {
 ...mapActions({
 CHANGE_COUNT: type.CHANGE_COUNT
 }),
 add: function() {
 this.CHANGE_COUNT(type.CHANGE_COUNT);
 }
 }
};
</script>

<style lang="" scoped>

</style>index.js file:
import Vuex from 'vuex'
import Vue from 'vue'
import actions from './action'
import mutations from './mutation'
import getters from './getter'
import tab2 from './module/tab2'
import tab3 from './module/tab3'

Vue.use(Vuex)

let state = {
 count: 1,
 arr:[]
}


let store = new Vuex.Store({
 state,
 getters,
 mutations,
 actions,
 modules:{
 tab2,tab3
 }

})

export default storevuex It provides something called an auxiliary function. Its advantage is that it allows you to display some things you need to use on one page, and you can also write less content when using it. However, this is not necessary. You can use it according to your needs. .
It should be noted that the places where they take effect are different.
...mapGetters are written in the calculated properties of this page, and then you can use the content in the getters just like using calculated properties.
...mapActions is written in the methods of this page. It can be called in other methods or even written directly in @click, like this:
<em @click="CHANGE_COUNT">{{count}}</em>Jiang Zi, in tab1 The number will increase by 1 each time it is clicked.
mudule
The vuex documentation is vague about the module, so you still have to use it yourself.
In this example, I set up two modules: tab2 and tab3, which correspond to two components with the same name respectively. Of course, I did this just for testing. Just look at tab2.
// module/tab2.js
const tab2 = {
 state: {
 name:`这是tab2模块的内容`
 },
 mutations:{
 change2(state){
  state.name = `我修改了tab2模块的内容`
 }
 },
 getters:{
 name(state,getters,rootState){
  console.log(rootState)
  return state.name + ',使用getters修改'
 }
 }
}

export default tab2;// tab2.vue
<template>
<p>
<p>这是tab2的内容</p>
<strong @click="change">点击使用muttion修改模块tab2的内容:{{info}}</strong>
<h4>{{newInfo}}</h4>
</p>
</template>
<script>
export default {
mounted() {
// console.log(this.$store.commit('change2'))
},
computed: {
info: function() {
return this.$store.state.tab2.name;
},
newInfo(){
return this.$store.getters.name;
}
},
methods: {
change() {
this.$store.commit('change2')
}
}
};
</script>
<style lang="" scoped>
</style>This example mainly focuses on how to call stated in the module on the page.
First let’s talk about state. This is very simple. Just write it like this on the page:
this.$store.steta.tab2(模块名).name
Console $store in the mounted section of this page. You can see that in the module, stete has added a layer. Nested in state.
As for action, mutation, and getter, they are the same as the general usage, there is no difference.
Also, in getters and actions, the state of the root structure can be obtained through rootState. There is no such method in mutation.
Related recommendations:
Vuex improvement learning sharing
About Vuex’s family bucket status management
Implement the initialization method of vuex
The above is the detailed content of Learn simple vuex and modularization. For more information, please follow other related articles on the PHP Chinese website!

Hot AI Tools

Undresser.AI Undress
AI-powered app for creating realistic nude photos

AI Clothes Remover
Online AI tool for removing clothes from photos.

Undress AI Tool
Undress images for free

Clothoff.io
AI clothes remover

Video Face Swap
Swap faces in any video effortlessly with our completely free AI face swap tool!

Hot Article
Hot Tools

Notepad++7.3.1
Easy-to-use and free code editor

SublimeText3 Chinese version
Chinese version, very easy to use

Zend Studio 13.0.1
Powerful PHP integrated development environment

Dreamweaver CS6
Visual web development tools

SublimeText3 Mac version
God-level code editing software (SublimeText3)
Hot Topics
 1387
1387
 52
52

 The easiest way to query the hard drive serial number
Feb 26, 2024 pm 02:24 PM
The easiest way to query the hard drive serial number
Feb 26, 2024 pm 02:24 PM
The hard disk serial number is an important identifier of the hard disk and is usually used to uniquely identify the hard disk and identify the hardware. In some cases, we may need to query the hard drive serial number, such as when installing an operating system, finding the correct device driver, or performing hard drive repairs. This article will introduce some simple methods to help you check the hard drive serial number. Method 1: Use Windows Command Prompt to open the command prompt. In Windows system, press Win+R keys, enter "cmd" and press Enter key to open the command
 How to Optimize the Maintainability of Java Code: Experience and Advice
Nov 22, 2023 pm 05:18 PM
How to Optimize the Maintainability of Java Code: Experience and Advice
Nov 22, 2023 pm 05:18 PM
How to Optimize the Maintainability of Java Code: Experience and Advice In the software development process, writing code with good maintainability is crucial. Maintainability means that code can be easily understood, modified, and extended without causing unexpected problems or additional effort. For Java developers, how to optimize the maintainability of code is an important issue. This article will share some experiences and suggestions to help Java developers improve the maintainability of their code. Following standardized naming rules can make the code more readable.
 How to write a simple student performance report generator using Java?
Nov 03, 2023 pm 02:57 PM
How to write a simple student performance report generator using Java?
Nov 03, 2023 pm 02:57 PM
How to write a simple student performance report generator using Java? Student Performance Report Generator is a tool that helps teachers or educators quickly generate student performance reports. This article will introduce how to use Java to write a simple student performance report generator. First, we need to define the student object and student grade object. The student object contains basic information such as the student's name and student number, while the student score object contains information such as the student's subject scores and average grade. The following is the definition of a simple student object: public
 How to write a simple online reservation system through PHP
Sep 26, 2023 pm 09:55 PM
How to write a simple online reservation system through PHP
Sep 26, 2023 pm 09:55 PM
How to write a simple online reservation system through PHP. With the popularity of the Internet and users' pursuit of convenience, online reservation systems are becoming more and more popular. Whether it is a restaurant, hospital, beauty salon or other service industry, a simple online reservation system can improve efficiency and provide users with a better service experience. This article will introduce how to use PHP to write a simple online reservation system and provide specific code examples. Create database and tables First, we need to create a database to store reservation information. In MyS
 How to solve the poor maintainability error of Python code?
Jun 25, 2023 am 11:58 AM
How to solve the poor maintainability error of Python code?
Jun 25, 2023 am 11:58 AM
Python, as a high-level programming language, is widely used in software development. Although Python has many advantages, a problem that many Python programmers often face is that the maintainability of the code is poor. The maintainability of Python code includes the legibility, scalability, and reusability of the code. In this article, we will focus on how to solve the problem of poor maintainability of Python code. 1. Code readability Code readability refers to the readability of the code, which is the core of code maintainability.
 Quick Start: Use Go language functions to implement a simple library management system
Jul 30, 2023 am 09:18 AM
Quick Start: Use Go language functions to implement a simple library management system
Jul 30, 2023 am 09:18 AM
Quick Start: Implementing a Simple Library Management System Using Go Language Functions Introduction: With the continuous development of the field of computer science, the needs of software applications are becoming more and more diverse. As a common management tool, the library management system has also become one of the necessary systems for many libraries, schools and enterprises. In this article, we will use Go language functions to implement a simple library management system. Through this example, readers can learn the basic usage of functions in Go language and how to build a practical program. 1. Design ideas: Let’s first
 How to write a simple music recommendation system in C++?
Nov 03, 2023 pm 06:45 PM
How to write a simple music recommendation system in C++?
Nov 03, 2023 pm 06:45 PM
How to write a simple music recommendation system in C++? Introduction: Music recommendation system is a research hotspot in modern information technology. It can recommend songs to users based on their music preferences and behavioral habits. This article will introduce how to use C++ to write a simple music recommendation system. 1. Collect user data First, we need to collect user music preference data. Users' preferences for different types of music can be obtained through online surveys, questionnaires, etc. Save data in a text file or database
 How to write a simple minesweeper game in C++?
Nov 02, 2023 am 11:24 AM
How to write a simple minesweeper game in C++?
Nov 02, 2023 am 11:24 AM
How to write a simple minesweeper game in C++? Minesweeper is a classic puzzle game that requires players to reveal all the blocks according to the known layout of the minefield without stepping on the mines. In this article, we will introduce how to write a simple minesweeper game using C++. First, we need to define a two-dimensional array to represent the map of the Minesweeper game. Each element in the array can be a structure used to store the status of the block, such as whether it is revealed, whether there are mines, etc. In addition, we also need to define
